1. Produktet er slutview
The Whirlpool W10324651 Hub is a genuine replacement part designed for specific Whirlpool appliances. This component is crucial for the proper functioning of your appliance, ensuring durability and optimal performance. Using genuine OEM parts helps maintain the integrity and longevity of your appliance as originally intended by the manufacturer.

Billede 1.1: This graphic illustrates the concept of Original Equipment Manufacturer (OEM) parts, emphasizing that Whirlpool, Maytag, KitchenAid, Amana, and JennAir are part of the Whirlpool Corporation family of brands, and their parts are specifically designed for their products.
2. Vigtige sikkerhedsoplysninger
Before attempting any repair or replacement, please read and understand all safety precautions. Failure to follow these instructions may result in personal injury, property damage, or appliance malfunction.
- Afbryd strømmen: Always disconnect the appliance from its power source (unplug or turn off circuit breaker) before beginning any service.
- Brug beskyttelsesudstyr: Brug passende personlige værnemidler, såsom handsker og sikkerhedsbriller, for at forhindre skader.
- Rådfør dig med en professionel: If you are unsure about any step or uncomfortable performing the repair, contact a qualified appliance service technician.
- Håndteres med forsigtighed: Components may have sharp edges or pinch points. Exercise caution during handling and installation.
3. Installationsvejledning
This section provides general guidance for replacing the W10324651 Hub. Specific steps may vary depending on your appliance model. Always refer to your appliance's service manual for detailed instructions.
3.1. Nødvendigt værktøj
- Skruetrækkere (Phillips og Flathead)
- Wrenches or Socket Set
- Tang
- Arbejdshandsker
- Sikkerhedsbriller
3.2. Før du begynder
- Ensure the appliance is completely disconnected from power.
- Clear the work area around the appliance.
- Have all necessary tools and the new W10324651 Hub ready.
3.3. Step-by-Step Replacement
- Adgang til hubben: Depending on your appliance (washer or dryer), you will need to access the area where the hub is located. This may involve removing the agitator, wash plate, or other internal components.
- Remove the Old Hub: Carefully unfasten any screws, bolts, or clips securing the old hub. Note the orientation and position of all parts for correct reassembly.
- Inspicer området: Clean any debris or residue from the shaft and surrounding area before installing the new hub.
- Install the New Hub: Position the new Whirlpool W10324651 Hub onto the shaft, ensuring it seats correctly. Secure it with the provided fasteners or the original hardware if it is in good condition.
- Saml igen: Reinstall all previously removed components in reverse order. Double-check all connections and fastenings.
- Prøve: Once fully reassembled and secured, reconnect power to the appliance and perform a test cycle to ensure proper operation.

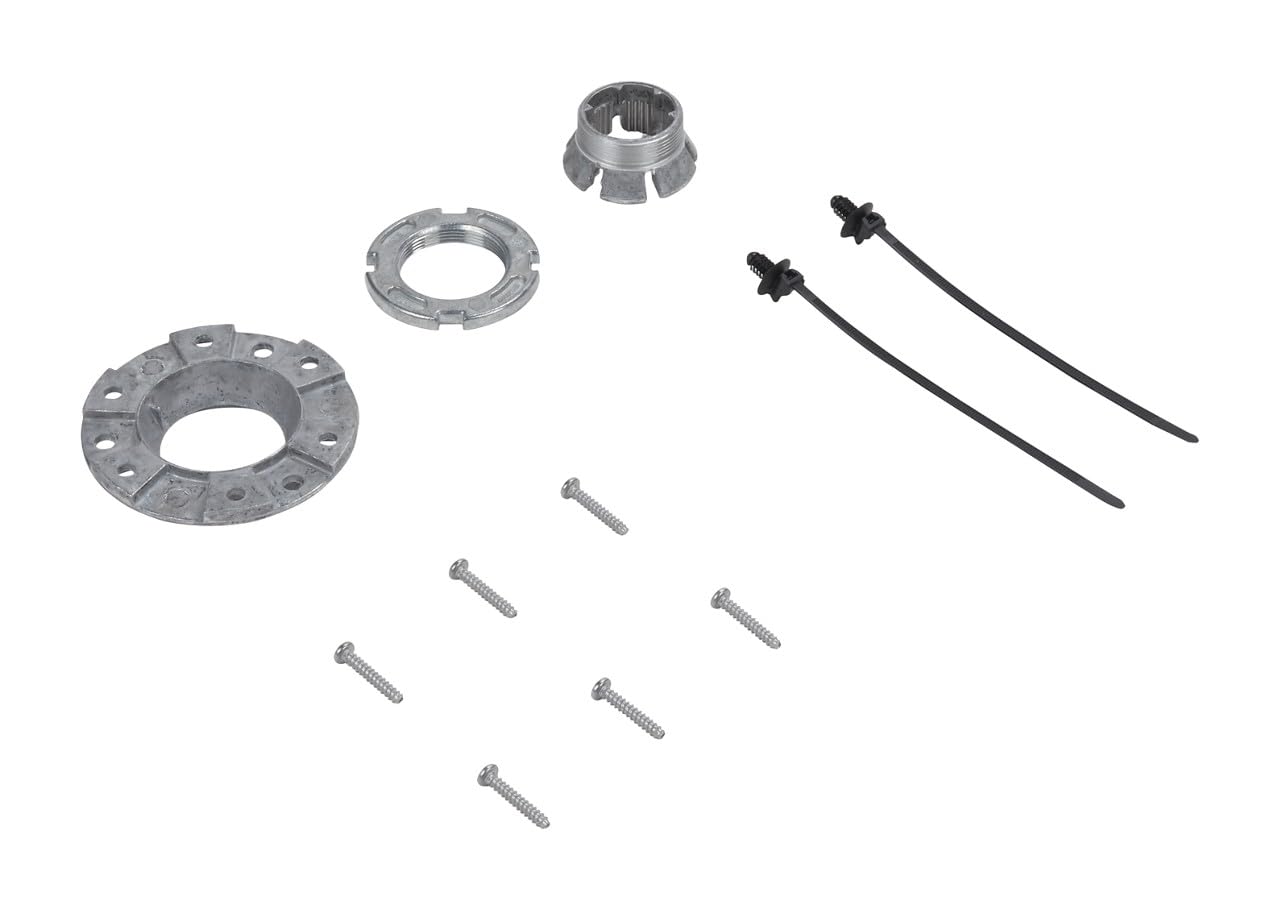
Billede 3.1: This image displays the Whirlpool W10324651 Hub along with its accompanying installation hardware, including screws and zip ties, which are typically part of a replacement kit.
Billede 3.2: En detaljeret view of the Whirlpool W10324651 Hub, showing its design and construction as a critical component for appliance function.
Video 3.1: This video from Whirlpool Service Parts highlights the importance of using genuine OEM parts for Whirlpool appliances, emphasizing their quality, durability, and precise fit to ensure optimal performance and longevity.
4. Betjening
The W10324651 Hub is an internal mechanical component that facilitates the rotational movement within your appliance, typically a washer or dryer. It does not have user-operable controls. Its correct installation ensures the smooth and efficient operation of the appliance's primary functions, such as agitation or spinning.
5. Vedligeholdelse
As an internal component, the W10324651 Hub generally requires no routine maintenance. However, to prolong the life of your appliance and its parts:
- Regularly clean your appliance according to its user manual to prevent buildup that could affect internal components.
- Avoid overloading your appliance, as this can put undue stress on the hub and other moving parts.
- Periodically inspect for unusual noises or vibrations, which could indicate wear or a loose component.
6. Fejlfinding
If your appliance is not functioning correctly after replacing the W10324651 Hub, consider the following:
- Power Check: Ensure the appliance is properly plugged in and the circuit breaker has not tripped.
- Installation vedrview: Double-check all steps of the installation process. Ensure the hub is securely fastened and all connections are tight.
- Korrekt del: Verify that the W10324651 Hub is the correct part for your specific appliance model.
- Andre problemer: The malfunction might be due to another component. If the problem persists, it is recommended to contact a qualified service technician for diagnosis.
7. Specifikationer
| Varenummer | W10324651 |
| Varens vægt | 7.8 ounce |
| Produktdimensioner | 4 x 3 x 2 tommer |
| Varemodelnummer | W10324651 |
| Inkluderede komponenter | Hub |
8. Garanti og support
The Whirlpool W10324651 Hub is listed with Ingen garanti as per product specifications. For any questions regarding installation, troubleshooting, or general appliance support, please contact Whirlpool Customer Service directly or visit the official Whirlpool website for authorized service information.
For yderligere hjælp kan du besøge Whirlpool-butik på Amazon or the official Whirlpool Corporation webwebsted.


