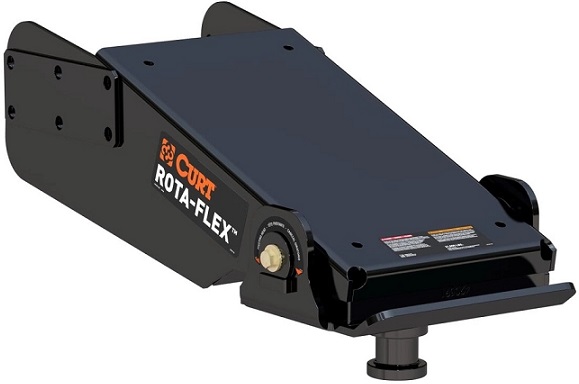
Curt ROTA-FLEX Pin Box
Specifications
- Part #: 807712, 328329, 176440, 328330
- Description: Rota-Flex Pin Box 24K L05, Rota-Flex SHD Pin Box 21,000 lbs M19, Rota-Flex Pin Box 19,000 lbs L05, Rota-Flex Pin Box 18,000 lbs
| Part # | Description |
| 807712 | Rota-Flex™ Pin Box 24K |
| 328329 | L05 Rota-Flex™ SHD Pin Box 21,000 lbs |
| 176440 | M19 Rota-Flex™ Pin Box 19,000 lbs |
| 328330 | L05 Rota-Flex™ Pin Box 18,000 lbs |
Introduction
- The Curt Rota-Flex™ Pin Box system redefines the experience of towing a 5th wheel. This system will help eliminate excessive wear and tear on the tow vehicle and trailer.
- The Curt Rota-Flex Pin Box significantly reduces fore-to-aft trailer movement and reduces vibration more than 2X the competition. The rubberized torsion compound absorbs motion and vibration caused by road shock. It gives a cushioned sensation over uneven road conditions and prevents chucking. Enjoy a smoother, more comfortable in-cab ride.
- Now with a powder-coated lower jaw, the Curt Rota-Flex® Pin Box System has been carefully engineered to match the existing pin box that it replaces. The system is fully adjustable in most cases and maintains the king pin location established by the original trailer manufacturer. By maintaining the static king pin location, stress and strain subjected to the trailer frame structure is consistent with the original king pin location.
- This manual will outline installation, preventative maintenance and basic troubleshooting procedures associated with this system.
- Additional information about this product can be obtained from lci1.com/support or by downloading the free LippertNOW app. The app is available on Apple App Store® for iPhone® and iPad® and also on Google Play™ for Android™ users.
- Apple App Store®, iPhone®, and iPad® are registered trademarks of Apple Inc. Google Play™ and Android™ are trademarks of Google Inc.
- For additional support on this product, please visit: https://support.lci1.com/curt-rota-flex-pin-box or scan the QR Code.

Safety Information
WARNING
THE “WARNING” SYMBOL ABOVE IS A SIGN THAT AN INSTALLATION PROCEDURE HAS A SAFETY RISK INVOLVED AND MAY CAUSE DEATH OR SERIOUS INJURY IF NOT PERFORMED SAFELY AND WITHIN THE PARAMETERS SET FORTH IN THIS MANUAL. ALWAYS WEAR EYE PROTECTION WHEN PERFORMING THIS INSTALLATION PROCEDURE. OTHER SAFETY EQUIPMENT TO CONSIDER WOULD BE HEARING PROTECTION, GLOVES, AND POSSIBLY A FULL FACE SHIELD, DEPENDING ON THE NATURE OF THE INSTALLATION PROCEDURE.
WARNING
FAILURE TO FOLLOW THE INSTRUCTIONS PROVIDED IN THIS MANUAL MAY RESULT IN DEATH, SERIOUS INJURY, TRAILER DAMAGE OR VOIDING OF THE COMPONENT WARRANTY.
WARNING
THE TRAILER MUST BE SUPPORTED PER MANUFACTURER’S RECOMMENDATIONS BEFORE WORKING UNDERNEATH. FAILURE TO DO SO MAY RESULT IN DEATH OR SERIOUS INJURY.
WARNING
FAILURE TO CHECK AND FOLLOW TOW RATINGS COULD RESULT IN TOW VEHICLE DAMAGE OR TOW VEHICLE AND TRAILER SEPARATION WHILE TOWING. TRAILER AND ITS CONTENTS MUST NOT EXCEED TOW VEHICLE, HITCH AND/OR TRAILER TOW RATINGS.
CAUTION
MOVING PARTS CAN PINCH, CRUSH OR CUT. KEEP CLEAR AND USE CAUTION.
Resources Required
- 1-2 people depending on procedure
- Cordless or electric drill or screw gun
- Appropriate drill bits
- Torque wrench capable of 300 ft. lbs.
- Impact wrench or ratchet
- Sockets
- Drift/centering pin
- 2nd Drift/centering pin (optional)
- Hammer (optional)
- Tape measure
Installation
WARNING
DUE TO THE WEIGHT OF THE PIN BOX, IT IS HIGHLY RECOMMENDED THAT AT LEAST TWO PEOPLE INSTALL THIS SYSTEM.
CAUTION
MOVING PARTS CAN PINCH, CRUSH OR CUT. KEEP CLEAR AND USE CAUTION.
Removal of Factory Pin Box
- Level the 5th wheel front to back.
- Measure the distance from the bottom of the factory king pin plate (Fig.1A) to a flat surface directly below.

- Make note of the bolt hole locations of the factory pin box. The Curt Rota-Flex pin box system will be remounted in the same hole settings (Fig.2A).
 WARNING
PROPERLY SUPPORT PIN BOX BEFORE REMOVING BOLTS. FAILURE TO DO SO MAY RESULT IN SEVERE PRODUCT DAMAGE, DEATH OR SERIOUS INJURY. - Properly support the pin box assembly.
NOTE: As the pin box assembly weighs several hundred pounds, a minimum of two people are required to complete the removal and installation. A forklift may be used to lift the pin box into position. - Remove fasteners that hold the original pin box in place.
- Remove factory pin box from the mounting frame.
Installing Curt Rota-Flex Pin Box
- Hoist the new pin box into place.
- Use a second person to line the pin box up to the mounting plate.
- Using a drift/centering pin (or screwdriver), center the holes and install at least one bolt on the road side at the rear and one bolt on the curb side (Fig.3A) at the front in the same holes the factory pin box bolts were located.

- Verify the pin height is within ½” (+ or -) of the factory setting, (Fig.1A).
- Reinstall the bolts that held the pin box in place previously. Lippert recommends using the nuts, bolts and washers that were removed previously, unless they are damaged or unusable.
- Using the torque wrench, check all the bolts to ensure they are tightened to specifications as listed on the Torque Chart (Fig.4).
 NOTE: To assist with hitching, grease may be applied around the kingpin and on the skid plate surface. See the Maintenance section for recommended grease specifications.
Operation
Hitching Procedure
WARNING
FAILURE TO FOLLOW THESE INSTRUCTIONS MAY RESULT IN DEATH OR SERIOUS INJURY.
WARNING
WORKING BETWEEN THE TOW VEHICLE AND TRAILER CAN BE DANGEROUS. FAILURE TO PROPERLY SECURE THE TOW VEHICLE AND TRAILER FROM MOVEMENT CAN RESULT IN SERIOUS PERSONAL INJURY OR DEATH AND SERIOUS PRODUCT DAMAGE. MAKE SURE TOW VEHICLE AND TRAILER ARE SECURED FROM MOVEMENT. MAKE SURE ALL SAFETY PRECAUTIONS ARE FOLLOWED TO PREVENT PERSONAL INJURY OR PRODUCT DAMAGE.
- Place blocks firmly against the front and rear of each trailer wheel to prevent possible movement either forward or backward.
- If necessary, lower the tow vehicle’s tailgate.
NOTE: Clearance of the lowered tailgate to the trailer needs to be monitored during hookups, since some combinations of tow vehicle and trailer have little or no clearance. - Using the trailer landing gear, adjust trailer height per the manufacturer’s recommendation so the bottom of the trailer’s pin box (Fig.5B) is ½” to 1” below the top portion hitch skid plate (Fig.5A).
 WARNING
DO NOT ATTEMPT TO HITCH THE TRAILER BY USING TRAILER JACKS TO LOWER THE TRAILER AND KINGPIN ONTO THE HITCH OPENING. THIS COULD RESULT IN THE KINGPIN COMING TO REST ON TOP OF THE SKID PLATE INSTEAD OF WITHIN THE HITCH OPENING, WHICH MAY RESULT IN DEATH OR SERIOUS INJURY.
NOTE: During the hitching maneuver, the bottom of the trailer’s pin box should come into contact with the hitch skid plate ramp. - Open the jaw on the 5th wheel head. Refer to the manufacturer’s instructions for proper 5th wheel hitch latch operation.
- Back the tow vehicle slowly toward the trailer until the tow vehicle’s hitch contacts the bottom of the pin box and the kingpin slides into the receiver.
- Latch 5th wheel hitch in closed position per the instructions of the 5th wheel hitch manufacturer.
- With the trailer wheels still blocked, make sure:
- A. The landing gear is resting on firm, level ground.
- B. The landing gear fully supports the trailer’s weight.
- C. The tow vehicle is stationary and in park with the emergency brake on.
- D. The bottom of the pin box is resting on top of the hitch.
- E. There is no space between the mating surfaces.
- If space exists between the pin box and hitch, the trailer has not been properly hitched. Do not tow the trailer. Instead, repeat the hitching steps 1-7 until the trailer is properly hitched.
- Connect any electrical cables between the tow vehicle and trailer.
- Raise the tailgate of the truck.
- Do not tow the trailer until a Pull Test has been conducted. Go to the Pull Test section in the manual.
Pull Test
WARNING
FAILURE TO PERFORM A PULL TEST MAY RESULT IN SEVERE PROPERTY DAMAGE, SERIOUS PERSONAL INJURY OR DEATH. FAILURE TO SECURE TOW VEHICLE AND TRAILER FROM MOVEMENT DURING PROCEDURE COULD RESULT IN SEVERE PROPERTY DAMAGE, SERIOUS PERSONAL INJURY OR DEATH. MAKE SURE TOW VEHICLE AND TRAILER ARE PROPERLY SECURED AGAINST MOVEMENT DURING THE PROCEDURE.
- Make sure the trailer wheels are blocked, the trailer landing gear is resting on firm ground to support the trailer and the tow vehicle is in park with the emergency brake engaged.
- Return to the cab of the tow vehicle, release the emergency brake and then apply the trailer brakes.
- Slowly pull the trailer forward with the tow vehicle.
- A. If the tow vehicle is properly hitched, the wheel blocks and trailer brakes should keep the truck from moving forward.
- B. If the trailer is not properly hitched, the trailer will separate from the hitch and the truck will move forward while leaving the trailer behind. If this happens, repeat the Hitching Procedure.
- After successfully performing the Pull Test, fully raise the landing gear per manufacturer’s recommendations.
- Check and inspect all electrical circuits for proper operation, including clearance lights, turn signals and stop lights.
- Remove and store all trailer wheel blocks.
Troubleshooting
| What is happening? | What should be done? |
| Trailer not level. | Adjust pin box or hitch accordingly. |
|
Excessive bottoming of skid pad assembly. Chucking in tow vehicle. |
Inspect the rubber compression bumpers to ensure they are in place. Check trailer brakes for proper operation. If above is satisfactory, it may be necessary to install a shear
spring with a different spring rate. |
| Skid pad assembly does not return to neutral position when disconnected from tow vehicle. |
Check for loose or torn rubber shear spring. |
|
Excessive noise from pin box area. |
Verify that the pin box is securely attached to the 5th wheel. If the king pin is excessively worn, the skid
pad will need to be replaced. Hitch mechanisms can also cause noise. Verify that unwanted noise is not coming from the hitch. The hitch manufacturer can provide guidelines for this check. |
Maintenance
- Inspect king pin for excessive wear (annually).
- Inspect the skid pad to ensure a neutral (centered) position. When the trailer is disconnected from the tow vehicle, an equal gap of approximately 1 – ¼” should be observed between the lip of the skid pad and the rubber compression bumpers. It is normal to be able to slightly move and twist the skid pad assembly with hand force.
- Inspect the retainment rods for excessive wear. The retainment rods may show surface scratch marks as an indication of occasional contact, but the scratches, if present, should be minimal.
- Inspect the plastic glide pads for excessive wear. The glide pad thickness should be no less than ¾”.
- Periodically check the torque values of all bolts.
WARNING
DO NOT MIX LITHIUM, CALCIUM, SODIUM OR BARIUM COMPLEX GREASES. MIXING OF THESE INCOMPATIBLE COMPOUNDS CAN CREATE A CORROSIVE AND/OR TOXIC CHEMICAL WITH FUMES THAT CAN RESULT IN A SERIOUS HEALTH RISK IF EXPOSED TO SKIN OR LUNGS. WHEN CONVERTING FROM ONE GREASE TO ANOTHER, MAKE SURE ALL OLD GREASE IS REMOVED COMPLETELY PRIOR TO APPLYING NEW GREASE.
| Approved Sources – Bearing Grease | |
| Mobile Oil | Mobilgrease HP |
| Exxon/Standard | Ronex MP |
| Kendall Refining Co. | Kendall L-427 |
| Ashland Oil Co. | Valvoline Val-plex EP Grease |
| Pennzoil Prod. Co. | Premium Wheel Bearing Grease 707L |
Manual information may be distributed as a complete document only, unless Lippert Components provides explicit consent to distribute individual parts.
All manual information is subject to change without notice. Revised editions will be available for free download at lippert.com. Manual information is considered factual until made obsolete by a revised version.
Please recycle all obsolete materials and contact Lippert Components with concerns or questions.
FAQ
- What should I do if I experience excessive swaying while towing?
If you notice excessive swaying, check the hitch connection and weight distribution of your trailer. Adjust as needed to ensure stability. - Can I install the Rota-Flex Pin Box myself?
While installation is possible for DIY enthusiasts, it is recommended to seek professional assistance to ensure proper setup and safety compliance.
Documents / Resources
 |
Curt ROTA-FLEX Pin Box [pdf] Owner's Manual ROTA-FLEX Pin Box, ROTA-FLEX, Pin Box |