
1. Introduction
The GigaBlue UHD Quad 4K Pro is an advanced PVR receiver designed to deliver an exceptional visual experience with cutting-edge technology. It features integrated DVB-S2x tuners, expandable tuner options, a powerful processor for stunning 4K UHD image quality, and extensive connectivity. This manual provides essential information for setting up, operating, maintaining, and troubleshooting your receiver.
2. Setup
2.1 Unpacking and Initial Inspection
Carefully remove all components from the packaging. Verify that all items are present: GigaBlue UHD Quad 4K Pro receiver, remote control, power adapter, and any included cables. Inspect the receiver for any visible damage.
2.2 Connecting Tuners
The receiver comes with two integrated DVB-S2x FBC tuners. Additional tuners (DVB-S2, DVB-T/T2, or DVB-C2) can be installed in the dedicated tuner slot to expand reception capabilities.
2.3 Installing Storage (SSD/HDD)
The GigaBlue UHD Quad 4K Pro supports a removable Plug & Play rack for 2.5-inch SATA hard drives or SSDs (up to 15mm height). To install, gently slide the drive into the designated slot until it clicks into place.
2.4 Connecting Peripherals
- HDMI: Connect the receiver to your TV or display using an HDMI cable for 4K UHD video and audio output.
- USB: Use the USB-A and USB-C ports for external storage devices, keyboards, or other compatible accessories.
- Gigabit LAN: Connect an Ethernet cable to the LAN port for internet access and network features like SAT>IP and multiroom.
- Power: Connect the 12V external power supply to the receiver and then to a power outlet.
3. Operating Instructions
3.1 Basic Operation
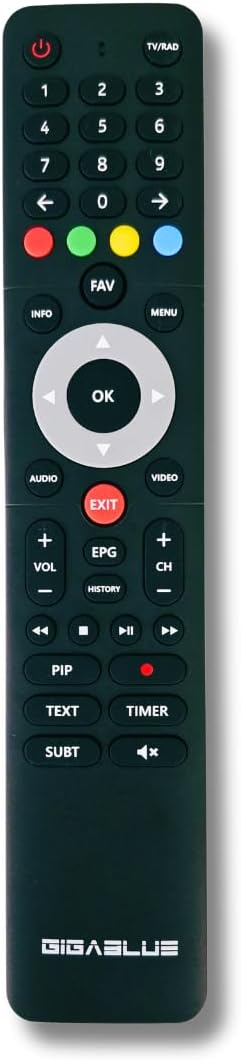
Once powered on, the receiver will boot into the main interface. Use the remote control to navigate menus and select channels.
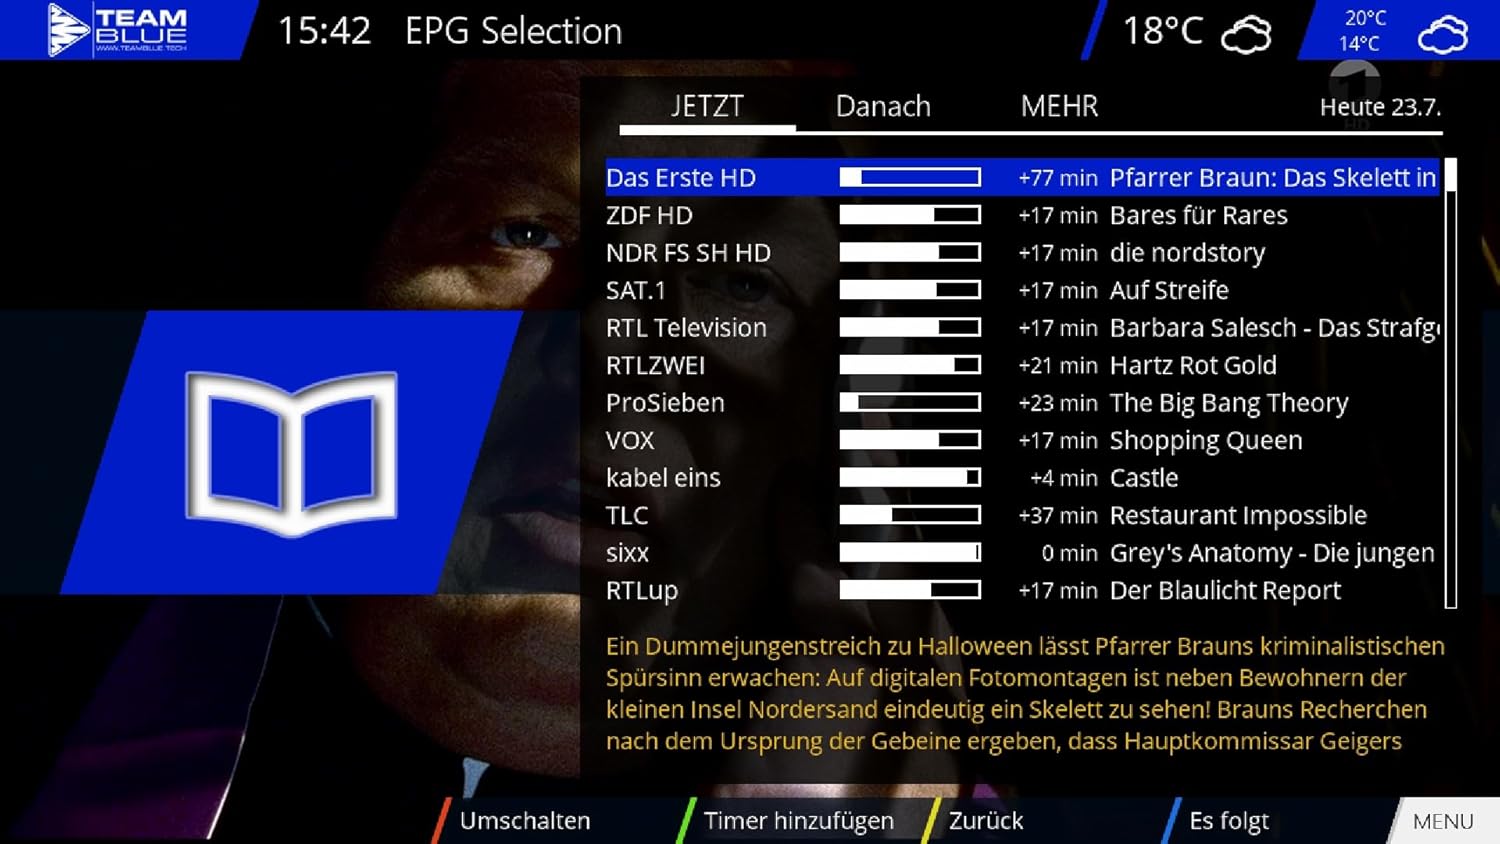
3.2 Electronic Program Guide (EPG)
Access the EPG to view program schedules, set timers for recordings, or activate Time-Shift. The EPG provides a comprehensive overview of available broadcasts.

3.3 PVR Functionality
The integrated Personal Video Recorder (PVR) allows you to record and play back your favorite shows. Connect a 2.5-inch SATA SSD/HDD for storage. Use the EPG or manual timer settings to schedule recordings. The Time-Shift function enables pausing live TV and resuming later.
3.4 Multiroom and SAT>IP
The receiver supports SAT>IP functionality and acts as a multiroom server, distributing TV signals to up to 16 clients within your home network. This allows you to watch live content on various devices.


3.5 Connectivity and Features
- Bluetooth 5.4: Connect Bluetooth soundbars, headphones, or other audio devices for enhanced sound.
- WebKit Browser & YouTube: Utilize the integrated web browser for internet navigation and access YouTube content.
- PIP (Picture-in-Picture): Display up to four images simultaneously on the screen.
- Blind Scan: Automatically search for available satellite channels.
- Channel Management: Create and manage unlimited TV and radio channel lists, including bouquet (favorites) lists.
- Mobile Apps: Free iOS and Android applications are available for controlling and using the device.
- Software Updates: Update the receiver's software via the internet or Over-The-Air (OTA).
4. Maintenance
4.1 Software Updates
Regularly check for and install software updates to ensure optimal performance, stability, and access to new features. Updates can be performed directly from the receiver's menu via an internet connection or OTA.
4.2 Cleaning
To clean the receiver, use a soft, dry cloth. Avoid using liquid cleaners or abrasive materials, as these can damage the device's surface. Ensure the device is powered off and unplugged before cleaning.
4.3 Hard Drive Replacement
The 2.5-inch SATA HDD/SSD is designed for easy replacement. Refer to section 2.3 for installation guidance. Ensure the receiver is powered off before attempting to remove or install a drive.
5. Troubleshooting
5.1 No Power
- Check if the power adapter is securely connected to both the receiver and a working power outlet.
- Verify that the power outlet is functional by plugging in another device.
5.2 No Picture/Sound
- Ensure the HDMI cable is correctly connected to both the receiver and your TV.
- Select the correct HDMI input on your TV.
- Check the audio settings on both the receiver and your TV.
5.3 Receiver Crashing/Unstable Operation
- Perform a software update (refer to section 4.1). Outdated firmware can cause instability.
- If issues persist, consider flashing an alternative image (e.g., OpenPli or OpenATV) if you are an advanced user, as suggested by some users for improved stability.
- Ensure adequate ventilation around the receiver to prevent overheating.
5.4 Remote Control Issues
- Replace the batteries in the remote control.
- Ensure there are no obstructions between the remote control and the receiver's IR sensor.
- Maintain a reasonable distance from the receiver; the remote control has a limited range.
5.5 Installation Time-Consuming
- Initial setup, especially channel scanning and configuration, can take time. Follow the on-screen prompts patiently.
- Refer to this manual for step-by-step guidance.
6. Specifications
| Feature | Specification |
|---|---|
| Brand | GigaBlue |
| Model Number | UHD Quad 4K Pro |
| Color | Black |
| Video Resolution | 4K Ultra HD |
| Video Decoding | HEVC / H.265 |
| Tuners | 2x DVB-S2x FBC (expandable with optional DVB-C/T2 tuner) |
| Storage | Removable Plug & Play rack for 2.5" SATA HDD/SSD (max 15mm height) |
| Connectivity | HDMI (2 ports), USB-A, USB-C, Gigabit LAN (RJ45), Bluetooth 5.4, Wi-Fi (via adapter, if not integrated) |
| Audio Output Mode | Stereo, Surround |
| Surround Sound Channels | 5.1 |
| Operating System | Linux OS (Enigma2 based) |
| Special Features | Sat>IP, Multiroom, Multiboot, Time-Shift, PVR, EPG, WebKit Browser, YouTube, PIP (4x), Blind Scan, HBB-TV |
| Power Supply | External 12V |
| Compatible Devices | Television |
7. Warranty and Support
7.1 Spare Parts Availability
Spare parts for the GigaBlue UHD Quad 4K Pro are available for up to 5 years from the date of purchase.
7.2 Software Updates Guarantee
Information regarding guaranteed software updates is not available. However, GigaBlue typically provides ongoing support and updates for its products.
7.3 Technical Support
For technical assistance, troubleshooting beyond this manual, or warranty claims, please contact GigaBlue customer support or your retailer. Refer to the official GigaBlue website for contact information and additional resources.

