1. Úvod
The MASTECH MY70 is a reliable and versatile digital multimeter designed for basic electrical measurements. It is suitable for a wide range of applications, including workshop use, hobby projects, and general electrical testing. This manual provides essential information for the safe and effective operation, maintenance, and troubleshooting of your MY70 multimeter.
2. Bezpečnostní informace
Always observe the following safety precautions to prevent personal injury and damage to the multimeter or equipment under test.
- Read and understand all instructions in this manual before using the multimeter.
- Nepřekračujte maximální vstupní hodnoty pro žádnou funkci.
- Buďte opatrní při práci s objtagnad 30 V AC RMS, 42 V peak nebo 60 V DC. Tyto objemytages představují nebezpečí úrazu elektrickým proudem.
- Před změnou funkcí nebo rozsahů vždy odpojte měřicí vodiče od obvodu.
- Inspect test leads for damaged insulation or exposed metal before each use. Replace if damaged.
- Před použitím se ujistěte, že je kryt baterie bezpečně uzavřen.
- Nepoužívejte multimetr, pokud se jeví poškozený nebo pokud je jeho kryt otevřený.
- Dodržujte místní a národní bezpečnostní předpisy.
This device complies with IEC 61010, CE, and RoHS standards.
3. Vlastnosti produktu
The MASTECH MY70 Digital Multimeter offers a range of essential measurement capabilities:
- AC a DC Voltage Měření
- Měření střídavého a stejnosměrného proudu
- Měření odporu
- Test diod
- Test kontinuity s bzučákem
- Test hFE tranzistoru
- Funkce Data Hold
- Automatické vypnutí
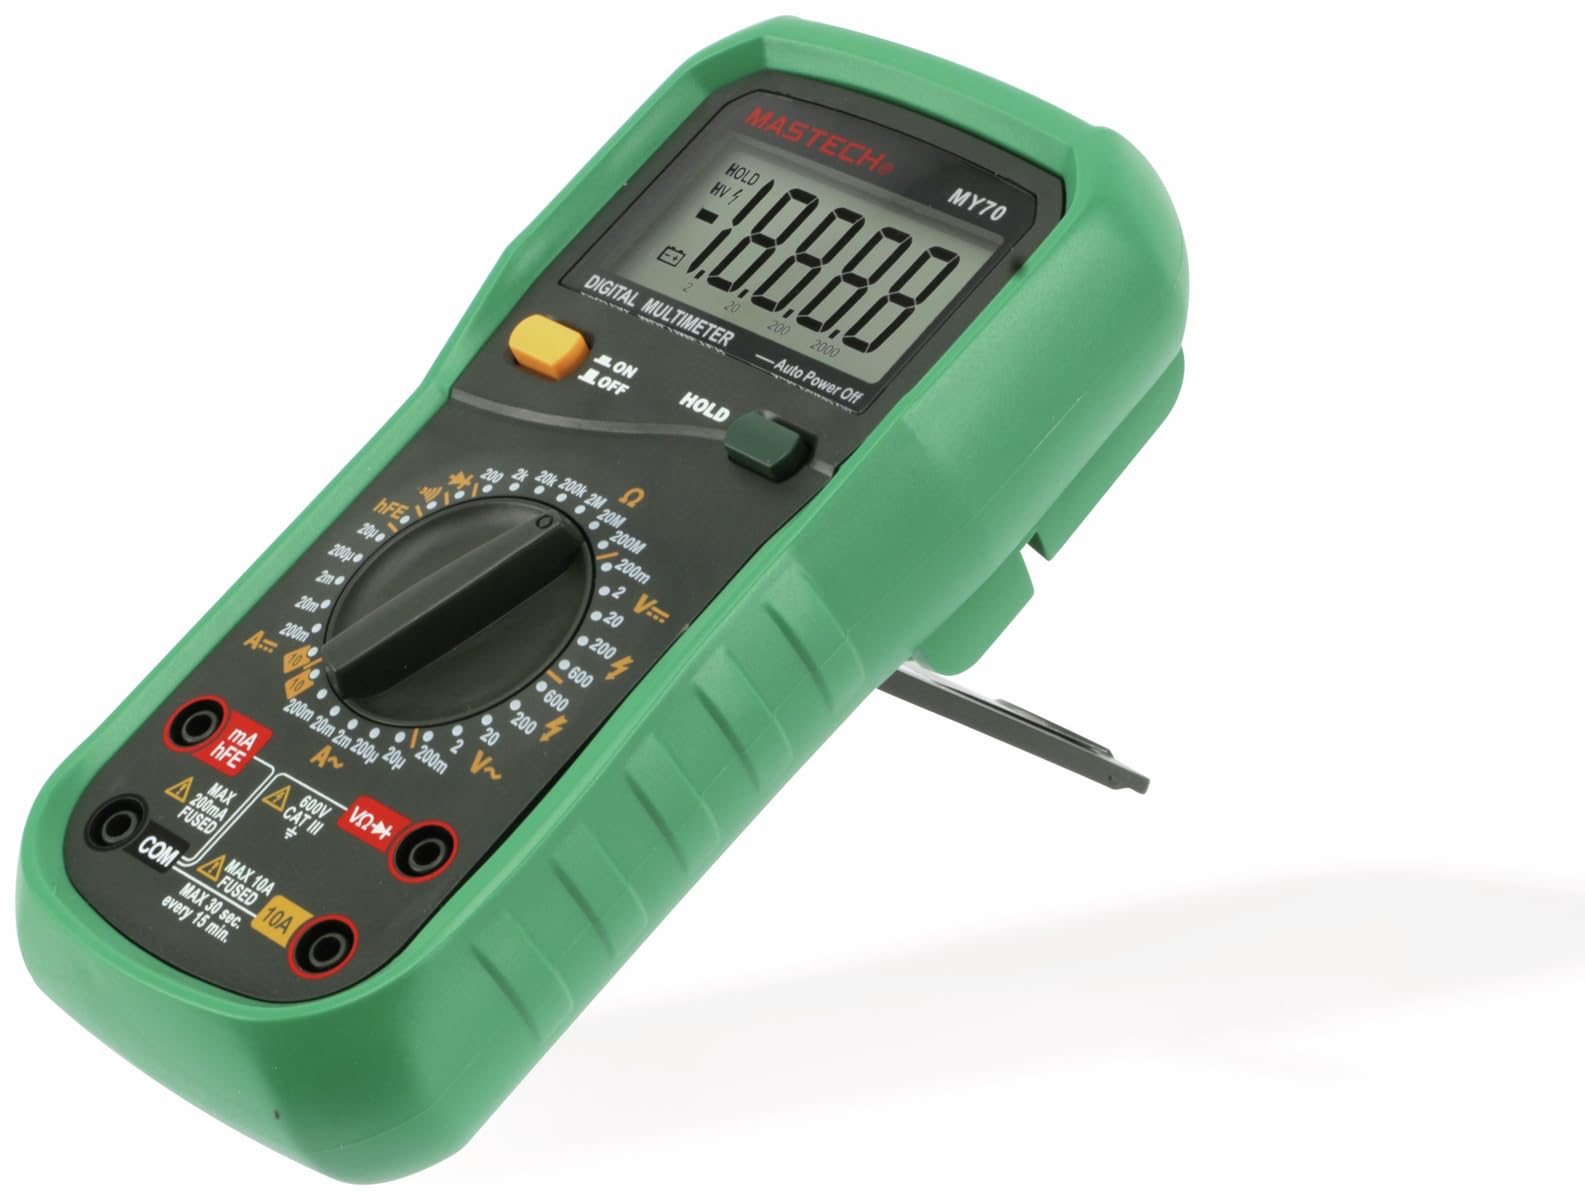
Obrázek 3.1: Přední strana view of the MASTECH MY70 Digital Multimeter.
4. Obsah balení
Ověřte, zda jsou v balení přítomny všechny položky:
- Digitální multimetr MASTECH MY70
- Měřicí kabely (jeden červený, jeden černý)
- 9V Battery (NEDA 1604 or 6F22 type)
- Transistor Test Socket (hFE adapter)
- Uživatelská příručka (tento dokument)
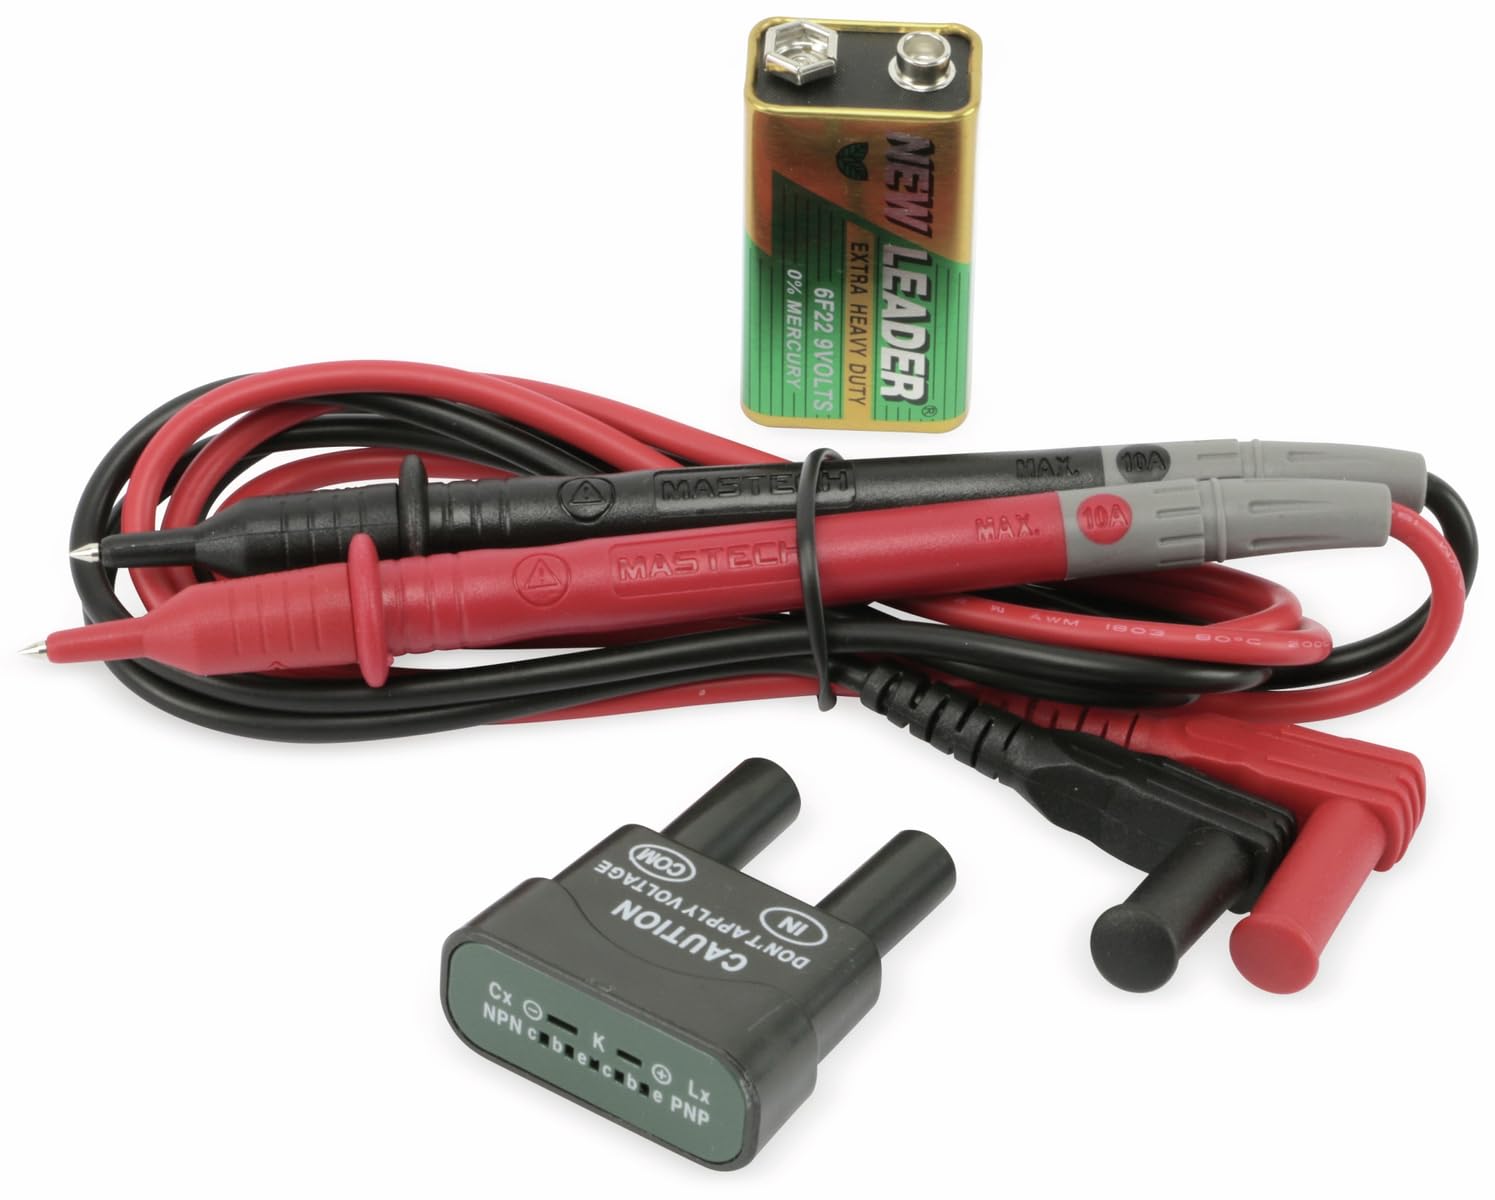
Figure 4.1: MASTECH MY70 Multimeter accessories.
5. Nastavení
5.1 Instalace baterie
- Ujistěte se, že je multimetr VYPNUTÝ.
- Najděte přihrádku na baterie na zadní straně jednotky.
- Odšroubujte upevňovací šroub(y) a sejměte kryt baterie.
- Připojte 9V baterii k bateriovým svorkám a dbejte na správnou polaritu.
- Vložte baterii do přihrádky a nasaďte kryt, který zajistíte šroubem (šrouby).

Obrázek 5.1: Zadní view with battery compartment.
5.2 Připojení měřicích kabelů
For most measurements, connect the black test lead to the "COM" (common) jack and the red test lead to the "VΩmA" jack. For high current measurements (up to 10A), connect the red lead to the "10A" jack.
6. Návod k obsluze
To begin, turn the rotary switch to the desired function and range. Connect the test leads to the circuit or component under test.
6.1 DC svtagMěření e (V=)
- Set the rotary switch to the desired "V=" range (e.g., 20V, 200V).
- Připojte černý měřicí vodič do zdířky „COM“ a červený měřicí vodič do zdířky „VΩmA“.
- Zapojte měřicí vodiče paralelně přes DC napětítage source or component.
- Přečtěte si svtage hodnota na displeji.
6.2 AC svtagMěření (V~)
- Set the rotary switch to the desired "V~" range (e.g., 200V, 600V).
- Připojte černý měřicí vodič do zdířky „COM“ a červený měřicí vodič do zdířky „VΩmA“.
- Zapojte měřicí vodiče paralelně přes AC napětítage source or component.
- Přečtěte si svtage hodnota na displeji.
6.3 Měření stejnosměrného proudu (A=)
Pozor: Always connect the multimeter in series with the circuit when measuring current. Never connect it in parallel across a voltage zdroj.
- Set the rotary switch to the desired "A=" range (e.g., 200µA, 10A).
- For currents up to 200mA, connect the red test lead to the "VΩmA" jack. For currents up to 10A, connect the red test lead to the "10A" jack. The black lead always connects to "COM".
- Otevřete obvod, kde má být měřen proud, a zapojte multimetr sériově.
- Odečtěte aktuální hodnotu na displeji.
6.4 Měření odporu (Ω)
Pozor: Před měřením odporu se ujistěte, že je obvod bez napětí a všechny kondenzátory jsou vybité.
- Set the rotary switch to the desired "Ω" range (e.g., 200Ω, 2MΩ).
- Connect the black test lead to "COM" and the red test lead to "VΩmA".
- Connect the test leads across the component whose resistance is to be measured.
- Odečtěte hodnotu odporu na displeji.
6.5 Test diod (→|)
- Set the rotary switch to the "→|"pozice".
- Connect the black test lead to "COM" and the red test lead to "VΩmA".
- Připojte červený vodič k anodě a černý vodič ke katodě diody. Proud proudu vpředtagZobrazí se pokles (obvykle 0.5 V až 0.8 V pro křemíkové diody).
- Prohoďte vodiče. Na displeji by se mělo zobrazit „OL“ (přetížení), pokud je dioda v pořádku.
6.6 Zkouška kontinuity (•))))
- Set the rotary switch to the "•)))"pozice".
- Connect the black test lead to "COM" and the red test lead to "VΩmA".
- Připojte měřicí vodiče k obvodu nebo součástce.
- Pokud je odpor nižší než přibližně 50 Ω, ozve se bzučák, který signalizuje přerušení obvodu.
6.7 Test tranzistoru hFE
- Set the rotary switch to the "hFE" position.
- Insert the transistor (NPN or PNP) into the appropriate sockets on the transistor test adapter.
- Read the hFE (DC current gain) value on the display.
6.8 Funkce Data Hold
Press the "HOLD" button to freeze the current reading on the display. Press it again to release the hold function and resume live readings.
7. Údržba
7.1 Čištění
Otřete pouzdro reklamouamp cloth and a mild detergent. Do not use abrasives or solvents. Ensure the multimeter is completely dry before use.
7.2 Výměna baterie
When the battery symbol appears on the display, the 9V battery needs to be replaced. Refer to Section 5.1 for battery installation instructions.
7.3 Výměna pojistky
If the current measurement function fails, the fuse may need replacement. The MY70 uses two fuses: a 400mA/250V (F400mA/250V) fuse for the mA range and a 10A/250V (F10A/250V) fuse for the 10A range. To replace a fuse:
- Ujistěte se, že je multimetr VYPNUTÝ a měřicí vodiče jsou odpojené.
- Odstraňte kryt baterie a baterii.
- Unscrew the additional screws holding the back case.
- Carefully separate the two halves of the case.
- Locate the blown fuse(s) and replace with fuses of the identical type and rating.
- Reassemble the case, ensuring all screws are tightened.
8. Řešení problémů
| Problém | Možná příčina | Řešení |
|---|---|---|
| Žádný displej nebo tlumený displej | Slabá baterie nebo vybitá baterie | Vyměňte 9V baterii. |
| Zobrazuje se „OL“ (přetížení) | Input value exceeds selected range or open circuit | Select a higher range or check for an open circuit. |
| Incorrect current reading or no current reading | Blown fuse or incorrect lead connection | Check and replace fuse if necessary. Ensure leads are connected in series and to the correct jacks. |
| Inaccurate resistance reading | Component still energized or parallel components affecting reading | Ensure circuit is de-energized. Isolate the component for accurate measurement. |
9. Specifikace
| Parametr | Hodnota |
|---|---|
| Model | MY70 |
| Výrobce | MASTECH |
| Zdroj napájení | 9V Battery (NEDA 1604 or 6F22) |
| Rozměry (D x Š x V) | 20.5 x 12.5 x 6 cm (přibližně 8.07 x 4.92 x 2.36 palce) |
| Hmotnost | Přibližně 567 gramů (1.25 libry) |
| Bezpečnostní normy | IEC 61010, CE, RoHS |
| Maximální provozní teplota | 60 °C (140 °F) |
| DC svtage Dosah | 200mV, 2V, 20V, 200V, 600V |
| AC svtage Dosah | 200V, 600V |
| Rozsah DC proudu | 200µA, 2mA, 20mA, 200mA, 10A |
| Rozsah odporu | 200Ω, 2kΩ, 20kΩ, 200kΩ, 2MΩ, 20MΩ |
10. Záruka a podpora
For warranty information and technical support, please refer to the official Mastech webnebo se obraťte na místního distributora. Uschovejte si účtenku jako doklad o koupi pro případ reklamace.
Manufacturer: Mastech
Číslo modelu: MY70


