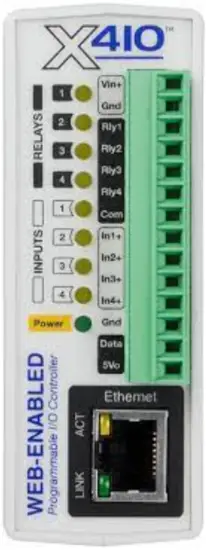
CONTROL by WEB X-410CW Web Enabled Programmable Controller
Cloud Setup & Cell Activation
(For faster setup, we recommend doing this step first)
- Register or login to your account at: www.ControlByWeb.cloud
- Choose ‘Devices’ from the left navigation bar and click ‘New Device’.
- On the New Device page, select the ‘Cell Device’ tab.
- Enter a device name, the last 6 digits of serial number, and the Cell ID (located on the side of the device) and click ‘Submit’.
- You’ll be redirected to the Device Edit page. *Click ‘Activate SIM Card’.
*Note: If data plan was purchased separately, first enter Data Plan Code (sent via email) & click ‘Apply Data Plan’.
Activation may take 15 minutes. Click ‘Check SIM Status’ to verify activation.
- Once activated, power up the X-410CW.
May take up to 5 minutes to connect.
LAN Setup Steps (Recommended for Initial Setup)
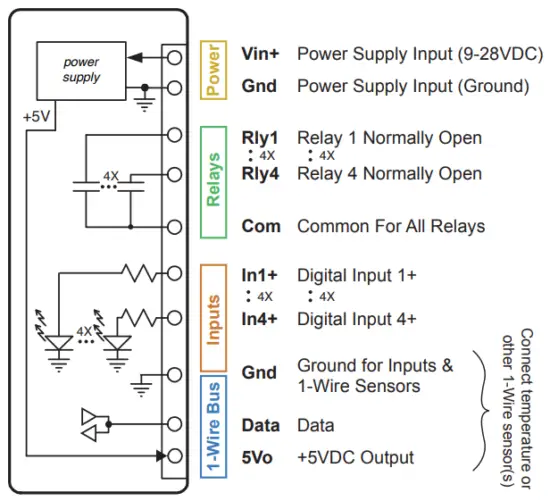
- Power the module and connect to network.
- Set IP address on computer to be on the same network as the module. (Example: Set computer to 192.168.1.50)
- To configure the module, open a web browser and enter: http://192.168.1.2/setup.html
- Assign permanent IP address to module, then restart module.
- Restore computer’s IP address, if necessary, and access the module at its new IP address to finish setup.
Factory Default Settings
IP Address: 192.168.1.2
Subnet Mask: 255.255.255.0
Control Page Web Address: http://192.168.1.2
Control Password: (no password set)
Setup Page Web Address: http://192.168.1.2/setup.html
Setup Username: admin
Setup Password: we relay (all lower case)
CUSTOMER SUPPORT
1681 West 2960 South, Nibley, UT 84321, USA
www.ControlByWeb.com
See users manual for setup instructions:
www.ControlByWeb.com/support/

Documents / Resources
 |
CONTROL by WEB X-410CW Web Enabled Programmable Controller [pdf] User Guide X-410CW Web Enabled Programmable Controller, X-410CW, Web Enabled Programmable Controller, Enabled Programmable Controller, Programmable Controller, Controller |


