1. Introducció
This manual provides essential information for the safe and effective use of your Eiko FC8T9/CW Circline T-9 G10Q Base Halogen Bulb. Please read these instructions carefully before installation and retain for future reference.
The Eiko FC8T9/CW is a 22-watt, cool white halogen circline bulb designed for specific lighting fixtures. It features a G10Q base and a T-9 circular shape, providing a brighter, whiter light output for indoor applications.
2. Informació de seguretat
- Desconnexió d'alimentació: Always ensure the power supply to the fixture is turned off at the circuit breaker before installing, removing, or cleaning the bulb.
- Manejar amb cura: Halogen bulbs can be fragile. Handle the bulb by its base or edges, avoiding direct contact with the glass to prevent oils from your skin from causing hot spots and premature failure.
- Correct Fixture: Use this bulb only in fixtures designed for circline T-9 bulbs with a G10Q base and the specified wattage (22W).
- Temperatura de funcionament: Halogen bulbs operate at high temperatures. Do not touch the bulb immediately after use. Allow it to cool completely before handling.
- Ventilació: Ensure the fixture provides adequate ventilation to prevent overheating.
- Eliminació: Elimineu les bombetes usades d'acord amb la normativa local.
- Només per a ús interior: This bulb is intended for indoor applications.
3. Producte acabatview
The Eiko FC8T9/CW is a circular halogen bulb designed for specific lighting applications. Its unique shape and base type ensure compatibility with appropriate fixtures.
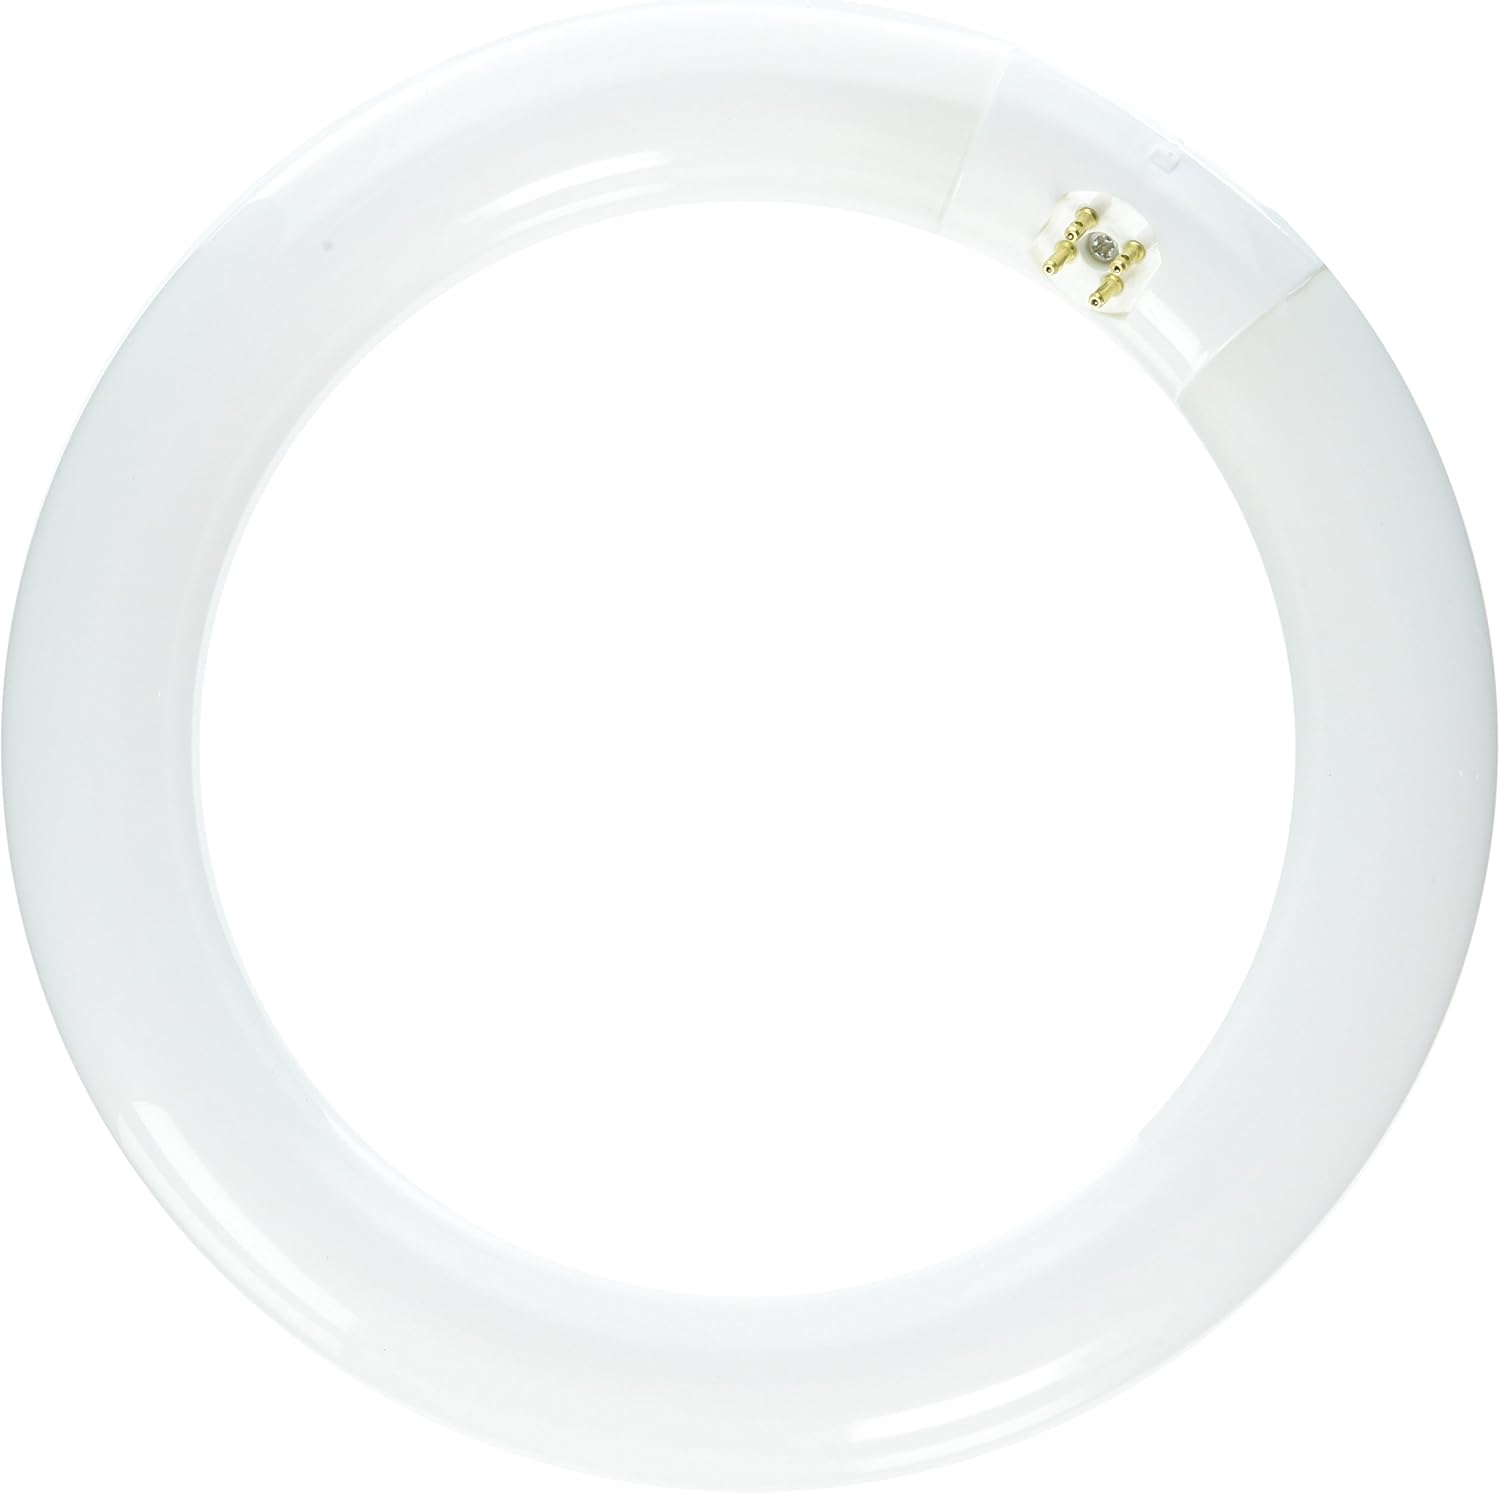
Figura 3.1: Eiko FC8T9/CW Circline Halogen Bulb. This image shows the circular shape of the bulb and its G10Q base connectors.
Característiques principals:
- Tipus: Halogen Circline Bulb
- Model: FC8T9/CW
- Wattage: 22 watts
- Tipus de base: G10Q
- Color clar: Cool White (4100 Kelvin)
- Forma: T-9 Circular
4. Instruccions d'instal·lació
- Apagueu l'alimentació: Locate the circuit breaker controlling the light fixture and switch it to the "OFF" position. Verify that the power is off by attempting to turn on the light switch.
- Treure la bombeta antiga (si escau): If replacing an existing bulb, allow it to cool completely. Carefully grasp the old circline bulb and gently twist or pull it from its socket, depending on the fixture design. Note how the pins align with the socket.
- Inspeccionar l'aparell: Revisa el sòcol de l'aparell per si hi ha danys o restes. Assegura't que estigui net i sec.
- Instal·lar una bombeta nova: Align the four pins of the G10Q base on the new Eiko FC8T9/CW bulb with the corresponding slots in the fixture's socket. Gently push the bulb into the socket until it is firmly seated. Do not force the bulb, as this can damage the pins or the socket.
- Restaura l'alimentació: Un cop instal·lada la bombeta de manera segura, torneu a l'interruptor i torneu a encendre l'alimentació a la posició "ON".
- Prova: Turn on the light switch to confirm the new bulb is functioning correctly.

Figura 4.1: Bulb dimensions for proper fixture fit. The image shows the bulb held by hands, indicating its circular shape and approximate size of 8.4 inches (21 cm).
5. Funcionament
The Eiko FC8T9/CW bulb operates immediately upon receiving power from a compatible fixture. Simply use the light switch connected to your fixture to turn the bulb on or off.
- Ensure the fixture's switch is in the "ON" position after installation.
- The bulb will provide a cool white light suitable for various indoor environments.
6. Manteniment
Neteja:
- Always turn off the power and allow the bulb to cool completely before cleaning.
- Wipe the bulb gently with a clean, dry, lint-free cloth. Avoid using abrasive cleaners or liquids, as these can damage the bulb's surface or internal components.
- If accidental contact with skin oils occurs, clean the bulb with rubbing alcohol and a clean cloth to prevent hot spots.
Substitució:
Bulbs naturally dim over time. Replace the Eiko FC8T9/CW bulb when its light output significantly decreases or when it ceases to function. Follow the installation instructions (Section 4) for safe replacement.
7. Solució De Problemes
| Problema | Causa possible | Solució |
|---|---|---|
| La bombeta no s'encén. | No power to fixture, loose connection, incorrect bulb type, or defective bulb. | Check circuit breaker. Ensure bulb is fully seated in socket. Verify fixture compatibility. Replace bulb if necessary. |
| La bombeta parpelleja. | Loose connection, incompatible dimmer (if applicable), or nearing end of life. | Turn off power, re-seat bulb. Ensure fixture is not on a dimmer not rated for halogen. Replace bulb. |
| La bombeta es crema ràpidament. | Sobrevoltage, excessive vibration, frequent switching, or improper handling (skin oils). | Verifica el volum de l'aparelltage. Ensure bulb is not subject to excessive vibration. Minimize frequent on/off cycles. Clean bulb if handled directly. |
8. Especificacions
| Atribut | Valor |
|---|---|
| Marca | Eiko |
| Número de model | FC8T9/CW |
| Tipus de llum | Halògen |
| Wattage | 22 watts |
| Mida de la forma del bulb | T9 (Circline) |
| Tipus de base | G10Q |
| Color clar | Blanc fresc |
| Temperatura de color | 4100 Kelvin |
| Voltage | 120 Volts |
| Material | Vidre |
| Ús interior/exterior | Interior |
| Pes de l'article | 3.2 unces (aproximadament 0.2 lliures) |
| Dimensions del producte | 1 x 1 x 2.7 inches (packaging/overall, bulb diameter approx. 8.4 inches) |
| Índex de reproducció del color (CRI) | 80 |
9. Garantia i Suport
Specific warranty information for the Eiko FC8T9/CW bulb may vary. Please refer to the packaging or contact Eiko directly for detailed warranty terms and conditions.
For technical support or further inquiries, please visit the official Eiko weblloc o poseu-vos en contacte amb el seu departament d'atenció al client.
Fabricant: Eiko


