1. Uvod
This manual provides detailed instructions for the installation, operation, and maintenance of your MOES WiFi Smart Light Switch (1-Gang). This smart switch is designed to enhance your home lighting control with convenience and smart features.
Ključne karakteristike:
- Supports both no-neutral wire and with-neutral wire configurations.
- No hub required; connects directly to your 2.4GHz Wi-Fi network.
- Kompatibilno s Alexom i Google Assistantom za glasovno upravljanje.
- Daljinsko upravljanje putem aplikacije za pametni telefon.
- Timer and scheduling functions for automated lighting.
- Space-saving design fits most standard wall boxes.

Image 1.1: MOES WiFi Smart Light Switch packaging and the 1-gang switch unit.
2. Sigurnosne informacije
- Uvijek isključite napajanje na prekidaču prije instalacije ili održavanja.
- Ako niste sigurni u vezi električnih instalacija, obratite se kvalificiranom električaru.
- This switch is designed for indoor use only.
- Ne prekoračujte maksimalna opterećenja navedena u specifikacijama proizvoda.
3. Vodič za instalaciju
3.1. Kontrolna lista prije instalacije
- Ensure your home has a 2.4GHz Wi-Fi network. 5GHz networks are not supported.
- Confirm the existing wiring in your wall box (neutral wire present or not).
- Tools required: Screwdriver, wire strippers, voltage tester.
3.2. Upute za ožičenje
The MOES Smart Light Switch supports both neutral wire and no-neutral wire configurations. Please identify your wiring type before proceeding.
3.2.1. No-Neutral Wire Installation
If your wall box does not have a neutral wire, a capacitor (included in the package) is required for proper operation. This capacitor must be connected across the light bulb terminals.
- Isključite napajanje: Pronađite osigurač i isključite napajanje prekidača koji mijenjate. Provjerite je li napajanje isključeno pritiskom na dugme za jačinu zvuka.tage tester.
- Identifikujte žice: In your wall box, identify the Line (Live) wire, Load wire(s), and Ground wire.
- Connect wires to the switch:
- Connect the Line wire to the 'L' terminal on the smart switch.
- Connect the Load wire(s) to the 'L1' (OUT) terminal. For 1-gang switches, typically only L1 is used.
- Connect the Ground wire to the 'GND' terminal.
- Install Capacitor: Connect the provided capacitor across the light bulb terminals (between the live and neutral wires at the light fixture). This is crucial for no-neutral setups to ensure stable power to the smart switch.
- Montirajte prekidač: Secure the smart switch into the wall box and attach the faceplate.
- Obnovite napajanje: Ponovo uključite struju na prekidaču.

Image 3.1: Wiring diagram for no-neutral wire installation, showing capacitor connection.

Image 3.2: Comparison of Neutral + Live Wire and No Neutral Wire diagrams, highlighting the capacitor for no-neutral setups.
3.2.2. With-Neutral Wire Installation
If your wall box has a neutral wire, the installation is straightforward.
- Isključite napajanje: Pronađite osigurač i isključite napajanje prekidača koji mijenjate. Provjerite je li napajanje isključeno pritiskom na dugme za jačinu zvuka.tage tester.
- Identifikujte žice: In your wall box, identify the Line (Live) wire, Neutral wire, Load wire(s), and Ground wire.
- Connect wires to the switch:
- Connect the Line wire to the 'L' terminal on the smart switch.
- Spojite neutralnu žicu na 'N' terminal.
- Connect the Load wire(s) to the 'L1' (OUT) terminal. For 1-gang switches, typically only L1 is used.
- Connect the Ground wire to the 'GND' terminal.
- Montirajte prekidač: Secure the smart switch into the wall box and attach the faceplate.
- Obnovite napajanje: Ponovo uključite struju na prekidaču.
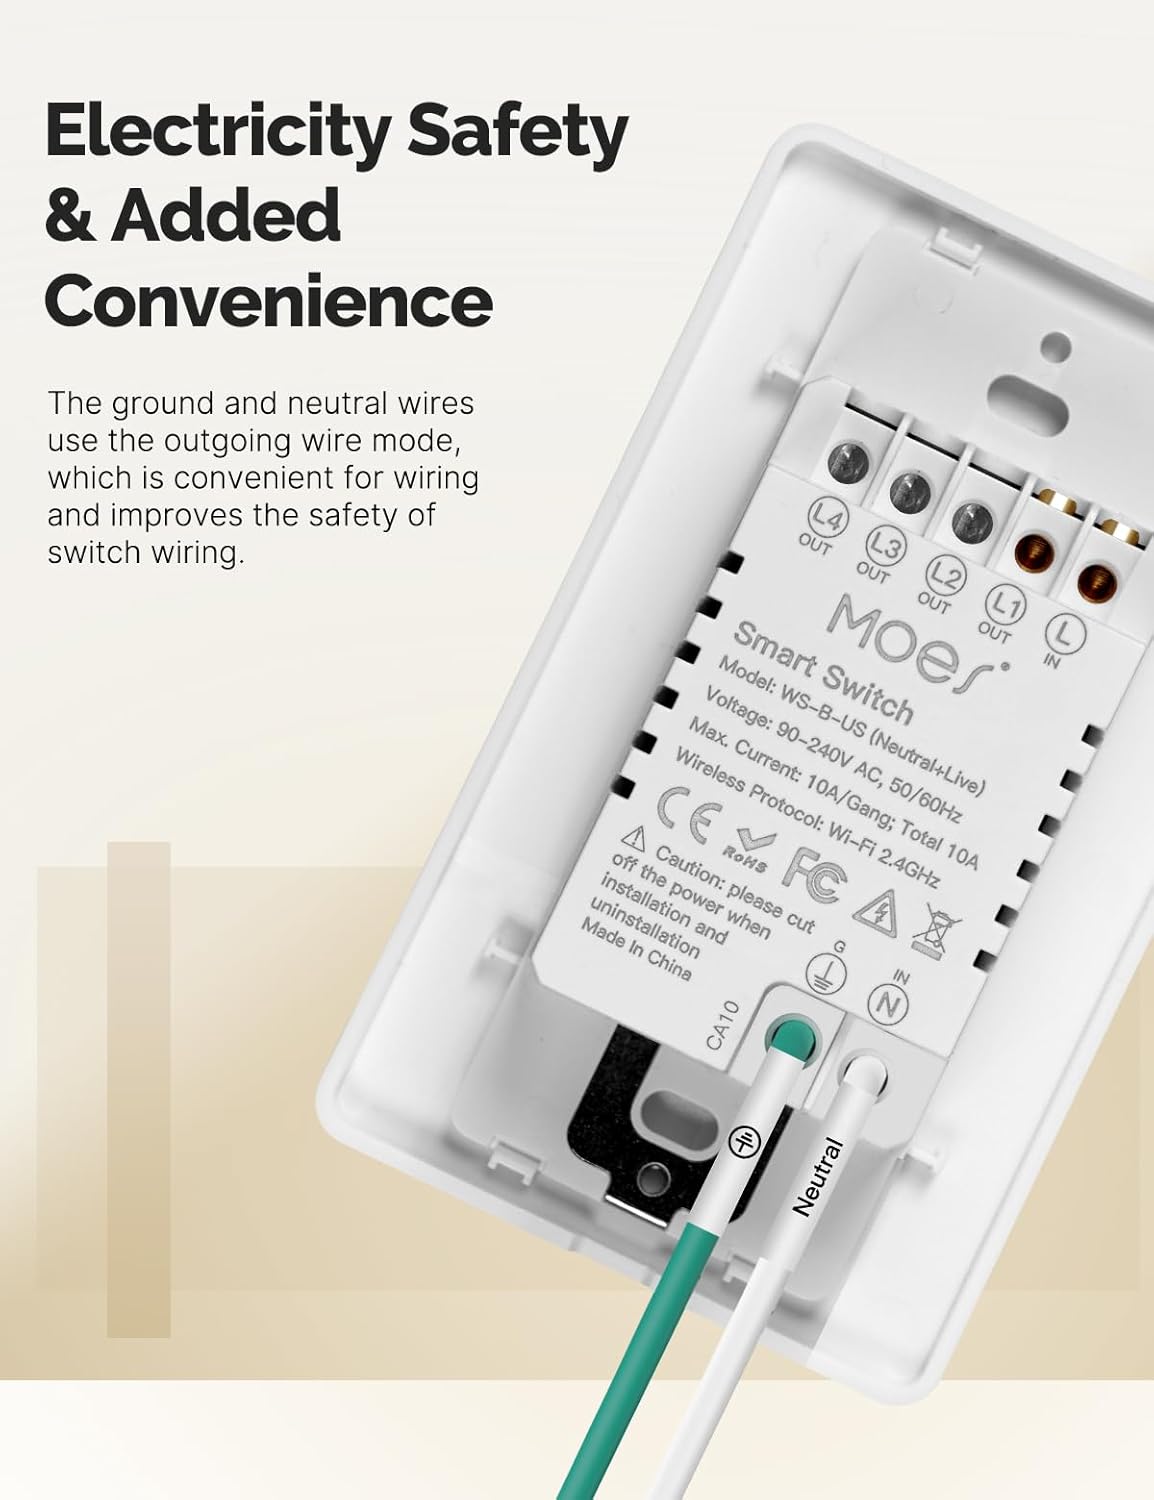
Slika 3.3: Pozadi view of the MOES Smart Switch showing wiring terminals for Line, Neutral, Load, and Ground connections.
3.3. Uparivanje aplikacija
- Preuzmite aplikaciju: Download the "Smart Life" or "MOES" app from your smartphone's app store.
- Registracija/Prijava: Kreirajte nalog ili se prijavite na aplikaciju.
- Dodaj uređaj: Dodirnite ikonu '+' u gornjem desnom uglu aplikacije da biste dodali novi uređaj.
- Odaberite vrstu uređaja: Choose "Electrical" then "Light Switch" or "Switch (Wi-Fi)".
- Unesite detalje o Wi-Fi mreži: Ensure your phone is connected to a 2.4GHz Wi-Fi network. Enter your Wi-Fi password.
- Način uparivanja: The switch should automatically enter pairing mode (indicator light blinking rapidly). If not, press and hold the switch button for 5-10 seconds until it blinks rapidly.
- Potpuno uparivanje: Follow the on-screen instructions in the app to complete the pairing process. Once connected, you can rename the switch.
Video 3.1: A visual guide demonstrating the general installation process for the MOES Smart Light Switch, including wiring and app pairing. (Note: Video may show a multi-gang switch, but principles apply to 1-gang).
4. Uputstvo za upotrebu
4.1. Ručna kontrola
Press the physical button(s) on the switch to turn the connected light(s) on or off. The switch features high-quality buttons for reliable operation.
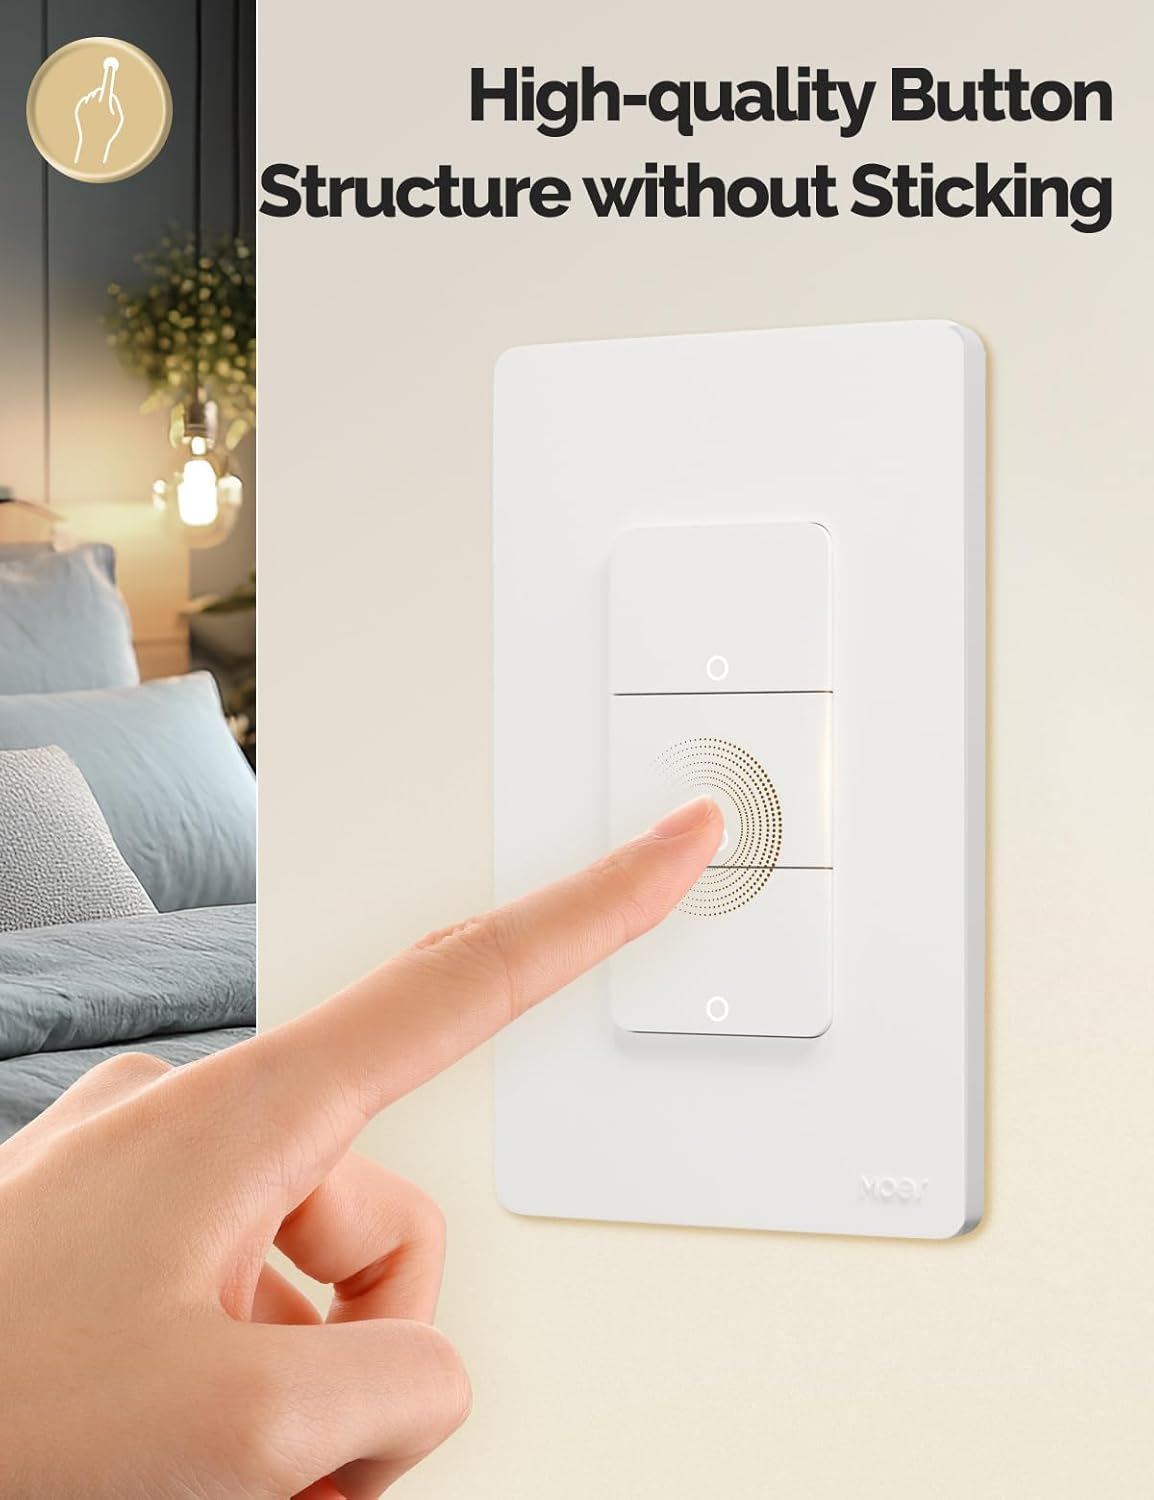
Image 4.1: Close-up of the MOES Smart Switch highlighting its high-quality button design.
4.2. App Control (Remote Control)
Once paired with the app, you can control your lights from anywhere using your smartphone.
- Open the "Smart Life" or "MOES" app.
- Select your smart switch from the device list.
- Tap the on/off icons to control your lights.

Image 4.2: Demonstrates remote control functionality of the smart switch via the mobile application.
4.3. Upravljanje glasom
The switch is compatible with Amazon Alexa and Google Assistant for hands-free control.
- Poveži račun: In your Alexa or Google Home app, link your "Smart Life" or "MOES" account.
- Otkrijte uređaje: Zamolite svog glasovnog asistenta da otkrije nove uređaje.
- Glasovne komande: Koristite komande poput "Alexa, upali svjetlo u dnevnoj sobi" ili "Hej Google, ugasi svjetlo u spavaćoj sobi".

Image 4.3: Setup showing smart speakers (Alexa, Google Home) interacting with the smart switch for voice control.
4.4. Funkcije tajmera i rasporeda
Automate your lighting with customizable timers and schedules through the app.
- Raspored: Set specific times for lights to turn on or off daily or on selected days.
- Odbrojavanje: Set a countdown timer for lights to turn off after a set duration.
- Vremenski okvir ciklusa: Configure lights to cycle on and off at regular intervals.
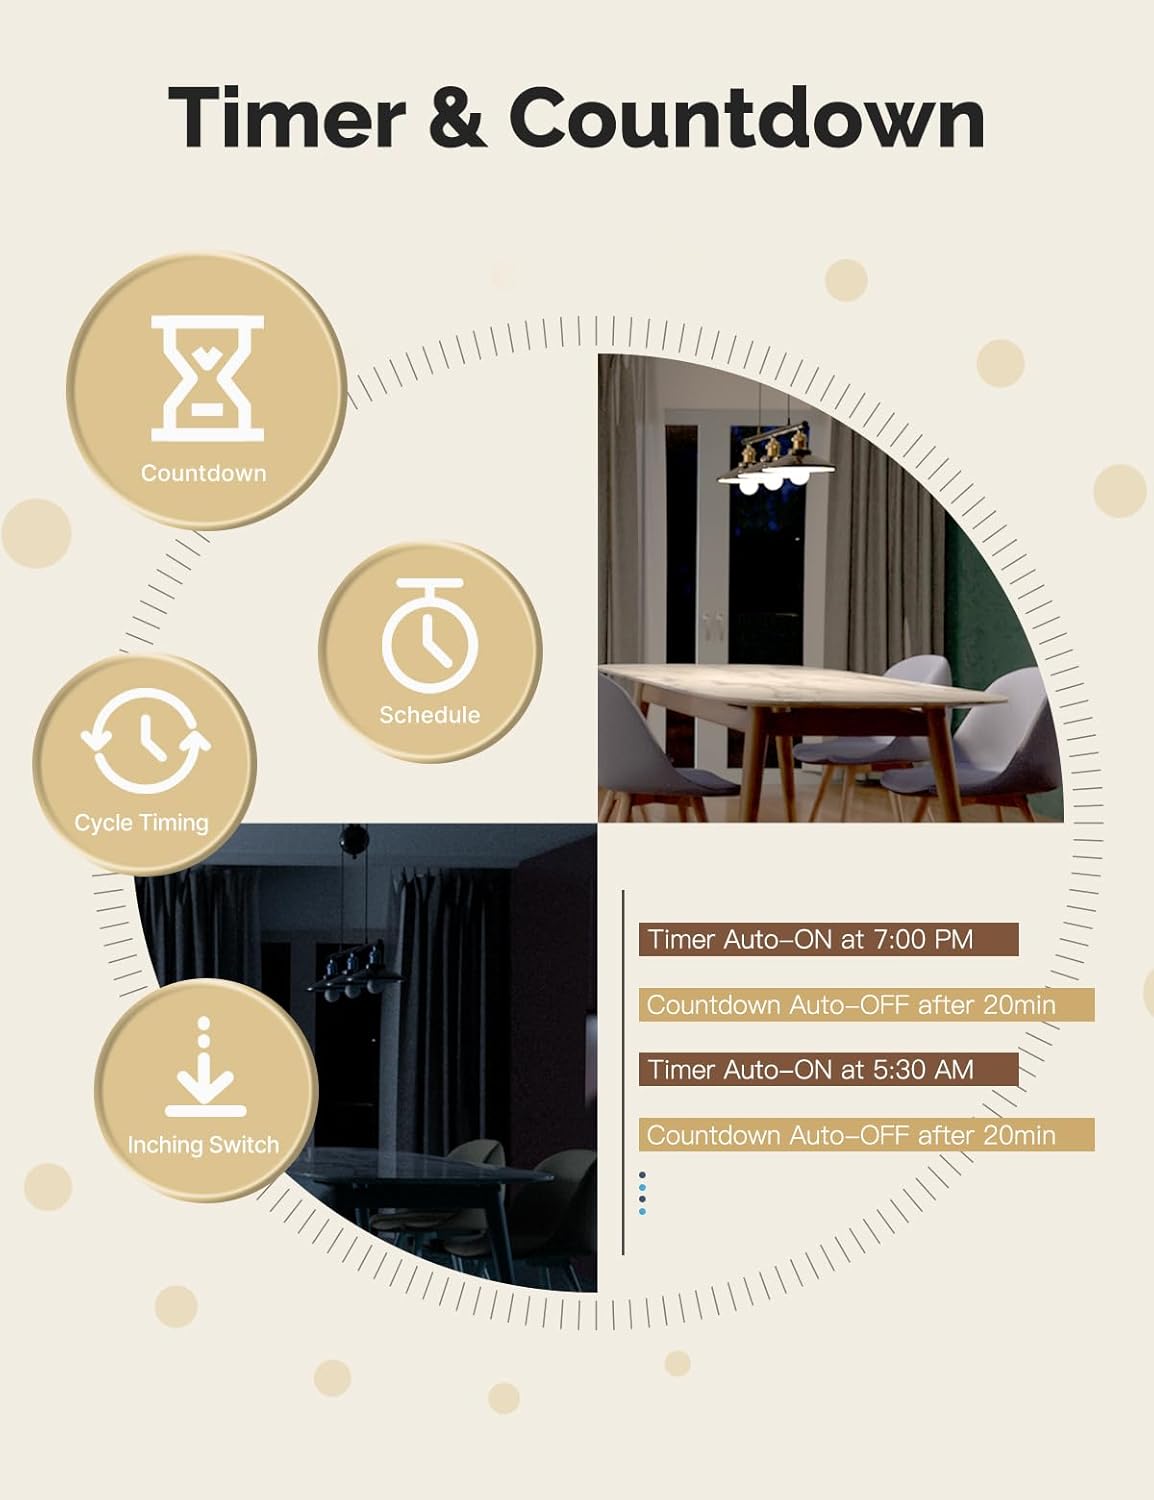
Image 4.4: Visual representation of timer and countdown settings available in the smart home application.
4.5. Indicator Light Mode
The switch features an indicator light that can be configured via the app to show ON/OFF status or switch location in the dark.

Image 4.5: Illustrates different indicator light modes, such as showing ON/OFF status or switch location.
4.6. Relay Status Settings
Konfigurišite ponašanje prekidača nakon nestanka strujetage (Power-off, Power-on, or Restart Memory) through the app settings.

Image 4.6: Screenshot of the app interface for configuring relay status settings after a power interruption.
5. Održavanje
- Clean the switch faceplate with a soft, dry cloth. Avoid abrasive cleaners or solvents.
- Redovno provjeravajte ažuriranja aplikacija kako biste osigurali optimalne performanse i sigurnost.
- Ensure your Wi-Fi network is stable and within range of the switch.
6. Otkrivanje problema
| Problem | Mogući uzrok | Rješenje |
|---|---|---|
| Prekidač ne reaguje na aplikacije/glasovne komande. |
|
|
| Lights flicker or do not turn off completely (no-neutral wiring). |
|
|
| Switch gets warm or burns out. |
|
|
| Difficulty with initial installation. |
|
|
7. Specifikacije
| Feature | Detalj |
|---|---|
| Brand | MOES |
| Model | WS-US-L (1-Gang) |
| Način rada | Automatski |
| Vrsta kontakta | Normalno otvoren |
| Tip konektora | Vijčani terminali |
| Terminal | Screw |
| Tip kruga | 2-way |
| Vrsta montaže | Zidni nosač |
| Kontakt materijal | Bakar |
| Broj pozicija | 1 |
| Kontrolni metod | Aplikacija, Daljinski upravljač, Dodir, Glas |
| Bežični protokol | Wi-Fi 2.4 GHz |
| Voltage | 90-240V AC, 50/60Hz |
| Max. Current (per gang) | 8A |
| Total Max. Current | 8A |

Image 7.1: Detailed dimensions and technical specifications of the MOES Smart Light Switch.
8. Garancija i podrška
MOES products are designed for reliability and performance. For warranty information, technical support, or further assistance, please visit the official MOES webweb-mjesto ili direktno kontaktirajte njihovu korisničku službu.
Više informacija i resursa za podršku možete pronaći na MOES trgovina na Amazonu.


