Brightown Mechanical Plug-in Timer Switch

INTRODUCTION
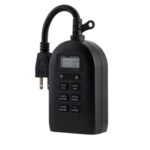
This Brightown Mechanical Plug-in Timer Switch is a useful and flexible way to control electrical devices in your yard or home. This timer switch makes it easy to set your devices to turn on and off automatically, saving you time and energy and making your life easier. That costs $16.99 and has 9 choices that let you change the timer to fit your needs. The Brightown Timer Switch makes sure that power is used efficiently, whether you’re using it for lights, tools, or outdoor decorations. The item has a Photocell Light Sensor that lets it work automatically based on the amount of light in the room. It also has 2H, 4H, 6H, and 8H time modes to give you even more options. This product, which was made by Brightown and is UL approved, meets high quality and safety standards. This product has been on the market since March 2019 and is made to work with many different devices, making it an important part of any smart home setup.
SPECIFICATIONS
| Brand | Brightown |
| Price | $16.99 |
| Product Dimensions | 1.57 D x 8.2 W x 7.4 H Inches |
| Number of Settings | 9 |
| Manufacturer | Brightown |
| Item Weight | 8.1 ounces |
| Grounded Outlets | 2 |
| Photocell Light Sensor | Yes |
| Timing Modes | 2H/4H/6H/8H |
| Power Source | Corded Electric |
| Voltage | 125 Volts (AC) |
| Type of Bulb | Electric |
| Switch Style | Push Button |
| Certification | UL |
WHAT’S IN THE BOX
- Plug-in Timer Switch
- Manual
FEATURES
- Manual Time Settings: For more options, you can set the timer to start at dusk by hand and pick from 2, 4, 6, or 8-hour time modes.

- Eco-Friendly: This timer is both cheap and good for the environment because it automatically adjusts the lights based on the amount of natural light.
- UL Certified: The timer is listed by UL, which means it meets strict safety standards and can be used with your electrical devices.
- Design that Can Handle the Weather: This timer is made to work well in rain or snow, so it can handle the weather outside.
- Heavy-duty: Made of fire-resistant PPO material and 14 AWG SJTW wire, this timer is strong and safe to use outside for a long time.
- Two Grounded Outlets: The timer has two grounded outlets, so you can use it to handle more than one thing, like garden lights, Christmas lights, or appliances outside.
- Versatile Use: It can be used to handle garden lights, outdoor lights, fans, pool pumps, small fountains, and more, making it a useful addition to your outdoor space.
- Photosensitive Switch: The built-in photosensitive switch turns lights on and off instantly based on the light level in the room, so you don’t have to do it yourself.
- Wide Application: It works with many outdoor devices, like lights, pool pumps, waterfalls, and more, making it useful in many situations.
- Built to last: Made with waterproof materials that can handle rough conditions, so it will work well in both summer and winter.

- Simple Plug-In Design: It’s easy to set up because it only needs to be plugged in and doesn’t need any extra wires.
- Features for Safety: It protects against electrical problems like short circuits, making it safe to use anywhere.
- Style of Push Button Switch: It has a push-button design for easy manual control, so you can override automatic features if you need to.
- Small and Lightweight: The timer is built to last, but it’s also small and light—only 8.1 ounces—so it’s easy to put in a lot of different places.
SETUP GUIDE
- Open the Timer’s box: Open the box and make sure that the timer and all of its parts are inside, along with the safety instructions and instruction booklet.
- Plug into a Power Source: Connect the timer’s plug to an outdoor electrical source that is grounded. Make sure that the outlet is plugged correctly and that it works with the timer.
- Connect Things: Use the timer’s two grounded outlets to connect your garden lights, Christmas lights, or other electrical items.

- Set the Time: To make sure the timer works correctly in the future, use the built-in manual setting to set the current time.
- Turn on Photocell Mode: Set the timer to “automatic” mode so that the photocell light sensor automatically turns the lights on at dusk and off at dawn.

- Select Timing Mode: You can set the device to automatically turn off after 2, 4, 6, or 8 hours by choosing from the countdown choices.
- Test Functionality: Make sure all the devices that are linked are working by turning on the timer by hand and watching the devices to make sure they are doing what you want them to do.
- Change the timer for daylight saving time: If needed, change the timer’s set time to reflect daylight saving time.
- Program Multiple Devices: You can use the two grounded outlets to set different on/off times for multiple devices. For example, you could use them to handle both Christmas lights and a pool pump.
- Weather Protection: If you place the timer outside, make sure it is at least 2 feet above the ground and vertical so water doesn’t splash into the outlets.
- Place the Timer: Put the timer somewhere that will be safe from bad weather and where it won’t get knocked over or broken.
- Use with Outdoor Appliances: Set the timer for outdoor lights, garden lights, or other outdoor appliances that will work better with automatic scheduling.
- Check out the Setup: Make sure the timer is put in somewhere safe and dry, away from any water or moisture that might be standing.
- Monitor Operation: Make sure the timer and any related devices are working the way you set them by checking their operation on a regular basis.
- If your needs change, like if you get new outdoor lights or decorations, you’ll need to re-program the timer to work with them.
CARE & MAINTENANCE
- Regular Checks: Look over the timer every so often for any damage, wear, or loose connections, especially around the outlets and power line.
- Clean with a Dry Cloth: Wipe the timer clean with a dry cloth to get rid of any dust or dirt. To keep internal parts from getting damaged, don’t use liquid cleaners.
- Store Indoors During Bad Weather: If you’re not going to use the timer during winter storms or heavy rain, keep it inside to keep it safe from too much water or freezing temperatures.
- Protect from Direct Sunlight: To keep the timer from getting too hot or breaking down, keep it out of direct sunlight for long amounts of time.
- Avoid Overloading: Make sure that the total power of all the devices connected to the timer does not go over what it is supposed to handle to keep it from overheating or damaging the electricity.
- Check the Power Cord: Look at the power cord often for signs of wear, cuts, or breaking, and replace it right away if you find any.
- For Use in Dry Places: If you are using the timer outside, make sure you put it somewhere that it won’t get wet or get direct rain on it.
- Reprogram for Seasonal Changes: Change the timer’s settings to match changes in daylight hours, like in the spring or fall, to make sure that lights and machines work at the best times.
- Test the Timer’s Functions: Every couple of months, test the timer to make sure that all of the settings are right and that the light sensor works.
- Check Grounded Outlets: Make sure that the links to the timer’s grounded outlets are tight and that the outlets are not broken. Electrical problems can happen when plugs are too loose.
- Keep Sharp Objects Away: Do not put anything sharp near the timer or its lines to keep them from getting damaged and making it less useful.
- Make Sure There Is Enough Airflow: Put the timer somewhere with good airflow to keep it from getting too hot, especially when handling high-wattage devices.
- Replace if Not Working: If the timer stops working or responding, you should get a new one to make sure it keeps working safely and correctly.
- Keep Manual for Future Use: Keep the user manual somewhere safe so you can use it later to set or change the timer.
- Do Not Open or Tamper with Internal Components: If you are not qualified to do so, do not open or tamper with the timer’s internal components. Doing so can void the guarantee and pose safety risks.
TROUBLESHOOTING
| Problem | Solution |
|---|---|
| Timer is not working. | Check if the timer is properly plugged into the outlet. |
| Device doesn’t turn on/off. | Ensure the device is compatible with the timer’s wattage. |
| The timer does not respond. | Reset the timer by unplugging it for 30 seconds. |
| Light stays on after timer ends. | Adjust the timer settings to match the desired cycle. |
| Timer’s photocell light sensor is not working. | Ensure the sensor is clean and exposed to light. |
| Timer keeps tripping circuits. | Check the maximum load rating to avoid overload. |
| Settings are incorrect. | Double-check your timer’s settings for accurate time intervals. |
| Timer only works intermittently. | Verify the timer is securely plugged in and not loose. |
| Timer won’t turn off. | Reprogram the timing settings to ensure proper intervals. |
| Timer is making a buzzing sound. | Ensure the timer is not overloaded or malfunctioning. |
PROS & CONS
Pros
- Simple and easy to use with a push-button switch.
- Photocell Light Sensor for automatic light control.
- Flexible timing modes with 2H, 4H, 6H, and 8H options.
- Ideal for energy-saving automation for lights and appliances.
- UL-certified for safety and reliability.
Cons
- Limited to devices that work with a standard 125V AC connection.
- No digital or Wi-Fi connectivity options for the remote control.
- May not be ideal for high-power devices requiring constant power.
- Requires manual adjustments for settings—no app support.
- The plastic body might not be as durable as some heavy-duty options.
WARRANTY
Brightown offers a 1-year warranty on the Mechanical Plug-in Timer Switch, ensuring that any defects in material or workmanship will be addressed promptly. If your timer malfunctions within this period, you can contact Brightown’s customer service for a replacement or a full refund. The warranty provides peace of mind, ensuring long-term reliability.
FREQUENTLY ASKED QUESTIONS
What is the price of the Brightown Mechanical Plug-in Timer Switch?
The Brightown Mechanical Plug-in Timer Switch is priced at $16.99, offering an affordable solution for scheduling and controlling electrical devices.
What are the product dimensions of the Brightown Mechanical Plug-in Timer Switch?
The Brightown Mechanical Plug-in Timer Switch has dimensions of 1.57 inches in depth, 8.2 inches in width, and 7.4 inches in height, making it a compact and space-efficient device for various uses.
How much does the Brightown Mechanical Plug-in Timer Switch weigh?
The Brightown Mechanical Plug-in Timer Switch weighs 8.1 ounces, providing a lightweight and portable design suitable for everyday use.
How many settings does the Brightown Mechanical Plug-in Timer Switch offer?
The Brightown Mechanical Plug-in Timer Switch has 9 settings, allowing for versatile control over your connected devices or lighting.
What type of power source does the Brightown Mechanical Plug-in Timer Switch use?
The Brightown Mechanical Plug-in Timer Switch is powered by corded electric, which allows it to be plugged into a standard electrical outlet for operation.
What is the voltage rating for the Brightown Mechanical Plug-in Timer Switch?
The Brightown Mechanical Plug-in Timer Switch operates at a 125-volt AC power supply, suitable for most household electrical systems in the U.S.
How many grounded outlets does the Brightown Mechanical Plug-in Timer Switch have?
The Brightown Mechanical Plug-in Timer Switch features 2 grounded outlets, providing power to multiple devices or lights simultaneously.
What are the available timing modes for the Brightown Mechanical Plug-in Timer Switch?
The Brightown Mechanical Plug-in Timer Switch offers 2H, 4H, 6H, and 8H timing modes, allowing you to schedule when your devices or lights turn on or off based on your preferences.