BLAUBERG DPCH Series Ceiling Diffuser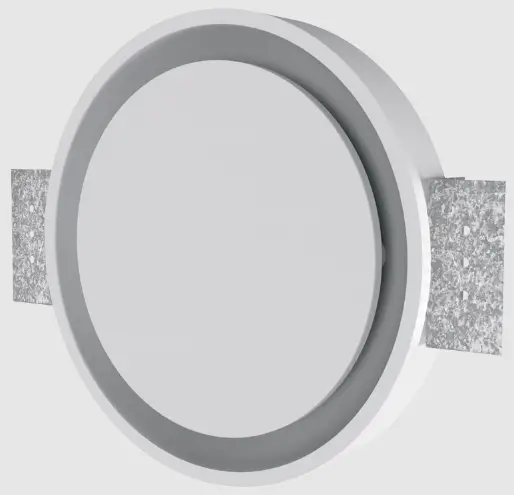
Specifications:
- Product: Ceiling Diffuser dPCH
- Application: Supply and extract ventilation systems for heating
and air conditioning - Usage: Industrial, commercial, and domestic premises
- Design Features: Plastic flange, Metal flange with F-shaped
cuff, Metal flange with U-shaped cuff - Spigot Diameter: 125mm
- Overall Dimensions (d x H x H1): 108mm x 58mm x 125mm
Product Usage Instructions:
Mounting:
- Locate the mounting template and align it with the diffuser to
mark the hole position. - Connect the flexible air duct to the rigid air duct using a
worm drive clamp or duct tape. - Install the air duct onto the diffuser’s flange and secure the
connection. - Secure the diffuser into the ceiling hole using screws.
- Install the front panel fixed with magnet holders.
Decoration Works:
- Apply primer and spackling paste onto the drywall.
- Glue the glass cloth over the spackling paste and cut along the
diffuser’s outline when dry. - Putty and grind the surface before painting.
- Paint the diffuser and drywall using appropriate paint for
highly humid rooms.
Adjusting Air Flow:
Air flow adjustment is done via a round throttle (not included).
Remove inserts from the throttle as needed and place it in the
diffuser’s spigot.
FAQ:
Q: How do I ensure proper distance between the diffuser’s
flange and ceiling elements?
A: When making a layout draft, ensure a minimum distance (B) of
100mm exists between the diffuser’s flange and ceiling
elements.
Q: What screws should I use to attach mounting brackets to
drywall?
A: Use screws at least 3.9mm in diameter to attach mounting
brackets to drywall.
“`
Ceiling diffuser
dPCH
EN insTAllATiOn insTruCTiOn
dPCH
PURPOSE
Ceiling diffusers are used in supply and extract ventilation systems, for heating and air conditioning in industrial, commercial and domestic premises.
DELIVERY SET
Diffuser – 1 pc.; Template – 1 pc.; Installation instruction – 1 pc.; Packing box – 1 pc.; Glass cloth – 1 pc.
DESIGNATION KEY
DPCH MFC 125 Spigot diameter [mm] Design features: _ : plastic flange MFC: metal flange with an F-shaped cuff MUC: metal flange with a U-shaped cuff Series
OVERALL AND CONNECTING DIMENSIONS [mm]
Ø 250 80 H 39 H1
ø 3.6
Ø d
d H H1
DPCH 125
108 58
125
DPCH MFC/MUC 125
98 49
323
DESIGN
1 — casing
5
2 — front panel
3 — magnet holder
4 — mounting bracket
5 — flange
1
3
4 2
2
dPCH
ATTENTION! When making a layout draft for the ventilation system, ensure a minimum distance (B) exists between the diffuser’s flange to the ceiling elements.
B
B
DPCH 125
100
DPCH MFC/MUC 125 100 B
ATTENTION! To prevent vibration, a section of flexible duct must be attached in between the diffuser and rigid duct.
To attach the mounting brackets to drywall, use screws at least 3.9 mm in diameter. Before starting the installation, secure the mounting brackets in pre-made holes on the diffuser’s casing. Adjust the position of the mounting brackets based on the ceiling thickness (A).
A
Remove the front panel fixed with magnet holders.
3
MOUNTING 1
dPCH
For comfortable mounting, locate the mounting template on the internal packing attachment. Align the template with the diffuser and make a mark coaxial to the hole in the middle.
2
45°
Align the template with the ceiling and mark up the places to install the diffuser and make holes for mounting. Make a hole in the drywall. Remove the chamfer at a 45° angle up to 1/3 drywall thickness.
3
Connect the flexible air duct to rigid air duct.Fix the connection with the worm drive clampor duct tape.
4
Install the air duct onto the diffuser’s flange.
4
dPCH 5
Secure the connection with the worm drive clamp or duct tape.
6
Install the diffuser into the hole in the ceiling. The mounting brackets must be supported with the back side of the drywall. Align the mark on the diffuser with the center of the hole in the middle.
7
Secure the diffuser with screws. Install the front panel fixed with magnet holders.
5
dPCH DECORATION WORKS
ATTENTION! When marking up holes and decorating, it is recommended to use the technology, instruments and materials approved by the drywall manufacturer or local standard of the country where the drywall is being mounted.
Example of performing decoration works (according to the Knauf technology)
1
Dust the surfaces and slits. Apply the primer (“Knauf Tiefengrund” or similar). When dry, putty (use “Knauf Fugenfüller” or similar) the slit between the diffuser and drywall. When the spackling paste is dry, grind on the surface.
2
Apply the primer (“Knauf Tiefengrund” or similar). Apply the spackling paste (“Knauf HP Finish” or similar) onto drywall. Glue the glass cloth. Spread it over with a putty knife. When dry, cut out along the diffuser’s outline..
6
dPCH 3
Apply the primer (“Knauf Tiefengrund” or similar). When dry, putty (“Knauf HP Finish” or similar) and grind on the surface.
4
Apply the primer (the one recommended by the paint’s manufacturer). Paint the diffuser and the drywall. For highly humid rooms, use the appropriate high-humidity primer and paint.
7
ADJUSTING AIR FLOW
Air flow is adjusted via the round throttle (not included in the delivery set and must be ordered separately). To adjust, remove the inserts from the throttle as necessary and place it in the diffuser’s spigot.
dPCH
1
8
dPCH
9
dPCH
10
dPCH
11
www.blaubergventilatoren.de B277EN-01
Documents / Resources
 |
BLAUBERG DPCH Series Ceiling Diffuser [pdf] Instruction Manual DPCH, DPCH MFC 125, DPCH MUC 125, DPCH Series Ceiling Diffuser, DPCH Series, Ceiling Diffuser, Diffuser |


