BIRDSNAP Smart Bird Feeder with Camera

FCC WARNING
Any changes or modifications not expressly approved by the party responsible for compliance could void the user’s authority to operate the equipment.
This device complies with part 15 of the FCC Rules. Operation is subject to the following two conditions: (1)This device may not cause harmful interference, and (2)this device must accept any interference received, including interference that may cause undesired operation.
ISEDC RSS WARNING
This device compiles with ISEDC licence-exempt RSS standard(s).Operation is subject to the following two conditions: (1)This device may not cause interference, and(2) this device must accept any interference, including interference that may cause undesired operation of the device.
BASIC PARAMETERS
| Cable length | 3m |
| Operating voltage | 5V DC |
| Operating temperature | -20.5°C to 48.5°C(-5°F to 120°F) |
What’s In The Box
If some items are missing or damaged, please contact AI-Birdfy@outlook.com
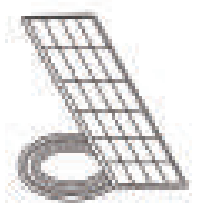
- Solar Panel *1
- Universal Joint *1

- Socket Nut *1

- Locking Screw Cap *1

- Base *1

- Screws *4

- Wall Anchors *3

- Quick Start Guide *1

INSTALLATION
- Place Solar Panel in an area with consistent sunlight throughout the year. It only needs a few hours of direct sunlight each day to keep your camera powered.
- Wipe the face of the solar panel with a soft, damp cloth regularly to clear any dust or debris.
- The amount of energy that the solar panel produces is affected by weather conditions, seasonal changes, geographic location, etc.
Step 1: Fix the Base to your mounting location using the included Screws.

Step 2: Install the Locking Screw Cap into the Universal Joint and screw the circular Socket Nut into the Universal Joint.

Step 3: Screw the Universal Joint into the Solar Panel.

Step 4: Screw the Locking Screw Cap into the Base.

Step 5: Adjust the angle of Solar Panel.
- Loosen the Locking Screw Cap.

- Turn the Universal Joint (sleeve rod ).

- Orient the Solar Panel towards a direction with longer light hours (recommended upward 30°)

- Tighten the Locking Screw Cap when the Solar Panel is in position.

Customer Support
Email address: AI-Birdfy@outlook.com

Documents / Resources
 |
BIRDSNAP Smart Bird Feeder with Camera [pdf] User Guide Smart Bird Feeder with Camera, Smart, Bird Feeder with Camera, Feeder with Camera, Camera |


