

Concealed Cistern MANCONCIS
Push Button ARIBBMPB, ARICHMPB, ARIMBMPB
Thank you for choosing Better Bathrooms.
Please read this manual before installing your product and keep for future reference.
Please note: Image is for illustrative purposes only and may differ slightly to the actual product.
- Multi-person assembly
- Tools required
- We always recommend using professional tradespeople to install your product
Congratulations on your purchase
And welcome to our growing gang of savvy shoppers
We’re on a mission to bring you extraordinary bathroom products, for less. From modern to traditional style ceramics, plus the gorgeous fixtures, fittings and furniture to match. So, you can fall in love with your space every single day.
As one of the UK’s largest independent bathroom stores, we’ve received countless awards; including the National Business Awards UK, the Digital Entrepreneur Awards and being placed on The Sunday Times Fast Track 100.
We hope your new product goes above and beyond your expectations. However, should any problems occur, please:
- log in to your account and contact our customer services team via your self-serve
portal — betterbathrooms.com/CustomerAccount/Login - contact us via betterbathrooms.com/content/contact-us
Important information
- Please read these instructions thoroughly and retain for future reference.
- Manufactured to BS EN14055 WC and urinal cisterns.
- All installation work must be carried out to comply with the Water Bylaw Regulations.
- The installation should be designed to allow access for maintenance.
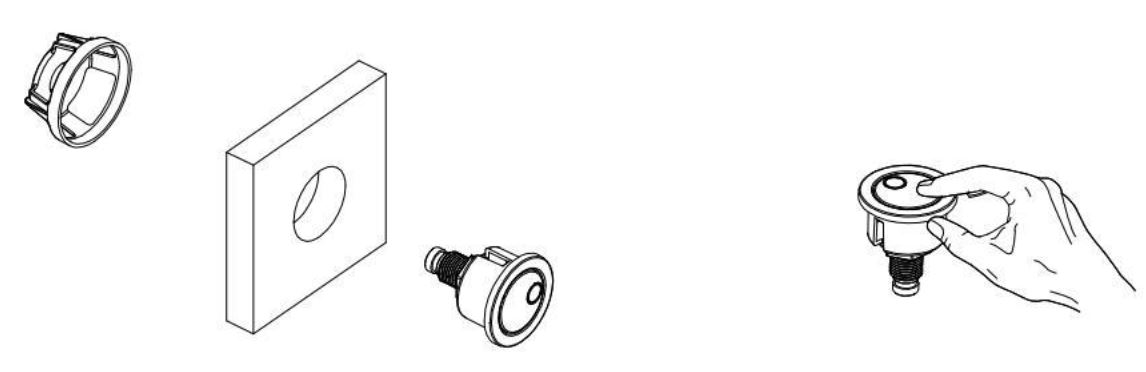
Accessories list

Parts List


Cistern dimensions


Technical specifications

Installation steps


Trouble Shooting
For all troubleshooting solutions, please refer to the Maintenance section.
Insufficient or too much water entering the cistern tank
1. Adjust the inlet valve using the adjustment screw.
Water filling into the cistern slowly
- If the water flows into the cistern slowly, the washer on the inlet valve could be blocked and may require cleaning.
- Remove and run under warm water and clean using a small brush to remove any blockage, if this does not resolve the issue, check the water supply to the cistern.
- If this is running freely, replace the inlet valve.
Tank fills correctly but insufficient water leaving the tank
1. Adjust the flush valve volume.
Water running into the pan continually after flushing
1. Establish if the water level in the cistern is reaching the overflow on the syphon, if yes, replace the inlet valve. If it doesn’t, replace the upper section of the syphon.

Maintenance
For all maintenance measures below, you will need to gain access to the cistern tank by removing panels/tops on your WC unit, (this access will differ depending on your WC unit), and for the water supply to be turned off.
Once you have gained access, remove the screws in the tank face/lid and this will release the second section of the face/lid by unclipping from the tank.

Inlet valve adjustment
Twist the adjustment screw as shown in the direction required.

Inlet valve washer cleaning
- Unscrew the washer section from the inlet valve.
- Place the washer under warm running water and brush to remove any blockage.
- Then replace and tighten back into position.

Flush valve removal and adjustment
- The flush valve is made of two parts, the bottom section which is secured to the cistern tank and the upper section which can twist and pull away from the bottom section.
- During this maintenance the bottom section can remain in position

- To adjust the volume of water leaving the tank, move the slider as shown.
- If you need to remove the flush valve to check the washer or remove the washer for cleaning, take the flush valve out and take the washer down as the process showed below.

Push button operation failure
- Take the button down as the steps below, normally press the half flush & full flush, observe whether the button can bounce back or not. If not, please replace the button.
Cleaning
To maintain the surface of the push button surface, wipe with a clean damp cloth and wipe dry, do not use any abrasive cleaning agents or materials.
If any harsh chemicals come into contact with the surface of the product, rinse and wipe clean immediately.
For more information
- visit betterbathrooms.com
- email customerservices@buyitdirect.co.uk
- call 0330 390 3062
- write to Trident Business Park, Neptune Way, Huddersfield, HD2 IUA
Read More About This Manual & Download PDF:
Documents / Resources
 |
better bathrooms ARI Series Concealed Cistern MANCONCIS Push Button [pdf] User Manual ARIBBMPB, ARICHMPB, ARIMBMPB, ARI Series Concealed Cistern MANCONCIS Push Button, ARI Series, ARI Series MANCONCIS Push Button, Concealed Cistern MANCONCIS Push Button, Concealed Cistern MANCONCIS, MANCONCIS Push Button, MANCONCIS, Push Button |