1. Уводзіны
This manual provides essential instructions for the setup, operation, and maintenance of your Samsung Xpress SL-M2070FW Multifunctional Printer. This device offers 4-in-1 functionality, including printing, copying, scanning, and faxing, designed to streamline your workflow. It supports wireless connectivity via NFC, Wi-Fi Direct, and Google Cloud Print for convenient use.

Малюнак 1.1: Фронт view of the Samsung Xpress SL-M2070FW Multifunctional Printer, showing the paper tray and output area.
2. Настройка
2.1 Распакоўка і пачатковае размяшчэнне
- Акуратна дастаньце прынтар з упакоўкі.
- Зніміце з прынтара ўсе ахоўныя стужкі і ўпаковачныя матэрыялы.
- Размясціце прынтар на ўстойлівай, роўнай паверхні з належнай вентыляцыяй.
2.2 Падключэнне сілкавання
- Падключыце шнур харчавання да прынтара, а затым да заземленай электрычнай разеткі.
- Націсніце кнопку харчавання, каб уключыць прынтар.
2.3 Усталёўка картрыджа з тонерам
- Адкрыйце пярэднюю крышку прынтара.
- Remove the toner cartridge from its packaging and gently shake it side to side to distribute the toner.
- Устаўце картрыдж з тонерам у прынтар, пакуль ён не зафіксуецца са шчоўкам.
- Зачыніце пярэднюю крышку.
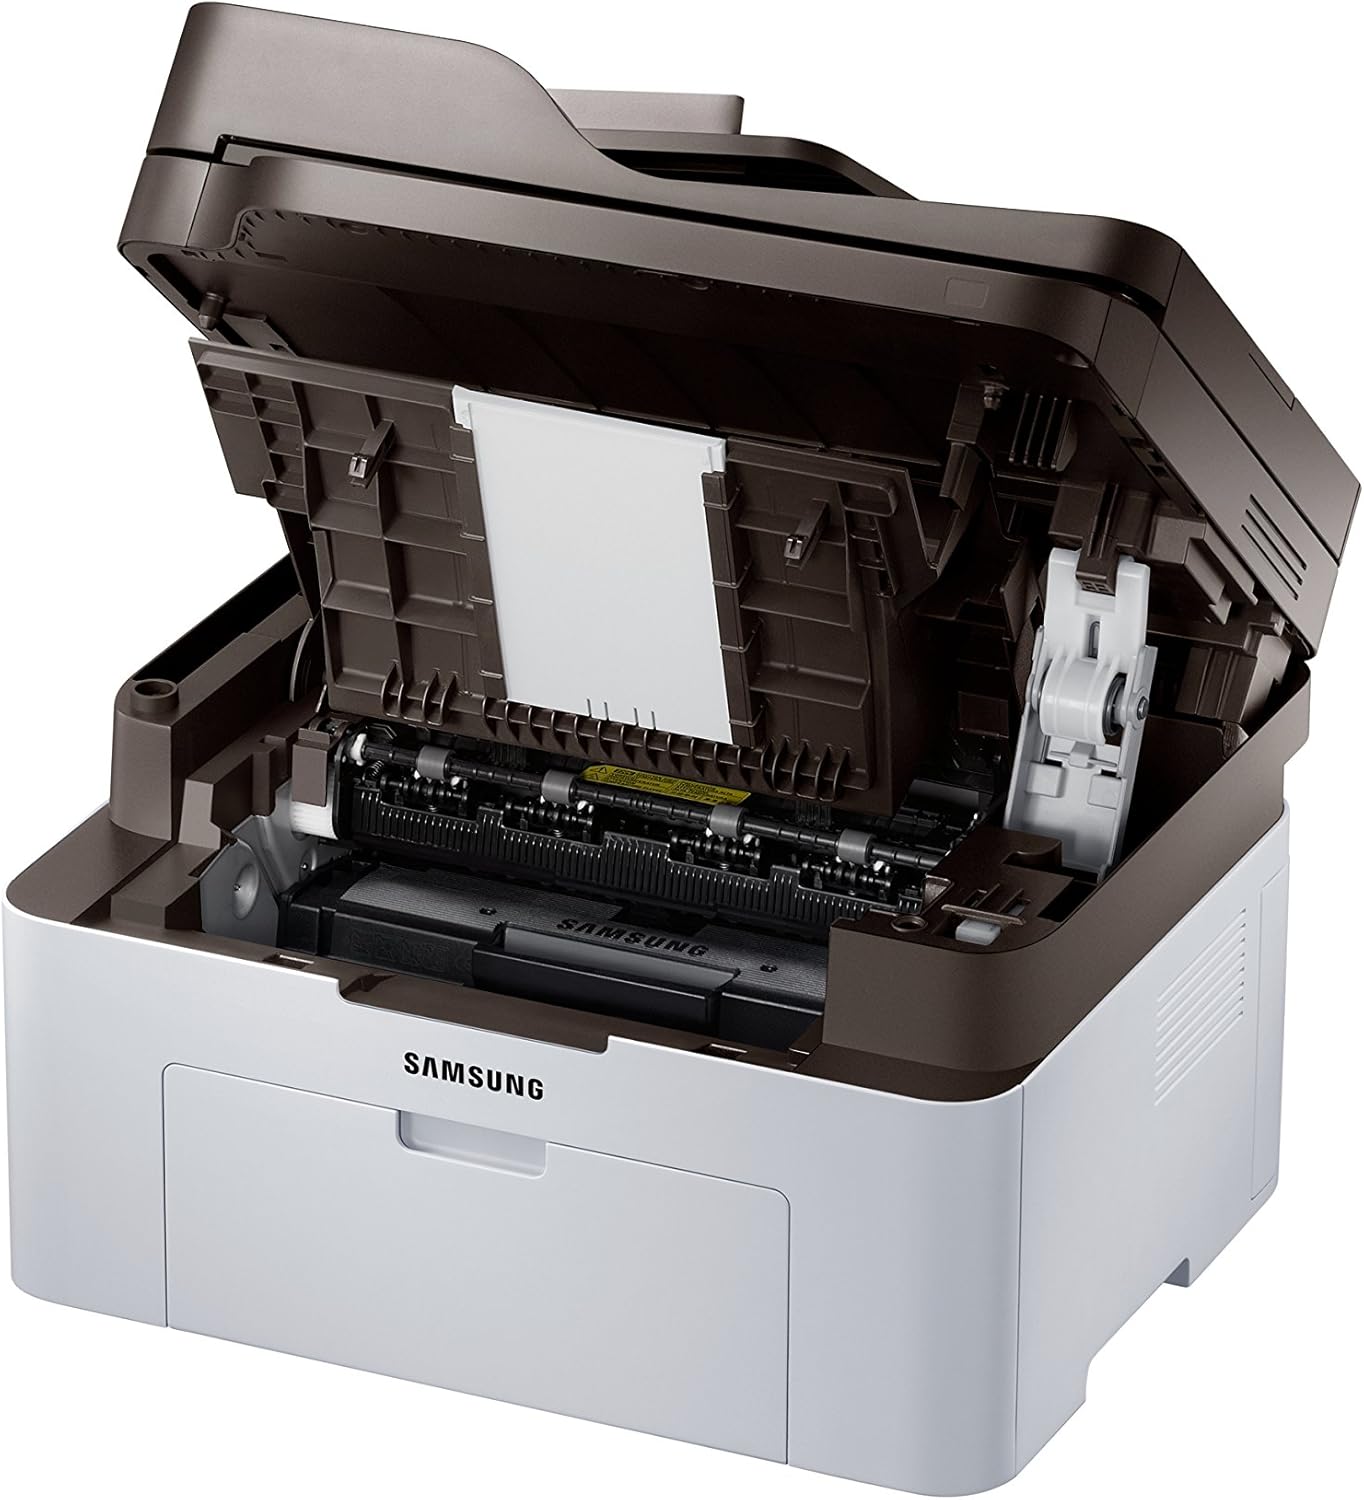
Малюнак 2.1: Front cover open, revealing the toner cartridge slot for installation or replacement.
2.4 Усталёўка праграмнага забеспячэння і падключэнне
- Insert the provided installation CD into your computer's CD-ROM drive, or download the latest drivers from the Samsung support webсайт.
- Follow the on-screen instructions to install the printer software.
- For wireless setup, follow the prompts to connect the printer to your Wi-Fi network. The printer supports NFC for easy pairing with compatible devices.
- For USB connection, connect the printer to your computer using a USB cable (not always included).
3. Інструкцыя па эксплуатацыі

Малюнак 3.1: Вуглавы view showing the control panel with display and function buttons.
3.1 Друк дакументаў
- Пераканайцеся, што прынтар уключаны і падлучаны да кампутара або сеткі.
- Загрузіце паперу ва ўваходны латок.
- На камп'ютары адкрыйце дакумент, які вы хочаце раздрукаваць.
- Выберыце Друк з меню праграмы (напрыклад, File > Друк).
- Choose the Samsung Xpress SL-M2070FW from the list of available printers.
- Adjust print settings as needed (e.g., number of copies, paper size, quality).
- Націсніце Друк.
3.2 Капіраванне дакументаў
- Змесціце дакумент тварам уніз на шкло сканера або тварам уверх у аўтаматычную падачу дакументаў (ADF).
- На панэлі кіравання прынтара націсніце кнопку Копія кнопка.
- Use the navigation buttons to select copy options (e.g., number of copies, darkness, original size).
- Націсніце Пачаць кнопку, каб пачаць капіраванне.
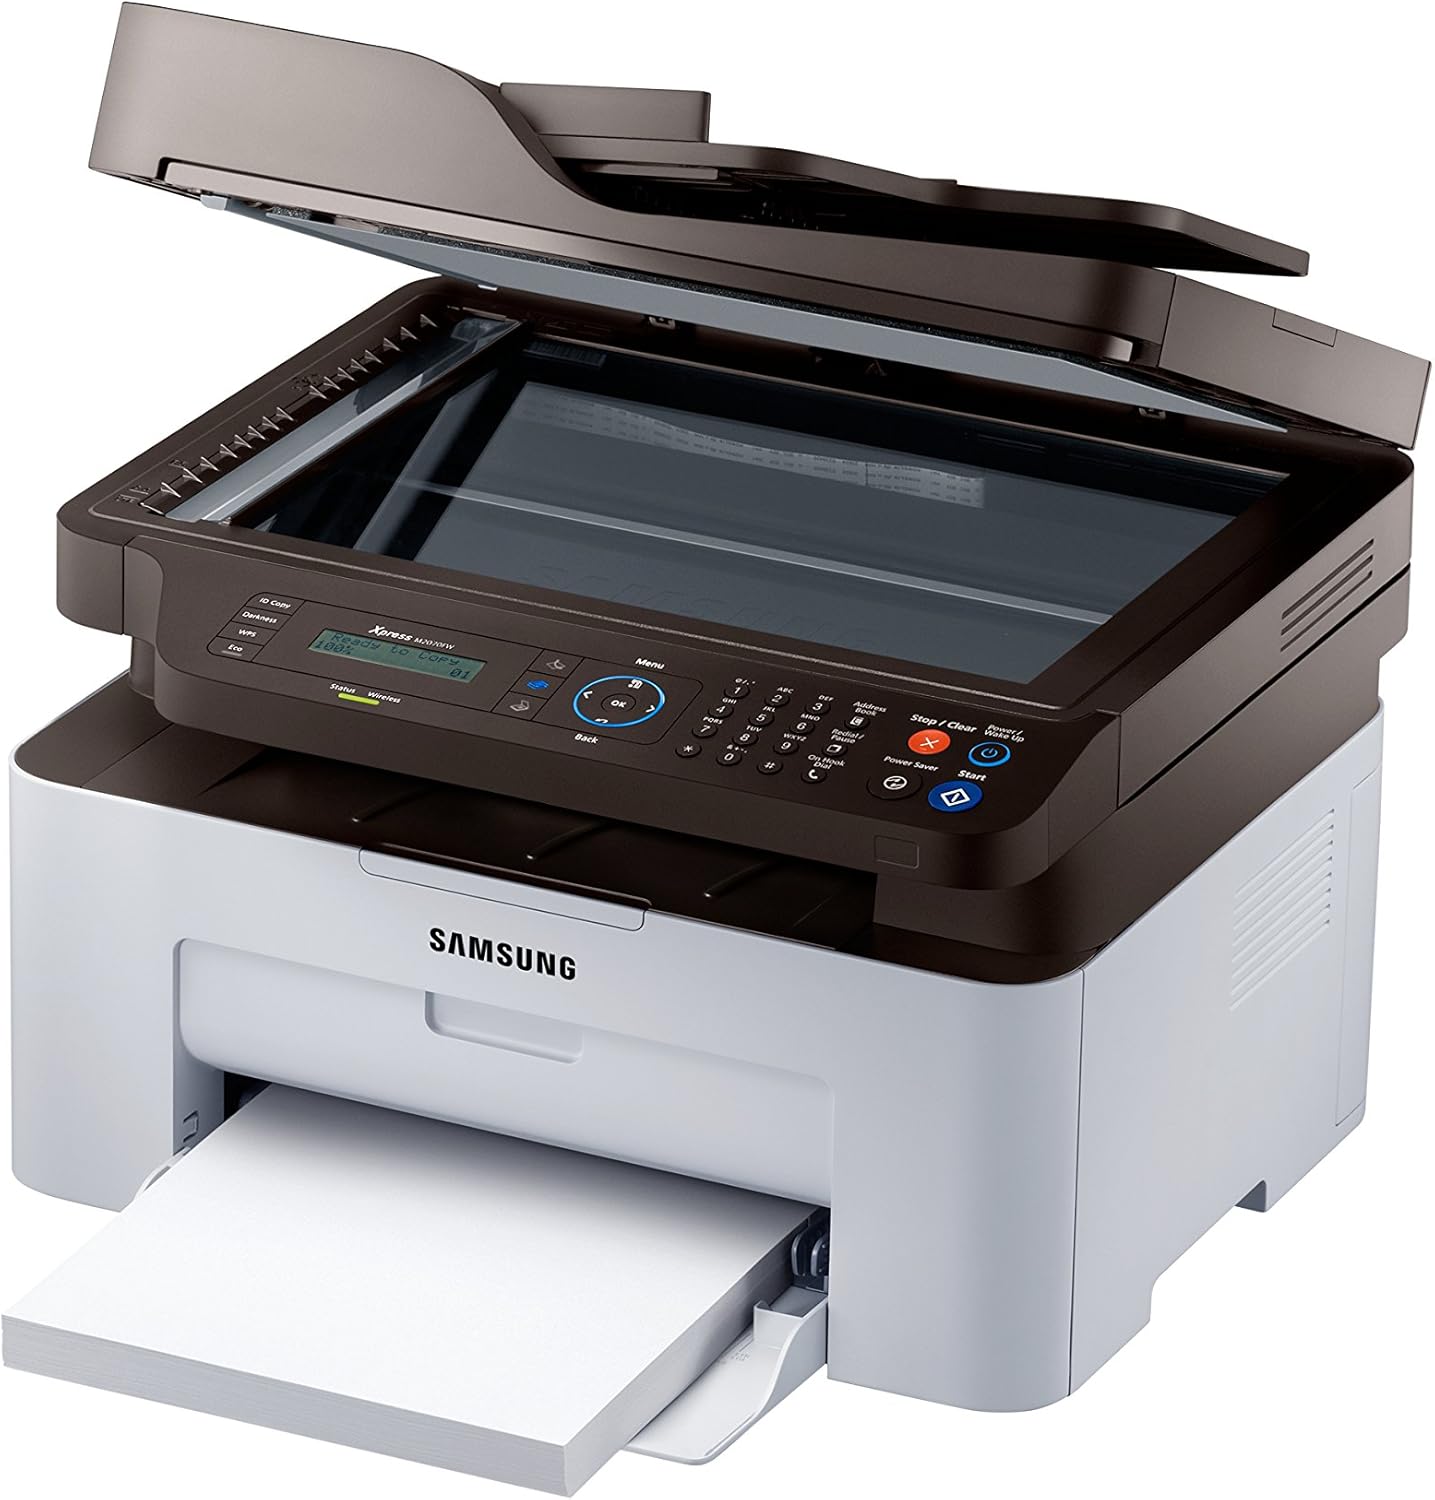
Малюнак 3.2: Top cover open, showing the flatbed scanner glass for copying and scanning.
3.3 Сканіраванне дакументаў
- Змесціце дакумент на шкло сканера або ў аўтадататар дакументаў.
- From your computer, open the Samsung Easy Document Creator software or a similar scanning application.
- Выберыце сканаваць and choose your desired settings (e.g., resolution, color mode, destination).
- Націсніце сканаваць каб пачаць працэс.
3.4 Адпраўка факсаў
- Загрузіце дакумент у аўтапад'ёмнік дакументаў або пакладзеце яго на шкло сканера.
- На панэлі кіравання прынтара націсніце кнопку Факс кнопка.
- Увядзіце нумар факса атрымальніка з дапамогай лічбавай клавіятуры.
- Пры неабходнасці адрэгулюйце параметры факса.
- Націсніце Пачаць кнопку, каб адправіць факс.
3.5 Wireless Printing (NFC, Wi-Fi Direct, Google Cloud Print)
- NFC: Tap your NFC-enabled smartphone or tablet to the NFC tag on the printer to establish a direct connection and print.
- Прамы Wi-Fi: Connect your mobile device directly to the printer's Wi-Fi Direct network without needing a router.
- Google Cloud Print: Register your printer with Google Cloud Print to print from anywhere using your Google account. Refer to the online manual for detailed registration steps.
4. Тэхнічнае абслугоўванне
4.1 Замена картрыджа з тонерам
- When the toner low message appears on the display, order a new toner cartridge.
- Адкрыйце пярэднюю крышку прынтара.
- Асцярожна выцягніце стары картрыдж з тонерам.
- Распакуйце новы картрыдж з тонерам і акуратна страсяніце яго.
- Устаўце новы картрыдж, пакуль ён не зафіксуецца пачуўшы фіксацыю.
- Зачыніце пярэднюю крышку.
4.2 Чыстка прынтара
- Знешні выгляд: Працірайце знешнія паверхні прынтара мяккай тканінай без ворса. Не выкарыстоўвайце абразіўныя ачышчальнікі.
- Шкло сканера: Gently clean the scanner glass with a soft cloth dampened with glass cleaner. Ensure no residue remains.
- Інтэр'ер: Periodically open the front cover and gently remove any paper dust or debris with a dry, lint-free cloth.
5. Выпраўленне непаладак
| праблема | Магчымая прычына | Рашэнне |
|---|---|---|
| Прынтар не ўключаецца. | Шнур сілкавання не падключаны належным чынам. | Check power cord connections to the printer and wall outlet. Ensure the outlet is functional. |
| Захрасла папера. | Incorrect paper loading; foreign objects in paper path. | Remove all paper from the tray and reload correctly. Open covers and carefully remove any jammed paper or obstructions. |
| Дрэнная якасць друку. | Low toner; dirty print head/drum; incorrect print settings. | Replace toner cartridge. Clean the interior of the printer. Adjust print quality settings in the printer driver. |
| Немагчыма падключыцца бесправадным шляхам. | Incorrect Wi-Fi password; printer too far from router; network issues. | Verify Wi-Fi password. Move printer closer to the router. Restart printer and router. Reconfigure wireless settings. |
6. Тэхнічныя характарыстыкі
- Назва мадэлі: SL-M2070FW
- Функцыі: Друк, капіраванне, сканаванне, факс
- Тэхналогія друку: Лазер (манахромны)
- Максімальная хуткасць друку (монахромны): 20 старонак у хвіліну (ppm)
- Максімальная хуткасць капіравання (чорна-белая): 14 праміле
- Max Copy Resolution (Black & White): 600 dpi
- Тып сканера: Планшэтны
- Тэхналогія падключэння: USB, Wireless (Wi-Fi, NFC, Wi-Fi Direct, Ethernet)
- Hardware Interface: Ethernet, USB
- Ёмістасць памяці: 128 Мб
- Спажываная магутнасць: 50 Вт (працоўны рэжым)
- Памеры прадукту: 15.98 х 14.16 х 12.15 цалі
- Вага прадмета: 18.92 фунта (8.6 кілаграма)
- Уключаныя кампаненты: Scanner Glass, Fax Machine, Paper Tray
7. Гарантыя і падтрымка
Your Samsung Xpress SL-M2070FW Multifunctional Printer comes with a limited warranty. For detailed information regarding warranty terms and conditions, please refer to the warranty card included with your product or visit the official Samsung support webсайт.
For technical assistance, driver downloads, or further support, please visit the Samsung support webсайт або звярніцеся ў службу падтрымкі кліентаў.
- Інтэрнэт-падтрымка: www.samsung.com/support/
- Тып гарантыі: Абмежаваная гарантыя