B ONE B1SR1ZB Smart Single Relay Dual Switch

Introduction
The Zigbee-based Smart Single Relay is a 1-channel, 16A wireless AC power switch device with power monitoring capabilities. It enables remote control of an electrical appliance, each with a 16A capacity, to provide a smart automation experience. This relay allows you to seamlessly connect with the B.One Plus App on your smartphone and conveniently turn on/off connected electrical appliances and monitor their power consumption. It can be installed inside the switchboard and is compatible with the Zigbee-en-abled B.One Hub, making it ideal for automating traditional switchboards.
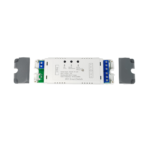
Product Structure

Technical Specifications
| Electrical Parameters | |
| Operating voltage | 100 – 240VAC
(Single Phase), 50/60Hz |
| Maximum load rating at 250VAC | 16A – Resistive Load 6.4A – Inductive Load (at 0.4 Power factor) |
| Over current protection | >17.6 A soft cut-off |
| Over voltage protection | >300 V |
| Under voltage protection | < 90 V |
| Over power protection | >4646 W |
| Over temperature protection | >90°C |
| Communications | |
| Protocol | HA Zigbee 3.0 |
| Working Frequency | 2400 MHz – 2483.5 MHz |
| Network range | Upto 50 meters LOS (open area) |
| Environmental | |
| Operating Temperature | Operating: 0°C to 50°C Storage: -20°C to 70°C
(For indoor use in dry locations only) |
| Operating humidity | < 90% |
| Mechanical | |
| Dimensions | 55.3 x 48.5 x 17.6 mm |
| Colour | White |
| B.One Plus App support | Android 8.0 and above / iOS 15.0 and above |
Installation
Requirements
- You will need a smartphone (Android/iOS) with the B.One Plus App installed and your account activated on it.
- The Zigbee-enabled B.One Hub is connected to your home internet router and has been added to your account in the B.One Plus App.
Get B.One Plus App at

For a detailed user manual scan the QR code below:

Make electrical connections
Ensure to disconnect the power source before making the electrical connections.
- Installation must be done by an experienced electrician to ensure the user safety.
- While installing the device, ensure that B.One logo must be front-faced. This is required for proper communication with the Zigbee-enabled B.One Hub.
- While making the electrical connection, lugs must be connected using a crimping tool. If the lugs are not connected properly, then it may lead to short circuit and damage the device.

Refer to the figure below to connect the Smart Relay to the external Switch: 
LED Indicators
| LED | Status | Description |
| Green | Fast Blink (1 sec delay) | Pairing mode |
| Green & Red | Alternate Blinking | Not Paired with controller |
| Green | Solid | Load ON, Paired |
| Red | Solid | Load OFF, Paired |
| Green | Blink (5 times in 1.5 sec) | Factory Reset |
Addition of the device
Launch the B.One Plus App. From the Home screen, navigate to Devices > Tap on the (+) button > Switches and Controls > Zigbee Switches and Controls > Single In-wall Relay and follow the device pairing instructions.
Device Pairing
- After powering ON, Smart relay goes into auto addition mode for the next 5 minutes and it will be added into the Zigbee-enabled B.One Hub. If the Relay is not added to the network, then it can be paired using any one of the following options:
- Using Pairing/Reset Button: Press the button 5 times within 8 seconds to put device into pairing mode.

- Using External Switch (S1 or S2): Turn ON/OFF the external switch (S1 or S2) 10 times (5 ON/OFF cycles) within 8 seconds.
- After successfully joining the network, both the LEDs would be turned ON/OFF (Depends on the state of the external switch i.e. ON – Green and OFF – RED).

Deletion of the device
To delete the device or to remove it from the Zigbee -enabled B.One Hub, follow these steps:
- On the B.One Plus App, select the Devices screen and tap on Edit. Select (-) icon to delete the device.
- Tap on Delete to confirm the device deletion. Screen displays confirmation message when it is success-fully removed from the Zigbee network.
Factory Reset
- You can factory reset the device using one of the following options:
- Using Pairing/Reset Button: Press the Pairing/Reset button 5 times within 8 secs to factory reset the device.

- Using External Switch (S1 or S2): Turn ON/OFF the external switch (S1 or S2) 10 times (5 ON/OFF cycles) within 8 seconds.

- Once factory reset is done, the connected load blinks twice and the device goes into auto pairing mode.
Device Care and Maintenance
Correct Disposal
Proper disposal of the Single Relay device is vital for safety and environmental considerations. Please adhere to the following guidelines when disposing of the device:
- Do not dispose of the device into fire: The Single Relay device contains combustible components. It is crucial to never dispose of the device by burning it or exposing it to fire. This can lead to hazardous situations and environmental pollution.
- Do not dispose of the device with regular waste: The Single Relay device should not be discarded with regular household or municipal waste. Improper disposal may result in the device ending up in-
Proper disposal options
To ensure the correct and responsible disposal of the Single Relay device, consider the following options:
- Electronic waste recycling: Look for local electronic waste recycling facilities or programs in your area. These facilities specialize in the proper handling and recycling of electronic devices. Contact your local recycling center or municipality for information on drop-off points or collection events for electronic waste.
- Manufacturer or retailer programs: Check if the manufacturer or retailer of the Single Relay device has a take-back program or recycling initiative in place. Many companies offer recycling services for their products to promote responsible disposal. Visit their official website or contact their customer support for more information on how to return the device for proper recycling.
By following these guidelines and responsibly disposing of the Single Relay device, you contribute to minimizing environmental impact and promoting sustainable practices.
Warranty
Blaze Automation warrants its products against defects in materials and/or workmanship under normal use for a period of ONE (1) YEAR from the date of purchase by the original purchaser (“Warranty Period”). If a defect arises and a valid claim is received within the Warranty Period, then as your sole remedy (and Blaze Automation’s sole liability), Blaze Automation will at its option either 1) repair the defect at no charge, using new or refurbished replacement parts, or 2) replace the product with a new unit that is functionally equivalent to the original, in each case within a mutually agreed lead time between both the purchaser and Blaze, following receipt of the returned product. A replacement product or part assumes the remaining warranty of the original product. When a product or part is exchanged, any replacement item becomes your property and the replaced product or part becomes a property of Blaze Automation.
Obtaining Service
To obtain warranty service, speak with your point of contact at Blaze or with the authorized distributor from your country of purchase. Please be prepared to describe the product that needs service and the nature of the problem. A purchase receipt is required. The product must be insured, and shipped freight prepaid and securely packaged.
You must contact Blaze for a Return Material Authorization Number (“RMA Number”) before shipping any product, and include the RMA Number, a copy of your purchase receipt and a description of the problem you are experiencing with the product. Any claim under this Limited Warranty must be submitted to Blaze Automation before the end of warranty period.
Exclusions
This warranty does not apply to
- damage caused by failure to follow the instructions(as explained in the user manual) relating to the product’s use or the installation of components
- damage caused by accident, abuse, misuse, transport, neglect, fire, floods, earthquake or other external causes
- damage caused by service performed by anyone who is not an authorized representative of Blaze Automation
- accessories used in conjunction with a covered product
- the Product or part that has been modified to alter functionality or capability
- items intended to be periodically replaced by the purchaser during the normal life of the Product, including, without limitation, batteries, bulbs or cables
- the Product that is used commercially or for a commercial purpose, in each case as determined by Blaze Automation.
TO THE EXTENT PERMITTED BY APPLICABLE LAW, BLAZE AUTOMATION DISCLAIMS ANY AND ALL STATUTORY OR IMPLIED WARRANTIES, INCLUDING WITHOUT LIMITATION, WARRANTIES OF MERCHANTABILITY, FITNESS FOR A PARTICULAR PURPOSE AND WARRANTIES AGAINST HIDDEN OR LATENT DEFECTS. IF BLAZE AUTOMATION CANNOT LAWFULLY DISCLAIM STATUTORY OR IMPLIED WARRAN-TIES, THEN TO THE EXTENT PERMITTED BY LAW, ALL SUCH WARRANTIES SHALL BE LIMITED IN DURATION TO THE WARRANTY PERIOD. BLAZE AUTOMATION SHALL NOT BE LIABLE FOR (I) ANY LOST PROFITS, COST OF PROCURE-MENT OF SUBSTITUTE PRODUCTS, OR ANY INCIDENTAL OR CONSEQUENTIAL DAMAGES, OR (II) ANY AMOUNTS IN EXCESS OF THE PURCHASE PRICE FOR THE PRODUCT, IN EACH CASE WHETHER RESULTING FROM THE USE OF OR INABILITY TO USE OF PRODUCT, OR ARISING OUT OF ANY BREACH OF THIS WARRANTY, EVEN IF COMPANY HAS BEEN ADVISED OF THE POSSIBILITY OF SUCH DAMAGES.
To exercise your rights under this warranty, please follow the instructions above under the heading “Obtaining Service,” or contact Blaze Automation at Blaze Automation Services Private Limited, Q2, 10th floor, Cyber Towers, Hitech-city, Hyderabad, Telangana – 500081, India.
Reach us at

FAQ
- Q: What should I do if the LED indicators do not behave as expected?
- A: In case of LED indicator issues, perform a factory reset by pressing the Pairing/Reset Button 5 times within 8 seconds to reset the device.
- Q: Can I install the Smart Single Relay Dual Switch myself?
- A: Installation should be done by an experienced electrician to ensure proper setup and user safety.
Documents / Resources
 |
B ONE B1SR1ZB Smart Single Relay Dual Switch [pdf] User Manual B1SRDS1ZB, B1SR1ZB, B1SR1ZB Smart Single Relay Dual Switch, Smart Single Relay Dual Switch, Single Relay Dual Switch, Relay Dual Switch, Dual Switch |