1. Giriş
This manual provides detailed instructions for the LILYGO T-Deck Plus ESP32-S3 LORA-89 915Mhz TTGO Development Board. It covers product features, technical specifications, setup procedures, operational guidelines, maintenance tips, and troubleshooting information. The LILYGO T-Deck Plus is a versatile development board featuring an ESP32-S3 microcontroller, LORA-89 915Mhz connectivity, a 2.8-inch display, and a QWERTY keyboard, designed for various communication and IoT applications, including those utilizing Meshcore firmware.
2. Məhsul bitdiview
2.1 Əsas Xüsusiyyətlər
- MCU: ESP32-S3FN16R8 Dual-core LX7 microprocessor
- Bağlantı: LORA-89 915Mhz, USB-C
- Ekran: 2.8 düym
- Giriş: QWERTY klaviaturası
- GPS: Integrated GPS module
- Mikroproqram: Pre-installed with Meshcore Firmware
- Güc: USB Powered, includes 1 Nonstandard Battery
- Material: Acrylonitrile Butadiene Styrene (ABS) shell
2.2 Fiziki komponentlər
The LILYGO T-Deck Plus features a compact design with a full QWERTY keyboard and a vibrant display. Key components include the screen, keyboard, USB-C port, and various internal modules for LORA and GPS functionality.

Şəkil 1: Ön və arxa view of the LILYGO T-Deck Plus, showing the display, keyboard, and rear casing with T-Deck branding.

Şəkil 2: Ön view of the LILYGO T-Deck Plus, highlighting the 2.8-inch display showing 'MESHCORE Ripple v7.6' and the QWERTY keyboard.
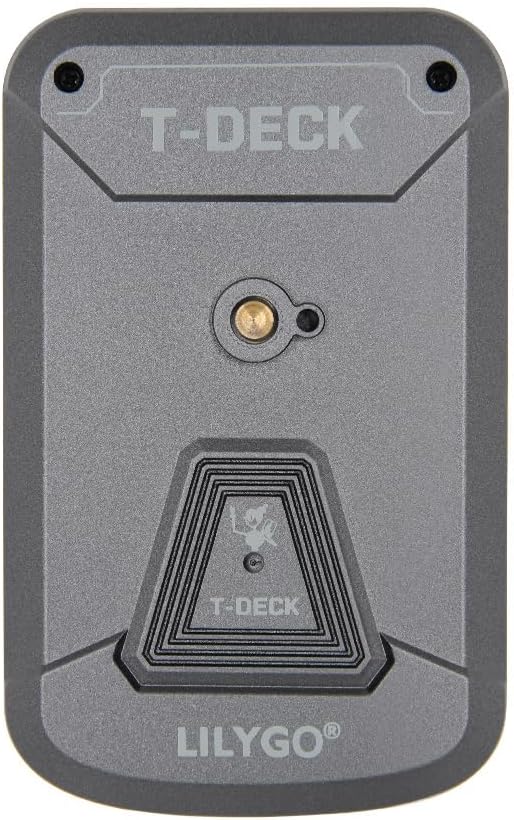
Şəkil 3: Arxa view of the LILYGO T-Deck Plus, featuring the T-Deck branding and mounting points.

Figure 4: LILYGO T-Deck Plus with approximate dimensions: Length 115mm, Width 72mm, Height 20mm.
3. Texniki spesifikasiyalar
| Xüsusiyyət | Detal |
|---|---|
| İstehsalçı | LİLİQO |
| MCU | ESP32-S3FN16R8 Dual-core LX7 microprocessor |
| LORA Frequency | 915Mhz (LORA-89) |
| Ekran | 2.8 düym |
| Bağlantı texnologiyası | USB-C |
| Uyğun Cihazlar | PC |
| Güc mənbəyi | USB Powered, 1 Nonstandard Battery (included) |
| Material | Akrilonitril Butadien Stirol (ABS) |
| Daxil olan komponentlər | User Manual (digital/physical) |
| Xüsusi Xüsusiyyət | Development Board with Display, GPS, LORA-89 Connectivity, ESP32-S3FN16R8 Microprocessor, Meshcore Firmware |
4. İlkin Quraşdırma
4.1 Cihazın doldurulması
Before first use, ensure the LILYGO T-Deck Plus is fully charged. Connect the device to a standard USB power adapter (not included) or a computer's USB port using the provided USB-C cable. The charging indicator (if present) will typically show the charging status.
4.2 İlk işə salınma
Locate the power button on the device. Press and hold the power button for approximately 3-5 seconds until the display illuminates. The device will boot into the pre-installed Meshcore firmware interface.
4.3 Firmware Considerations
The LILYGO T-Deck Plus comes pre-installed with Meshcore firmware. For advanced configurations or to install alternative firmware (e.g., Meshtastic), refer to the official LILYGO documentation or the specific firmware project's guides. Connecting the device to a PC via USB-C is typically required for firmware flashing.
5. Əməliyyat Təlimatları
5.1 Əsas naviqasiya
Utilize the integrated QWERTY keyboard for text input and menu navigation. The display provides visual feedback for all operations. Specific navigation methods will depend on the installed firmware (e.g., Meshcore UI).
5.2 Kompüterə qoşulma
Connect the LILYGO T-Deck Plus to your computer using a USB-C cable. The device can be recognized as a serial port for programming or for accessing internal storage, depending on the firmware and operating mode. Ensure appropriate drivers are installed on your PC if necessary.
5.3 LORA Functionality
The integrated LORA-89 915Mhz module enables long-range, low-power communication. Configuration of LORA parameters (e.g., channel, encryption, data rate) is performed through the device's firmware interface or via a connected PC. Refer to the Meshcore firmware documentation for detailed LORA usage instructions.
5.4 GPS Funksionallığı
The device includes a GPS module for location tracking. For optimal GPS performance, operate the device outdoors with a clear view of the sky. GPS acquisition time may vary. Location data can be accessed and utilized by the installed firmware for various applications.
6. Qulluq və Baxım
- Təmizləmə: Use a soft, dry cloth to clean the device. Avoid abrasive cleaners or solvents. For the screen, a microfiber cloth is recommended.
- Yaddaş: Cihazı birbaşa günəş işığından və həddindən artıq temperaturdan uzaq sərin, quru yerdə saxlayın.
- Batareyaya qulluq: To prolong battery life, avoid fully discharging the device frequently. If storing for extended periods, charge the battery to approximately 50% and recharge every few months.
- Ətraf Mühitin Mühafizəsi: Protect the device from dust, moisture, and physical impact. The ABS shell provides some protection, but it is not waterproof or shockproof.
7. Giderme
- Cihaz yanmır:
- Ensure the device is fully charged. Connect it to a power source using the USB-C cable and allow it to charge for at least 30 minutes before attempting to power on again. Verify the power button is pressed correctly.
- GPS siqnalı əldə edilməyib:
- GPS acquisition can take several minutes, especially during first use or after a long period of inactivity. Ensure the device is outdoors with an unobstructed view of the sky. Power cycling the device may sometimes help. If issues persist, verify GPS settings within the firmware.
- Connectivity issues (USB-C/LORA):
- For USB-C connectivity, ensure the cable is functional and properly connected. Try a different USB port on your computer. For LORA, check firmware settings for correct frequency, channel, and network parameters. Ensure no physical obstructions are blocking the signal.
- Screen is unresponsive or frozen:
- Attempt a soft reset by pressing and holding the power button until the device powers off, then restart it. If the issue persists, a firmware re-flash might be necessary.
8. Zəmanət və Dəstək
Warranty information for the LILYGO T-Deck Plus is typically provided by the retailer or manufacturer at the time of purchase. Please retain your proof of purchase for warranty claims.
For technical assistance, firmware updates, or further inquiries, please refer to the official LILYGO website or contact their customer support channels. Community forums and online resources related to ESP32-S3 and Meshcore firmware can also provide valuable support.


