AStarBox Power Control Software
Product Information
Specifications
- Power supply: Up to 5A
- Software version: AStarBox Software Installation and Use V2.0
- Battery: Rechargeable Pi Foundation RTC backup battery
Product Usage Instructions
Installation:
- VNC into your AStarBox and ensure it is connected to the internet.
- Open the browser and download the software from astarbox.co.uk.
- Access the Downloads folder and open a terminal.
- Type the following commands in the terminal:
- cd Downloads
- ls as*
- tar xvf astarbox_1.6.tar
- cd astarbox
- ./install.sh
- To enable battery charging, type: ./batcharge.sh
- Reboot your AstarBox for changes to take effect.
Additional Information (for AstroArch users):
- To install Python tk package on AstroArch, connect to the internet and run: update-astroarch
- If needed, install tk package by running: sudo pacman -S tk
Graphical User Interface:
After rebooting, double click on the AStarBox icon to access the controls for power ports.
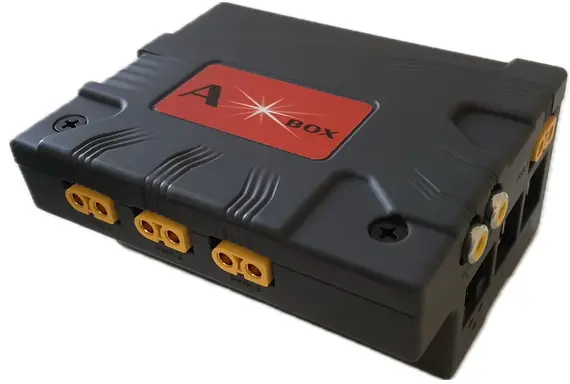
Use radio buttons to switch power on/off and sliders to control power to dew heaters. Port and dew controller numbers correspond to those on the AStarBox case.
Installation
VNC into your AStarBox, ensure it is connected to the internet and open the browser:
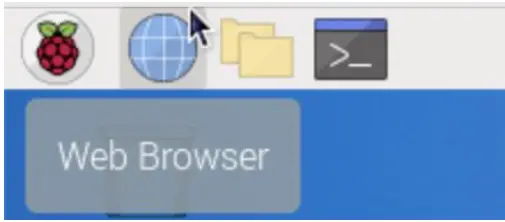
- Download the software from astarbox.co.uk: https://www.astarbox.co.uk/software-download
The browser will place the software into the Downloads folder. To install it, first open a terminal:

In the terminal window, type:
- cd Downloads
followed by Return. This will cd (change directory) to the Downloads folder. Note that filename completion works well in unix – if you type cd Dow and then press the Tab key, the filename will autocomplete.
Once in the folder type:
- ls as*
This will list all the files starting with “as” and will confirm that the software is in the right place. The software will be in a file called astarbox_1.6.tar (note that the version number may change in the future). This is an archive file format so the files must first be extracted. Type:
- tar xvf astarbox_1.6.tar
again, filename completion can help. This will create a new directory astarbox. Change into this directory:
- cd astarbox
The files can now be installed. Type:
- ./install.sh
The install script will:
- Install the AstarBox command line tools and a graphical user interface
- Enable 5A power supply to the raspberry Pi (but see note below for AstroArch)
- Enable a 1.6A limit for USB connected devices (default is 0.6A)
- Enable the I2C interface which controls the AStarBox power sockets.
- Install the AStarBox TSX power controller plugin if you have installed The Sky X
This graphical user interface will appear as an icon on the desktop.

If you have added the Pi Foundation RTC backup battery, this is rechargeable. However, by default, the battery is not charged and over a few months will stop working. We have provided a script which will enable battery charging. WARNING: do not enable this if you are using a conventional button battery since recharging this could be dangerous. The official battery is rechargeable.
To enable the battery charging, type:
- ./batcharge.sh
You will need to reboot your AstarBox after running install.sh or batcharge.sh for the changes to take effect.
Additional information if you use AstroArch: The AStarBox user interface employs the Python tk package; this is installed on most OS Distributions, but not on AstroArch. To install this, connect your AStarBox to the internet, open a console window and ensure AstroArch is up to date. Type:
- update-astroarch
This will take a little while to complete and will require you to approve installation at certain points. The downloads may fail. If this happens, repeat the update-astroarch command. When done, type:
- sudo pacman -S tk
You will be prompted for the password (astro). This will install the tk package and will allow the AStarBox user interface to run.
Note that AstroArch enables the RTC backup battery charging by default, so there is no need to run batcharge.sh. Ensure you are only using a rechargeable battery since trying to charge a standard battery may cause safety issues.
Finally, the AStarBox is designed to supply up to 5A of power to the Raspberry Pi. By default, only 3A will be accepted. Howwever, the command to change this, rpi-eeprom-config is not distributed by default with AstroArch. Refer to the “Installing AstroArch Guide” for more information and potential solutions.
Graphical User Interface
After rebooting, double click on the AStarBox icon to show the controls for the AStarBox power ports:

Clicking on the radio buttons will turn the power on and off. The amount of power going to the dew heaters is controlled by the sliders. Here Ports 2 and 4 are on, while Dew 1 is at about 50% power and Dew 2 is off. The control panel also shows the input voltage. The port and dew controller numbers correspond to those on the AStarBox case:

The names can also be edited. Double click on a name and enter the name of the equipment that port will power.

When you are done, press Return to save the name. You can do this for all the power and dew heater ports:

The names and power states are persistent. When you turn on your AStarBox, the power states will be restored to their last settings. In this case, the ASI1600MCPro, Lakeside Focuser and AstroTrac360 will be turned on, the FSQ85 dew heater will be set to about 65% power and the camera heater will be switched off.
Note that the power is not switched off if you reboot or turn off the AStarBox. The power will remain on until you disconnect the power supply.
Command Line Tools
The installation process also installs two command line tools. astarbox_port allows controls of the ports, astarbox_volt will report the current input voltage.
- astarbox_port
This command can be used to set both the state of the power port or the percentage of power for the dew heaters.
The commands
- astarbox_port 1 on
- astarbox_port 3 off
will turn on power for port 1 and off for port 3. The numbering is identical to the GUI and matches up with the numbering on the box (see figures above).
The command will also produce an output to confirm the change:
- Setting PCA9685 power port 1 state to on
PCA9685 is the electronic device that controls the port state.
To adjust the amount of power to the dew sockets, use the command e.g. :
- astarbox_port pwm1 50
This will set the amount of power to the DEW1 port to 50%. pwm is the technique used to control the amount of power to the dew heater. The percentage is an integer value from 0 (off) to 100 (fully on). Use pwm2 to control the DEW2 port.
- astarbox_volt
This command has no parameters – it reports the input voltage to the device. To use this, simply type:
- astarbox_volt
A typical output is:
- 12.49 volts on input
FAQ
- Q: How do I change the power supply from default 3A to 5A on AstroArch?
- A: The command rpieeprom-config is not distributed by default with AstroArch. Refer to the Installing AstroArch Guide for potential solutions.
- Q: What should I do if I face issues during AstroArch update?
- A: If downloads fail during update-astroarch, repeat the command. Ensure to approve installation at the required points.
Documents / Resources
 |
AStarBox Power Control Software [pdf] User Guide Power Control Software, Control Software, Software |