
1. Product Overview
The OLIGHT Oclip 2 Ultra is a versatile Everyday Carry (EDC) rechargeable flashlight designed for convenience and adaptability. It features a unique dual-axis design, allowing for flexible aiming, and a comprehensive 4-in-1 lighting system. This bundle includes the Oclip 2 Ultra flashlight, a charging dock, and an Oclip 2 holster.
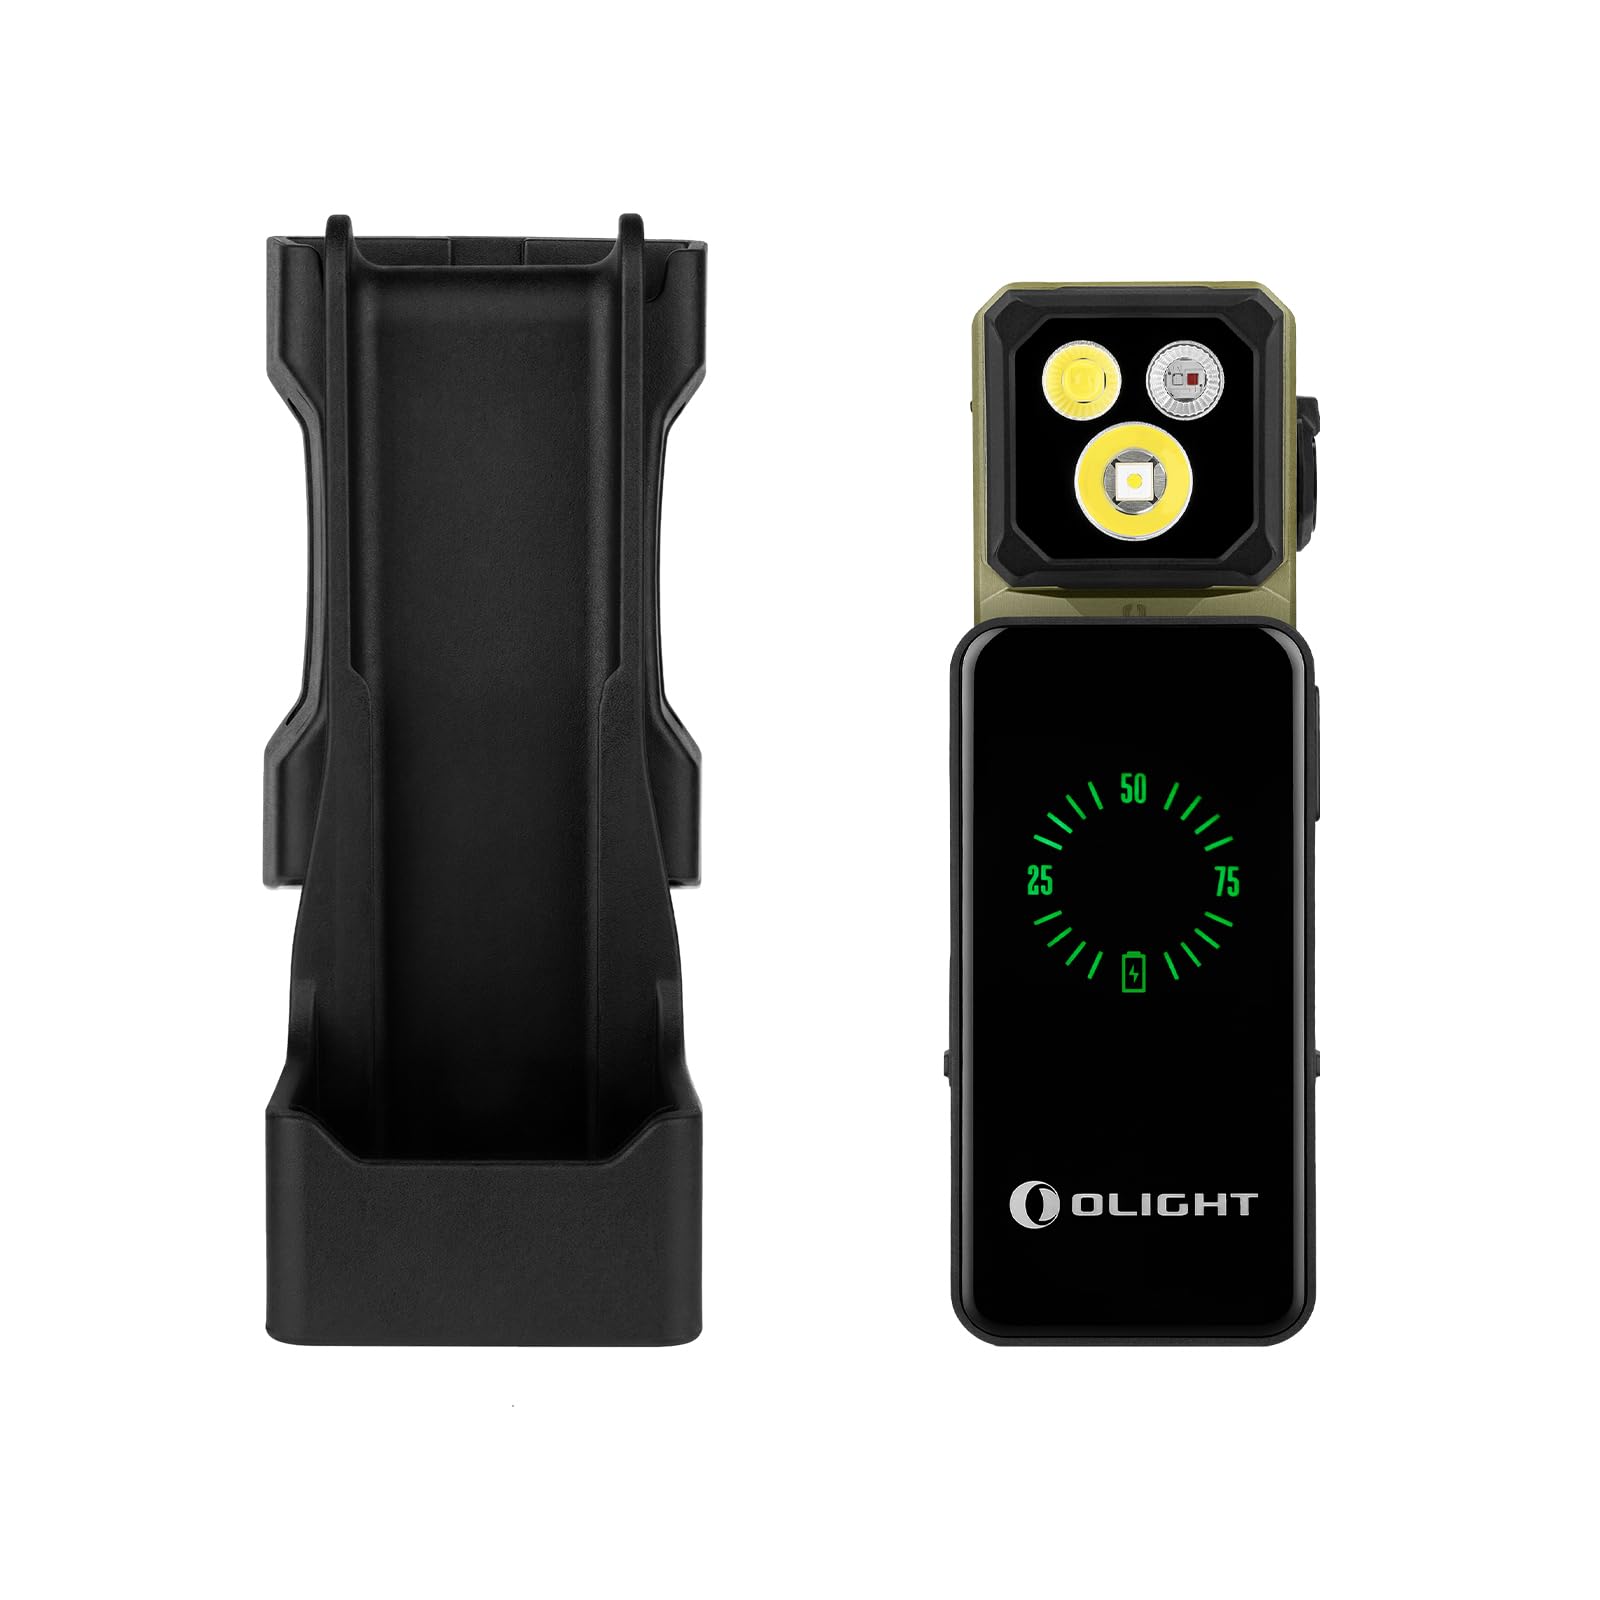
Figure 1.1: The OLIGHT Oclip 2 Ultra flashlight docked in its charging station, showcasing its compact design and integrated display.
Key Features:
- Dual-Axis Design: 115-degree tilting head and 360-degree rotating clip for flexible light aiming.
- 4-in-1 Lighting System: Offers floodlight (up to 580 lumens), spotlight (up to 130 meters), red light, and UV light (up to 800 mW).
- Versatile Mounting: Can be clipped, magnetically attached (via MCC tail or clip), or hung for hands-free operation.
- Rechargeable: Equipped with a built-in lithium polymer battery and includes a charging dock.
- Durable Construction: Designed for EDC (Everyday Carry) use.
2. Package Contents
Please inspect the package contents upon receipt. If any items are missing or damaged, contact customer support.
- OLIGHT Oclip 2 Ultra Flashlight
- Charging Dock
- Oclip 2 Holster
- User Manual
3. Specifications
The following table outlines the key specifications of the OLIGHT Oclip 2 Ultra flashlight:
| Feature | Specification |
|---|---|
| Brand | OLIGHT |
| Special Feature | Rechargeable |
| Color | Olive Green |
| Light Source Type | LED |
| White Brightness | 580 lumens (Max) |
| Light Output Maximum | 580 lumens |
| Mounting Type | Clip Mount |
| Light Source Special Features | UV light, Red light |
| Number Of Light Sources | 4 |
| Style Name | EDC |
| Unit Count | 1 Count |
4. Getting Started (Setup)
4.1 Initial Charging
Before first use, fully charge your Oclip 2 Ultra flashlight. The device is equipped with a built-in rechargeable lithium polymer battery.
- Place the Oclip 2 Ultra flashlight into the provided charging dock. Ensure proper alignment.
- Connect the charging dock to a USB power source using a compatible cable (not always included, check package).
- The indicator on the charging dock will show the charging status. Charge until the battery indicator shows full.

Figure 4.1: The Oclip 2 Ultra flashlight securely placed in its charging dock, ready for charging.
4.2 Unlocking the Device
The Oclip 2 Ultra arrives in a locked state to prevent accidental activation. To unlock it for first use:
- Press and hold the power button for approximately 2 seconds. The light will briefly flash to indicate it is unlocked and ready for use.
4.3 Attaching the Holster
The included holster provides additional carrying and mounting options.

Figure 4.2: The Oclip 2 Ultra flashlight inserted into its dedicated holster, ready for secure transport or mounting.
- Slide the Oclip 2 Ultra flashlight into the holster until it clicks securely into place.
- The holster can be clipped onto belts, attached to walls, or vehicles, and features a magnetic base for secure magnetic attachment.
5. Operation
5.1 Power On/Off and Mode Selection
The Oclip 2 Ultra features a single selector for controlling power and switching between its four lighting modes.
- Power On/Off: Press the selector button once to turn the flashlight on or off.
- Mode Cycling: While the light is on, press and hold the selector button to cycle through the available modes: Floodlight, Spotlight, Red Light, and UV Light. Release the button to select the desired mode.
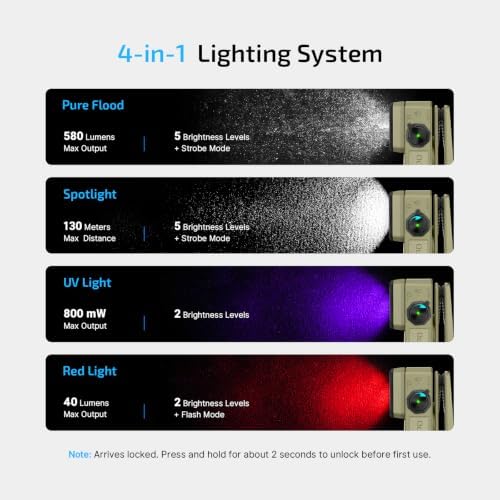
Figure 5.1: Illustration of the Oclip 2 Ultra's four distinct lighting modes: Pure Flood, Spotlight, UV Light, and Red Light, along with their respective maximum outputs and brightness levels.
5.2 Brightness Adjustment
Each lighting mode (Floodlight and Spotlight) offers multiple brightness levels and a strobe mode. Red light and UV light modes have two brightness levels and a flash mode for red light.
- Adjusting Brightness: While a mode is active, short press the selector button to cycle through its brightness levels.
- Strobe/Flash Mode: For Floodlight and Spotlight, a quick double-press of the selector button will activate strobe mode. For Red Light, a quick double-press activates flash mode.
5.3 Dual-Axis Adjustment
The Oclip 2 Ultra's dual-axis design allows for precise light positioning.
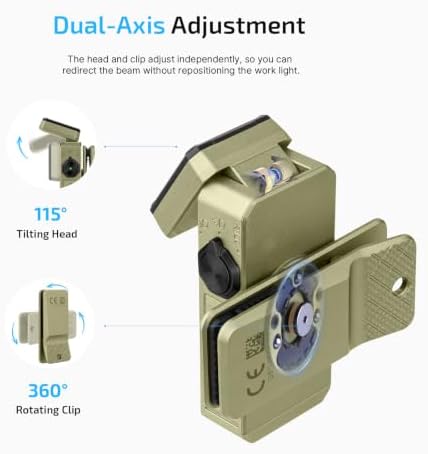
Figure 5.2: Visual representation of the Oclip 2 Ultra's dual-axis adjustment capabilities, highlighting the 115-degree tilting head and 360-degree rotating clip for flexible light positioning.
- Tilting Head: The flashlight head can be tilted up to 115 degrees to direct the beam.
- Rotating Clip: The integrated clip can rotate a full 360 degrees, allowing for versatile orientation when mounted.
5.4 Mounting Options
The Oclip 2 Ultra offers multiple hands-free mounting solutions:

Figure 5.3: Examples of the Oclip 2 Ultra's versatile hands-free mounting options, including clipping to clothing, magnetic attachment to metal surfaces via the clip or tail, and hanging from hooks.
- Clip: The clip can grip materials up to 14 mm thick, such as collars, pockets, backpack straps, or MOLLE webbing.
- Magnetic Attachment: Magnets in both the MCC tail and the clip allow the flashlight to securely attach to steel surfaces, functioning as a magnetic work light.
- Hang: The design allows it to be hung from hooks, carabiners, or tent loops for overhead lighting.
6. Maintenance
Proper maintenance ensures the longevity and optimal performance of your Oclip 2 Ultra flashlight.
- Cleaning: Wipe the flashlight body and lens with a soft, clean cloth. Avoid using abrasive cleaners or solvents.
- Charging Port: Keep the charging contacts on the flashlight and dock clean and free of debris to ensure efficient charging.
- Storage: Store the flashlight in a cool, dry place when not in use. For long-term storage, ensure the battery is partially charged (around 50%) to preserve battery health.
- Battery: The built-in lithium polymer battery is non-removable. Do not attempt to replace it.
7. Troubleshooting
If you encounter issues with your Oclip 2 Ultra, refer to the following common problems and solutions:
| Problem | Possible Cause | Solution |
|---|---|---|
| Flashlight does not turn on | Battery is depleted Device is locked | Charge the flashlight fully Press and hold the selector button for 2 seconds to unlock |
| Flashlight does not charge | Charging contacts are dirty Charging cable/adapter faulty Improper placement in dock | Clean charging contacts on flashlight and dock Try a different USB cable or power adapter Ensure flashlight is correctly seated in the dock |
| Light output is dim or inconsistent | Low battery Lens is dirty | Recharge the flashlight Clean the flashlight lens with a soft cloth |
If the issue persists after attempting these solutions, please contact OLIGHT customer support.
8. Warranty and Support
OLIGHT products are manufactured with high-quality materials and craftsmanship. For detailed warranty information, please refer to the official OLIGHT website or the warranty card included with your product.
Customer Support:
For technical assistance, warranty claims, or general inquiries, please visit the official OLIGHT website or contact their customer service department. Contact information can typically be found on the product packaging or the OLIGHT website.
- OLIGHT Official Website: www.olightstore.com