
1. Important Safety Instructions
Please read all safety instructions carefully before using this projector. Keep this manual for future reference.
- Power Source: Use only the power adapter supplied with the projector. Ensure the voltage matches your local power supply.
- Ventilation: Do not block any ventilation openings. Ensure adequate space around the projector for proper airflow to prevent overheating.
- Heat: Do not place the projector near heat sources such as radiators, heat registers, stoves, or other apparatus that produce heat.
- Moisture: Do not expose the projector to rain, moisture, dripping, or splashing. Do not place objects filled with liquids, such as vases, on the projector.
- Cleaning: Unplug the projector from the wall outlet before cleaning. Use a dry cloth for cleaning. Do not use liquid cleaners or aerosol cleaners.
- Servicing: Do not attempt to service this product yourself. Refer all servicing to qualified service personnel.
- Eye Protection: Do not look directly into the projector lens when the lamp is on. The bright light can cause eye damage.
2. Package Contents
Verify that all items are present in the package:
- Magcubic HY300F Projector
- Power Adapter
- Remote Control
- User Manual (this document)
- (Optional: Projector Stand, depending on purchase bundle)
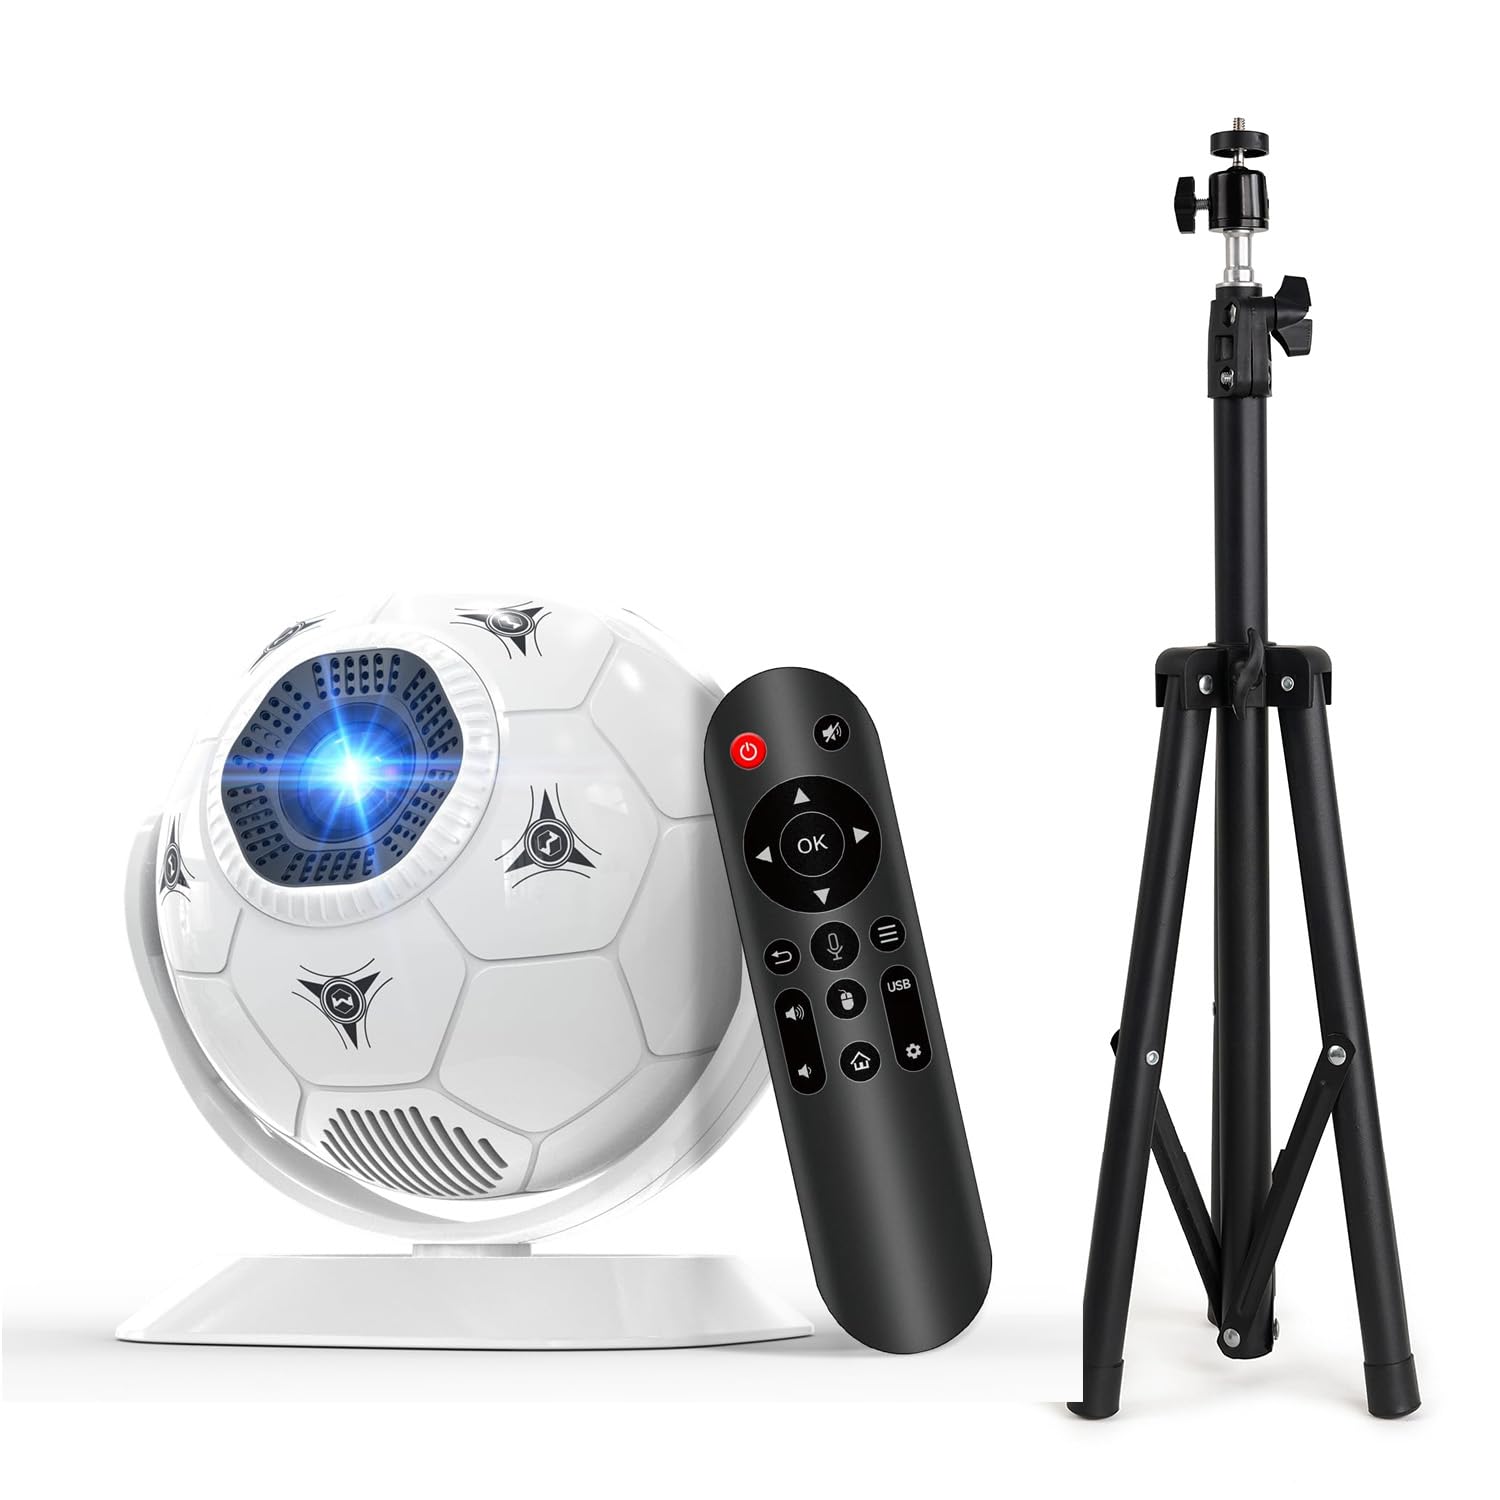
Image 1: Magcubic HY300F Projector with its main accessories. The spherical projector is shown alongside its power adapter and remote control.
3. Setup Guide
3.1 Physical Placement
- Positioning: Place the projector on a stable, flat surface or mount it on a ceiling or tripod. The spherical design allows 360° rotation for flexible angle adjustment.
- Projection Distance: For an optimal viewing experience, position the projector between 0.75 meters and 2.5 meters from the projection surface. This distance yields a screen size of 35 to 135 inches.
- Screen Alignment: Ensure the projector is aimed directly at your screen or wall.
3.2 Power Connection
- Connect the power adapter to the projector's power input port.
- Plug the other end of the power adapter into a wall outlet.
- The projector will typically power on or enter standby mode.
3.3 Initial Boot and Auto Keystone Correction
- Press the power button on the projector or remote control to turn it on.
- The projector features automatic keystone correction, which will instantly adjust the image to be rectangular and sharp. Manual adjustments are generally not required.
3.4 Network and Bluetooth Setup
- Wi-Fi Connection:
- Navigate to the "Settings" menu on the projector's Android 14 interface.
- Select "Network & Internet" and then "Wi-Fi".
- Choose your desired Wi-Fi network (supports 2.4 GHz/5 GHz Wi-Fi 6) and enter the password.
- Bluetooth Pairing:
- From the "Settings" menu, select "Connected Devices" and then "Pair new device".
- Ensure your Bluetooth device (e.g., headphones, speaker) is in pairing mode.
- Select your device from the list to pair.
4. Operating Instructions
4.1 Android 14 Interface
The projector runs on Android 14, providing an intuitive user interface. Navigate using the remote control's directional buttons and select button.
- Home Screen: Access pre-installed apps, settings, and input sources from the main home screen.
- App Management: The projector comes with 1 GB RAM and 8 GB storage, allowing smooth operation of multiple applications.
4.2 Using Pre-installed Applications
Popular streaming services such as Netflix, Disney+, YouTube, and Prime Video are pre-installed. To use them:
- Select the desired app icon from the home screen.
- Log in with your account credentials if prompted.
- Begin streaming content.
4.3 Adjusting Projection Settings
- Focus: While auto-keystone is present, manual focus adjustment might be available via the remote or a physical dial on the projector for fine-tuning sharpness.
- Picture Mode: In the "Settings" menu, navigate to "Display" or "Picture" to adjust brightness, contrast, color temperature, and other image parameters.
4.4 Audio Output
The projector includes an integrated 5W speaker for audio playback. For an enhanced audio experience:
- Bluetooth: Pair with external Bluetooth speakers or headphones as described in Section 3.4.
- USB: If supported, connect external audio devices via USB.
5. Maintenance
Proper maintenance ensures the longevity and optimal performance of your projector.
- Lens Cleaning: Gently wipe the projector lens with a soft, lint-free cloth specifically designed for optical lenses. Do not use abrasive cleaners or excessive force.
- Exterior Cleaning: Use a soft, dry cloth to wipe the exterior of the projector. For stubborn marks, slightly dampen the cloth with water.
- Ventilation Ports: Periodically check ventilation ports for dust accumulation. Use a soft brush or compressed air to clear any blockages. Ensure the projector is turned off and unplugged before cleaning.
- Storage: When not in use for extended periods, store the projector in a cool, dry place, away from direct sunlight and extreme temperatures.
6. Troubleshooting
If you encounter issues with your projector, refer to the following common solutions:
| Problem | Possible Cause | Solution |
|---|---|---|
| No image projected | Power issue, incorrect input source, lens cap on. | Check power connection. Ensure projector is on. Verify input source. Remove lens cap. |
| Image is blurry | Out of focus, incorrect projection distance. | Adjust focus (if manual option exists). Ensure projector is within optimal projection distance (0.75m - 2.5m). |
| No sound | Volume too low, external audio device not connected/paired. | Increase volume. Check Bluetooth connection to external speakers/headphones. |
| Wi-Fi connection issues | Incorrect password, router too far, network congestion. | Re-enter password. Move projector closer to router. Restart router. |
| Remote control not working | Dead batteries, obstruction. | Replace batteries. Ensure no obstructions between remote and projector. |
7. Specifications
| Feature | Detail |
|---|---|
| Model | HY300F |
| Native Resolution | 1280 x 720 (720p) |
| Supported Resolution | Up to 4K/1080P decoding |
| Brightness | 200 ANSI Lumens |
| Contrast Ratio | 10000:1 |
| Operating System | Android 14 |
| Processor | Allwinner H726 quad-core |
| RAM | 1 GB |
| Storage | 8 GB |
| Wi-Fi | Dual-band Wi-Fi 6 (2.4 GHz/5 GHz) |
| Bluetooth | Bluetooth 5.4 |
| Speaker | Integrated 5W |
| Projection Size | 35 - 135 inches |
| Projection Distance | 0.75 - 2.5 meters |
| Throw Ratio | 0.9:1 (Short Throw) |
| Keystone Correction | Automatic |
| Form Factor | Portable, Spherical |
| Dimensions | 16.5 × 14 × 17 cm (approximate) |
8. Warranty and Support
For warranty information, please refer to the warranty card included with your product or contact your retailer. Magcubic is committed to providing quality products and customer support.
For further assistance, technical support, or to view more products, please visit the official Magcubic store: