
1. Introduction
The Ninja PREPi 6-in-1 Prep & Store System is designed to simplify your meal preparation by offering versatile functions including dicing, chopping, puréeing, slicing, shredding, and crinkle cutting. This system allows you to prepare ingredients directly in the included bowls, which can then be used for serving or storage with the provided lids. This manual provides essential information for the safe and effective use of your Ninja PREPi system.
2. Important Safety Information
Please read all instructions carefully before using your Ninja PREPi system. Failure to follow these safety instructions may result in property damage, personal injury, or death.
- Electrical Safety: Always ensure the appliance is unplugged from the outlet when not in use, before assembling or disassembling parts, and before cleaning. Do not immerse the motor base in water or other liquids.
- Blade Safety: Blades are sharp. Handle the Chop & Purée Blade, Reversible Slice & Shred Disc, Crinkle Cut Disc, and Dicing Kit components with extreme care. Always use the provided food pusher when feeding ingredients into the chute.
- Child Safety: Keep the appliance and its cord out of reach of children. This appliance is not intended for use by children.
- Proper Use: Do not use the appliance for anything other than its intended purpose. Do not operate any appliance with a damaged cord or plug, or after the appliance malfunctions or has been dropped or damaged in any manner.
- Overheating: Do not overload the appliance. If the motor stalls, unplug the unit and allow it to cool before attempting to restart.
3. What's Included
Unpack all components and ensure you have received the following items:

Image: All components of the Ninja PREPi 6-in-1 Prep & Store System, including the motor base, bowls, lids, and various blades and discs.
- 500-watt Motor Base
- 5-cup PREPi Bowl
- 7-cup PREPi Bowl
- 2 Storage Lids (for 5-cup and 7-cup bowls)
- Chop & Purée Blade
- Reversible Slice & Shred Disc
- Crinkle Cut Disc
- Dicing Kit (includes dicing grid and pusher)
- 3-part Food Pusher (for feed chute)
- Feed Chute Lid
4. Setup and Assembly
Before first use, wash all parts except the motor base in warm, soapy water, then rinse and dry thoroughly. The motor base can be wiped clean with a damp cloth.
- Place the Bowl: Position your chosen PREPi bowl (5-cup or 7-cup) onto the motor base, aligning the tabs and twisting clockwise until it locks securely into place.
- Insert the Blade/Disc:
- For Chopping/Puréeing: Carefully place the Chop & Purée Blade onto the spindle in the center of the bowl.
- For Slicing/Shredding or Crinkle Cutting: Place the desired disc (Reversible Slice & Shred Disc or Crinkle Cut Disc) onto the spindle. Ensure the correct side of the Reversible Slice & Shred Disc is facing up for your desired function (slice or shred).
- For Dicing: Place the dicing grid into the bowl, ensuring it sits flat. Then, attach the dicing pusher assembly to the feed chute lid.
- Attach the Feed Chute Lid: Place the feed chute lid onto the bowl, aligning the arrow on the lid with the arrow on the bowl handle, and twist clockwise until it locks. Ensure the lid is securely locked for the appliance to operate.
- Insert Food Pusher: Place the 3-part food pusher into the feed chute opening.
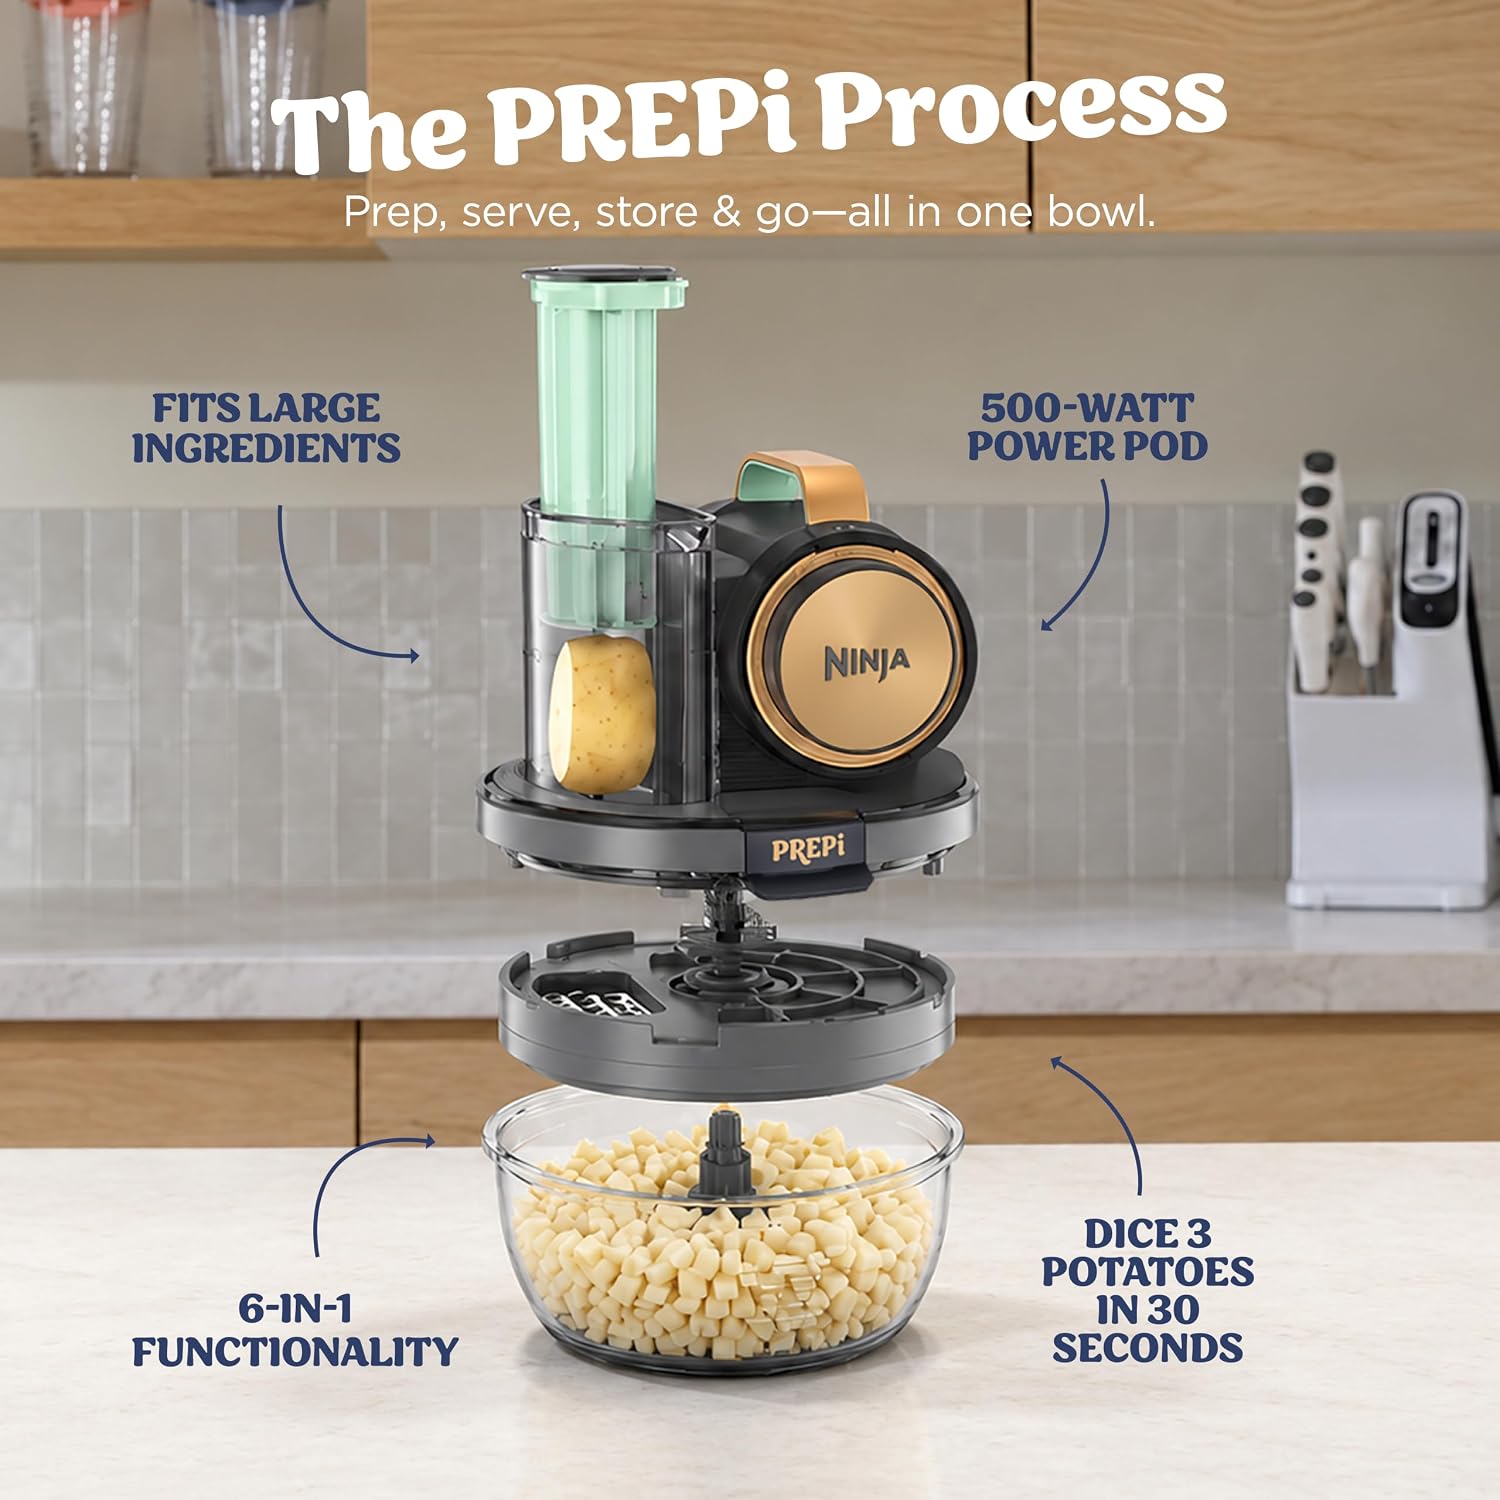
Image: Visual representation of the PREPi process, showing the motor pod, feed chute, bowl, and dicing kit.
5. Operating Instructions
Always ensure the appliance is properly assembled and locked before plugging it in and operating.

Image: The four stages of using the Ninja PREPi: Prep, Serve, Store, and Go, illustrating its integrated functionality.
General Operation
- Prepare your ingredients by washing and cutting them into appropriate sizes to fit the feed chute.
- With the appliance assembled and locked, plug the power cord into an electrical outlet.
- Place ingredients into the feed chute. For best results, do not overfill.
- Press down firmly on the top of the motor base to activate the blades/disc. Use short pulses for coarse results or continuous pressure for finer processing.
- Once processing is complete, release pressure, unplug the unit, and wait for the blades/disc to stop completely before disassembling.
Specific Functions

Image: Bowls displaying the results of Shred, Slice, Crinkle Cut, Chop, Dice, and Purée functions.
- Dicing: Use the Dicing Kit. Place ingredients into the feed chute and use the dicing pusher to press them through the grid. This creates uniform cubes.
- Chopping & Puréeing: Use the Chop & Purée Blade. Add ingredients directly into the bowl. Pulse for chopping, or process continuously for puréeing.
- Slicing & Shredding: Use the Reversible Slice & Shred Disc. Ensure the correct side is facing up for your desired cut. Feed ingredients through the chute using the food pusher.
- Crinkle Cutting: Use the Crinkle Cut Disc. Feed ingredients through the chute using the food pusher to create wavy, ridged textures.
Using the Feed Chute
The 3-part feed chute accommodates various ingredient sizes. Always use the food pusher to guide ingredients through the chute and keep your hands away from the blades/discs.

Image: A cucumber being fed into the Ninja PREPi's feed chute, demonstrating the ease of use for meal preparation.
6. Care and Maintenance
Proper cleaning and maintenance will ensure the longevity and optimal performance of your Ninja PREPi system.

Image: The Ninja PREPi system with a note indicating that all parts except the motor and dicing spindle are dishwasher safe.
- Cleaning the Motor Base: Unplug the motor base. Wipe it clean with a damp cloth. Do not immerse the motor base in water or any other liquid.
- Cleaning Other Parts: All other parts (bowls, lids, blades, discs, dicing kit components, food pusher) are dishwasher safe. You can also wash them by hand in warm, soapy water. Use caution when handling sharp blades and discs.
- Stubborn Residue: For stubborn residue, soak parts in warm, soapy water before cleaning. Use a non-abrasive brush if necessary.
- Drying: Ensure all parts are thoroughly dry before reassembling or storing.
7. Storage
Store your Ninja PREPi system in a dry place. The compact design allows for convenient countertop storage or easy placement in a cabinet. Ensure all blades and discs are stored safely to prevent accidental injury.

Image: Multiple Ninja PREPi bowls with lids, filled with prepped food, stored neatly inside a refrigerator.
8. Troubleshooting
If you encounter issues with your Ninja PREPi system, refer to the following common problems and solutions:
| Problem | Possible Cause | Solution |
|---|---|---|
| Appliance does not turn on. | Not plugged in; Bowl or lid not securely locked; Overheating. | Ensure unit is plugged in. Check that the bowl and lid are twisted and locked into place. If overheated, unplug and let cool for 15-30 minutes. |
| Motor stalls or struggles. | Too much food in the bowl; Ingredients are too hard. | Reduce the amount of food. Cut hard ingredients into smaller pieces. |
| Food is unevenly processed. | Too much food; Not enough food; Ingredients not cut to uniform size. | Process in smaller batches. Add more food if processing very small amounts. Cut ingredients into similar sizes before processing. |
| Lid is difficult to remove. | Food stuck between lid and bowl. | Ensure appliance is unplugged. Gently tap the lid to dislodge food, then twist counter-clockwise to remove. |
9. Specifications
| Feature | Detail |
|---|---|
| Model Number | PN351 |
| Brand | Ninja |
| Wattage | 500 watts |
| Voltage | 120 volts |
| Product Dimensions (D x W x H) | 15.2" x 10.79" x 16.93" |
| Bowl Capacities | 5-cup and 7-cup |
| Material | Plastic (BPA-free bowls) |
| Care Instructions | Dishwasher Safe (all parts except motor base and dicing spindle) |

Image: Diagram showing the approximate dimensions of the Ninja PREPi system.
10. Warranty and Support
Your Ninja PREPi 6-in-1 Prep & Store System is covered by a limited warranty. For specific warranty details, please refer to the warranty card included with your product packaging or visit the official Ninja website. For customer support, replacement parts, or service inquiries, please contact Ninja Customer Service through their official website or the contact information provided in your product documentation.
Website: www.ninjakitchen.com