
Introduction
Thank you for purchasing the Pioneer GM-EL704 Class AB Car Amplifier. This amplifier is designed to enhance your in-car audio experience with powerful and clear sound. Delivering 70W x 4 RMS output at 4 Ω, it features a bridgeable design for versatile configurations and Class AB technology for an optimal balance of audio fidelity and efficiency. This manual provides essential information for proper installation, operation, and maintenance to ensure safe and optimal performance of your amplifier.
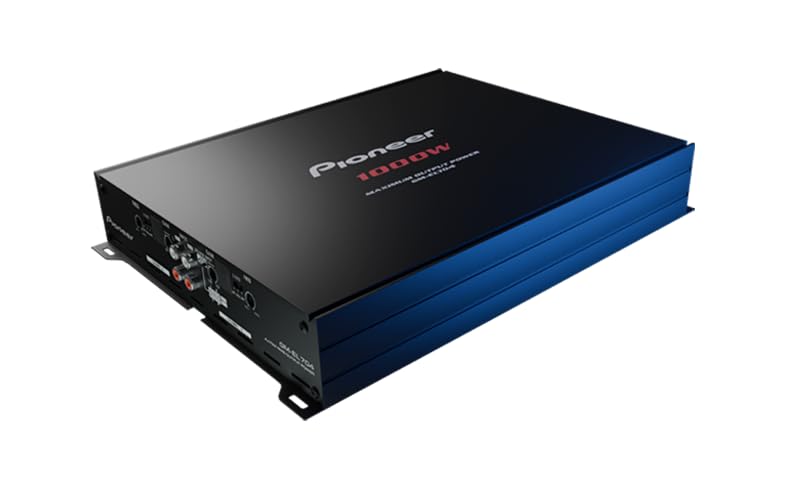
Image: Top-down view of the Pioneer GM-EL704 Class AB Car Amplifier, showcasing its compact design.
Safety Information
Please read all safety instructions carefully before installing or operating this amplifier. Failure to follow these instructions may result in injury or damage to the product or vehicle.
- Professional Installation Recommended: Installation of car audio equipment can be complex. If you are unsure about any part of the installation process, consult a qualified professional.
- Power Source: Connect the amplifier only to a 12-volt DC negative ground electrical system.
- Wiring: Ensure all wiring is properly routed and secured to prevent pinching, cutting, or short-circuiting. Use appropriate gauge wires for power, ground, and speakers.
- Fuses: Always use fuses of the specified rating. Never replace a fuse with one of a higher rating.
- Ventilation: Install the amplifier in a location that allows for adequate ventilation to prevent overheating. Do not cover the amplifier with carpets or other materials.
- Volume Levels: Avoid prolonged listening at excessively high volume levels, which can cause hearing damage.
Package Contents
Verify that all items are present in the package:
- Pioneer GM-EL704 Class AB Car Amplifier
- Installation Screws
- Owner's Manual (this document)
- Warranty Card
Setup and Installation
Proper installation is crucial for optimal performance and safety. Follow these steps carefully.
1. Mounting Location
Choose a mounting location that is dry, well-ventilated, and away from direct sunlight or heat sources. Ensure the amplifier is securely fastened to a solid surface to prevent movement during vehicle operation.
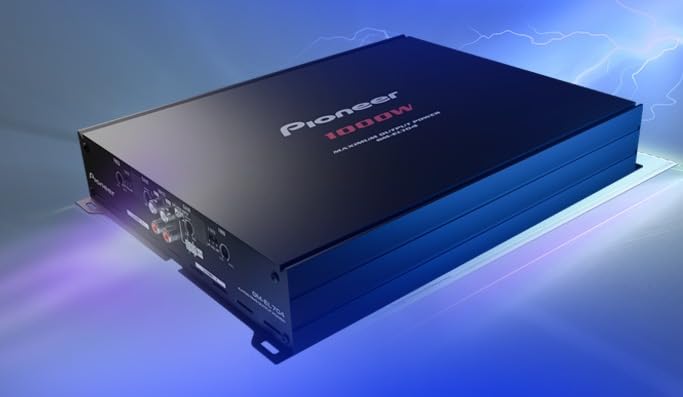
Image: Side view of the Pioneer GM-EL704 amplifier, highlighting potential mounting points.
2. Wiring Connections
Before making any connections, disconnect the vehicle's negative battery terminal to prevent short circuits.
Power and Ground Wiring
- Power (BATT+): Connect a suitable gauge power cable (e.g., 8 AWG or thicker) directly from the vehicle's positive battery terminal to the amplifier's BATT+ terminal. Install an in-line fuse holder within 18 inches (45 cm) of the battery.
- Ground (GND): Connect a short, heavy gauge ground cable (same as power cable) from the amplifier's GND terminal to a clean, unpainted metal surface on the vehicle chassis. Ensure a good electrical connection.
- Remote (REM): Connect a remote turn-on wire from your head unit's remote output to the amplifier's REM terminal. This wire turns the amplifier on and off with your head unit.
Input Connections (RCA)
Connect RCA cables from your head unit's pre-out outputs to the amplifier's RCA input jacks. Ensure correct channel matching (Front L/R, Rear L/R).
Speaker Connections
Connect your speakers to the amplifier's speaker terminals. Observe correct polarity (+ to + and - to -). The GM-EL704 supports both stereo and bridged configurations.
- Stereo Mode: Connect one speaker per channel (minimum 2 Ω per channel).
- Bridged Mode: For higher power output to a subwoofer or a pair of speakers, bridge two channels. Refer to the amplifier's terminal markings for specific bridged connections (minimum 4 Ω in bridged mode).
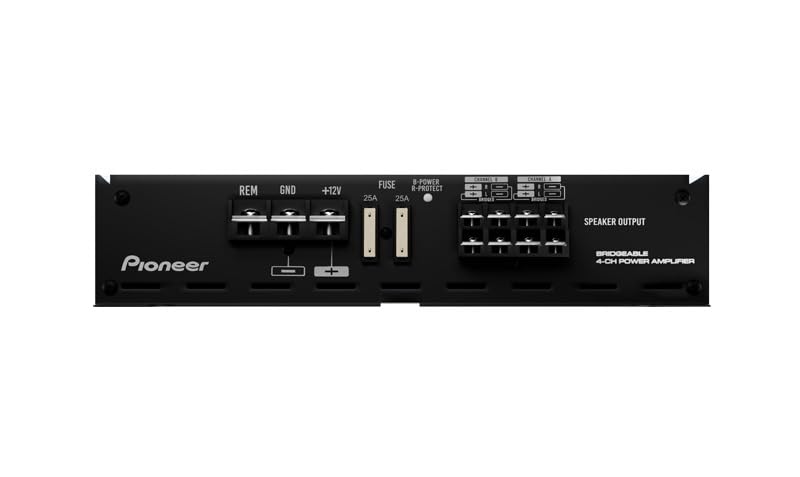
Image: Detailed view of the Pioneer GM-EL704's input and output terminals, including power, ground, remote, RCA, and speaker connections.
3. Initial Settings
- Gain Control: Start with the gain control set to minimum. Gradually increase it until the sound is clear and undistorted at your desired maximum volume level from the head unit. Avoid setting the gain too high, as this can cause distortion and damage to speakers.
- Crossover (LPF/HPF): If your amplifier has a built-in crossover, set it according to your speaker type. Use High-Pass Filter (HPF) for full-range speakers to block low frequencies, and Low-Pass Filter (LPF) for subwoofers to block high frequencies.
Operating Instructions
Once installed and configured, operating your GM-EL704 amplifier is straightforward.
- Power On/Off: The amplifier will automatically turn on when your head unit is powered on (via the remote wire) and turn off when the head unit is off.
- Volume Adjustment: Control the overall system volume using your head unit. The amplifier's gain control is for matching the output level of the head unit to the amplifier's input sensitivity, not for daily volume control.
- Sound Customization: Use your head unit's equalizer and sound settings to fine-tune the audio output to your preference.
Maintenance
Regular maintenance helps ensure the longevity and performance of your amplifier.
- Cleaning: Periodically wipe the amplifier's exterior with a soft, dry cloth. Do not use harsh chemicals or abrasive cleaners.
- Ventilation: Ensure that the amplifier's cooling fins are free from dust and debris. Blocked fins can lead to overheating.
- Connections: Occasionally check all wiring connections for tightness and corrosion. Loose connections can cause poor performance or damage.
Troubleshooting
If you encounter issues with your amplifier, refer to the following common problems and solutions before seeking professional service.
| Problem | Possible Cause | Solution |
|---|---|---|
| No Power / Amplifier does not turn on |
|
|
| No Sound Output |
|
|
| Distorted Sound |
|
|
| Amplifier Overheats |
|
|
Specifications
Key technical specifications for the Pioneer GM-EL704 Class AB Car Amplifier:
- Model Number: GM-EL704
- Number of Channels: 4
- Output Power: 70 Watts x 4 (RMS at 4 Ω)
- Amplifier Class: Class AB
- Voltage: 12 Volts (DC)
- Minimum Supply Voltage: 10.5 Volts
- Maximum Supply Voltage: 16 Volts
- Supply Current: 20 Amps
- Item Dimensions (L x W x H): 35 x 16 x 5.5 Centimeters
- Item Weight: 1 Grams
- Material Type: Aluminium, Plastic, Steel
- Operating Temperature: 85 Degrees Celsius (Maximum)
- Certifications: CE Certified, CEA-2006 Compliant, FCC Certified, RoHS Compliant
- Country of Origin: Japan
Warranty and Support
Pioneer stands behind the quality of its products.
- Warranty: This product comes with a 3-year warranty from the date of purchase. Please refer to the included warranty card for detailed terms and conditions.
- Manufacturer: Pioneer India
- Importer Contact Information: Sony India
- Packer Contact Information: AudioKoncepts
For technical assistance, troubleshooting beyond this manual, or warranty claims, please contact your authorized Pioneer dealer or the respective support channels.
