
Important Safety Instructions
Please read this manual carefully before operating the appliance and retain it for future reference. Failure to follow these instructions may result in electric shock, fire, or serious injury.
- Always ensure the power supply matches the voltage specified on the rating label.
- Do not immerse the appliance, cord, or plug in water or other liquids.
- Unplug the appliance from the power outlet when not in use, before filling water, or before cleaning.
- Keep the appliance out of reach of children and pets.
- Do not block the air inlets or outlets. Ensure adequate ventilation around the unit.
- Do not use the appliance near flammable materials or gases.
- Only use the appliance on a stable, level surface to prevent tipping.
- Do not operate the appliance with a damaged cord or plug. Contact qualified service personnel for repair.
- Do not attempt to repair or modify the appliance yourself.
Product Overview
The Generic 12L 4-in-1 Evaporative Air Cooler combines the functions of a fan, humidifier, air purifier, and cooler. It is designed to provide a comfortable environment in residential settings.
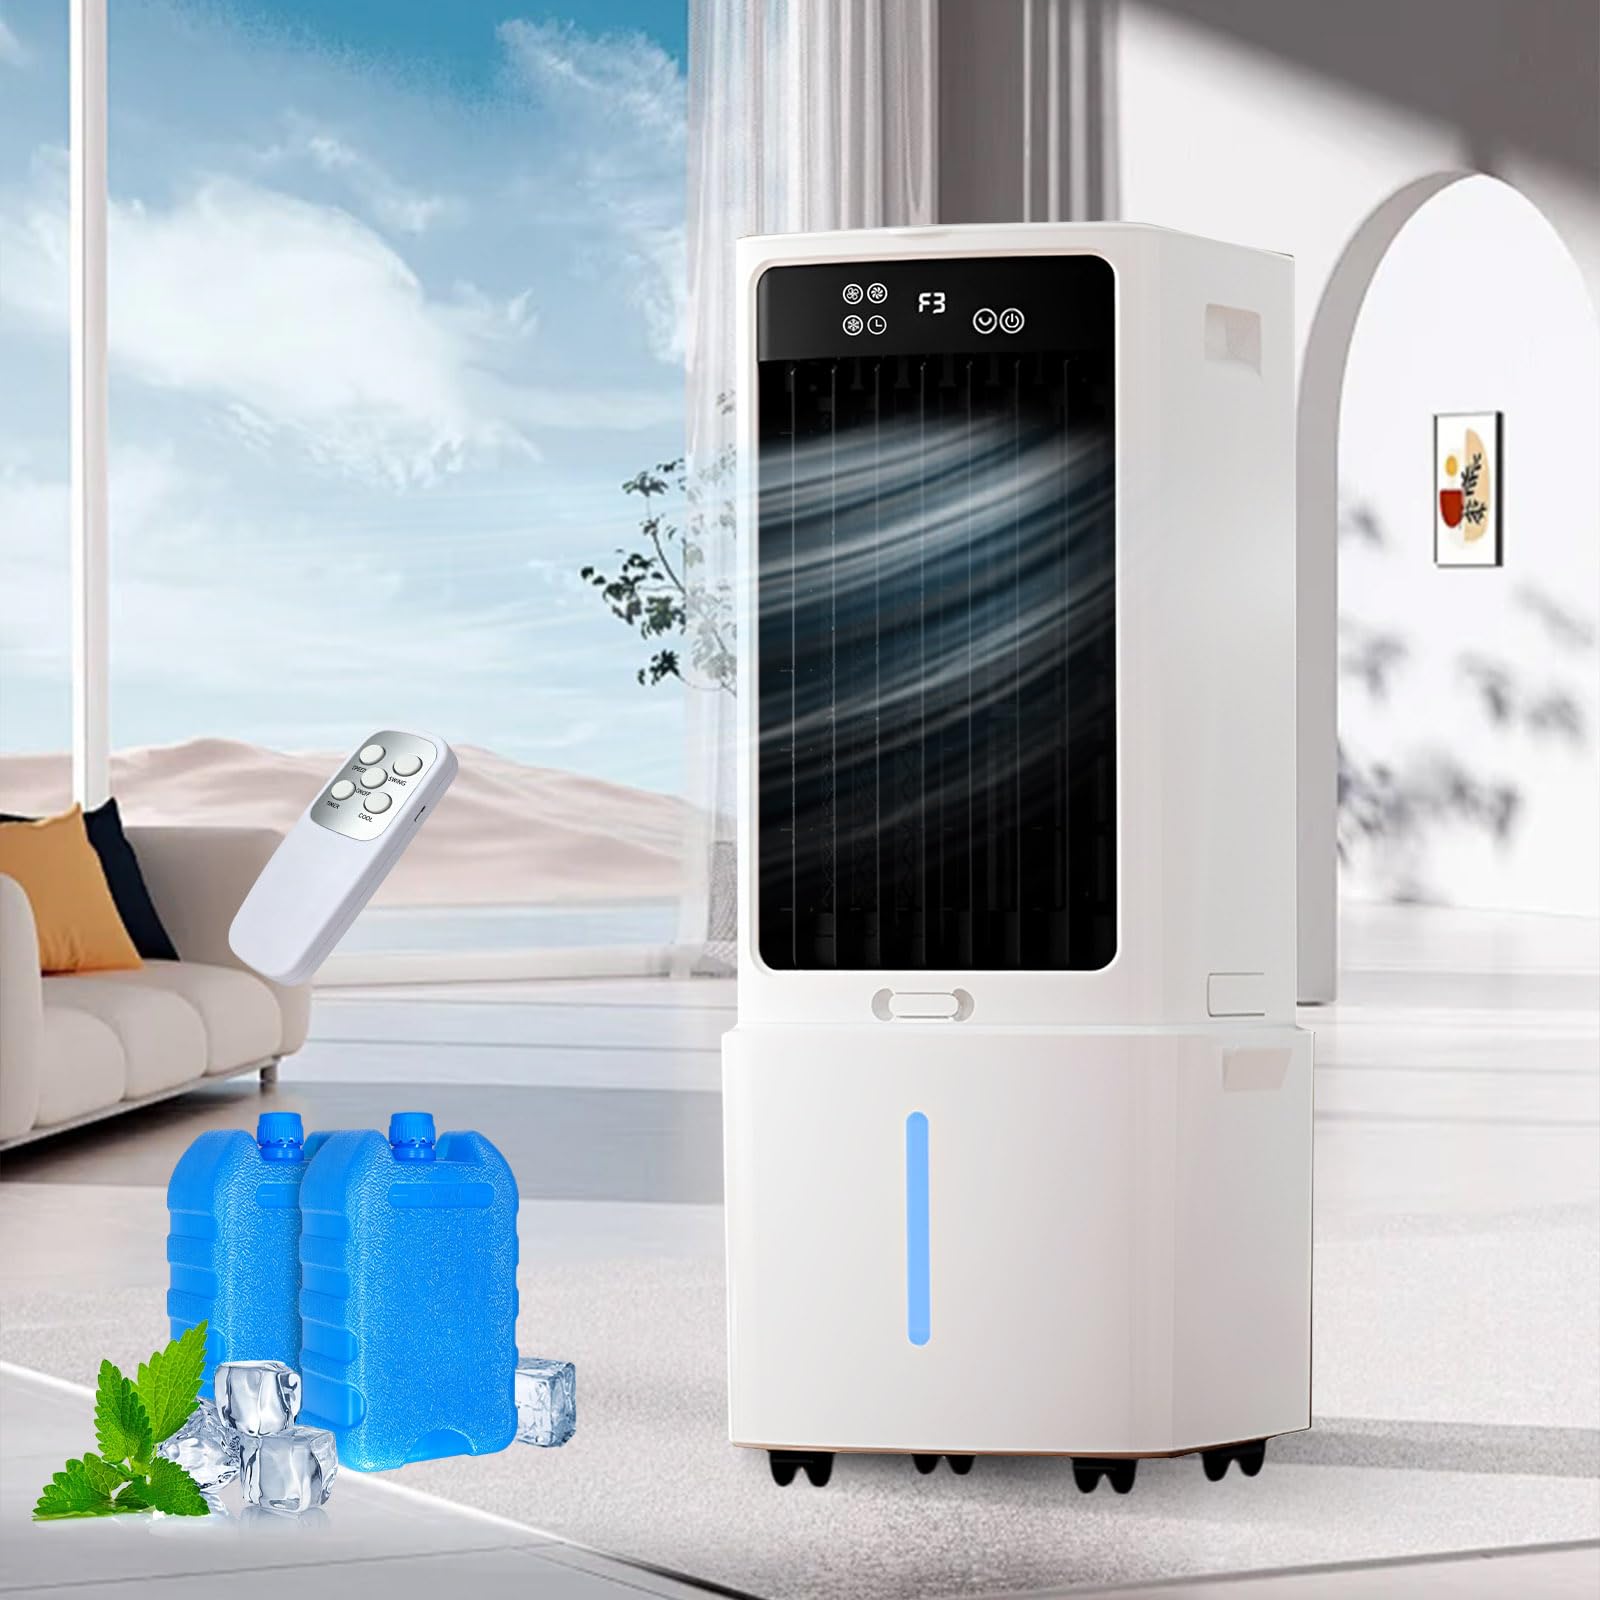
Image: Main unit of the 12L 4-in-1 Evaporative Air Cooler, showing the front panel, air outlet, and control interface.
Components:
- Main Air Cooler Unit
- Remote Control
- 2 Ice Crystal Boxes (Cooling Packs)
- User Manual (this document)
Setup
1. Unpacking
- Carefully remove the air cooler from its packaging.
- Check for any damage during transit. If damaged, do not operate and contact customer support.
- Remove all packing materials and protective films.
2. Positioning the Unit
- Place the air cooler on a firm, level surface.
- Ensure there is at least 20 cm (8 inches) of clear space around the unit for proper airflow.
- Avoid placing the unit in direct sunlight or near heat sources.
3. Filling the Water Tank
- Pull out the water tank from the bottom rear of the unit.
- Fill the tank with clean, cool water. Do not exceed the 'MAX' fill line.
- For enhanced cooling, place the provided ice crystal boxes (cooling packs) in the freezer until frozen.
- Once frozen, place the ice crystal boxes into the water tank along with the water.
- Carefully push the water tank back into the unit until it clicks into place.
Operating Instructions
1. Power On/Off
- Plug the power cord into a suitable electrical outlet.
- Press the Power button on the touchscreen panel or remote control to turn the unit on or off.
2. Fan Speed Adjustment
- Press the Speed button repeatedly to cycle through Low, Medium, and High fan speeds.
3. Mode Selection
Press the Mode button to select from the following modes:
- Normal Mode: Provides a constant airflow at the selected speed.
- Natural Mode: Simulates natural breeze by varying fan speed.
- Sleep Mode: Operates at a lower, quieter speed, gradually decreasing fan speed over time for undisturbed sleep.
4. Oscillation Function
- Press the Oscillation button to activate or deactivate the automatic wide-angle oscillation, distributing cool air evenly.
5. Timer Setting
- Press the Timer button repeatedly to set the desired operating time (up to 12 hours). The unit will automatically turn off after the set time.
6. Remote Control Usage
The remote control allows you to operate all functions from a distance. Ensure the remote control is pointed towards the unit's receiver.
Image: Example of a remote control for the air cooler, showing buttons for Power, Speed, Mode, Oscillation, and Timer.
Maintenance
Regular cleaning and maintenance will ensure optimal performance and extend the lifespan of your air cooler.
1. Cleaning the Exterior
- Before cleaning, always unplug the unit from the power outlet.
- Wipe the exterior surfaces with a soft, damp cloth. Do not use abrasive cleaners or solvents.
- Ensure no water enters the control panel or other electrical parts.
2. Cleaning the Water Tank
- Empty any remaining water from the tank.
- Remove the water tank and clean it with a mild detergent and water. Rinse thoroughly.
- Allow the tank to air dry completely before reinserting it.
- Clean the water tank at least once a week during regular use to prevent mold and mildew growth.
3. Cleaning the Air Filter
- Locate the air filter at the rear of the unit (behind the water tank).
- Carefully remove the filter.
- Rinse the filter under running water to remove dust and debris. For stubborn dirt, use a soft brush.
- Allow the filter to dry completely before placing it back into the unit.
- Clean the air filter every two weeks or more frequently depending on usage and air quality.
4. Storage
- If storing the unit for an extended period, ensure the water tank and filter are clean and dry.
- Store the appliance in a cool, dry place, away from direct sunlight and extreme temperatures.
Troubleshooting
| Problem | Possible Cause | Solution |
|---|---|---|
| Unit does not turn on | No power supply; Power cord not properly plugged in; Power button not pressed. | Check power outlet; Ensure power cord is securely plugged in; Press the Power button. |
| Weak airflow | Air filter is dirty; Air inlets/outlets blocked; Water level too low. | Clean the air filter; Ensure clear space around the unit; Refill water tank. |
| No cooling effect | Water tank empty; Ice crystal boxes not frozen or not used. | Refill water tank; Freeze and insert ice crystal boxes. |
| Unusual noise | Unit not on a level surface; Obstruction in fan blades. | Place unit on a stable, level surface; Unplug and check for obstructions (contact service if necessary). |
| Remote control not working | Batteries depleted; Obstruction between remote and unit. | Replace batteries; Ensure clear line of sight to the unit's receiver. |
Specifications
| Feature | Specification |
|---|---|
| Model Number | ZFHLFJ-ty1208 |
| Brand | Generic |
| Water Tank Capacity | 12 Liters |
| Functions | 4-in-1 (Fan, Humidifier, Air Purifier, Cooler) |
| Power | 65 Watts |
| Fan Speeds | 3 (Low, Medium, High) |
| Modes | Normal, Natural, Sleep |
| Control Type | Remote Control, Touchscreen |
| Special Features | Oscillation, Timer (up to 12 hours), 2 Ice Packs |
| Recommended Coverage Area | 10 Square Meters |
| Mounting Type | Freestanding |
| Dimensions (D x W x H) | 10D x 10W x 10H millimeters (Note: This dimension seems unusually small and may be a data entry error. Please refer to product packaging for accurate dimensions.) |
Warranty and Support
This product comes with a standard manufacturer's warranty. For specific warranty details, please refer to the warranty card included in the packaging or contact your retailer.
For technical support, troubleshooting assistance, or to inquire about replacement parts, please contact the customer service department of your retailer or the manufacturer directly. Contact information can typically be found on the product packaging or the retailer's website.