
Introduction
Thank you for choosing the Shintenchi Mesh Office Chair. This manual provides essential information for the safe assembly, operation, and maintenance of your new office chair. Please read these instructions carefully before assembly and retain them for future reference.
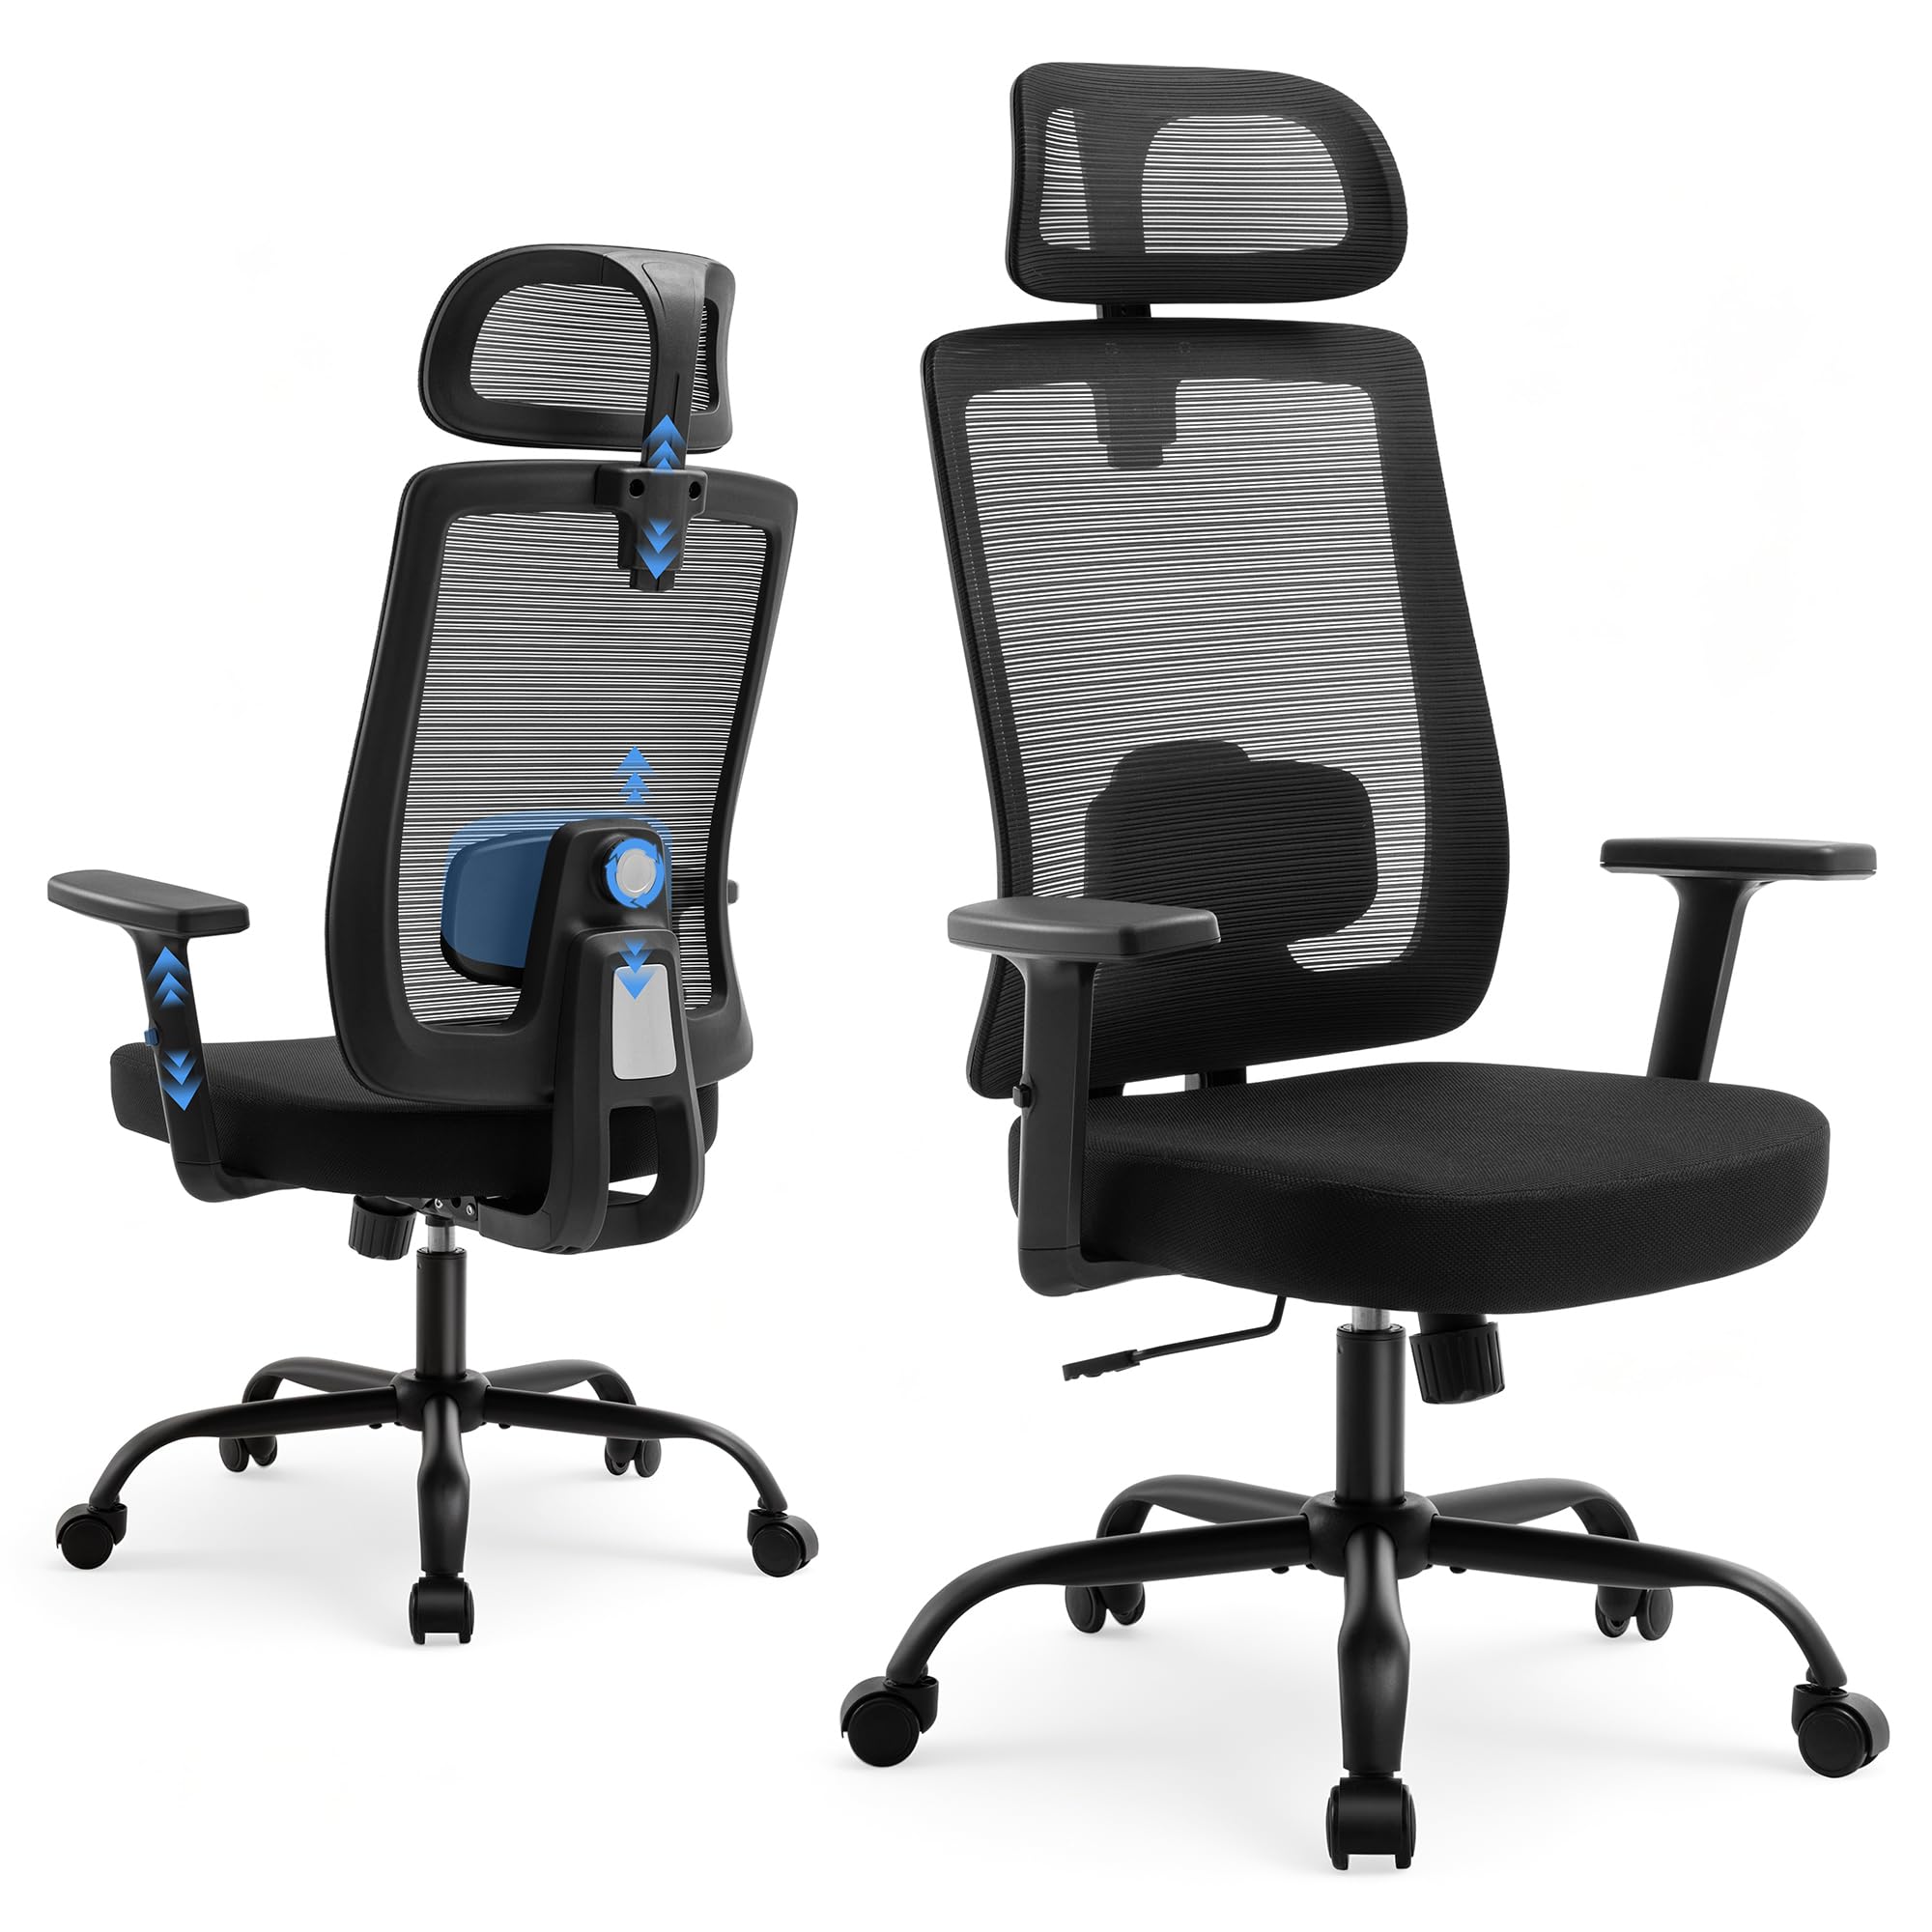
Image: The Shintenchi Mesh Office Chair, black, positioned in a modern home office environment with a desk and computer monitors.
Safety Information
- Weight Capacity: Do not exceed the maximum weight capacity of 330 lbs (150 kg).
- Assembly: Ensure all screws and bolts are securely tightened before using the chair. Periodically check and re-tighten fasteners.
- Usage: Use the chair on a flat, stable surface. Avoid standing on the chair or using it as a step stool.
- Children: Keep children away from the assembly area. Small parts can be a choking hazard.
- Maintenance: Do not use abrasive cleaners or harsh chemicals on the chair. Refer to the maintenance section for cleaning instructions.
Package Contents
Before beginning assembly, verify that all components are present and undamaged. If any parts are missing or damaged, please contact customer support.
- Backrest Assembly
- Seat Cushion Assembly
- Armrests (2)
- Headrest
- Gas Lift Cylinder
- Star Base
- Casters (5)
- Mechanism Plate
- Hardware Pack (screws, washers, Allen wrench)
- User Manual (this document)
Assembly Instructions
Assembly typically takes 15-30 minutes. It is recommended to assemble the chair on a soft, clean surface to prevent scratches.
- Attach Casters to Base: Insert each of the five casters into the holes at the end of each leg of the star base until they click securely into place.
- Insert Gas Lift: Place the gas lift cylinder into the center hole of the star base. Ensure it is seated firmly.
- Attach Mechanism Plate to Seat: Align the mechanism plate with the screw holes on the underside of the seat cushion. Secure it with the provided screws, ensuring the front of the mechanism faces the front of the seat.
- Attach Armrests to Seat: Fasten the armrests to the sides of the seat cushion using the designated screws. Do not fully tighten yet.
- Attach Backrest to Seat: Connect the backrest to the seat assembly, aligning the mounting points. Secure with screws. Once the backrest is attached, fully tighten all screws for the armrests and backrest.
- Attach Headrest: Slide the headrest into the designated slots at the top of the backrest. Adjust its height as desired.
- Connect Seat to Gas Lift: Carefully place the assembled seat and backrest onto the gas lift cylinder, ensuring the center hole of the mechanism plate aligns with the top of the gas lift. Press down firmly to secure.
Operating Instructions (Adjustments)
Your Shintenchi office chair offers multiple adjustment options to customize your seating experience for optimal comfort and support.
1. Seat Height Adjustment
To adjust the seat height, locate the lever on the right side, beneath the seat.
- To Raise: While seated, lift the lever and slightly raise your body weight off the seat. The seat will rise. Release the lever at the desired height.
- To Lower: While seated, lift the lever and apply pressure to the seat. The seat will lower. Release the lever at the desired height.
2. Backrest Recline and Tilt-Rock Function
The chair features a recline function from 90° to 135° and adjustable tilt-rock tension.

Image: Visual guide for adjusting the chair's recline angle (90-135 degrees) and tilt-rock tension, along with armrest height adjustment.
- To Recline/Lock: Pull the lever on the left side (opposite the height adjustment lever) outwards to allow the backrest to recline. Push the lever inwards to lock the backrest at your desired angle.
- Adjust Tilt Tension: The round knob located underneath the seat, at the front of the mechanism, controls the tilt tension. Turn clockwise to increase tension (making it harder to recline) or counter-clockwise to decrease tension (making it easier to recline).
3. Lumbar Support Adjustment
The lumbar support can be adjusted in both height and depth to provide tailored support to your lower back.

Image: Detailed view of the lumbar support, illustrating how to adjust its height (up & down) and depth (forward & back) for personalized comfort.
- Height Adjustment: Gently push the lumbar support up or down along the backrest to find the optimal height for your lower back curve.
- Depth Adjustment: Rotate the knobs on either side of the lumbar support to adjust how far it protrudes, increasing or decreasing the support intensity.
4. Armrest Height Adjustment
The armrests can be adjusted vertically to support your arms and shoulders.
- Locate the button or lever on the side of each armrest. Press and hold it while moving the armrest up or down to your desired height. Release the button/lever to lock it in place.
5. Headrest Adjustment
The headrest can be adjusted to support your neck and head.
- Grasp the headrest and gently slide it up or down to achieve the most comfortable position for your neck and head.
Maintenance
Regular maintenance helps prolong the life and appearance of your office chair.
- Cleaning: Wipe clean with a soft, damp cloth. For mesh areas, a mild soap solution can be used, followed by wiping with a clean, damp cloth and air drying. Avoid harsh chemicals or abrasive cleaners.
- Fasteners: Periodically check all screws and bolts to ensure they are tight. Re-tighten as necessary to maintain stability and safety.
- Casters: Clean casters regularly to remove hair, dust, and debris that can impede smooth rolling.
- Gas Lift: Do not attempt to disassemble or repair the gas lift cylinder. If it malfunctions, contact customer support.
Troubleshooting
| Problem | Possible Cause | Solution |
|---|---|---|
| Chair wobbles or feels unstable | Loose screws or uneven assembly. | Check and tighten all screws and bolts, especially those connecting the seat, backrest, and armrests. Ensure the chair is on a level surface. |
| Gas lift does not adjust height | Lever not engaged correctly or gas lift malfunction. | Ensure the height adjustment lever is fully pulled up or pushed down. If the issue persists, the gas lift may need replacement. Contact customer support. |
| Casters do not roll smoothly | Debris caught in casters or damaged casters. | Turn the chair over and remove any hair, dust, or debris from the caster wheels. If casters are damaged, they may need replacement. |
| Backrest does not recline or lock | Recline lever not engaged or tilt tension too high. | Ensure the recline lever is pulled out to allow recline and pushed in to lock. Adjust the tilt tension knob counter-clockwise to reduce resistance. |
| Chair makes squeaking noises | Loose connections or friction between parts. | Tighten all screws. Apply a small amount of silicone lubricant to moving parts or connection points if the noise persists. |
Specifications

Image: Front and side views of the Shintenchi Mesh Office Chair with key dimensions labeled, including height, width, and depth.
| Brand | Shintenchi |
| Model Name | Ergonomic Office Chair |
| Model Number | STC-BGY001-BK-X-2P-A1 |
| Color | Black |
| Material | Metal, Polyester, Polypropylene |
| Upholstery Fabric Type | Mesh |
| Frame Material Type | Stainless Steel |
| Product Dimensions (D x W x H) | 28.7" x 28.7" x 53" |
| Seat Depth | 19.3 inches |
| Item Weight | 29 pounds |
| Maximum Weight Recommendation | 330 pounds |
| Additional Features | Adjustable Height, Adjustable Recliner, Arm Rest, Ergonomic, Tilt, Lumbar Support, Headrest |

Image: A person seated in the Shintenchi office chair, highlighting its robust construction and 330 lbs weight capacity.
Warranty and Support
For warranty information, product support, or to order replacement parts, please contact Shintenchi customer service. Refer to your purchase documentation for specific warranty terms and contact details.
Typically, customer support can be reached via the retailer where the product was purchased or through the manufacturer's official website.