
1. Introduction
This manual provides instructions for the assembly, operation, and maintenance of your Walsunny 12x20 Heavy Duty Carport. Please read all instructions carefully before assembly and use to ensure safe and proper operation.
The Walsunny 12x20 Carport is designed as a heavy-duty vehicle shelter, suitable for trucks, SUVs, and boats. It features a robust steel frame, a waterproof PE canopy, and roll-up ventilation windows. This structure can also serve as an outdoor party tent or a shaded workspace.
2. Safety Information
- Anchoring: Always ensure the carport is securely anchored to the ground using the provided windproof ropes and tent pegs. In areas prone to high winds, additional anchoring methods (e.g., concrete footings, heavier anchors) are recommended.
- Snow Load: While designed to handle heavy snow, excessive accumulation should be removed promptly to prevent structural damage.
- Assembly: Assembly requires a minimum of 2-3 adults. Do not attempt to assemble alone.
- Location: Choose a level, clear area for installation, away from overhead power lines, trees, or other structures that could cause damage.
- Fire Hazard: Keep all heat sources and open flames away from the canopy material.
- Children: Keep children away from the assembly area.
3. Packing List
Before beginning assembly, verify that all components listed below are present. If any parts are missing or damaged, please contact Walsunny customer support.

Image: Detailed view of all components included in the Walsunny 12x20 Carport package.
- Top Poles (x4)
- Middle Poles (x10)
- Bottom Poles (x8)
- Four-way Connectors (x4)
- T-shaped Connectors (x4)
- Bolts (x4)
- Base Plates (x4)
- Canopy (x1)
- Sandbags (x4)
- Tent Pegs (x14)
- Gloves (x1 pair)
- Bungee Balls (x1 set)
- Wind Ropes (x4)
4. Setup and Assembly Instructions
The Walsunny Carport features a smart spring-button system for quick, tool-free assembly. It is recommended that 2-3 adults perform the assembly.

Image: Visual guide illustrating the easy assembly features of the carport, including spring-button connections, elastic ball bungees, loop fasteners, and the roll-up door with zipper.
- Frame Assembly: Begin by connecting the steel poles using the four-way and T-shaped connectors. The spring-button design allows for quick locking. Ensure all connections are secure.
- Base Installation: Attach the base plates to the bottom poles. Position the assembled frame in your desired location.
- Canopy Placement: Carefully drape the 180g PE canopy over the assembled frame. Ensure it is centered and evenly distributed.
- Securing the Canopy: Use the elastic ball bungees to securely tie down the canopy covers to the frame for added stability.
- Attaching Sidewalls: The sidewalls feature loop fasteners. Attach these to the posts for a firm and snug fit.
- Anchoring: Utilize the provided tent pegs and wind ropes to anchor the carport firmly to the ground. For enhanced stability, fill the sandbags and place them at the base of the legs.
For visual assistance, refer to the detailed assembly diagrams provided in the packaging.
5. Operating Instructions
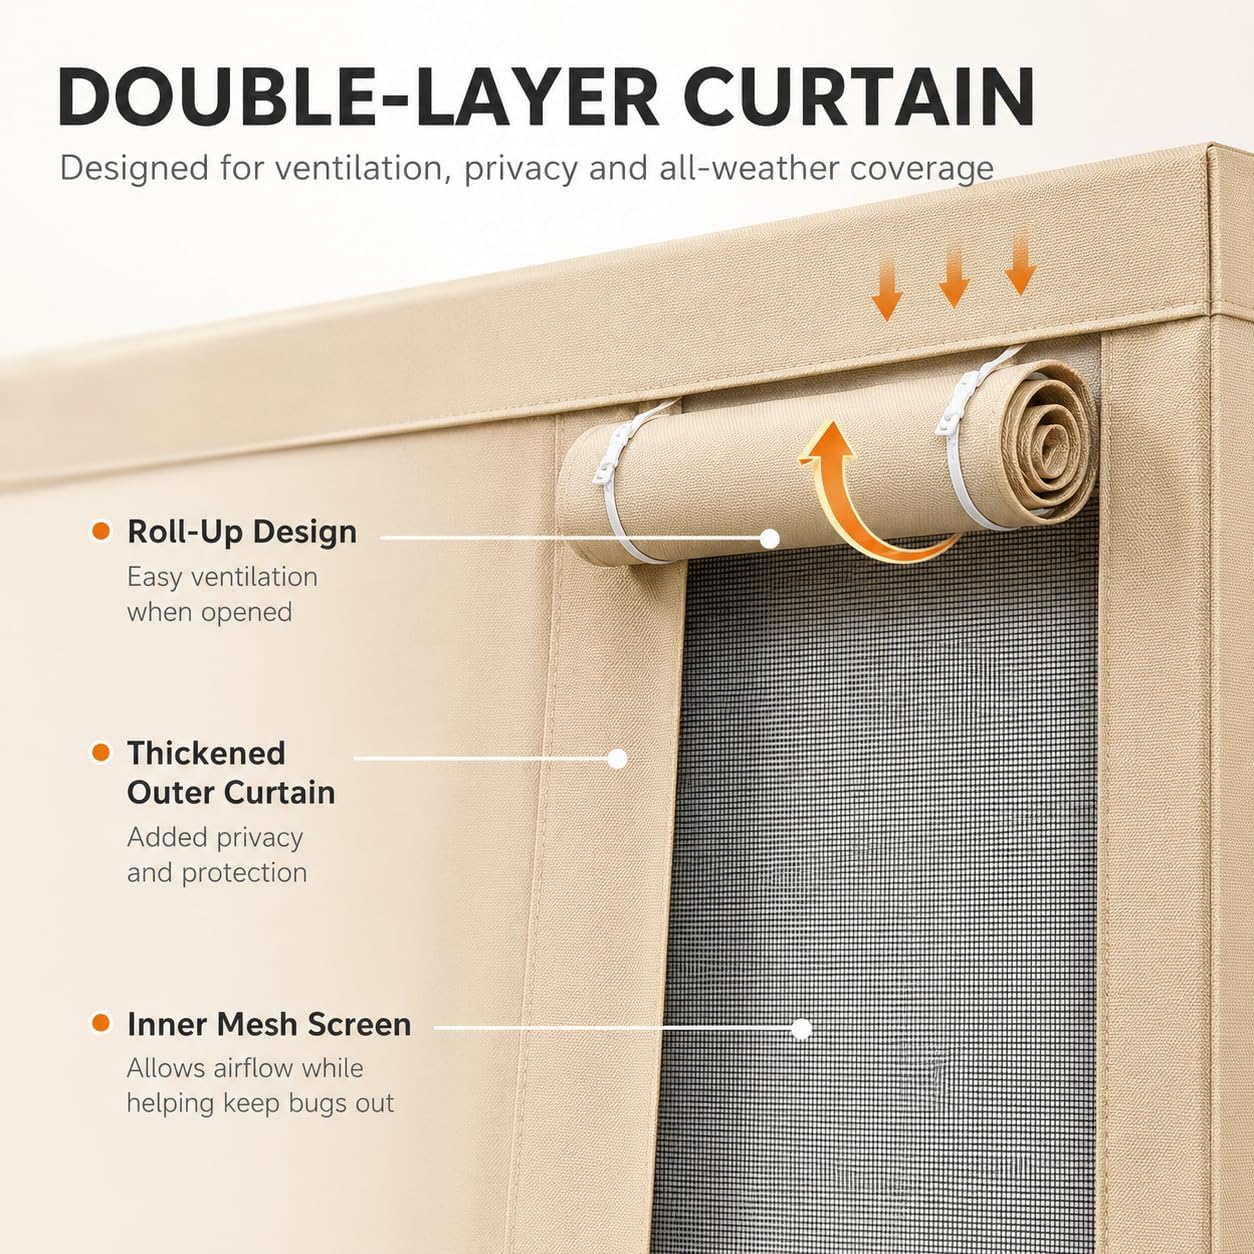
Image: Diagram illustrating the double-layer curtain system with roll-up outer curtain, thickened privacy layer, and inner mesh screen for ventilation and protection.
- Roll-Up Windows: The carport features sidewalls with mesh windows. These can be rolled up and secured to maximize airflow and ventilation.
- Zippered Doors: The front and rear panels include zippered doors. These can be rolled up for vehicle access or fully sealed to protect your vehicle from dust and debris.
- Weather Protection: The 180g triple-layer PE canopy is 100% waterproof and UV-resistant, shielding your vehicle from sun, rain, and other elements.
6. Maintenance
- Regular Inspection: Periodically check all frame connections, ropes, and anchors to ensure they remain tight and secure, especially after strong winds or heavy precipitation.
- Canopy Cleaning: Clean the canopy with mild soap and water. Avoid harsh chemicals or abrasive brushes that could damage the material.
- Snow Removal: In snowy conditions, regularly remove snow from the canopy to prevent excessive weight accumulation and potential collapse.
- Storage: If disassembling for storage, clean and dry all components thoroughly before packing them away in a cool, dry place.
7. Troubleshooting
| Problem | Possible Cause | Solution |
|---|---|---|
| Carport instability / swaying | Loose anchors or ropes; insufficient anchoring for weather conditions. | Tighten all ropes and re-secure anchors. Consider additional anchoring methods (e.g., concrete, heavier stakes) in windy areas. Ensure sandbags are filled and placed correctly. |
| Water pooling on canopy | Canopy not taut enough; improper frame assembly. | Ensure the canopy is stretched tightly and evenly over the frame. Recheck frame connections for proper assembly and alignment. |
| Difficulty with zippers | Dirt or debris in zipper teeth; zipper misalignment. | Clean zipper teeth with a soft brush. Apply a silicone-based lubricant if necessary. Ensure panels are aligned before zipping. |
8. Specifications
- Brand: Walsunny
- Model Number: CPKK9
- Dimensions (L x W x H): 240" x 144" x 118" (20 ft x 12 ft x 9.8 ft peak height)
- Floor Area: 240 square feet
- Item Weight: 97.7 pounds
- Material: Metal (Frame), 180g PE (Canopy)
- Frame Material: 1.5-inch Powder-Coated Steel Poles, Alloy Steel
- Color: Khaki
- Water Resistance Level: Waterproof
- UV Protection: Yes
- Number of Supporting Legs: 8
- Features: Roll-up mesh ventilation windows, zippered doors, reinforced legs, windproof ropes.
9. Warranty and Support
For any questions, missing parts, or support needs regarding your Walsunny Carport, please contact Walsunny customer service. Refer to your purchase documentation for specific warranty details.
You can typically find support contact information on the manufacturer's website or through the retailer where the product was purchased.


