
1. Product Overview
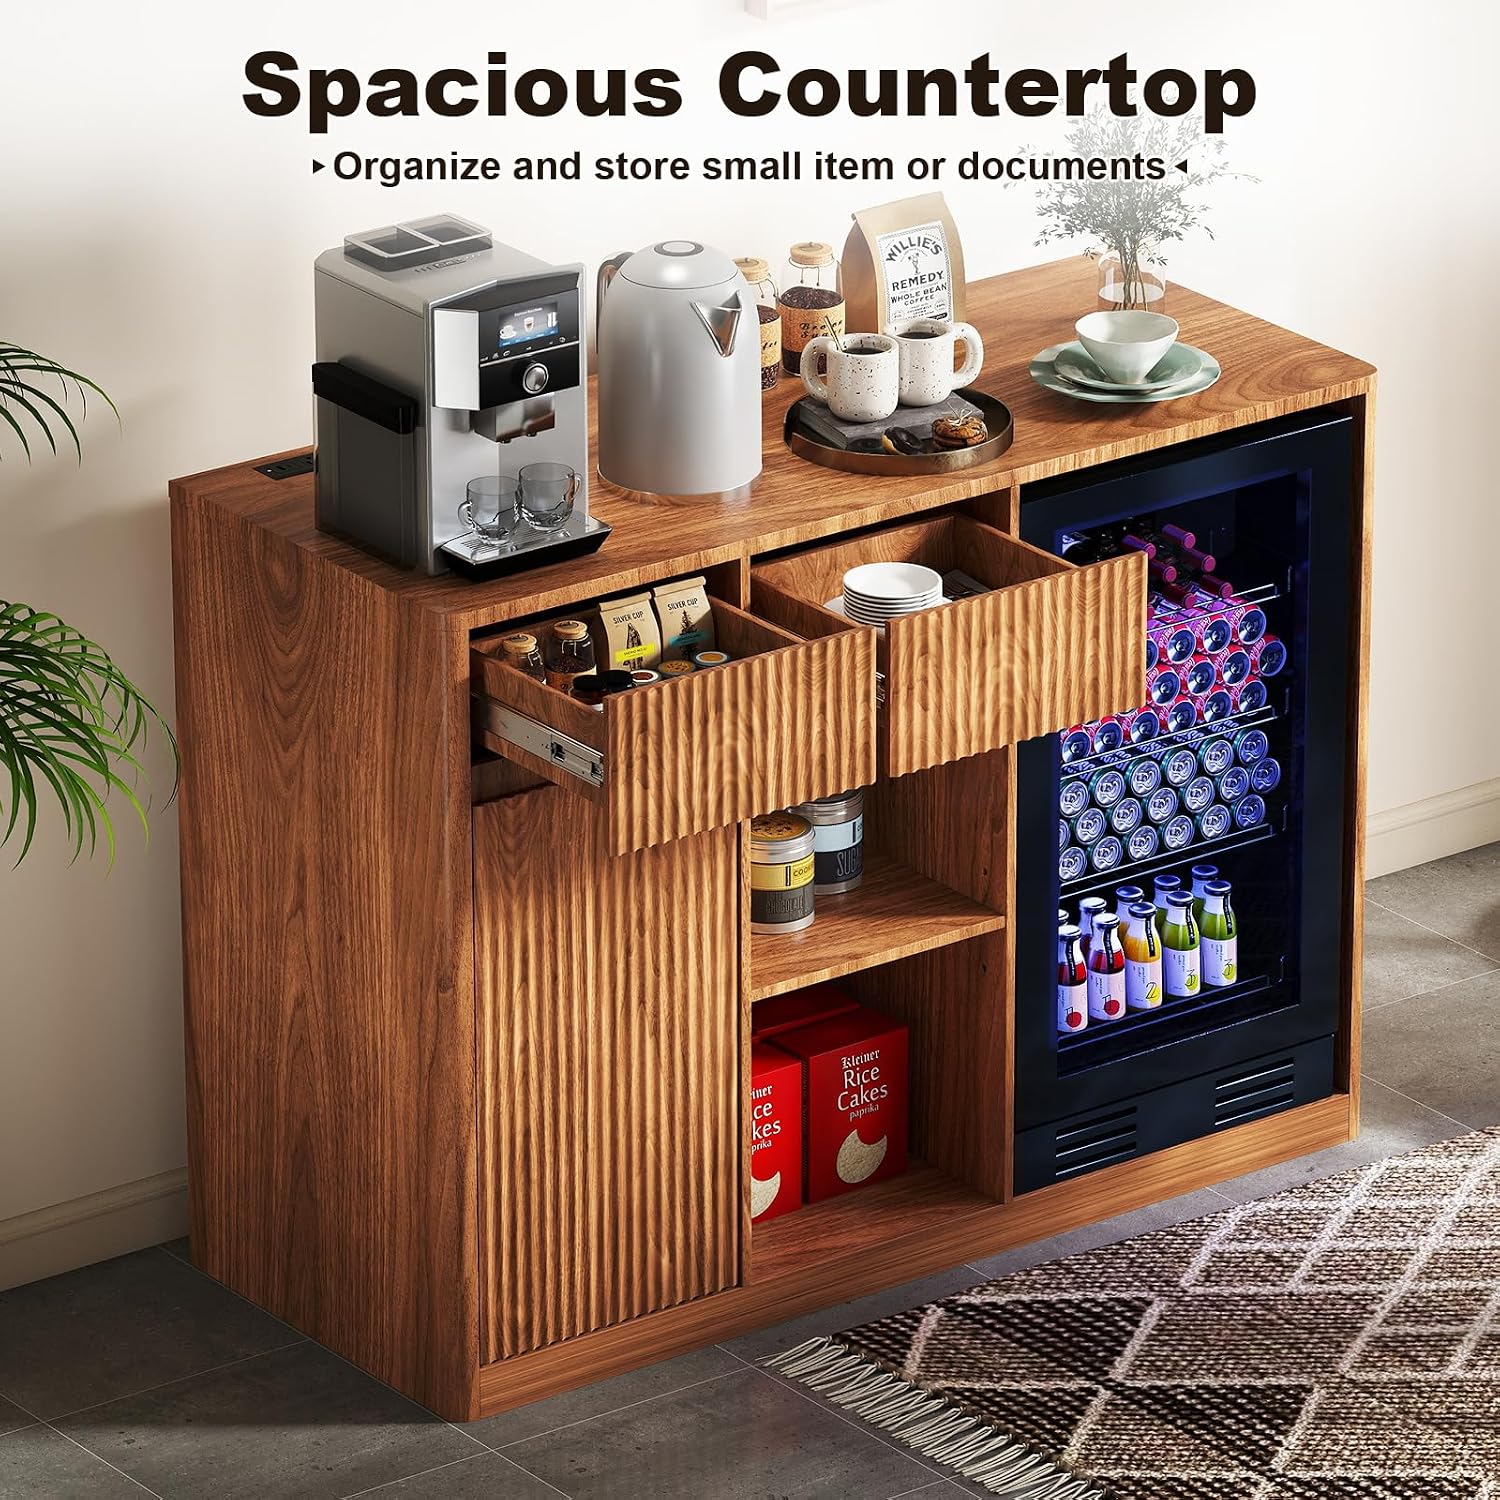
The Zevemomo Coffee Bar Cabinet is a versatile storage solution designed to organize coffee essentials, barware, and daily items. It features a spacious countertop, two drawers, a closed cabinet with glass racks, and two open shelves. A dedicated compartment is included for a standard mini fridge (not included), and a convenient power hub provides AC outlets and USB ports for electronic devices.
Key features include:
- Ample Storage: 51.2" x 20.9" countertop, two drawers, closed cabinet, and two open shelves.
- Mini Fridge Compatibility: Dedicated compartment (19.7"W x 20.7"D x 34.1"H) for most standard mini fridges.
- Integrated Power Hub: Two AC outlets, one USB port, and one Type-C port.
- Adjustable Shelves: Customizable shelf heights in open and enclosed areas.
- Durable Construction: Crafted from MDF with a scratch-resistant coating and waveform fluted doors.
2. Safety Information
Please read and understand all safety instructions before assembling and using this product. Failure to follow these instructions may result in injury or damage to the product.
- Assembly Safety: Assemble the unit on a soft, clean surface to prevent scratches. Ensure all hardware is securely tightened before use. Do not overtighten screws.
- Weight Capacity: Do not exceed the recommended weight capacity for the countertop, shelves, and drawers. Distribute weight evenly.
- Electrical Safety: Only use the integrated power hub with compatible devices. Do not overload the outlets. Keep liquids away from electrical components.
- Stability: For added stability and safety, especially in homes with children or pets, consider securing the cabinet to a wall using anti-tip hardware (if provided or purchased separately).
- Mini Fridge: Ensure the mini fridge dimensions fit within the designated compartment (19.7"W x 20.7"D x 34.1"H) to allow for proper ventilation. Do not block the fridge's ventilation openings.
3. Setup and Assembly
Assembly is required for this product. Please ensure all parts are present and undamaged before beginning. Two people are recommended for assembly.
3.1 Package Contents
Verify that all components and hardware listed in the packing list (typically found in the box) are present. If any parts are missing or damaged, contact customer support.
3.2 Tools Required (Not Included)
- Phillips Head Screwdriver
- Hammer (for dowels, if applicable)
- Measuring Tape
3.3 Assembly Steps
- Unpack all components and lay them out on a clean, soft surface to prevent scratches.
- Identify each part using the provided diagrams in the assembly guide.
- Follow the step-by-step instructions in the separate assembly manual to connect panels, install drawers, and attach doors.
- Install the adjustable shelves into the desired positions.
- Securely attach the back panel.
- Place the cabinet in its final desired location.
- Insert your mini fridge into the dedicated compartment, ensuring adequate space for ventilation.
- Plug the cabinet's power cord into a wall outlet.

4. Operating Instructions
4.1 Using the Power Hub
The integrated power hub is located on the countertop. It provides convenient access to power for your appliances and devices.
- Plug your coffee maker, kettle, or other small appliances into the 2 AC outlets.
- Charge your smartphone or other USB-powered devices using the 1 USB port or 1 Type-C port.
- Ensure the cabinet's main power cord is securely plugged into a functional wall outlet for the power hub to operate.

4.2 Adjusting Shelves
The cabinet features adjustable shelves in both the open storage area and the enclosed cabinet. This allows for flexible storage configurations to accommodate items of various heights.
- Empty the shelf you wish to adjust.
- Carefully lift the shelf and remove the shelf pins from their current holes.
- Reinsert the shelf pins into the desired new set of holes, ensuring they are level.
- Place the shelf back onto the pins, ensuring it is stable before placing items on it.

4.3 Drawers and Cabinet Doors
The two drawers provide concealed storage for smaller items. The cabinet doors open to reveal additional shelving and glass racks. The waveform fluted design adds a modern aesthetic.

5. Maintenance
Proper care and maintenance will extend the life and appearance of your Zevemomo Coffee Bar Cabinet.
- Cleaning: Wipe surfaces with a soft, damp cloth. Avoid harsh chemicals, abrasive cleaners, or polishes that may damage the finish.
- Spills: Clean up spills immediately to prevent staining or water damage to the wood material.
- Sunlight: Avoid prolonged exposure to direct sunlight, which can cause fading or discoloration.
- Heat: Do not place hot items directly on the surface. Use coasters or protective pads.
- Hardware: Periodically check and tighten all hardware connections to ensure stability.
6. Troubleshooting
If you encounter any issues with your cabinet, refer to the following common troubleshooting tips:
- Cabinet is Wobbly:
- Ensure all screws and fasteners are securely tightened.
- Verify the cabinet is on a level surface. Use furniture glides or shims if necessary.
- Drawers Do Not Slide Smoothly:
- Check that the drawer slides are correctly installed and aligned.
- Ensure no obstructions are in the drawer tracks.
- Power Hub Not Working:
- Confirm the cabinet's main power cord is fully plugged into a functional wall outlet.
- Test the wall outlet with another device to ensure it has power.
- Do not overload the power hub with too many high-power devices.
- Doors Are Misaligned:
- Adjust the hinges according to the assembly manual's instructions to align the doors.
7. Specifications
| Brand | Zevemomo |
| Model Name | Mini Fridge Coffee Bar Cabinet |
| Model Number | 61261DBr |
| Color | Brown |
| Material | Wood (Engineered Wood) |
| Product Dimensions (D x W x H) | 20.9" x 51.2" x 37" |
| Mini Fridge Compartment (W x D x H) | 19.7" x 20.7" x 34.1" |
| Item Weight | 93 pounds |
| Number of Drawers | 2 |
| Number of Doors | 2 |
| Number of Shelves | 4 (Adjustable) |
| Power Hub | 2 AC Outlets, 1 USB Port, 1 Type-C Port |
| UPC | 990484118462 |
8. Warranty and Support
For warranty information, product support, or to report missing/damaged parts, please contact Zevemomo customer service through the retailer where the product was purchased or visit the official Zevemomo store online.
Zevemomo Store: https://www.amazon.com/stores/Zevemomo/page/320452DD-B236-4755-87F5-D8D4E74F435A