
1. Product Overview
The PowerSmart DL5040 is a 4400-watt portable inverter generator designed for home emergency use, camping, and residential power needs. It features inverter technology for clean power output, a 223cc 4-stroke engine, and multiple outlets for versatile power delivery.
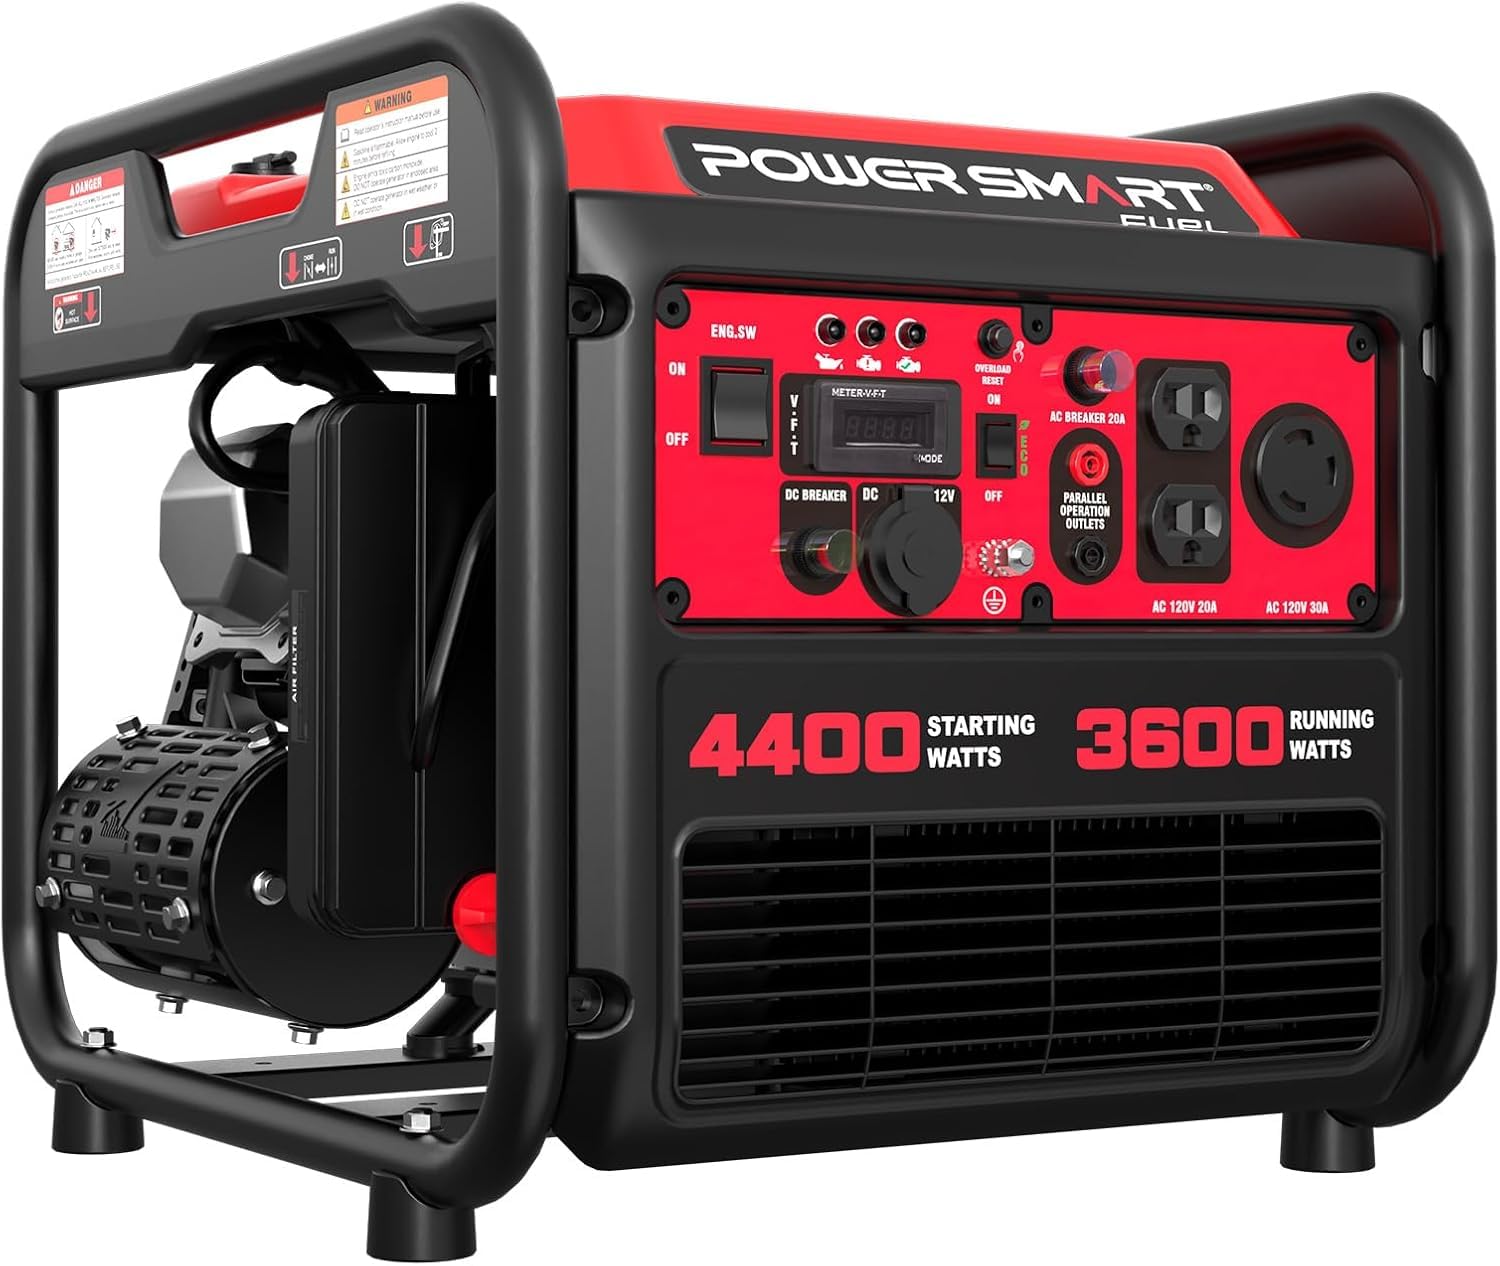
Image 1.1: The PowerSmart 4400 Watt Portable Inverter Generator, showcasing its compact design and control panel.
Key Features:
- Reliable Output: Equipped with a 223cc 4-stroke engine, providing 4400 starting watts and 3600 running watts.
- Inverter Technology: Delivers clean power (<3% THD) suitable for sensitive electronics.
- Long Runtime: Offers approximately 5.1 hours of continuous operation at 50% load (1800W).
- Control Panel: Includes a 120V 30A L5-30R twist-lock outlet, a 120V 20A 5-20R duplex household outlet, a 12V 8A DC port, Eco-mode, and parallel ports.
- Additional Features: Cold Start Technology, Digital Display, Low Oil Shutdown.
2. Safety Information
Read and understand all safety warnings and instructions before operating the generator. Failure to follow these instructions may result in serious injury or death.
2.1 Carbon Monoxide Hazard
- Generators produce carbon monoxide (CO), an odorless, colorless, and poisonous gas.
- NEVER operate the generator indoors, in a garage, or in any enclosed space.
- Always operate the generator outdoors in a well-ventilated area, far away from windows, doors, and vents.
- Install battery-operated carbon monoxide alarms in your home.
2.2 Fire Hazard
- Fuel is highly flammable. Store fuel in an approved container in a well-ventilated area.
- Do not refuel the generator while it is running or hot. Allow it to cool down before adding fuel.
- Keep fuel away from sparks, open flames, pilot lights, heat, and other ignition sources.
- Do not overfill the fuel tank.
2.3 Electrical Shock Hazard
- Do not operate the generator in wet conditions (rain, snow, high humidity).
- Ensure all electrical connections are secure and properly grounded.
- Never connect the generator directly to your home's electrical system without a transfer switch installed by a qualified electrician. This can cause backfeeding, which is dangerous for utility workers.
3. Setup
Follow these steps to prepare your generator for first use.
3.1 Unpacking
- Carefully remove the generator and all components from the packaging.
- Verify that all included components (oil funnel, spark plug wrench) are present.
- Inspect the generator for any shipping damage. Contact customer support if damage is found.
3.2 Adding Engine Oil
The generator is shipped without engine oil. You must add the correct amount and type of oil before starting.
- Place the generator on a level surface.
- Remove the oil fill cap/dipstick.
- Using the provided oil funnel, slowly add 10W-30 4-stroke engine oil until it reaches the upper mark on the dipstick. Do not overfill.
- Securely replace the oil fill cap/dipstick.

Image 3.1: Icon representing the need to add engine oil.
3.3 Adding Fuel
Use fresh, unleaded gasoline with a minimum octane rating of 87. Do not use E85 or mixed fuels.
- Ensure the generator is turned off and cool.
- Open the fuel tank cap.
- Carefully pour gasoline into the fuel tank, avoiding spills. Do not fill above the red indicator line inside the tank. The tank volume is 1.6 gallons.
- Securely close the fuel tank cap.
Video 3.1: Demonstrates checking the fuel level and the fuel cap, which indicates minimum 87 octane fuel.
4. Operating Instructions
4.1 Starting the Generator
- Ensure the generator is on a level surface and all connections are secure.
- Turn the engine switch to the "ON" position.
- Move the choke lever to the "CHOKE" position (if the engine is cold).
- Pull the recoil starter handle firmly until the engine starts.
- Once the engine starts, slowly move the choke lever to the "RUN" position.
- Allow the generator to run for a few minutes to warm up before connecting electrical loads.
Video 4.1: Shows the control panel and starting procedure of the PowerSmart generator.
4.2 Connecting Electrical Loads
The control panel features various outlets:
- AC 120V 20A Outlets (x2): Standard household outlets.
- AC 120V 30A L5-30R Twist-Lock Outlet: For higher power demands, often used with RVs (requires RV adapter).
- DC 12V 8A Port: For charging 12V batteries.

Image 4.1: Close-up of the generator's control panel, detailing the various outlets and indicators.
4.3 Eco-Mode Operation
Engage Eco-mode to optimize fuel consumption and reduce noise when running lighter loads. The engine speed will automatically adjust to the load demand.
- To activate: Flip the Eco-mode switch to "ON".
- To deactivate: Flip the Eco-mode switch to "OFF".
4.4 Parallel Operation
This generator supports parallel operation, allowing you to connect two compatible PowerSmart inverter generators to double the power output. Refer to the parallel kit instructions for detailed setup.

Image 4.2: Two PowerSmart generators connected for parallel operation, demonstrating increased power capability.
4.5 Stopping the Generator
- Disconnect all electrical loads from the generator.
- Allow the generator to run for a few minutes without load to cool down.
- Turn the engine switch to the "OFF" position.
- If storing for an extended period, turn off the fuel valve (if present) and allow the engine to run until it runs out of fuel.
5. Maintenance
Regular maintenance ensures optimal performance and extends the life of your generator. Always turn off the generator and allow it to cool before performing any maintenance.
5.1 Engine Oil Check and Change
- Check oil level before each use.
- Change oil after the first 20 hours of operation, then every 50-100 hours or annually.
- Refer to the engine manual for specific oil change procedures.
5.2 Air Filter Maintenance
- Inspect the air filter every 50 hours or more frequently in dusty conditions.
- Clean or replace the air filter as needed to ensure proper engine performance.
5.3 Spark Plug Inspection
- Inspect the spark plug annually or every 100 hours.
- Clean or replace if fouled or damaged. Use the provided spark plug wrench.
5.4 Storage
- For long-term storage, drain the fuel tank and carburetor, or use a fuel stabilizer.
- Change the engine oil.
- Store the generator in a clean, dry, well-ventilated area.
6. Troubleshooting
This section provides solutions to common operational issues. For problems not listed here, contact customer support.
| Problem | Possible Cause | Solution |
|---|---|---|
| Engine will not start | No fuel; Low oil level; Choke not set correctly; Spark plug issue; Engine switch OFF | Add fuel; Add oil (Low Oil Shutdown feature prevents starting); Adjust choke; Check/replace spark plug; Turn engine switch ON |
| No power output | Circuit breaker tripped; Overload; Eco-mode engaged with high load | Reset circuit breaker; Reduce load; Disengage Eco-mode for higher loads or check for overload reset button. |
| Engine runs rough | Stale fuel; Clogged air filter; Dirty spark plug | Drain and replace with fresh fuel; Clean/replace air filter; Clean/replace spark plug |
7. Specifications
Detailed technical specifications for the PowerSmart DL5040 generator.
| Model Name | DL5040 |
| Starting Wattage | 4400 watts |
| Running Wattage | 3600 watts |
| Engine Displacement | 223 cubic centimeters |
| Engine Type | 4-Stroke |
| Fuel Type | Gasoline |
| Tank Volume | 1.6 gallons |
| Runtime (50% load) | 5.1 hours |
| Voltage | 120 volts |
| Frequency | 60 hertz |
| Total Power Outlets | 4 (2x 120V 20A, 1x 120V 30A, 1x 12V 8A DC) |
| Item Weight | 61 pounds |
| Dimensions (L x W x H) | 16.9" x 16.5" x 19.3" |
| Special Features | Cold Start Technology, Digital Display, Low Oil Shutdown |

Image 7.1: Visual representation of the generator's dimensions and weight.
8. Warranty and Support
The PowerSmart DL5040 generator comes with a 2-year limited warranty. Additionally, PowerSmart provides FREE lifetime technical support from dedicated experts.
For warranty claims, technical assistance, or general inquiries, please refer to the contact information provided in your product packaging or visit the official PowerSmart website.

Image 8.1: Icon indicating the 2-year warranty period.


