
Introduction
Thank you for choosing the Gritin 2026 Gen2 LED Motion Sensor Light. This product is designed to provide versatile and efficient lighting for various indoor spaces, featuring a motion sensor, adjustable light settings, and a convenient flashlight mode. This manual provides detailed instructions for setup, operation, and maintenance to ensure optimal performance and longevity of your device.
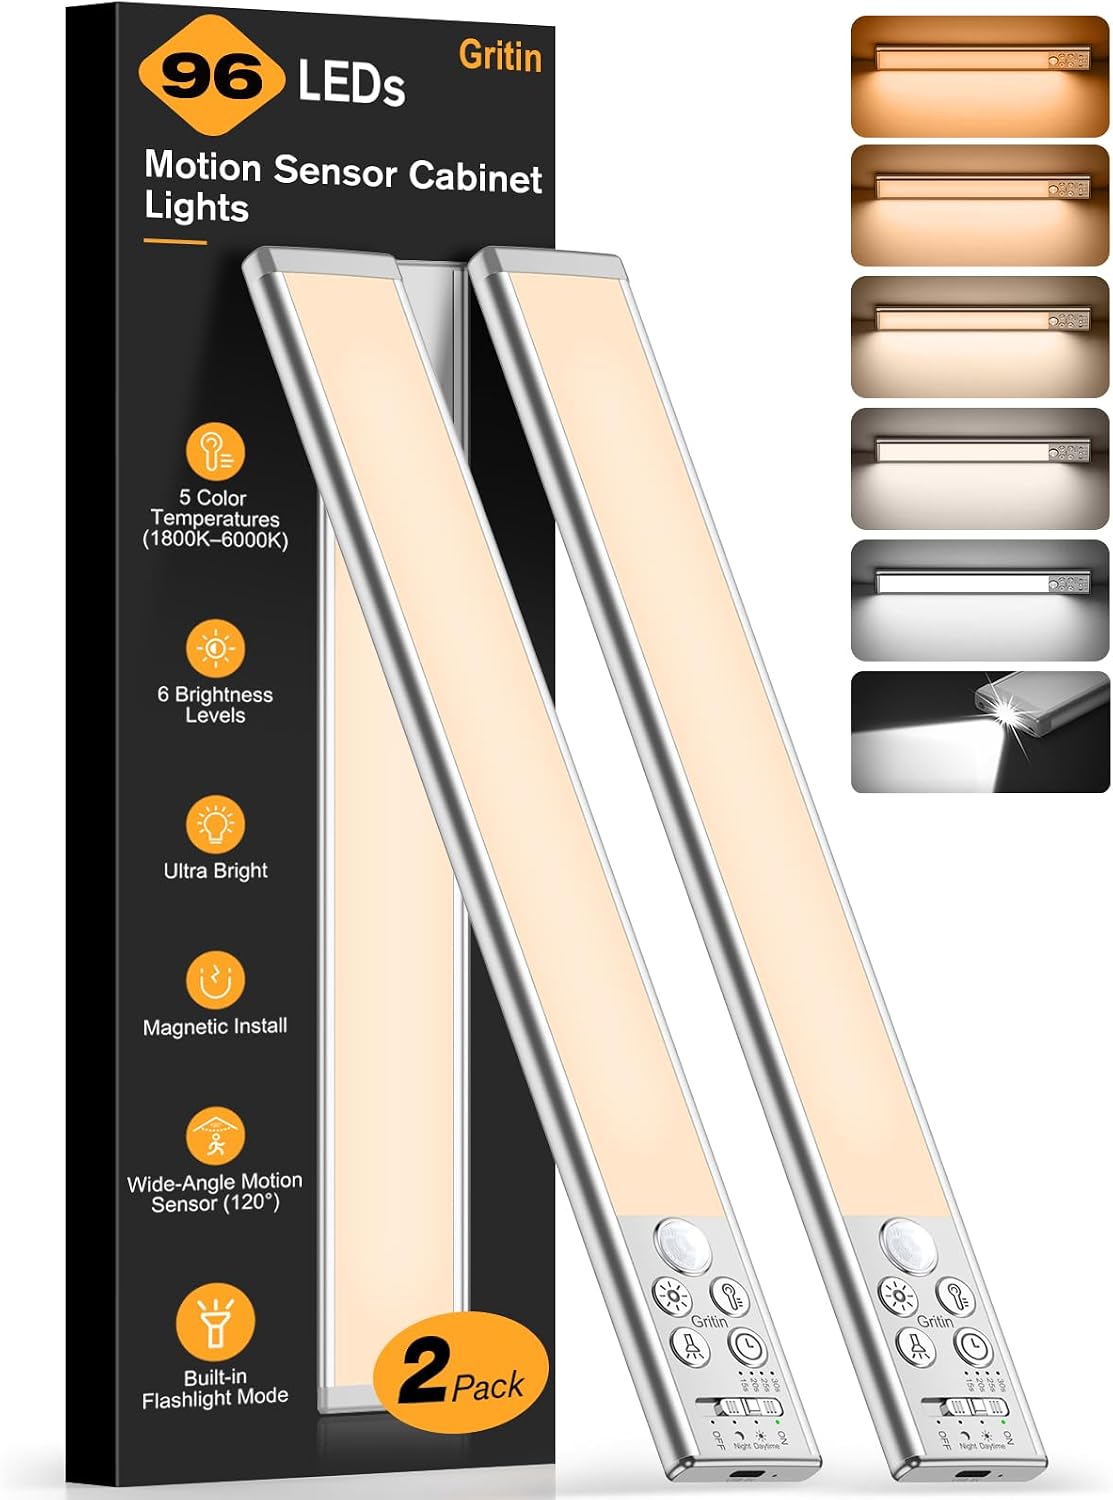
Image: The Gritin 2026 Gen2 LED Motion Sensor Light, 32.3CM Silver model.
Package Contents
Please check the package for the following items:
- Gritin 2026 Gen2 LED Motion Sensor Light (32.3CM Silver)
- USB-C Charging Cable
- Magnetic Mounting Plates with Adhesive
- Mounting Screws (optional use)
- User Manual
Product Overview
The Gritin 2026 Gen2 LED Motion Sensor Light combines a powerful under-cabinet light with a portable flashlight. It features multiple control buttons and a switch for various modes and settings.

Image: Detailed view of the light's control panel, showing buttons for color temperature, brightness, and mode selection, along with the flashlight LED.
Key Components:
- LED Light Bar: Main illumination for cabinet/under-surface use.
- Motion Sensor: Detects movement to activate the light.
- Flashlight LED: Located at one end for portable illumination.
- Mode Switch: Toggles between OFF, Night Sensing, Day Sensing, and ON modes.
- Color Temperature Button: Adjusts light color (1800K-6000K).
- Brightness Button: Adjusts light intensity (10%-100%).
- Detection Duration Button: Sets how long the light stays on after motion detection (15s/20s/25s/30s).
- USB-C Charging Port: For recharging the internal battery.
- Charging Indicator Light: Shows charging status.
Setup
1. Initial Charging
Before first use, fully charge the light. Connect the provided USB-C cable to the light's charging port and a USB power adapter (not included). The charging indicator will be red while charging and turn green when fully charged. A flashing red light indicates low battery.
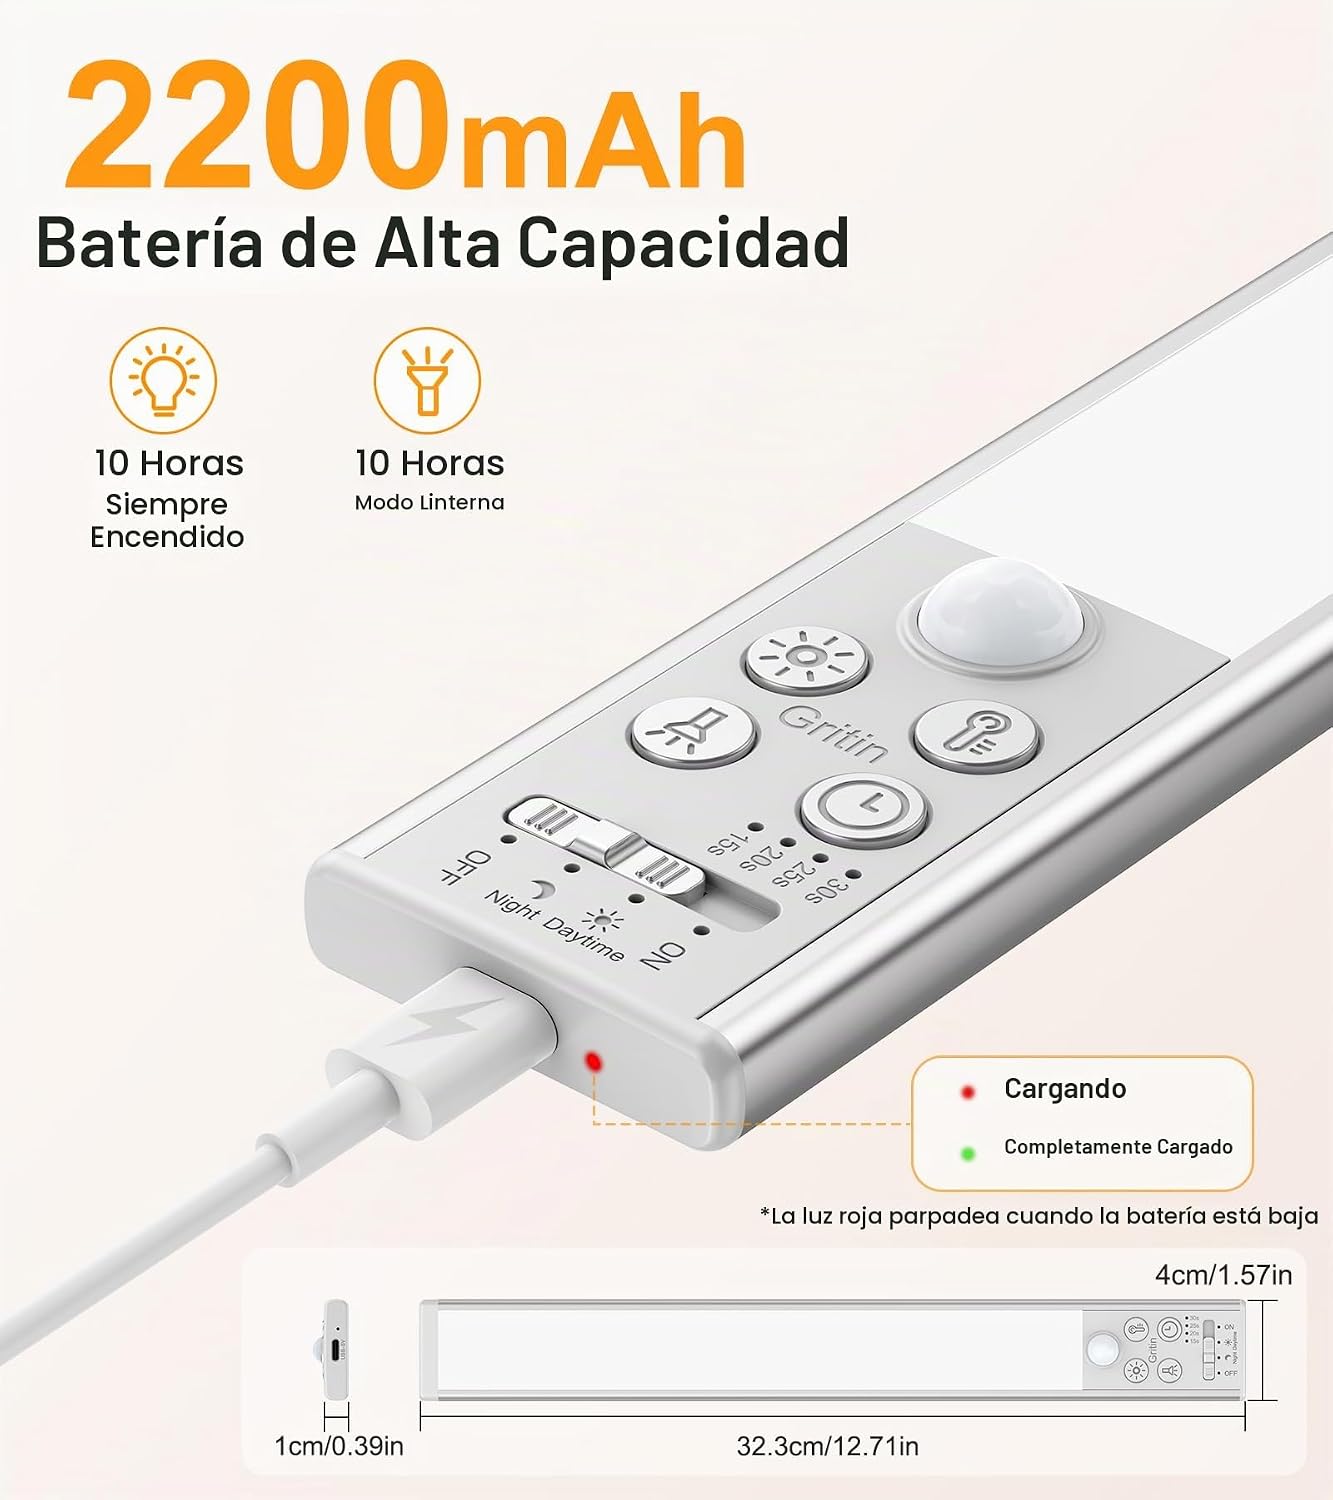
Image: Close-up of the light showing the USB-C charging port and indicator lights (red for charging, green for fully charged, flashing red for low battery).
2. Installation
The light offers flexible magnetic installation:
- For Metal Surfaces: The light has integrated magnets. Simply attach it directly to any metallic surface.
- For Non-Metallic Surfaces: Use the included magnetic mounting plates. Clean the desired surface thoroughly. Peel off the protective film from the adhesive side of the magnetic plates and firmly press them onto the surface. Ensure the plates are aligned with the magnets on the back of the light. Once the plates are secured, the light can be magnetically attached to them. You can also use the provided screws for a more permanent installation if preferred.
Image: Visual guide demonstrating magnetic installation on both metal and non-metal surfaces using adhesive plates.
Operating Instructions
1. Cabinet Light Function
The main light bar provides illumination for cabinets, shelves, and other areas.
a. Power Modes:
Use the slide switch on the light to select one of the following modes:
- OFF: The light is turned off.
- Night Sensing Mode (Moon Icon): The light will turn on automatically when motion is detected in dark or low-light conditions.
- Day Sensing Mode (Sun Icon): The light will turn on automatically when motion is detected, regardless of ambient light conditions.
- ON: The light remains continuously on.

Image: Illustrations of the four operating modes: Day Sensing, Night Sensing, Always ON, and OFF, showing typical use cases.
b. Color Temperature Adjustment:
The light offers 5 color temperature options and stepless adjustment:
- Short Press: Briefly press the color temperature button to cycle through 5 preset color temperatures: 1800K (Amber Light), 2500K (Warm Light), 3000K (Warm White), 4500K (Natural Light), and 6000K (Cool White).
- Long Press: Press and hold the color temperature button for stepless adjustment between 1800K and 6000K to find your preferred shade.

Image: A visual representation of the 5 distinct color temperatures available, ranging from warm amber to cool white, demonstrated in a closet setting.
c. Brightness Adjustment:
The light provides 6 brightness levels and stepless adjustment:
- Short Press: Briefly press the brightness button to cycle through 6 preset brightness levels: 10%, 25%, 50%, 75%, 90%, and 100%.
- Long Press: Press and hold the brightness button for stepless adjustment from 10% to 100% brightness.

Image: A grid showing the 6 distinct brightness levels, from Level 1 (dimmest) to Level 6 (brightest), and a diagram illustrating stepless dimming from 10% to 100%.
d. Detection Duration:
When in sensing modes, you can adjust how long the light stays on after motion is detected:
- Press the detection duration button to cycle through 15 seconds, 20 seconds, 25 seconds, and 30 seconds.

Image: A person in a kitchen with the light activated by motion, highlighting the 96 LEDs, 190LM output, 3m/10ft detection distance, and 120° detection angle, along with the 4 adjustable auto-off timers.
2. Flashlight Function
The light includes a dedicated flashlight LED at one end for emergencies or portable use.
- Activation: The flashlight switch is located at the end of the light. Short press to turn the flashlight ON/OFF.
- Brightness Adjustment: Press and hold the flashlight switch for stepless brightness adjustment from 30% to 100%.
Note: The cabinet light and flashlight cannot be used simultaneously. Activating one will automatically turn off the other for stable performance.

Image: A person using the light as a flashlight to illuminate an electrical panel, demonstrating its use in emergency situations. A close-up inset shows the powerful flashlight LED.
3. Smart Memory Function
The light features an intelligent memory function that saves your last used settings. This includes the color temperature, brightness level, light mode (cabinet light/flashlight), and detection duration. When the light is turned on again, it will recall these settings, eliminating the need for re-configuration.
Maintenance
- Cleaning: Wipe the light with a soft, dry cloth. Do not use abrasive cleaners or solvents.
- Battery Care: To prolong battery life, avoid fully discharging the battery frequently. Recharge the light when the low battery indicator flashes red.
- Storage: If storing the light for an extended period, charge it fully every 3-6 months to maintain battery health.
Troubleshooting
| Problem | Possible Cause | Solution |
|---|---|---|
| Light does not turn on. | Low battery; Incorrect mode selected; Sensor obstructed. | Charge the light; Ensure the mode switch is set to a sensing mode or ON; Clear any obstructions from the sensor. |
| Motion sensor not working. | Incorrect mode selected; Ambient light too bright (in Night Sensing mode); Sensor obstructed. | Ensure the mode switch is set to Night Sensing or Day Sensing; Test in a darker environment for Night Sensing mode; Clear sensor. |
| Light flickers or is dim. | Low battery. | Recharge the light fully. |
| Flashlight does not work. | Low battery; Cabinet light is active. | Charge the light; Ensure the cabinet light is off before activating the flashlight. |
Specifications
- Model Number: G1359
- Dimensions: 32.3 cm (L) x 4 cm (W) x 1 cm (H)
- Weight: 284 g
- Material: Aluminum
- Number of LEDs: 96
- Light Output: Up to 190 Lumens
- Color Temperature: 1800K-6000K (5 presets, stepless adjustment)
- Brightness Levels: 10%-100% (6 presets, stepless adjustment)
- Battery: 2200 mAh (Non-standard battery, included)
- Charging Port: USB-C
- Motion Sensor Angle: 120°
- Motion Sensor Range: Up to 3 meters (10 feet)
- Auto-off Timers: 15s/20s/25s/30s
- Power Source: Battery powered
- Installation Type: Magnetic mounting
- Control Method: Push button, Slide switch
- Indoor/Outdoor Use: Indoor, Outdoor (Note: Not waterproof for permanent outdoor exposure)
Warranty & Support
Gritin offers a 60-month (5-year) warranty for this product. For warranty claims or technical support, please contact Gritin customer service through the retailer where you purchased the product or visit the official Gritin website for contact information.
Please retain your proof of purchase for warranty validation.


