
1. Product Overview
This manual provides instructions for the chartustriable 94.5" TV Stand and Media Console Set. This product is a two-piece furniture set designed for media storage and display, featuring a farmhouse aesthetic with LED lighting and glass doors. It includes one 63" wide cabinet and one 31.5" wide cabinet, which can be combined for a total length of 94.5 inches or used separately.
The set is constructed from high-density engineered wood and includes anti-tipping hardware for stability. Integrated LED light strips are present in the upper open display shelves, and cable management holes are provided for organized wiring.
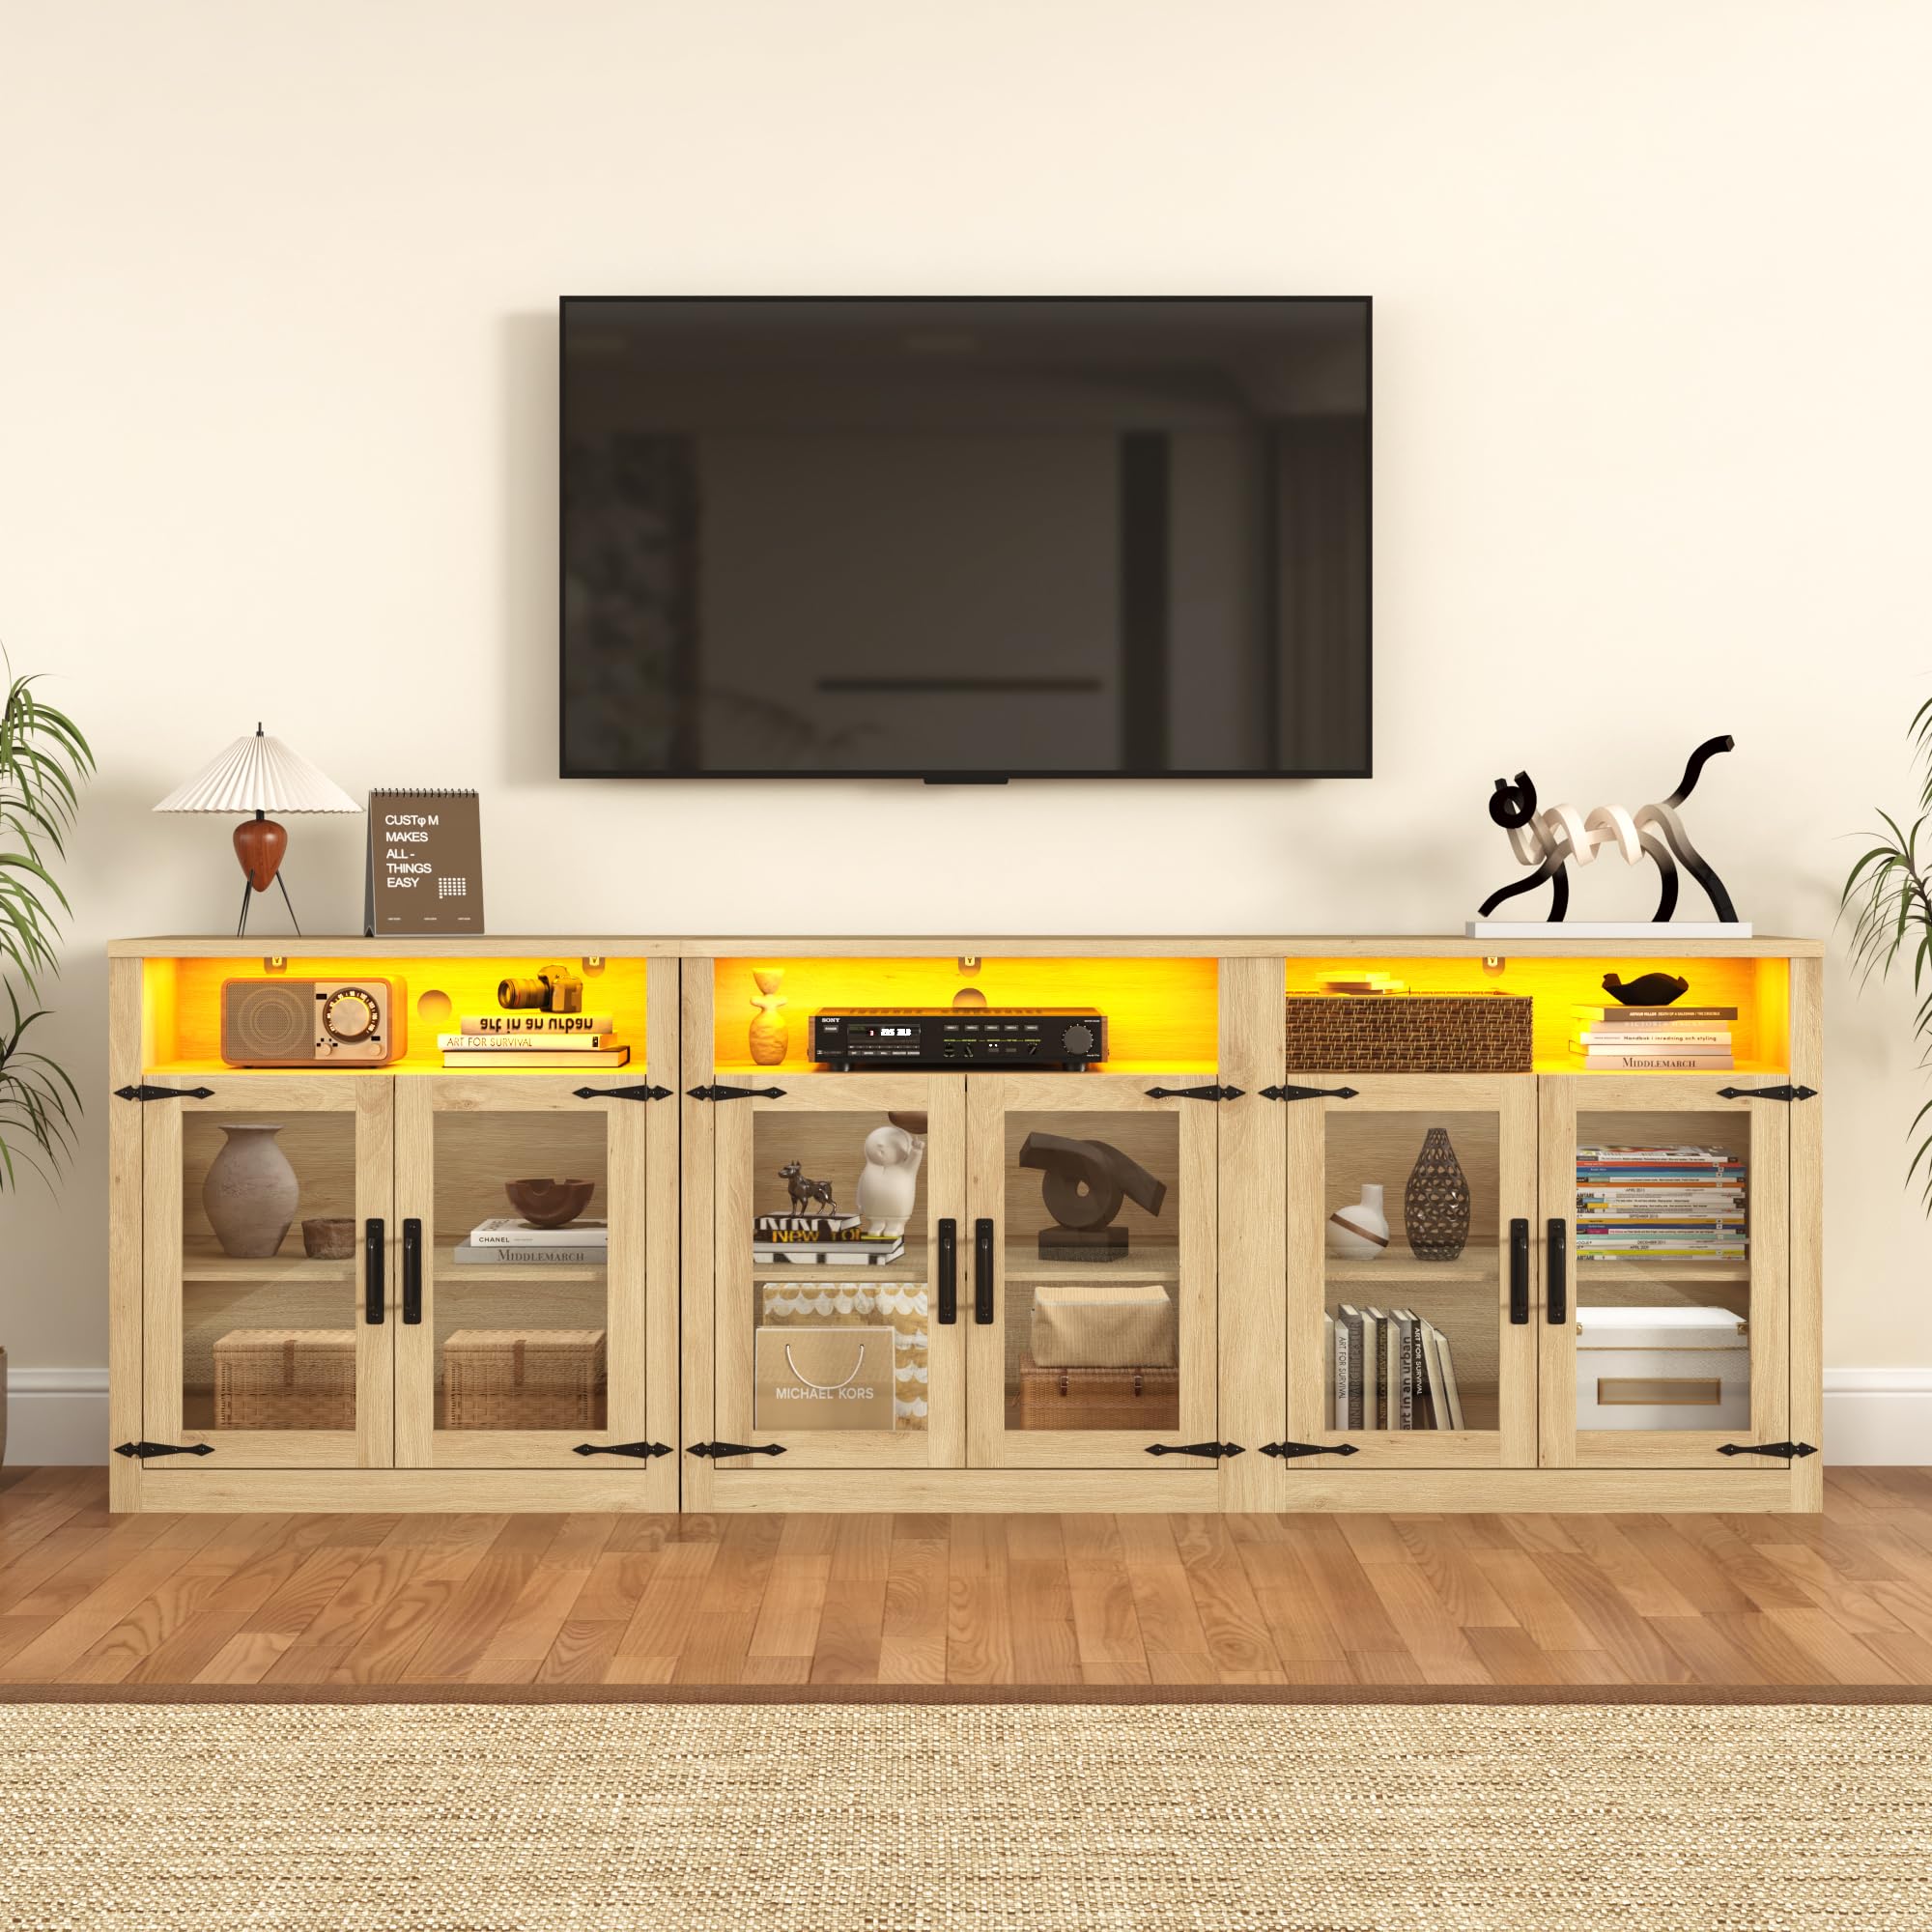
Figure 1: Assembled chartustriable 94.5" TV Stand and Media Console Set. This image shows the two cabinets combined, featuring the oak finish, glass doors, and illuminated open shelves.
2. Safety Information
- Read all instructions carefully before assembly and use.
- Two-person assembly is recommended due to the size and weight of the components.
- Always use the provided anti-tipping hardware to secure the cabinets to a wall. This is crucial to prevent injury, especially in homes with children or pets.
- Do not exceed the weight capacity of the shelves. Distribute weight evenly.
- Keep small parts and packaging materials away from children.
- Ensure all connections for LED lighting are secure and follow electrical safety guidelines.
3. Package Contents
Before beginning assembly, verify that all parts are present and undamaged. Refer to the included parts list in your packaging. The set typically includes:
- One 63" wide cabinet unit (components for assembly)
- One 31.5" wide cabinet unit (components for assembly)
- Hardware pack (screws, dowels, cam locks, hinges, magnetic catches, anti-tipping kit)
- LED light strips and power adapter
- Glass doors
- Instruction manual (this document)
If any parts are missing or damaged, contact customer support immediately.
4. Setup and Assembly
Assembly requires basic household tools (e.g., Phillips head screwdriver, hammer). Follow the numbered steps provided in the separate assembly guide included in your packaging for detailed, visual instructions. The general steps are outlined below:
- Prepare the Area: Clear a spacious, clean, and level area for assembly. Lay down a blanket or cardboard to protect the furniture pieces and your floor.
- Identify Components: Unpack all boxes and identify each panel and hardware piece by referring to the parts list.
- Assemble Cabinet Frames: Begin by assembling the main frames of both the 63" and 31.5" cabinets according to the detailed diagrams. Ensure all cam locks and screws are tightened securely.
- Install Shelves: Insert the fixed and adjustable shelves into their designated positions.
- Attach Back Panels: Secure the back panels to the assembled cabinet frames. Ensure the cable management holes are correctly oriented.
- Install Doors: Attach the hinges to the glass doors and then to the cabinet frames. Adjust hinges as needed for proper door alignment. Install magnetic catches to ensure doors close securely.
- Apply LED Lighting: Carefully adhere the LED light strips to the designated areas within the upper open display shelves. Connect the strips to the power adapter.
- Position and Secure: Decide whether to use the cabinets together or separately.
- If combining, align the two units carefully.
- Crucially, attach the anti-tipping hardware to the back of each cabinet and secure it firmly to a wall stud using appropriate wall anchors.

Figure 2: Key features including cable management holes, anti-tipping device, magnetic door catch, and decorative farmhouse style hinges.

Figure 3: Visual guide for TV size compatibility, indicating support for televisions up to 100 inches when the units are combined.

Figure 4: Dimensions of the individual cabinets and the combined 94.5" unit, illustrating flexible arrangement options.
5. Operating Instructions
5.1 LED Lighting
- Connect the LED light strip power adapter to a standard electrical outlet.
- The LED lights are typically controlled via an inline switch on the power cord or a remote control (if included). Refer to the specific LED light kit instructions for detailed operation.
- Ensure the power adapter is placed in a location where it will not be tripped over or damaged.
5.2 Cable Management
- Utilize the pre-drilled cable management holes on the back panels to route power cords and signal cables for your electronic devices.
- This helps to keep wires organized and reduces clutter, contributing to a cleaner aesthetic and preventing potential tripping hazards.
5.3 Storage and Display
- The glass doors allow for visible storage of decorative items, books, or media components while protecting them from dust.
- The open shelves are ideal for displaying items that benefit from the integrated LED illumination.
- Ensure items are placed securely and do not obstruct the closing of the doors.
6. Maintenance
- Cleaning: Wipe surfaces with a soft, damp cloth. Avoid harsh chemicals or abrasive cleaners, which can damage the finish. Dry immediately with a clean cloth.
- Glass Care: Clean glass doors with a standard glass cleaner and a soft cloth.
- Hardware Check: Periodically check all screws, cam locks, and anti-tipping hardware to ensure they remain tight. Retighten as necessary.
- LED Lights: If LED lights dim or fail, check the power connection. If the issue persists, the LED strip or power adapter may need replacement. Contact customer support for assistance.
- Avoid Moisture: Protect the furniture from excessive moisture and direct sunlight to prevent warping or fading.
7. Troubleshooting
7.1 Stability Issues
- Wobbling: Ensure all assembly hardware (screws, cam locks) is fully tightened. Verify the unit is on a level surface.
- Tipping Hazard: Confirm the anti-tipping hardware is correctly installed and securely anchored to a wall stud. Never place heavy items on top shelves without proper wall anchoring.
7.2 LED Lights Not Working
- No Power: Check if the power adapter is securely plugged into a working electrical outlet. Ensure all connections between the LED strips and the adapter are firm.
- Switch Issue: If an inline switch or remote is used, ensure it is in the "on" position and batteries (for remote) are functional.
- Damaged Strip: Inspect the LED strips for any visible damage. If damaged, contact customer support for replacement.
7.3 Doors Not Closing Properly
- Alignment: Adjust the hinges to ensure the doors are properly aligned and swing freely.
- Magnetic Catch: Check if the magnetic catches are correctly installed and aligned with the door plates.
- Obstruction: Ensure no items inside the cabinet are blocking the door from closing fully.
8. Specifications
| Feature | Detail |
|---|---|
| Brand | chartustriable |
| Model Number | 4LKFKQU04473 |
| Set Name | 2-Piece Farmhouse Media Console Table Set |
| Color | Oak |
| Material Type | Engineered Wood |
| Style | Farmhouse |
| Combined Dimensions (L x D x H) | 94.5 x 15.7 x 31.5 inches |
| Item Weight | 325 pounds |
| Included Components | One 63" Wide Cabinet, One 31.5" Wide Cabinet |
| TV Size Compatibility | Up to 100 inches (when combined) |
Note: All dimensions are approximate. The product data lists a height of 72 inches, which may refer to a full wall unit configuration not primarily depicted for this TV stand. The 31.5 inch height is consistent with the main product images and size diagrams for the console units.
9. Warranty and Support
For warranty information, please refer to the documentation included with your purchase or contact chartustriable customer support directly. Typically, furniture products come with a limited manufacturer's warranty covering defects in materials and workmanship.
If you require assistance with assembly, missing parts, or troubleshooting, please contact chartustriable customer service. Have your model number (4LKFKQU04473) and purchase details ready when contacting support.
For the most up-to-date contact information, please visit the official chartustriable brand store or website.