
1. Introduction
Product Overview
The Insoma 2-Zone Brass Water Timer is designed to automate your garden watering tasks efficiently. Featuring two independent outlets, it allows for flexible scheduling of different irrigation zones. Its robust construction with brass inlet and outlet, along with enhanced waterproofing, ensures durability for outdoor use. The large LCD screen provides clear visibility of settings and status.
Key Features
- 2 Independent Watering Zones: Program two separate areas with distinct schedules or operate them simultaneously.
- Flexible Programming: Customize start times, watering duration (1-360 minutes), and frequency (every 1-23 hours or 1-15 days).
- Manual Watering Mode: Initiate immediate watering for a customizable duration without affecting preset schedules.
- Rain Delay Function: Pause scheduled watering for 1 to 15 days to conserve water during rainy periods.
- Child Lock: Prevents accidental changes to programming by children or pets.
- Enhanced Durability: Features IPX5 waterproof rating, anti-UV coating, anti-oxidants, and a sealed battery cover for outdoor resilience.
- Large LCD Display: Clear and easy-to-read screen shows all watering information, battery level, and current time.
2. Setup and Installation
Package Contents
- Insoma 2-Zone Brass Water Timer
- User Manual
- Stainless Steel Filter (pre-installed or separate)
Battery Installation
- Locate the battery compartment on the back of the timer.
- Slide the battery cover off.
- Insert two (2) new 1.5V AA alkaline batteries (not included), ensuring correct polarity (+/-).
- Replace the battery cover, ensuring it is securely sealed to maintain waterproofing.
Connecting the Timer to Your Faucet
Ensure the faucet is turned off before installation.
- Inspect the brass inlet connector for the stainless steel filter. Ensure it is clean and properly seated.
- Screw the timer onto your outdoor garden faucet by hand until it is snug. Do not overtighten.
- Turn on the faucet fully. The timer is designed to withstand constant water pressure.

Figure 1: Components of the Insoma Water Timer, highlighting the durable brass inlet and outlet, and the stainless steel filter.
Connecting Hoses
Connect your garden hoses to the brass outlets at the bottom of the timer. You can connect one hose to Zone 1, another to Zone 2, or use only one zone as needed.

Figure 2: The water timer with two hoses connected, demonstrating the independent control over Zone 1 and Zone 2 for different irrigation areas.
3. Operating Instructions
Understanding the Display and Buttons
The large LCD screen displays current time, watering schedule, frequency, duration, and battery status. The buttons allow for navigation and setting adjustments:
- NOW/ZONE: Press to view current time or switch between Zone 1, Zone 2, or Both Zones for programming.
- ESC/OFF: Exits current setting mode or turns off the timer.
- MANUAL: Activates manual watering mode.
- OK: Confirms selections.
- +/-: Adjusts values up or down.
- DELAY: Activates rain delay mode.
Setting the Current Time
Upon first use or after battery replacement, the timer may prompt you to set the current time. Use the +/- buttons to adjust the hour and minute, and press OK to confirm each setting.
Programming Watering Schedules (Cycle Mode)
The timer offers two cycle modes: hourly and daily/multi-day. You can set a schedule for Zone 1, Zone 2, or both simultaneously.

Figure 3: The timer's display illustrating the options for setting watering duration and frequency in both hourly and daily cycle modes.
- Press the NOW/ZONE button repeatedly to select the zone you wish to program (Zone 1, Zone 2, or Both). The selected zone will be indicated on the display.
- Press OK to enter programming mode. The display will show options for 'START TIME', 'HOW LONG', and 'HOW OFTEN'.
- Set Start Time: Use +/- to adjust the desired start time for watering. Press OK to confirm.
- Set Watering Duration ('HOW LONG'): Use +/- to set the watering duration from 1 minute to 360 minutes. Press OK to confirm.
- Set Watering Frequency ('HOW OFTEN'):
- For hourly frequency: Use +/- to select 'Every 1H' to 'Every 23H'.
- For daily/multi-day frequency: Use +/- to select 'Every 1 Day' to 'Every 15 Days'.
- Once all settings are confirmed, the timer will return to the main display and the schedule will be active.
Manual Watering Mode
This mode allows for immediate, temporary watering without altering your programmed schedules.

Figure 4: The timer in manual watering mode, allowing for a customizable duration from 1 to 360 minutes for immediate watering tasks.
- Press the MANUAL button.
- Use the +/- buttons to set the desired watering duration (1 to 360 minutes).
- Press OK to start manual watering.
- To stop manual watering prematurely, press ESC/OFF.
Rain Delay Mode
The rain delay function pauses your programmed watering schedule for a set number of days, preventing overwatering and saving water during rainy weather.
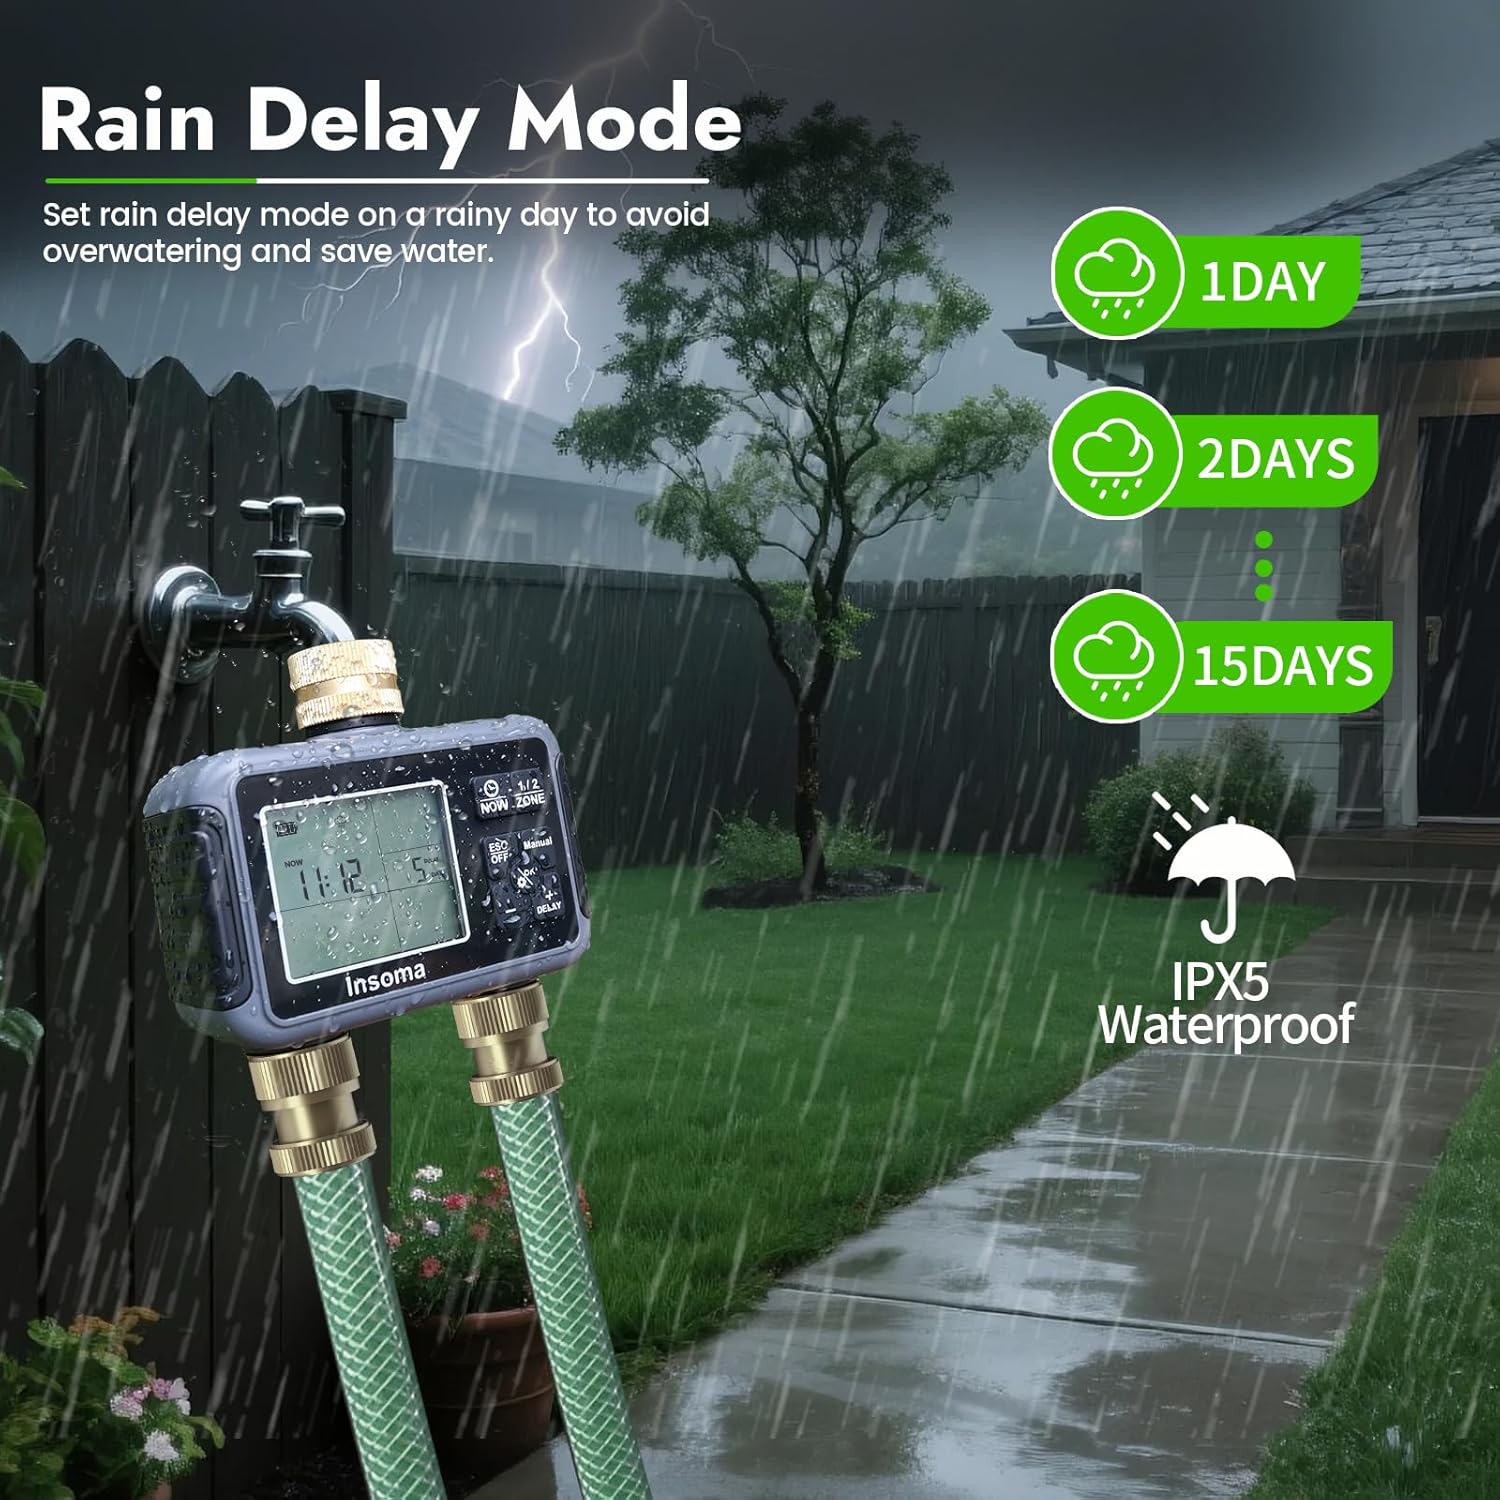
Figure 5: The timer displaying the rain delay options, allowing users to pause watering for 1, 2, or up to 15 days.
- Press the DELAY button.
- Use the +/- buttons to select the desired delay period (1 to 15 days).
- Press OK to activate the rain delay. The display will show the remaining delay days.
- The timer will automatically resume its programmed schedule after the delay period ends. To cancel rain delay, press ESC/OFF.
Child Lock Function
Activate the child lock to prevent unintended changes to your watering programs.

Figure 6: The child lock icon on the timer's display, signifying that the programming is secured against accidental changes.
- To activate: Press and hold the OK button for 3 seconds until a lock icon appears on the display.
- To deactivate: Press and hold the OK button for 3 seconds until the lock icon disappears.
4. Maintenance
Battery Replacement
When the battery indicator on the LCD screen shows low power, replace the batteries promptly to ensure continuous operation. Refer to the 'Battery Installation' section for instructions.
Cleaning the Filter
Periodically check the stainless steel filter at the inlet for debris. A clogged filter can reduce water flow or affect timer performance. Remove the timer from the faucet, carefully remove the filter, rinse it under running water, and reinsert it before reattaching the timer.
Winter Storage
Before the first frost, disconnect the water timer from the faucet and hoses. Remove the batteries. Store the timer indoors in a dry, frost-free location to prevent damage from freezing water.
5. Troubleshooting
Common Issues and Solutions
| Problem | Possible Cause | Solution |
|---|---|---|
| Timer display is blank or not turning on. | Dead or incorrectly installed batteries. | Replace with two new 1.5V AA alkaline batteries, ensuring correct polarity. Ensure battery cover is sealed properly. |
| Water does not flow or flow is weak. | Faucet is off; clogged filter; low battery; incorrect programming. | Ensure faucet is fully open. Clean the stainless steel filter. Check battery level. Verify watering schedule and duration are correctly set. |
| Timer is watering at unexpected times. | Incorrect programming; current time is wrong. | Review and adjust your watering schedules for each zone. Ensure the current time on the timer is set accurately. |
| Water is leaking from connections. | Loose connections; missing or damaged washer. | Ensure all connections (faucet, hoses) are tightened securely. Check that rubber washers are present and undamaged in all connections. |
6. Specifications
| Model Number | ISM-SGW07M-TT |
| Brand | Insoma |
| Color | Black |
| Product Dimensions (D x W x H) | 13.2 cm x 13.2 cm x 6.4 cm (approximately 5.2 x 5.2 x 2.5 inches) |
| Power Source | 2 x 1.5V AA Alkaline Batteries (not included) |
| Watering Duration | 1 minute to 360 minutes |
| Watering Frequency | Every 1-23 hours or Every 1-15 days |
| Rain Delay | 1 to 15 days |
| Water Resistance Rating | IPX5 |
7. Warranty and Support
Insoma products are designed for reliability and performance. For specific warranty information, please refer to the documentation included with your purchase or contact Insoma customer support directly. If you encounter any issues or have questions regarding the operation or maintenance of your water timer, please reach out to our support team for assistance.
Contact information can typically be found on the product packaging or the official Insoma website.


