
1. Introduction
This manual provides detailed instructions for the Aideepen ESP32-S3-CAM N16R8 Development Board. This board integrates an Xtensa 32-bit LX7 dual-core processor, a 3-megapixel OV3660 camera, and supports Wi-Fi and Bluetooth dual-mode communication. It is designed for Internet of Things (IoT), MicroPython, DIY, and Artificial Intelligence (AI) projects.
Key features include:
- High-performance dual-core processor: Integrated Xtensa 32-bit LX7 dual-core processor for powerful computing with low power consumption.
- 3-megapixel OV3660 Camera: Captures clear images and streams video in real-time, suitable for smart surveillance, face recognition, and computer vision.
- Wi-Fi and Bluetooth Dual Mode Support: Supports Wi-Fi 802.11 b/g/n and Bluetooth 5.0 (LE and Mesh) with a low-power coprocessor and up to 20 dBm output.
- Enhanced Features: Upgraded from previous ESP32 S3 versions with additional external antenna interfaces.
- Large Storage Capacity: Integrates 8 MB RAM and 16 MB Flash for complex application development.

Figure 1.1: Overview of the Aideepen ESP32-S3-CAM N16R8 Development Board.

Figure 1.2: Product dimensions. The board measures approximately 67mm (2.66 inches) in length, 28mm (1.1 inches) in width, and 12mm (0.5 inches) in height.
2. Setup
Follow these steps to set up your ESP32-S3-CAM N16R8 Development Board:
- Driver Installation: To use this development board, you must download and install the SH344 driver. Refer to the official Aideepen website or the provided User Guide (PDF) for download links and installation instructions.
- Power Connection: Connect the board to your computer using a USB-C cable. The board features dual USB-C interfaces for convenience.
- Antenna Configuration: The board comes with an onboard antenna (Location ① in Figure 2.3) with a gain of 2dB. If you intend to use an external antenna, manual modification (DIY welding) of the antenna interface is required to activate the external antenna function (Location ② in Figure 2.3).
- Software Environment: Set up your preferred development environment, such as Arduino IDE or PlatformIO. Ensure you have the correct board definitions and libraries installed for ESP32-S3.

Figure 2.1: Front and back view of the development board. Key components include the ESP32-S3 N16R8 module, OV3660 camera, W2812B LED, TX lamp, Power lamp, CH340 chip, Reset key, BOOT button, OTG and TTL USB-C ports, and a TF card holder on the back.
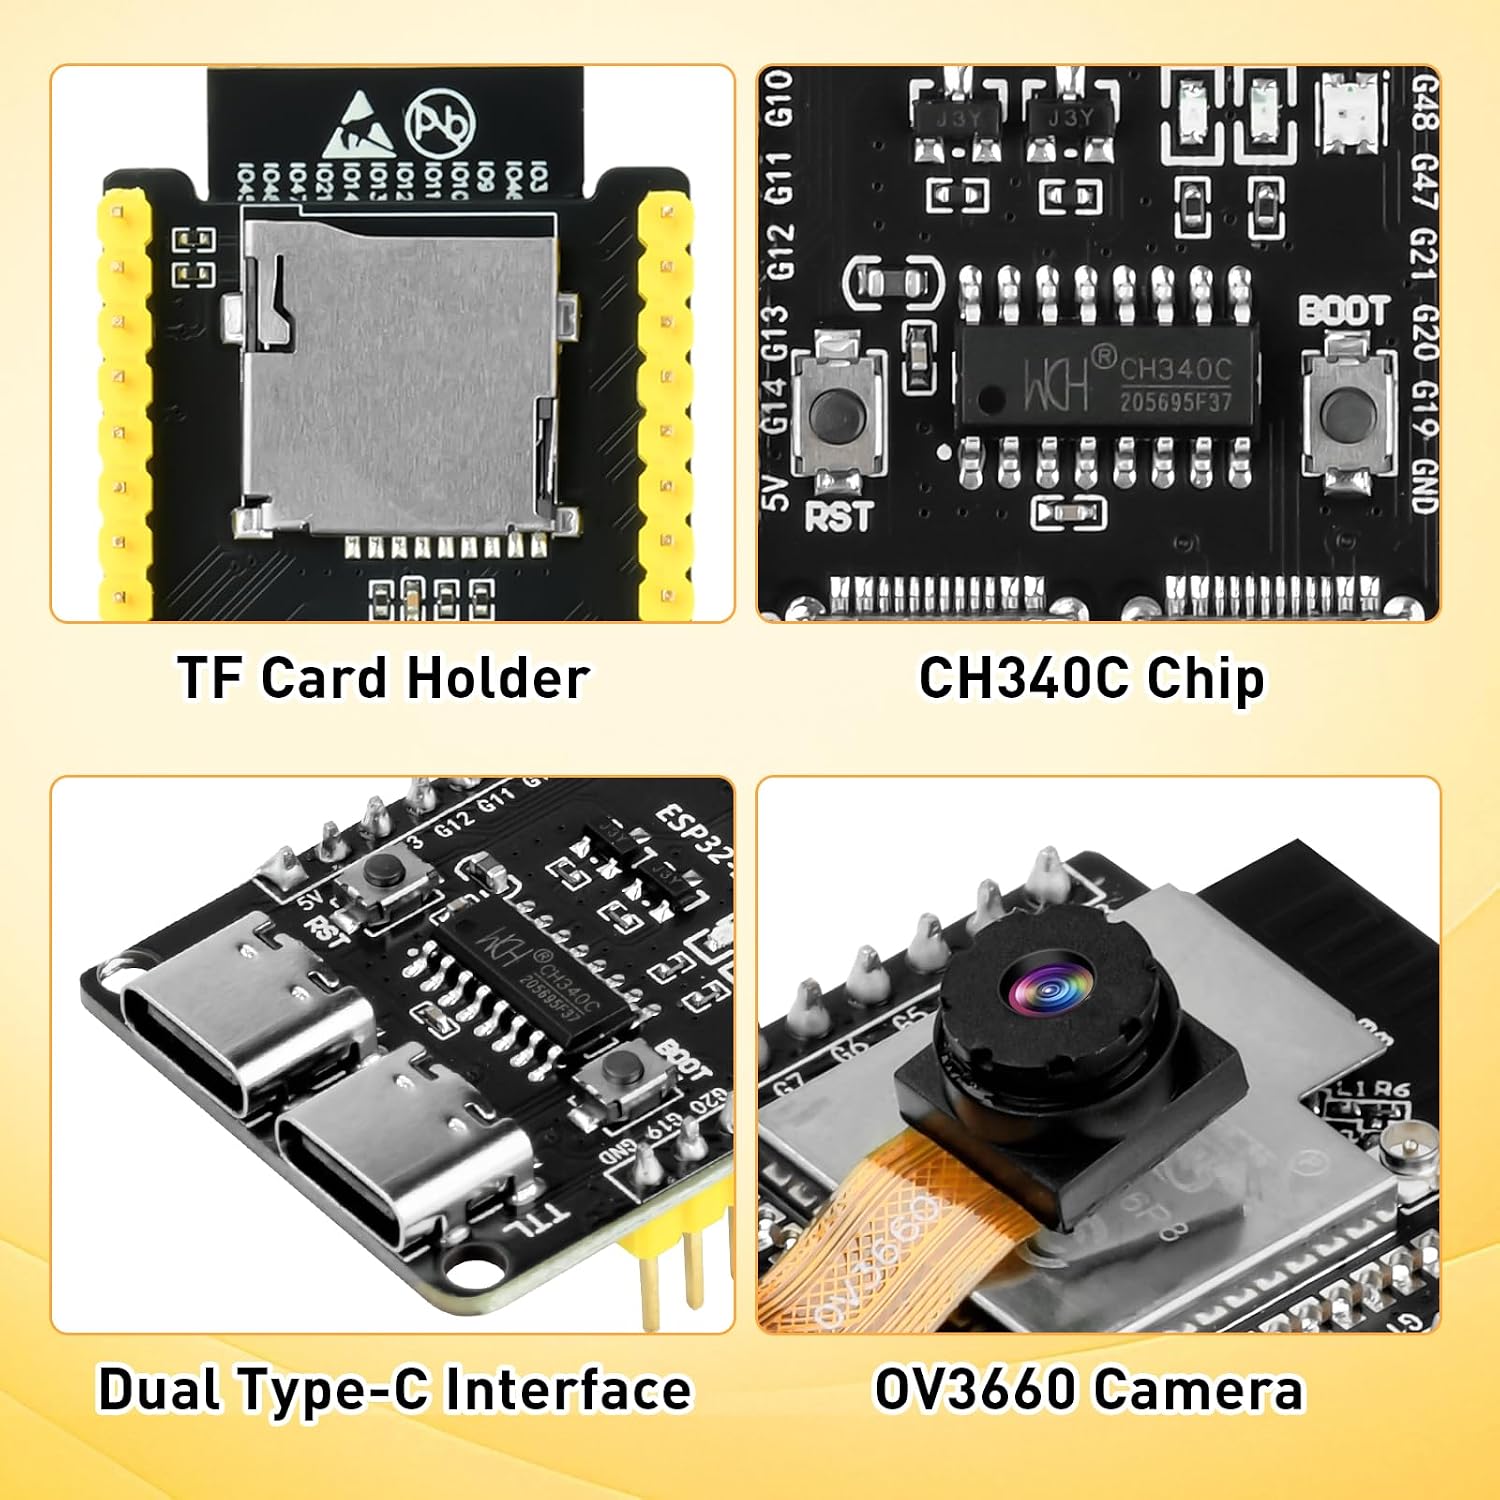
Figure 2.2: Detailed views of the TF Card Holder, CH340C Chip, Dual Type-C Interface, and OV3660 Camera module.

Figure 2.3: Antenna configuration. Location ① indicates the onboard antenna. Location ② is for an external antenna, requiring manual modification for activation.
3. Operating Instructions
The ESP32-S3-CAM N16R8 Development Board is versatile for various projects. Here are general operating guidelines:
- Programming: Use the USB-C port labeled 'TTL' for programming the board. Ensure your development environment is configured for the ESP32-S3 series.
- Camera Operation: The integrated OV3660 camera can be accessed through appropriate libraries in your code. It supports image capture and video streaming. Refer to example code for camera initialization and usage.
- Wi-Fi and Bluetooth: Utilize the ESP-IDF framework or Arduino libraries to implement Wi-Fi and Bluetooth functionalities. The board supports both Wi-Fi 802.11 b/g/n and Bluetooth 5.0 (LE and Mesh) for network connectivity and device communication.
- GPIO Usage: The board provides numerous General Purpose Input/Output (GPIO) pins for connecting external sensors, actuators, and other peripherals. Refer to the pinout diagram for specific pin functions.
- MicroSD Card: Insert a MicroSD card into the TF card holder for data storage, such as captured images or log files. Ensure proper initialization and file system handling in your code.

Figure 3.1: Pinout diagram of the ESP32-S3-CAM N16R8 Development Board, detailing GPIOs, power pins, and special function pins. A legend is provided for pin functions including Power (PWD), Ground (GND), Serial (for Debugging/Programming), Analog-to-Digital Converter (ADCX_CH), Reset, GPIO Input and Output (GPIOX), Touch Sensor Input Channel (TOUCHX), Strapping Pin Functions (STRAP), On-board SD Card Pin (SD), On-board LED Pin (LED), On-board WS2812 (WS2812), Built-in expansion memory chip pin (PSRAM), USB Function Pin (USB), Camera Pin (CAMERA), Jtag for Debugging (JTAG), and PWM Capable Pin (PWM).

Figure 3.2: Examples of the ESP32-S3-CAM N16R8 Development Board integrated into various AIoT projects, demonstrating its capabilities with displays and external circuits.
4. Maintenance
To ensure the longevity and optimal performance of your ESP32-S3-CAM N16R8 Development Board, observe the following maintenance guidelines:
- Handle with Care: Avoid dropping the board or subjecting it to physical shock.
- Static Discharge: Always handle the board in an anti-static environment to prevent damage from electrostatic discharge.
- Power Supply: Use a stable 5V DC power supply. Over-voltage can damage the components.
- Cleaning: If necessary, gently clean the board with a soft, dry brush or compressed air to remove dust. Avoid using liquids or harsh chemicals.
- Storage: Store the board in a dry, cool environment, away from direct sunlight and extreme temperatures.
5. Troubleshooting
If you encounter issues with your ESP32-S3-CAM N16R8 Development Board, consider the following troubleshooting steps:
- Board Not Detected: Ensure the SH344 driver is correctly installed. Try a different USB-C cable or port.
- Upload Errors: Verify that the correct board (ESP32-S3) is selected in your IDE. Check your wiring if using external components. Ensure the board is in programming mode (sometimes requires holding the BOOT button while pressing RST).
- Camera Issues: Confirm that the OV3660 camera module is securely connected to its FPC connector. Check camera initialization code and ensure sufficient power supply.
- Wi-Fi/Bluetooth Connectivity Problems: Double-check network credentials. Ensure the antenna is properly connected and configured (onboard or external). Verify that the Wi-Fi/Bluetooth stack is not being heavily impacted by other processes, such as continuous camera operations, which can affect TCP stability.
- Unexpected Behavior: Review your code for logical errors. Try running a simple example sketch to isolate the problem.
If problems persist, refer to the User Guide (PDF) or contact Aideepen customer support for further assistance.
6. Specifications
| Feature | Detail |
|---|---|
| Brand | Aideepen |
| Model Name | ESP32 S3 CAM |
| Processor | Xtensa 32-bit LX7 dual-core (Espressif) |
| Processor Speed | 2.4 GHz |
| RAM Memory Installed Size | 8 MB (PSRAM) |
| Flash Memory | 16 MB |
| Camera Module | OV3660 (3 Megapixel) |
| Wireless Connectivity | Wi-Fi 802.11 b/g/n, Bluetooth 5.0 (LE, Mesh) |
| Connectivity Technology | I2C, USB-C |
| USB Ports | 2 (Type-C) |
| Compatible Devices | Camera |
| Model Number | Type-C |
7. Warranty and Support
The Aideepen ESP32-S3-CAM N16R8 Development Board comes with a 1-year warranty from the date of purchase. This warranty covers manufacturing defects and ensures product quality.
For technical support, troubleshooting assistance, or warranty claims, please contact Aideepen customer service. You can typically find contact information on the product packaging, the retailer's website, or the official Aideepen brand store.
Additionally, a comprehensive User Guide (PDF) is available for download, which may provide further detailed information and examples.


