
1. Introduction
This manual provides detailed instructions for the installation, operation, and maintenance of your FAMVIVA 2K Solar Security Camera (Model PT808). Please read this manual thoroughly before use to ensure proper functionality and safety. Keep this manual for future reference.
2. Package Contents
Verify that all items are present in your package. If any items are missing or damaged, please contact customer support.
- FAMVIVA 2K Solar Security Camera (PT808)
- Solar Panel
- Mounting Bracket and Screws
- Instruction Manual
- Power Adapter (for initial charging)
- Charging Cable
3. Product Overview
The FAMVIVA PT808 is a 2K wireless outdoor security camera designed for comprehensive home surveillance. It features solar power capabilities, 360° pan-tilt-zoom (PTZ) functionality, color night vision, and IP66 weather resistance.
Key Features:
- 2K 3MP Live Video & Color Night Vision: Provides clear video day and night.
- 360° Full View (355° Horizontal, 90° Vertical PTZ): Offers wide area coverage.
- Solar Powered & Wire-Free: Operates on solar energy with a backup battery.
- IP66 Waterproof: Designed to withstand various weather conditions.
- PIR Motion Detection & 2-Way Talk: Detects human motion and allows two-way audio communication.
- Easy Setup & 2.4Ghz WiFi Connectivity: Simple installation and remote access via the Cloudedge app.
- SD Card/Cloud Storage: Supports local and cloud storage options.
Camera Components:

Image: The FAMVIVA PT808 camera with its solar panel, illustrating its pan (355°) and tilt (90°) rotation for full coverage. A smartphone screen below shows the camera's live view of a house.
4. Setup and Installation
4.1 Initial Charging
Before installation, fully charge the camera using the provided power adapter and charging cable. This ensures the internal battery is ready for operation.
4.2 App Download and Account Creation
Download the "Cloudedge" application from your smartphone's app store (iOS or Android). Follow the in-app instructions to create an account and log in.
4.3 Device Pairing
- Open the Cloudedge app and tap "Add device" or the "+" icon.
- Select "Battery Camera" or search for "FAMVIVA" and choose the appropriate model.
- Follow the on-screen prompts to connect the camera to your 2.4GHz Wi-Fi network. (Note: 5G Wi-Fi is not supported).
- If Bluetooth pairing fails, the app may offer a QR code method. Position the QR code generated by the app in front of the camera lens for scanning.
Video: This video demonstrates the operation and installation process, including app pairing and initial setup steps.
4.4 Mounting the Camera
- Choose a location with good sunlight exposure for the solar panel and a clear view for the camera.
- Use the provided stickers to mark drilling points on the wall.
- Drill pilot holes and securely attach the mounting base using the screws.
- Attach the camera and solar panel to the mounting base. Ensure the solar panel cable is securely connected to the camera.
- Adjust the camera angle for optimal coverage.

Image: The FAMVIVA PT808 camera and solar panel mounted on an exterior wall, illustrating the solar charging connection.
5. Operating Instructions
5.1 Live View and PTZ Control
Access the live feed through the Cloudedge app. Use the on-screen controls to pan (355° horizontal) and tilt (90° vertical) the camera to adjust the viewing angle.

Image: A smartphone displaying the live view from the FAMVIVA PT808 camera, with directional controls for pan and tilt functionality. The camera provides a wide view of a house and its surroundings.
5.2 Night Vision
The camera supports both standard infrared night vision and color night vision. To activate color night vision, the spotlight feature must be manually enabled within the app.
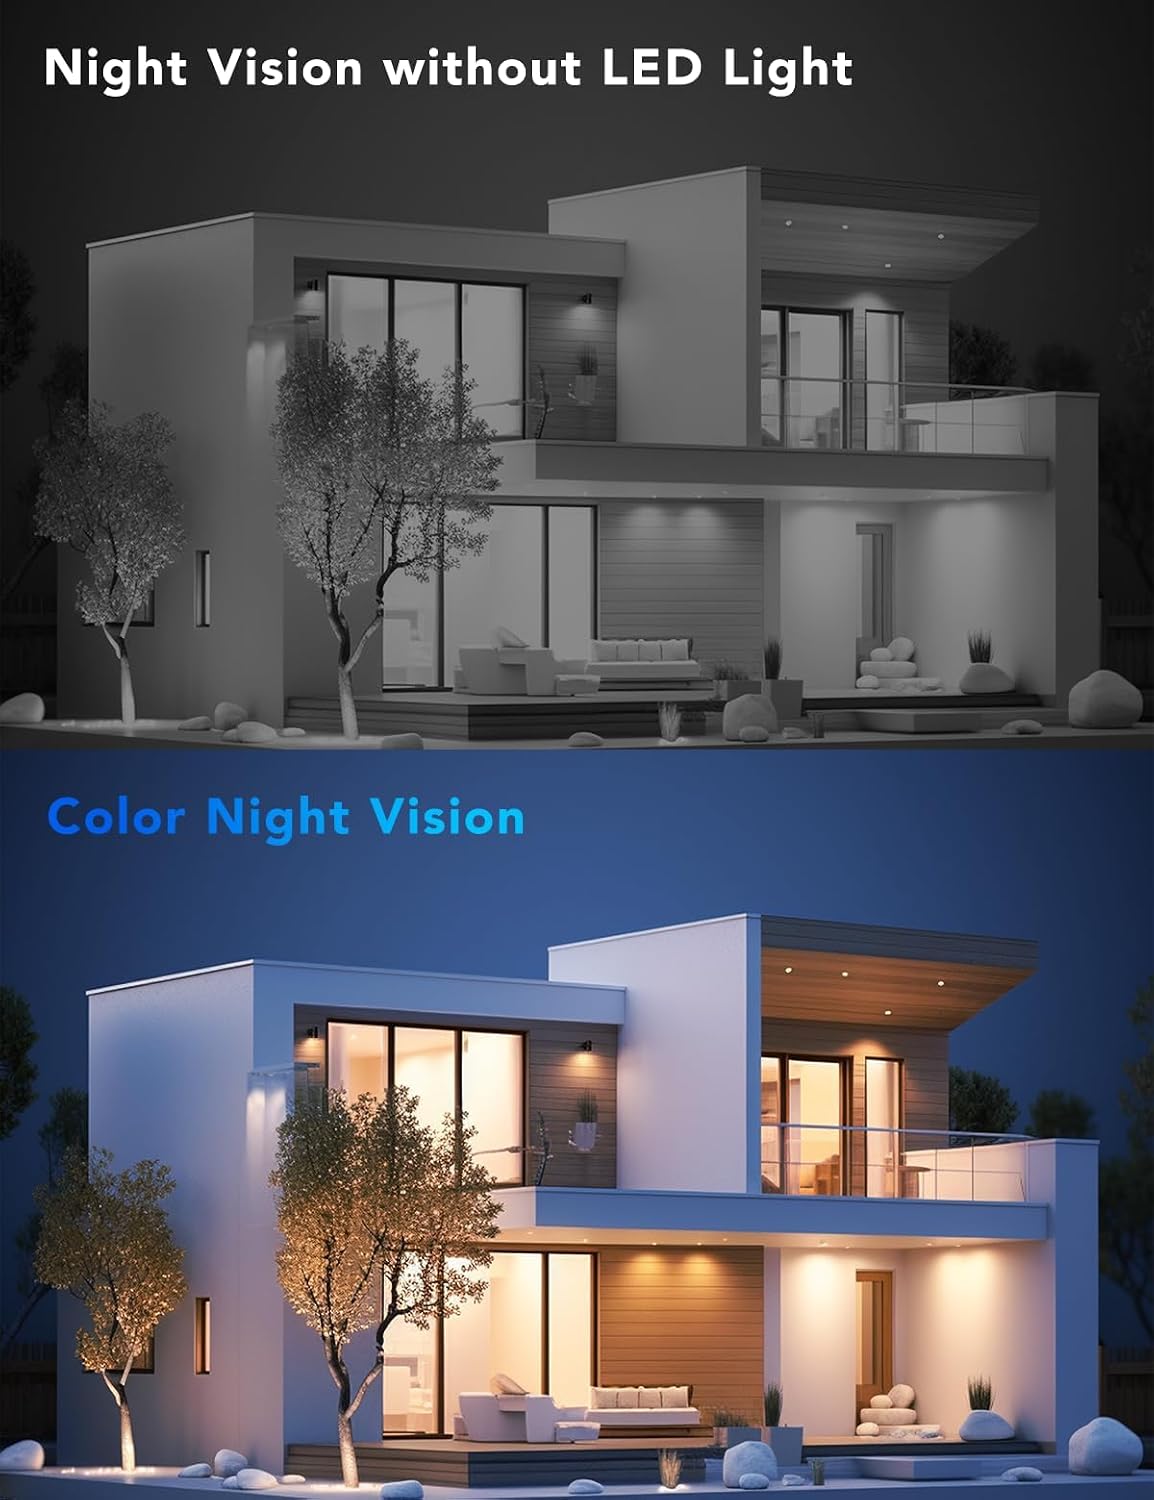
Image: A visual comparison demonstrating the camera's night vision capabilities. The top panel shows standard black and white night vision, while the bottom panel illustrates enhanced color night vision when the camera's spotlight is active.
5.3 Motion Detection and Alerts
The camera uses PIR sensors for precise human detection, minimizing false alarms. When motion is detected, the camera can:
- Send instant alerts to your mobile device.
- Record video and audio.
- Activate an alarm siren.
- Deploy a spotlight to deter intruders.

Image: The FAMVIVA PT808 camera detecting a person in a nighttime scenario. A red outline highlights the detected individual, and the camera's spotlight is activated, illustrating its deterrent features.
5.4 Two-Way Audio
Use the two-way audio feature in the app to communicate with individuals near the camera, such as delivery personnel.

Image: An illustration of the two-way audio function, showing a user interacting via their smartphone with a delivery person at the door, whose image is captured by the FAMVIVA PT808 camera.
5.5 Storage Options
The camera supports two storage methods for recorded events:
- Micro SD Card: Insert a Micro SD card (up to 128GB, not included) into the designated slot on the camera for local storage.
- Cloud Storage: Subscribe to the Cloudedge app's cloud storage service for remote access and backup of recordings. A 30-day free trial may be available for first-time subscribers.
6. Maintenance
6.1 Solar Panel Efficiency
Ensure the solar panel is kept clean and free from obstructions (e.g., leaves, dirt) to maximize charging efficiency. Periodically wipe the panel with a soft, damp cloth.
6.2 Battery Life
The integrated backup battery provides continuous operation. In periods of prolonged low sunlight or heavy usage, the camera may require manual charging via the power adapter.
6.3 Weather Resistance
The camera is IP66 waterproof, designed to withstand rain, snow, and heat. However, extreme weather conditions may temporarily affect performance or battery life.

Image: The FAMVIVA PT808 camera shown enduring various weather conditions (snow, rain, wind), highlighting its IP66 weather-resistant design.
7. Troubleshooting
7.1 Connectivity Issues
- Ensure your Wi-Fi network is 2.4GHz. The camera does not support 5G Wi-Fi.
- Check Wi-Fi signal strength at the camera's installation location.
- Restart your router and the camera.
- If pairing fails, try the QR code method as described in the setup section.
7.2 Motion Detection Accuracy
- Adjust the PIR sensor sensitivity settings in the Cloudedge app to reduce false alarms from pets or swaying vegetation.
- Ensure the camera's field of view is clear of unnecessary moving objects.
7.3 Night Vision Problems
- For color night vision, ensure the spotlight feature is manually activated in the app.
- Check for obstructions blocking the camera's view or the infrared LEDs.
7.4 Battery Not Charging
- Verify the solar panel is clean and receiving direct sunlight for several hours daily.
- Check the connection between the solar panel and the camera.
- If solar charging is insufficient, manually charge the camera using the power adapter.
8. Specifications
| Feature | Detail |
|---|---|
| Brand | FAMVIVA |
| Model Name | PT808 |
| Connectivity Technology | Wireless (2.4Ghz Wi-Fi) |
| Video Capture Resolution | 2K (1920p) |
| Pan/Tilt Range | 355° Horizontal, 90° Vertical |
| Special Features | 2-Way Audio, HD Resolution, Motion Sensor, Color Night Vision |
| Indoor/Outdoor Usage | Outdoor |
| Power Source | Solar Powered, Battery |
| Waterproof Rating | IP66 |
| Compatible Devices | Smartphone (Cloudedge App), Amazon Alexa |
| Storage Options | Micro SD Card (up to 128GB), Cloud Storage |
| Item Dimensions | 14.6 x 9.8 x 6 inches |
9. Warranty and Support
For warranty information or technical support, please refer to the contact details provided on the product packaging or the official FAMVIVA website. Keep your purchase receipt for warranty claims.