
1. Important Safety Instructions
Please read all instructions carefully before using the KEENSTAR Espresso Machine. Retain this manual for future reference.
- Ensure the appliance is connected to a grounded power outlet with the correct voltage.
- Do not immerse the machine, power cord, or plug in water or other liquids.
- Keep the appliance out of reach of children.
- Unplug the machine from the power outlet before cleaning and when not in use.
- Do not operate the machine with a damaged cord or plug, or if the appliance malfunctions or has been damaged in any manner.
- Use only manufacturer-recommended accessories.
- Avoid contact with hot surfaces, such as the steam wand and heated cup holder.
- Always ensure the water tank is filled to the appropriate level before operation.
2. Product Overview and Components
Familiarize yourself with the parts of your KEENSTAR Espresso Machine.
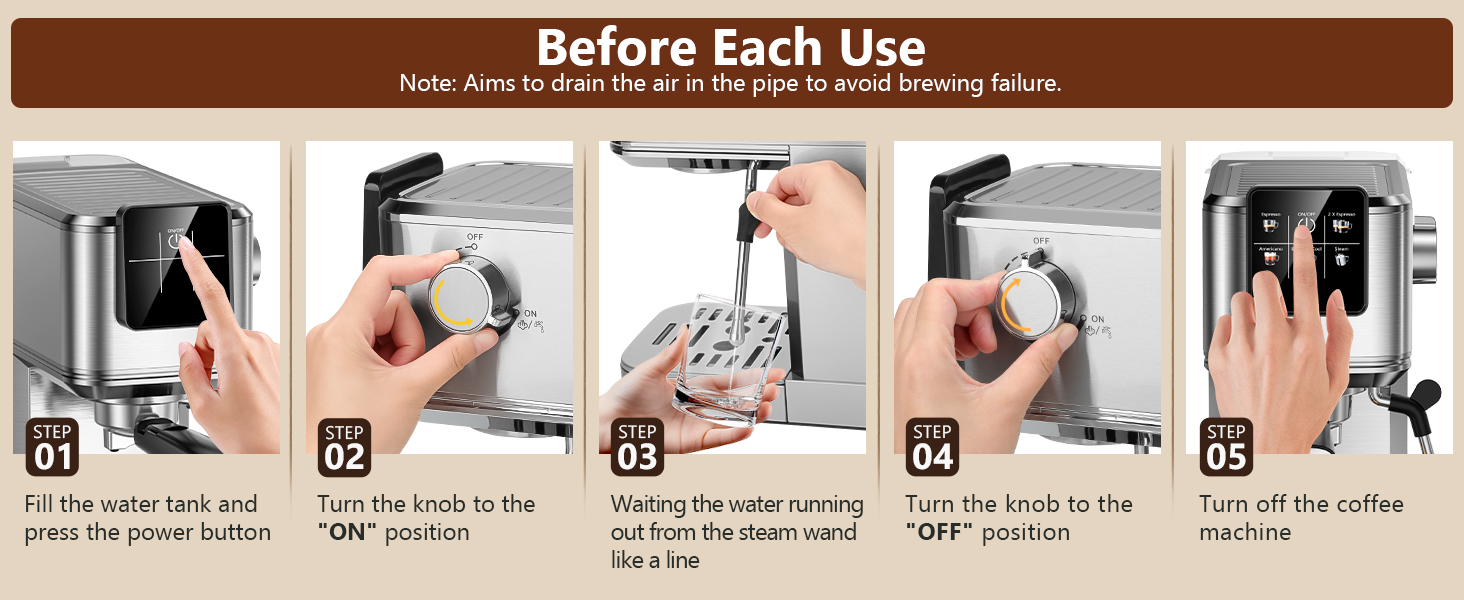
Image: Diagram showing the various components of the KEENSTAR Espresso Machine, including the control panel, tank cover, water tank, steam knob, 1-shot filter, 2-shot filter, portafilter, portafilter handle, steam nozzle, cup plate, removable drip tray, and coffee spoon & tamper.
Package Contents:
- KEENSTAR Espresso Machine (Main Unit)
- 1-Shot Filter
- 2-Shot Filter
- Portafilter
- Portafilter Handle
- Coffee Spoon & Tamper
- Removable Drip Tray
- Instruction Manual
Note: All accessories must be washed by hand and are not dishwasher safe.
3. Setup and First Use
Before Initial Use:
Before brewing your first coffee, it is essential to clean the internal system to remove any manufacturing residues and drain air from the pipes. This prevents brewing failure and ensures optimal taste.

Image: Visual guide for the initial setup process, showing steps to fill the water tank, turn on the machine, run water through the steam wand, and turn off the machine.
- Fill Water Tank: Fill the water tank with fresh, clean water and place it securely on the machine. Press the power button to turn on the machine.
- Drain Air: Turn the steam knob to the "ON" position. Allow water to run out from the steam wand like a continuous line. This drains air from the pipes.
- Turn Off: Once water flows steadily, turn the steam knob to the "OFF" position.
- Power Off: Turn off the coffee machine.
Water Tank Filling Guidelines:

Image: Illustration demonstrating the correct maximum fill level for the water tank (1200ml) and an incorrect overfilled tank.
Always ensure the water level in the tank does not exceed the maximum fill line (1200ml). Overfilling can lead to spills and potential damage.
4. Operating Instructions
Control Panel and Functions:
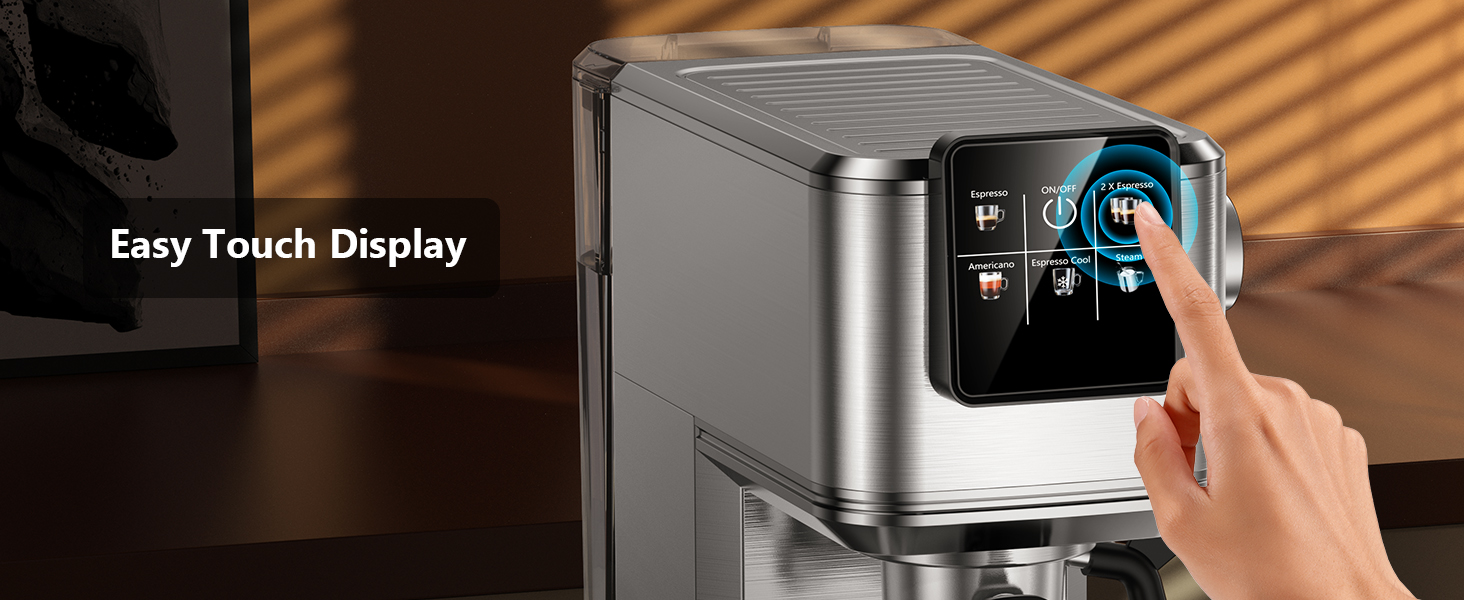
Image: Close-up of the LED touch screen displaying options for Espresso, ON/OFF, 2X Espresso, Americano, Espresso Cool, and Steam.
The machine features a convenient touch screen for selecting various coffee types:
- Espresso: For a single shot of espresso.
- 2X Espresso: For a double shot of espresso.
- Americano: Espresso diluted with hot water.
- Espresso Cool (Cold Brew): For a rapid cold brew espresso.
- Steam: Activates the steam wand for milk frothing.
Brewing Espresso:

Image: Step-by-step visual guide for brewing espresso, including filling the water tank, loading and tamping coffee, attaching the portafilter, preheating, and pressing the espresso button.
- Prepare Water: Fill the water tank with fresh water and press the power button.
- Load Coffee: Load ground coffee into the filter basket (use medium ground coffee, >0.5mm) and tamp it firmly. Insert the filter basket into the portafilter.
- Attach Portafilter: Place the portafilter into the group head and turn it to the right until it is fully locked. Ensure the filter is completely locked before extraction.
- Preheat: Place your cup under the portafilter. The blinking indicator signifies the machine is preheating. It is ready to brew when the indicator is steady.
- Brew: Press the desired Espresso button (single or double) on the touch screen.
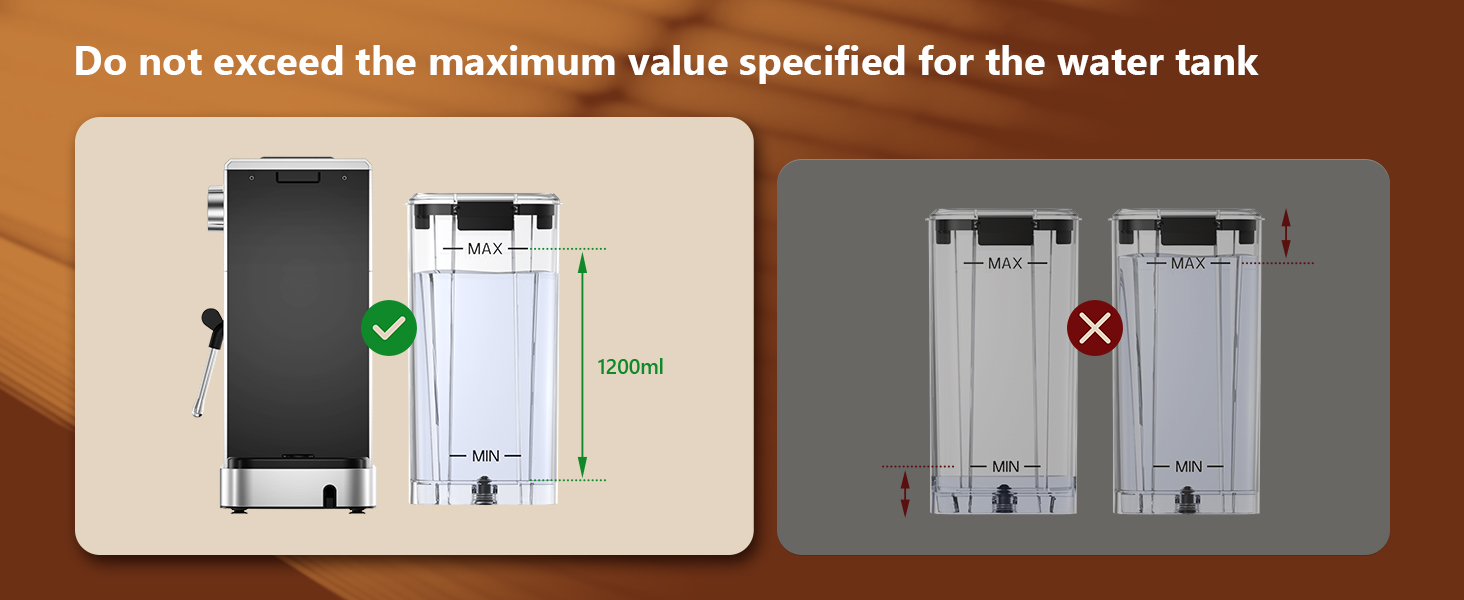
Image: A visual comparison showing medium ground coffee (recommended) versus fine ground coffee (not recommended) for optimal espresso extraction.
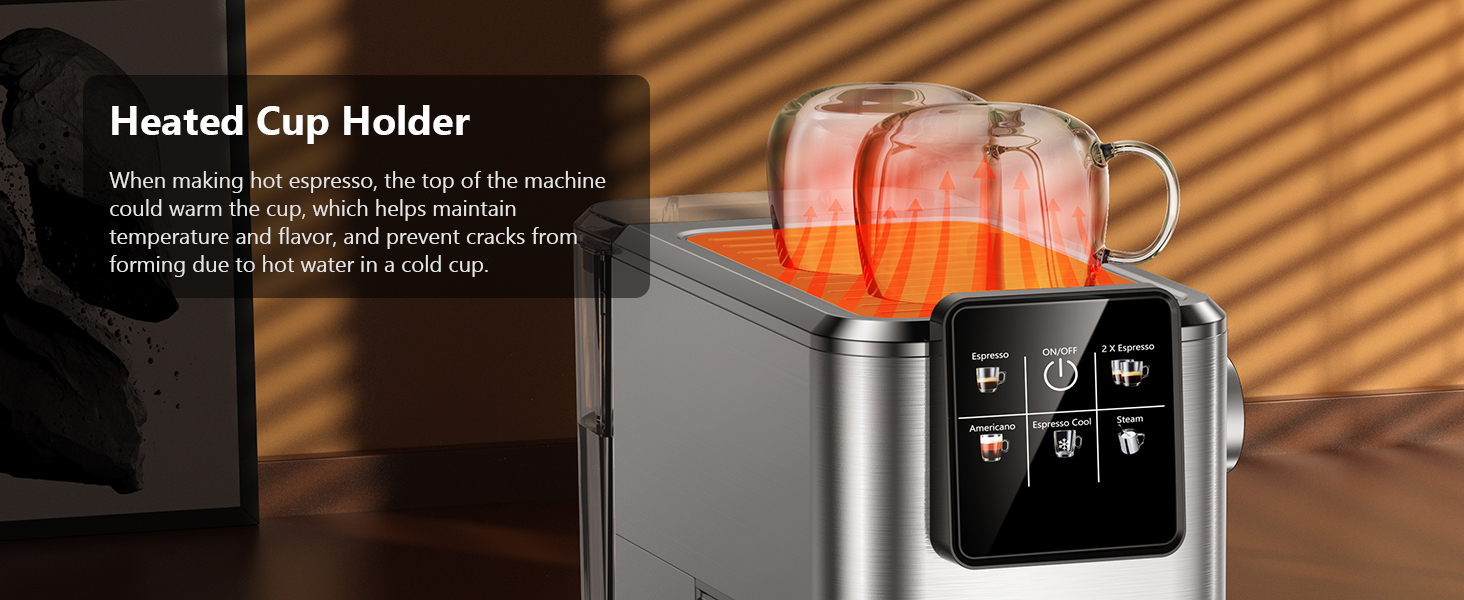
Image: Illustration showing the correct (locked) and incorrect (unlocked) positions of the portafilter before brewing.
Using the Milk Frother:
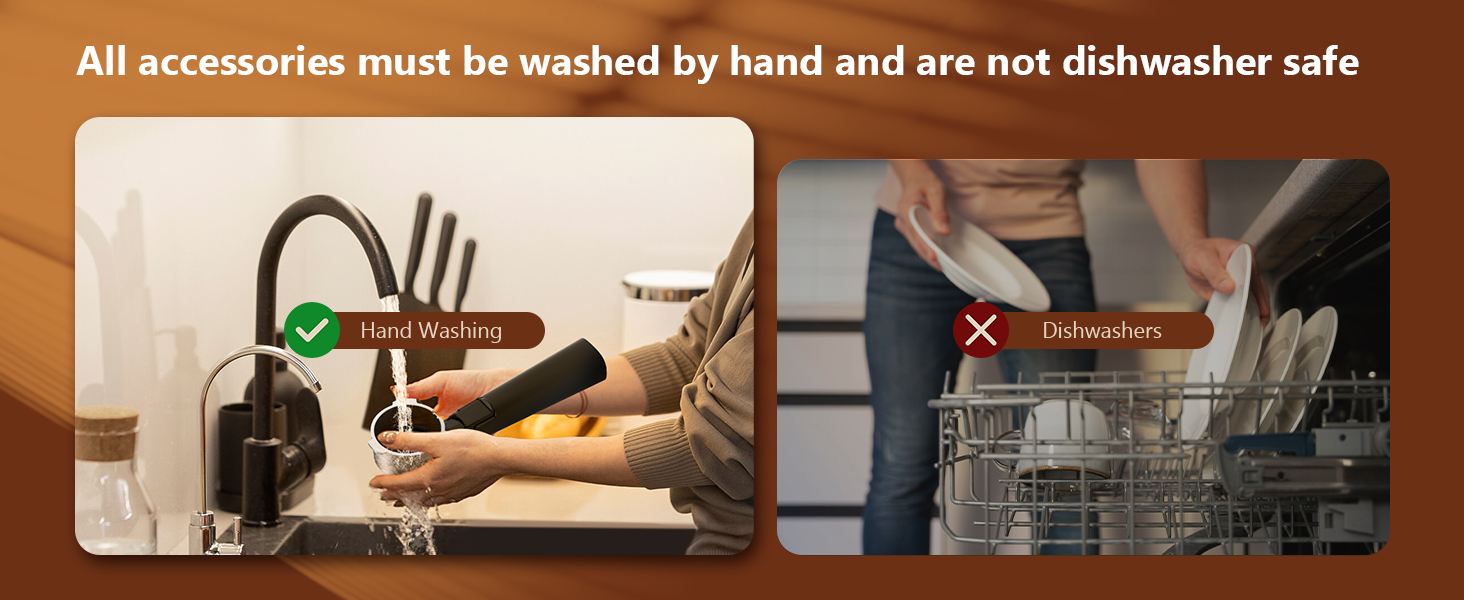
Image: Step-by-step visual guide for steaming milk, including pressing the steam button, preheating, draining residual water, and inserting the steam nozzle into milk.
- Power On: Press the power button.
- Activate Steam: Press the "Steam" button on the touch screen to preheat the steam function. The blinking indicator signifies preheating. It finishes preheating when the indicator is steady.
- Drain Water: After preheating, turn the steam knob to the "ON" position to release any remaining water in the pipe before frothing milk. Turn it off once steam is consistent.
- Froth Milk: Insert the steam nozzle approximately 1 inch into the surface of the milk. Gradually turn the steam knob to the "ON" position until steam begins to emerge. Move the pitcher up and down to create desired foam.
- Clean Wand: After frothing, turn off the steam knob and wipe the steam wand immediately with a damp cloth to prevent milk residue from drying.
Cold Brew Espresso Function:

Image: The KEENSTAR Espresso Machine preparing a cold brew espresso, with a glass of iced coffee and ice cubes visible. A tip states that the water in the tank must be iced water for this function.
The KEENSTAR Espresso Machine offers a rapid cold brew function. To use this feature:
- Ensure the water tank is filled with iced water. This is crucial for the cold brew process.
- Prepare your ground coffee in the portafilter as you would for hot espresso.
- Place a cup with ice under the portafilter.
- Select the "Espresso Cool" option on the touch screen. The machine will then brew a smooth, fresh cold brew in approximately 10 minutes.
5. Cleaning and Maintenance
Daily Cleaning:
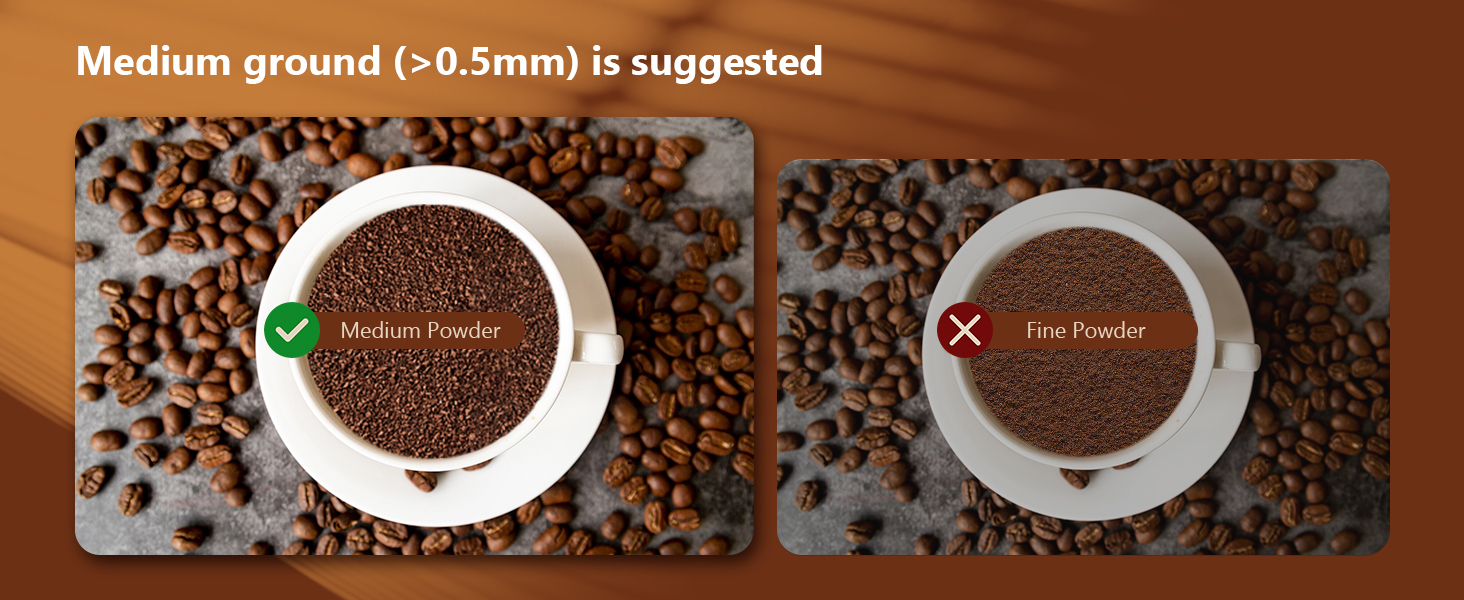
Image: A comparison showing the correct method of hand washing espresso machine accessories and an incorrect method of placing them in a dishwasher.
- Portafilter and Filter Baskets: After each use, remove the portafilter and discard the used coffee grounds. Rinse the portafilter and filter basket under warm water. Use a brush to remove any stubborn coffee residues.
- Drip Tray: The removable drip tray should be emptied and rinsed daily to prevent overflow and bacterial growth.
- Water Tank: Empty and rinse the water tank daily. Refill with fresh water for each use.
- Steam Wand: Immediately after frothing milk, wipe the steam wand with a damp cloth to remove any milk residue. Purge a small amount of steam to clear the internal nozzle.
- Machine Exterior: Wipe the exterior of the machine with a soft, damp cloth. Do not use abrasive cleaners or scouring pads.
Descaling:
Over time, mineral deposits (limescale) can build up inside the machine, affecting performance and taste. Descale your machine regularly, depending on your water hardness and usage frequency (e.g., every 2-3 months).
- Prepare Descaling Solution: Mix a descaling solution (e.g., citric acid or a commercial descaler) with water according to the product instructions.
- Fill Tank: Pour the descaling solution into the water tank.
- Run Solution: Place a large container under the group head and steam wand. Run approximately half of the solution through the group head (as if brewing espresso without coffee) and the other half through the steam wand.
- Soak: Turn off the machine and let it sit for 15-30 minutes to allow the solution to work.
- Rinse: Empty the water tank, rinse it thoroughly, and refill with fresh water. Run several full tanks of fresh water through both the group head and steam wand to rinse out any descaling solution.
6. Troubleshooting Guide
Before contacting customer service, please refer to the following common issues and solutions:
| Problem | Possible Cause | Solution |
|---|---|---|
| No coffee dispenses / Slow flow | Water tank empty; Air in system; Coffee too fine/over-tamped; Machine clogged with scale. | Fill water tank; Perform initial setup (drain air); Use medium ground coffee and proper tamping; Descale the machine. |
| Water leaks from machine | Portafilter not properly locked; Water tank not seated correctly; Drip tray full. | Ensure portafilter is fully locked; Re-seat water tank; Empty and clean drip tray. |
| No steam from wand | Steam function not preheated; Steam wand clogged. | Press 'Steam' button and wait for preheating; Clean steam wand thoroughly, purge steam. |
| Coffee is not hot enough | Cups not preheated; Machine not fully preheated. | Use the heated cup holder or rinse cups with hot water; Wait for the machine's indicator to be steady before brewing. |
| Machine does not turn on | Not plugged in; Power outage. | Check power cord connection; Verify power outlet is functional. |
7. Product Specifications
Detailed technical specifications for the KEENSTAR Espresso Machine Model JH-C5210.
| Feature | Detail |
|---|---|
| Brand | KEENSTAR |
| Model Name | JH-C5210 |
| Model Number | JH-C5210I |
| Color | Silver |
| Material | Stainless Steel |
| Capacity | 1.1 liters (Water Tank) |
| Product Dimensions (D x W x H) | 11.8"D x 5.5"W x 12.6"H (30cm D x 14cm W x 32cm H) |
| Item Weight | 4.6 pounds |
| Output Pressure | 20 Bar |
| Power | 1350W (for extraction), up to 1500W (for rapid heating) |
| Coffee Input Type | Ground Coffee |
| Special Features | Milk Frother, Touch Screen, Rapid Cold Brew, Pre-Soak Technology, Heated Cup Holder |

Image: The KEENSTAR Espresso Machine showcasing its compact design with dimensions: 11.8 inches (30cm) deep, 5.5 inches (14cm) wide, and 12.6 inches (32cm) high.
8. Warranty and Support
For warranty information, product registration, or technical support, please refer to the official KEENSTAR website or contact their customer service directly. Details are typically provided on the product packaging or the manufacturer's website.