
1. Introduction
This manual provides detailed instructions for the assembly, operation, and maintenance of your JAMFLY 12x20 ft Heavy Duty Carport. Please read all instructions carefully before beginning assembly and retain this manual for future reference. This carport is designed to provide versatile shelter for vehicles such as cars, trucks, boats, and motorcycles, and can also serve as an outdoor storage shed or temporary event tent.
2. Safety Information
Important Safety Precautions:
- Always secure the carport to the ground using the provided sandbags and ropes, especially in windy conditions.
- Do not use this carport in high winds exceeding 35 mph. Disassemble or reinforce the structure if severe weather is anticipated.
- Keep the carport at least 3 feet away from any heat sources, open flames, or combustible materials to prevent fire hazards.
- Ensure the assembly area is clear of obstructions and level.
- Do not hang heavy objects from the frame.
- Regularly inspect the frame and tarp for any damage or wear. Replace damaged parts immediately.
- Assembly requires at least 2-3 adults. Do not attempt to assemble alone.
3. Package Contents
Before assembly, verify that all components are present and undamaged. Refer to the parts list provided in your packaging for specific quantities.
- Rust-resistant powder-coated steel frame components
- 180g PE all-season tarp (roof cover)
- Removable sidewalls with roll-up windows
- Removable doors
- 8 sturdy legs
- 8 windproof ropes
- 4 sandbags
- 4 nylon ropes
- Elastic balls/straps for securing tarp
- Thickened based plates for legs

Figure 3.1: Key components of the carport's metal frame and securing accessories. This image highlights the sandbags, thickened base plates for stability, elastic ball straps for securing the tarp, the heavy-duty metal frame, and steel welding joints.

Figure 3.2: Detailed view of the thickened base plate for enhanced ground stability and the tight bouncy balls used to firmly secure the canopy to the frame.
4. Setup and Assembly Instructions
No special tools are required for assembly. It is recommended that 2-3 adults work together for efficient and safe setup.
- Build the Top Frame: Begin by assembling the horizontal and angled pipes to form the roof structure. Ensure all connections are secure.
- Assemble the Eight Leg Steel Pipes: Attach the vertical leg pipes to the top frame. Ensure the thickened base plates are oriented correctly at the bottom of each leg.
- Cover the Frame with Tarp: Carefully drape the 180g PE all-season tarp over the assembled frame. Align the tarp evenly and secure it to the frame using the elastic balls/straps.
- Install Side Fabric and Secure: Attach the removable sidewalls and doors to the frame. These can be rolled up or removed as needed.
- Secure Tent with Windproof Ropes, Ground Nails & Sandbags: For maximum stability, especially in varying weather conditions, use the provided windproof ropes, ground nails (if applicable, not explicitly listed but implied by 'ground nails'), and fill the sandbags to anchor the carport firmly to the ground.

Figure 4.1: Visual representation of the five assembly steps: 1. Build top frame, 2. Assemble legs, 3. Cover with tarp, 4. Install side fabric, 5. Secure with ropes and sandbags.
Video 4.1: An official video demonstrating the assembly process of the 12x20 Heavy Duty Carport. This video provides a visual guide to complement the written instructions, showing key steps and techniques for setting up the carport.
5. Operating Instructions
The JAMFLY carport is designed for flexible use and all-weather protection.
5.1. All-Weather Protection
The 180g PE all-season tarp provides protection against sun, rain, snow, and dust. The double slope sloping roof design helps make rain and snowfall quickly, preventing accumulation. The tarp features a waterproof heat insulation coating on both sides.

Figure 5.1: The carport in use, demonstrating its all-weather capabilities including UV protection, rainproofing, heat insulation, and dustproofing for a vehicle.

Figure 5.2: Illustration of the carport's roof design, highlighting its effectiveness in shedding rain and snow quickly due to the double slope and thickened PE fabric with waterproof coating.
5.2. Customizable Enclosure (Removable Sidewalls & Roll-up Windows)
The carport features removable sidewalls and doors, along with roll-up mesh windows, allowing you to adjust the enclosure based on your needs for ventilation or protection.
- With Sidewalls: Keep the sidewalls and doors installed for full protection against elements, creating a more enclosed garage-like space.
- Without Sidewalls: Remove the sidewalls for open-air activities, increased ventilation, or easier access, especially suitable for summer use.
- Roll-up Windows: The mesh windows on the sidewalls can be rolled up to allow airflow while still providing some barrier.
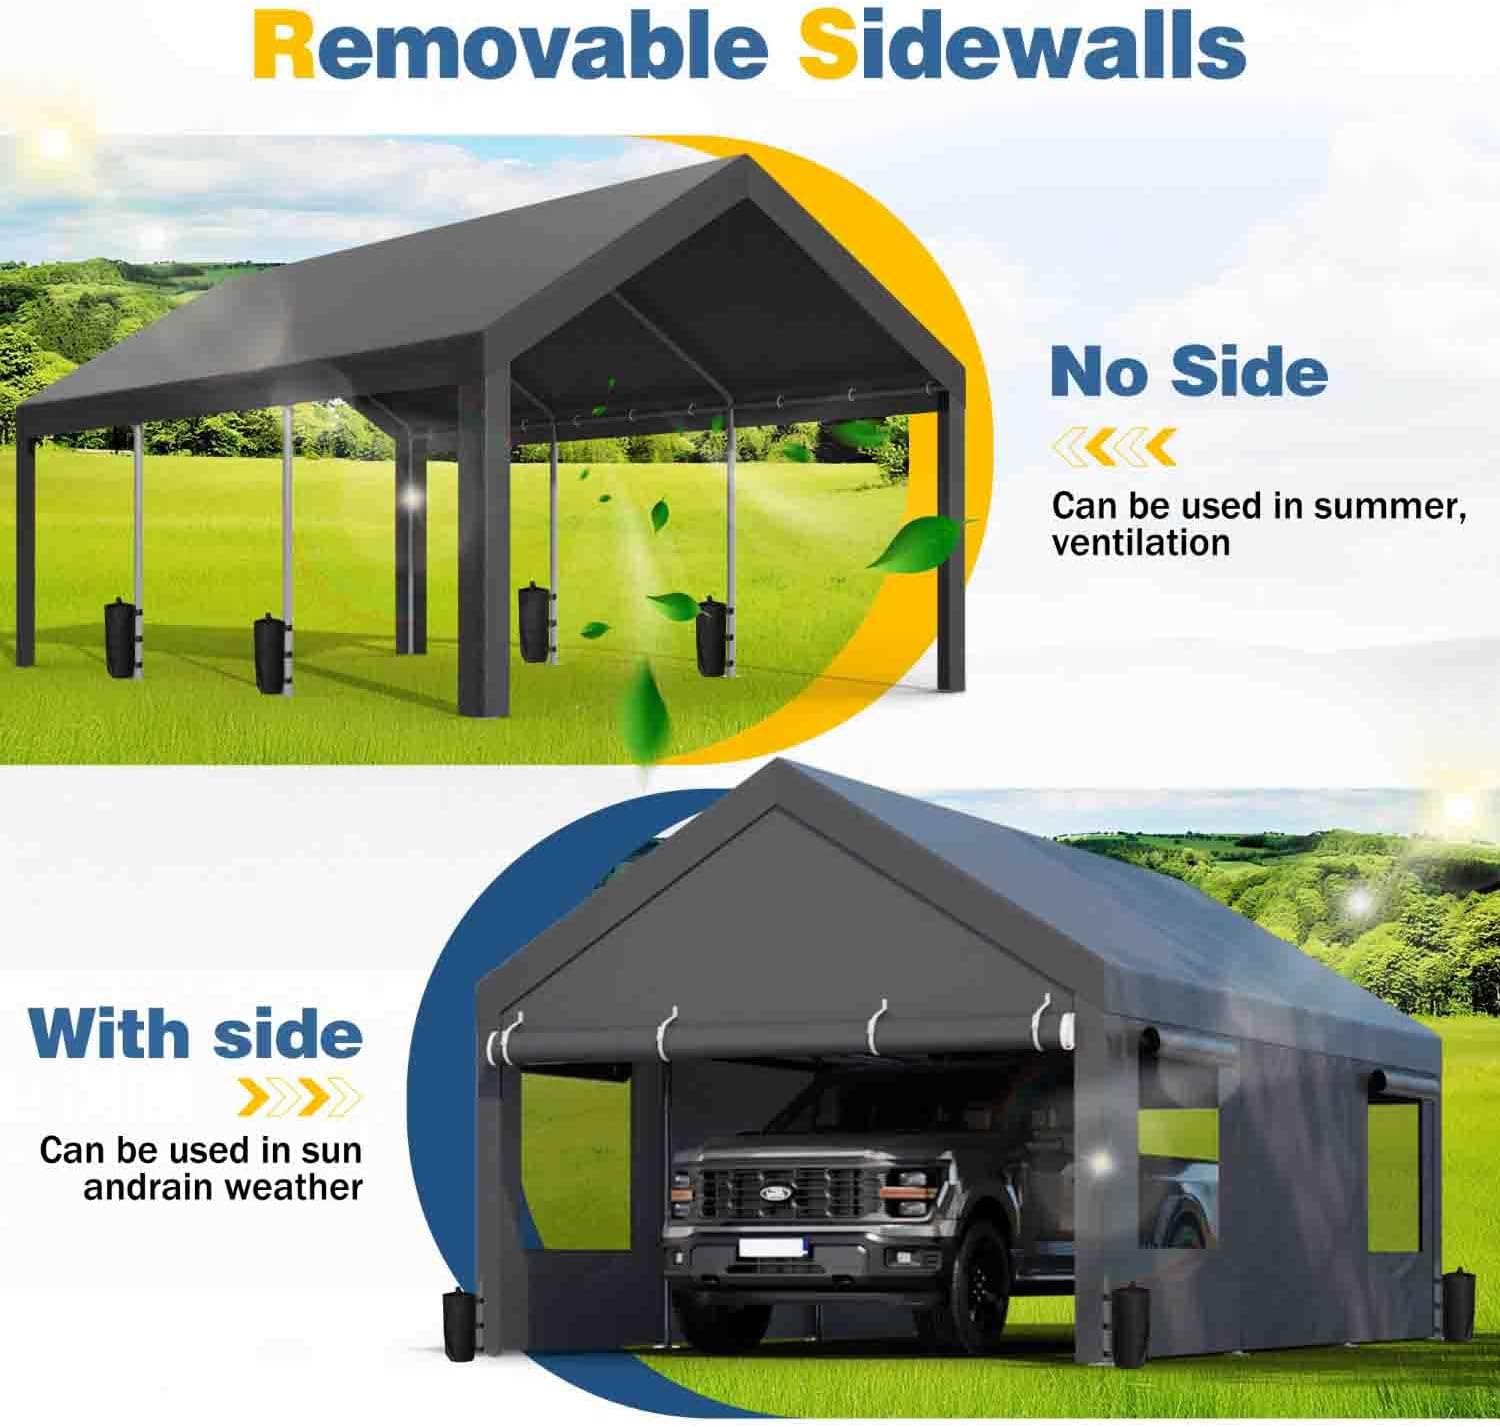
Figure 5.3: This image illustrates the flexibility of the carport with removable sidewalls. The top shows the carport without sides for ventilation, while the bottom shows it with sides for sun and rain protection.

Figure 5.4: Detail of the mesh windows, designed for better ventilation. It shows the outer 180g thickened PE tarp layer and the inner white gauze layer.

Figure 5.5: This image demonstrates the functionality of the double-layer ventilation mesh windows, illustrating how to roll up the curtain for airflow and pull it down for enclosure.
6. Maintenance
Proper maintenance will extend the life of your carport.
- Regular Inspection: Periodically check all frame connections, ropes, and anchors to ensure they are tight and secure.
- Clean Tarp: Clean the tarp with mild soap and water. Avoid harsh chemicals or abrasive cleaners that could damage the PE material. Rinse thoroughly and allow to dry completely before storage.
- Snow Removal: In areas with heavy snowfall, regularly remove accumulated snow from the roof to prevent excessive weight and potential damage to the frame.
- Storage: If disassembling for storage, ensure all components are clean and dry. Store in a cool, dry place away from direct sunlight.
7. Troubleshooting
Here are some common issues and their solutions:
- Carport feels unstable: Ensure all frame connections are fully engaged and tightened. Verify that all sandbags are filled and properly placed, and windproof ropes are securely anchored to the ground.
- Water pooling on roof: Check that the tarp is stretched taut and evenly distributed over the frame. Ensure the frame is assembled correctly to maintain the roof's slope.
- Tarp flapping in wind: Confirm that all elastic balls/straps are securely fastened to the frame. Reinforce with additional ropes or anchors if necessary, especially in gusty conditions.
- Difficulty with assembly: Review the assembly instructions and diagrams carefully. Ensure you have at least 2-3 adults assisting. Do not force connections; check for proper alignment.
8. Specifications
| Feature | Detail |
|---|---|
| Brand | JAMFLY |
| Model Number | JF-SDCP |
| Product Dimensions (L x W x H) | 240"L x 144"W x 117"H (20 ft L x 12 ft W x 9.75 ft H) |
| Material | Alloy Steel (Frame), 180g PE (Tarp) |
| Color | Grey |
| Water Resistance Level | Water Resistant |
| Ultraviolet Light Protection | Yes |
| Frame Type | Legged with Ropes |
| Special Features | Roll-up windows, Removable sidewalls & doors, Sandbags included |

Figure 8.1: Detailed product dimensions of the carport, indicating its 12 ft width, 20 ft length, and 9.8 ft peak height, with a side height of 6.2 ft.
9. Warranty and Support
For warranty information, replacement parts, or technical support, please contact JAMFLY customer service through the retailer where the product was purchased or visit the official JAMFLY website. Please have your model number (JF-SDCP) and purchase date available when contacting support.