
1. Introduction
Thank you for choosing the Canoly CM1861E 2-in-1 Espresso Machine and Cold Brew Maker. This appliance is designed to provide both rich espresso and refreshing cold brew coffee, along with milk frothing capabilities, in a compact design. Please read this manual thoroughly before operation to ensure proper use, maintenance, and safety.

Image 1.1: The Canoly CM1861E machine, demonstrating its ability to prepare both hot espresso and cold brew coffee simultaneously. A cup of espresso is shown under the portafilter, and a glass of iced coffee is to the left.

Image 1.2: An illustration of the internal workings of the Canoly CM1861E, highlighting the independent systems for hot espresso (red lines) and cold brew (blue lines) to ensure optimal temperature and flavor for each beverage.
2. Important Safety Instructions
When using electrical appliances, basic safety precautions should always be followed to reduce the risk of fire, electric shock, and/or injury to persons, including the following:
- Read all instructions.
- Do not touch hot surfaces. Use handles or knobs.
- To protect against fire, electric shock, and injury to persons, do not immerse cord, plugs, or appliance in water or other liquid.
- Close supervision is necessary when any appliance is used by or near children.
- Unplug from outlet when not in use and before cleaning. Allow to cool before putting on or taking off parts, and before cleaning the appliance.
- Do not operate any appliance with a damaged cord or plug or after the appliance malfunctions, or has been damaged in any manner. Return appliance to the nearest authorized service facility for examination, repair, or adjustment.
- The use of accessory attachments not recommended by the appliance manufacturer may result in fire, electric shock, or injury to persons.
- Do not use outdoors.
- Do not let cord hang over edge of table or counter, or touch hot surfaces.
- Do not place on or near a hot gas or electric burner, or in a heated oven.
- Always attach plug to appliance first, then plug cord into the wall outlet. To disconnect, turn any control to “off,” then remove plug from wall outlet.
- Do not use appliance for other than intended use.
3. Components
The Canoly CM1861E includes the following components:
- Espresso Machine Unit
- Filter Holder (Portafilter)
- Single Shot Filter Basket
- Tamper
- Instruction Manual (this document)
4. Setup
Before first use, ensure all packaging materials are removed and the machine is placed on a stable, level surface.
- Clean Components: Wash the water tank, portafilter, and filter basket with warm, soapy water. Rinse thoroughly and dry.
- Fill Water Tank: Remove the water tank from the back of the machine. Fill it with fresh, cold water up to the MAX line. Replace the tank securely.
- Initial Rinse Cycle: Plug the machine into a grounded electrical outlet. Place a large cup under the espresso spout. Turn on the machine using the power button on the touchscreen. Allow the machine to preheat. Once ready, press the Espresso button to run a cycle without coffee. Repeat this for the Cold Brew function as well. This primes the pump and cleans internal components.
5. Operating Instructions
The Canoly CM1861E features a touchscreen interface for easy operation.

Image 5.1: A close-up of the machine's touchscreen control panel, displaying intuitive icons for Cold Brew, Espresso (single/double shot), Temperature adjustment (194/198/201°F), and Steam for milk frothing.
5.1. Making Espresso
- Preheat: Ensure the machine is powered on and has completed its preheating cycle (indicated by the display). The 1350W heating system allows for optimal temperature in approximately 30 seconds.
- Grind Coffee: Use freshly ground espresso beans. A fine grind is recommended.
- Fill Portafilter: Place the single shot filter basket into the portafilter. Fill the basket with ground coffee.
- Tamp: Use the provided tamper to press the coffee grounds firmly and evenly. Ensure the surface is level.
- Attach Portafilter: Insert the portafilter into the group head and twist firmly to lock it into place.
- Select Temperature: Use the 'TEMP' button on the touchscreen to select your desired brewing temperature (194°F for dark roast, 198°F for medium roast, 201°F for light roast). This NTC Precise Temperature Control ensures optimal water temperature for balanced flavors.
- Brew Espresso: Place an espresso cup under the portafilter spout. Press the 'Espresso' button on the touchscreen. The machine will begin extracting espresso using its 20-bar pump, optimized for 9-bar extraction pressure for rich crema.
- Stop Brewing: The machine will automatically stop after a preset volume. You can also manually stop it by pressing the 'Espresso' button again.

Image 5.2: This diagram illustrates the effectiveness of the 20-bar pump in achieving complete and even saturation of coffee grounds, leading to a rich, golden crema, compared to less effective extraction methods.

Image 5.3: The machine's adjustable temperature feature is shown, allowing users to select optimal brewing temperatures (194°F, 198°F, 201°F) for light, medium, and dark roasts, respectively, to enhance flavor profiles.

Image 5.4: A detailed view of the NTC Precise Temperature Control system within the machine, which ensures optimal and stable water temperature for consistent and balanced coffee flavors.
5.2. Making Cold Brew
The Canoly CM1861E features a dedicated cold brew pipeline for quick preparation.
- Prepare Coffee: Use coarse ground coffee for cold brew.
- Fill Filter Basket: Place the filter basket (without tamping) into the portafilter and fill with coarse ground coffee.
- Attach Portafilter: Insert the portafilter into the group head and lock it into place.
- Brew Cold Brew: Place a glass with ice under the portafilter spout. Press the 'Cold Brew' button on the touchscreen. The machine will dispense refreshing, low-acid cold brew in approximately 3 minutes.

Image 5.5: The machine is shown preparing cold brew coffee, with accompanying icons emphasizing its benefits: low acidity, smooth taste, fresh brewing, and the elimination of overnight steeping.
5.3. Using the Steam Wand (Milk Frother)
The powerful steam wand creates barista-quality microfoam for milk-based beverages.
- Prepare Milk: Fill a stainless steel frothing pitcher with cold milk (dairy or non-dairy) to just below the spout.
- Activate Steam: Press the 'Steam' button on the touchscreen. The machine will begin heating to steam temperature.
- Purge Wand: Once the steam light is steady, position the steam wand over the drip tray and briefly open the steam knob to release any condensed water. Close the knob.
- Froth Milk: Immerse the tip of the steam wand just below the surface of the milk. Open the steam knob. Angle the pitcher to create a swirling motion. As the milk expands, lower the pitcher slightly to keep the tip just below the surface. Continue until desired volume and temperature are reached.
- Clean Wand: Close the steam knob. Immediately wipe the steam wand with a damp cloth to remove any milk residue. Briefly open the steam knob again to clear any milk from inside the wand.
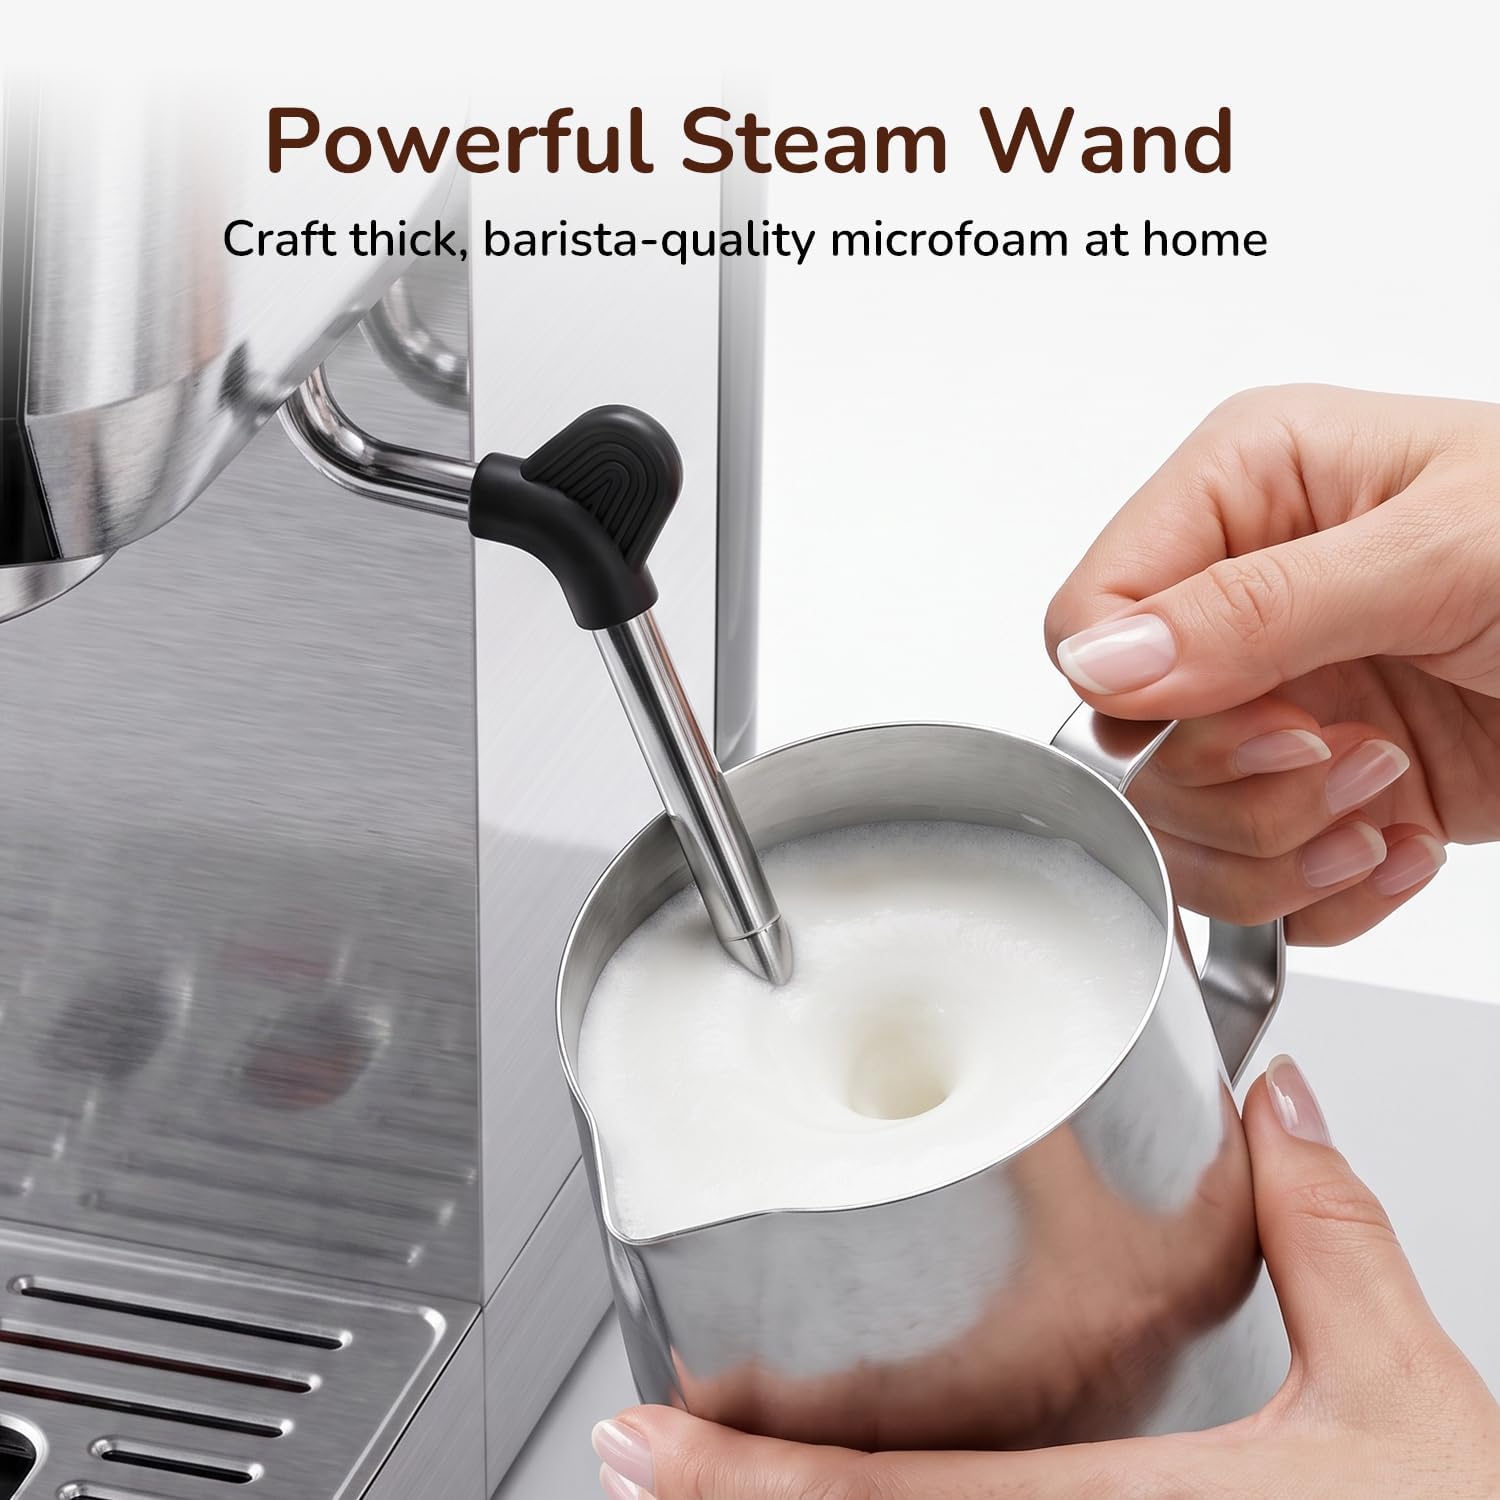
Image 5.6: A hand is shown using the powerful steam wand to create thick, barista-quality microfoam in a stainless steel pitcher, ideal for cappuccinos and lattes.
5.4. Independent Hot Water Function
The machine can also dispense hot water for other uses.
- Place Cup: Position a cup under the steam wand.
- Dispense Hot Water: Turn the steam knob to the hot water position. Hot water will dispense from the steam wand.
- Stop Water: Turn the steam knob back to the closed position to stop the flow.
This function is suitable for preparing tea, oatmeal, or warming cups.

Image 5.7: The machine is shown dispensing hot water into a teacup, with icons indicating its versatility for tea, oatmeal, and warming cups, offering more than just coffee options.
6. Maintenance and Cleaning
Regular cleaning ensures optimal performance and longevity of your machine.
- Daily Cleaning:
- Empty and rinse the drip tray and water tank daily.
- Remove the portafilter and discard used coffee grounds. Rinse the portafilter and filter basket.
- Wipe down the exterior of the machine with a damp cloth.
- Clean the steam wand immediately after each use as described in Section 5.3.
- Group Head Cleaning: Periodically, use a damp cloth to wipe the group head to remove any coffee residue.
- Descaling: Depending on water hardness and usage, descaling should be performed every 2-3 months. Follow the instructions provided with a suitable descaling solution for espresso machines.
7. Troubleshooting
If you encounter issues with your machine, refer to the following common problems and solutions:
| Problem | Possible Cause | Solution |
|---|---|---|
| No coffee dispenses | Water tank empty; pump not primed; coffee too finely ground/over-tamped; clogged filter. | Fill water tank; run initial rinse cycle; use coarser grind/less pressure; clean filter basket. |
| Coffee brews too quickly/weak | Coffee too coarsely ground; not enough coffee; insufficient tamping. | Use finer grind; increase coffee amount; tamp more firmly. |
| No steam from wand | Machine not at steam temperature; wand clogged. | Wait for steam indicator; clean steam wand thoroughly. |
| Water leaking from machine | Water tank not seated correctly; drip tray full; seals damaged. | Ensure water tank is secure; empty drip tray; contact customer support if seals are damaged. |
8. Specifications
- Model Name: CM1861E
- Brand: Canoly
- Capacity: 1.3 liters (water tank)
- Color: Stainless Steel
- Product Dimensions (D x W x H): 33D x 16.5W x 30.8H centimetres
- Item Weight: 3.92 kg
- Material: Stainless Steel, Acrylonitrile Butadiene Styrene, Metal, Styrene-acrylonitrile copolymer
- Operation Mode: Semi-Automatic
- Output Pressure: 20 bar
- Special Features: Cold Brew Coffee, Cup Warmer, Milk Frother, Touchscreen, Fast Heating
- Specific Uses: Cappuccino, Espresso, Iced Coffee, Latte

Image 8.1: The compact dimensions of the Canoly CM1861E are displayed, showing its depth (12.99 inches), width (6.5 inches), and height (12.13 inches), highlighting its space-saving design for various kitchen environments.
9. Warranty and Support
For warranty information or technical support, please refer to the contact details provided with your purchase documentation or visit the official Canoly website. Keep your proof of purchase for warranty claims.