
Introduction
This manual provides detailed instructions for the assembly, operation, maintenance, and troubleshooting of your Bellemave Queen Daybed with USB and Two Drawers. Please read all instructions carefully before beginning assembly and retain this manual for future reference.
Safety Information
- Ensure all parts are present and undamaged before assembly. Do not use damaged parts.
- Assemble the daybed on a soft, clean surface to prevent scratches.
- Tighten all fasteners securely. Periodically check and re-tighten fasteners as needed.
- Do not exceed the maximum weight capacity of 600 pounds.
- Keep small parts away from children during assembly to prevent choking hazards.
- Use only the provided hardware. Substituting hardware may compromise the daybed's stability.
Package Contents
Verify that all the following components are included in your package:
- Headboard
- Footboard/Side Panels
- Bed Slats
- Support Legs
- Two Storage Drawers
- Hardware Pack (screws, bolts, Allen wrench, etc.)
- USB Charging Module
Setup and Assembly Instructions
Assembly typically requires two adults. Approximate assembly time: 60-90 minutes.
- Unpack and Identify Parts: Carefully remove all components from the packaging. Lay them out on a soft, clean surface and compare them against the package contents list to ensure all parts are present.
- Assemble the Main Frame: Attach the headboard and footboard/side panels using the provided hardware. Ensure all connections are secure but do not fully tighten until the frame is complete.
- Install Bed Slats: Place the bed slats across the frame. Secure them to the side rails using the designated fasteners. Ensure even spacing for optimal mattress support.
- Attach Support Legs: Fasten any central support legs to the underside of the slat system or frame as indicated in the detailed assembly diagram.
- Insert Storage Drawers: Assemble the two storage drawers according to their individual instructions. Once assembled, slide them into the designated spaces beneath the daybed frame. The bottom wheel design allows for easy movement.
- Connect USB Module: Locate the pre-installed USB charging module. Connect it to a power source as per the electrical safety guidelines.
- Final Tightening: Once the entire daybed is assembled, go back and fully tighten all screws and bolts. Do not overtighten.

Image: Daybed frame with slats and support structure visible, prior to drawer insertion.

Image: Daybed frame with slats and storage drawers partially inserted.

Image: Front view of the daybed frame, highlighting the slat support system.
Operating Instructions
Using the Storage Drawers
The daybed is equipped with two spacious storage drawers. To use them, simply pull the drawer fronts outwards. The bottom wheels facilitate smooth opening and closing. Push the drawers fully inward to keep them neatly tucked under the daybed.
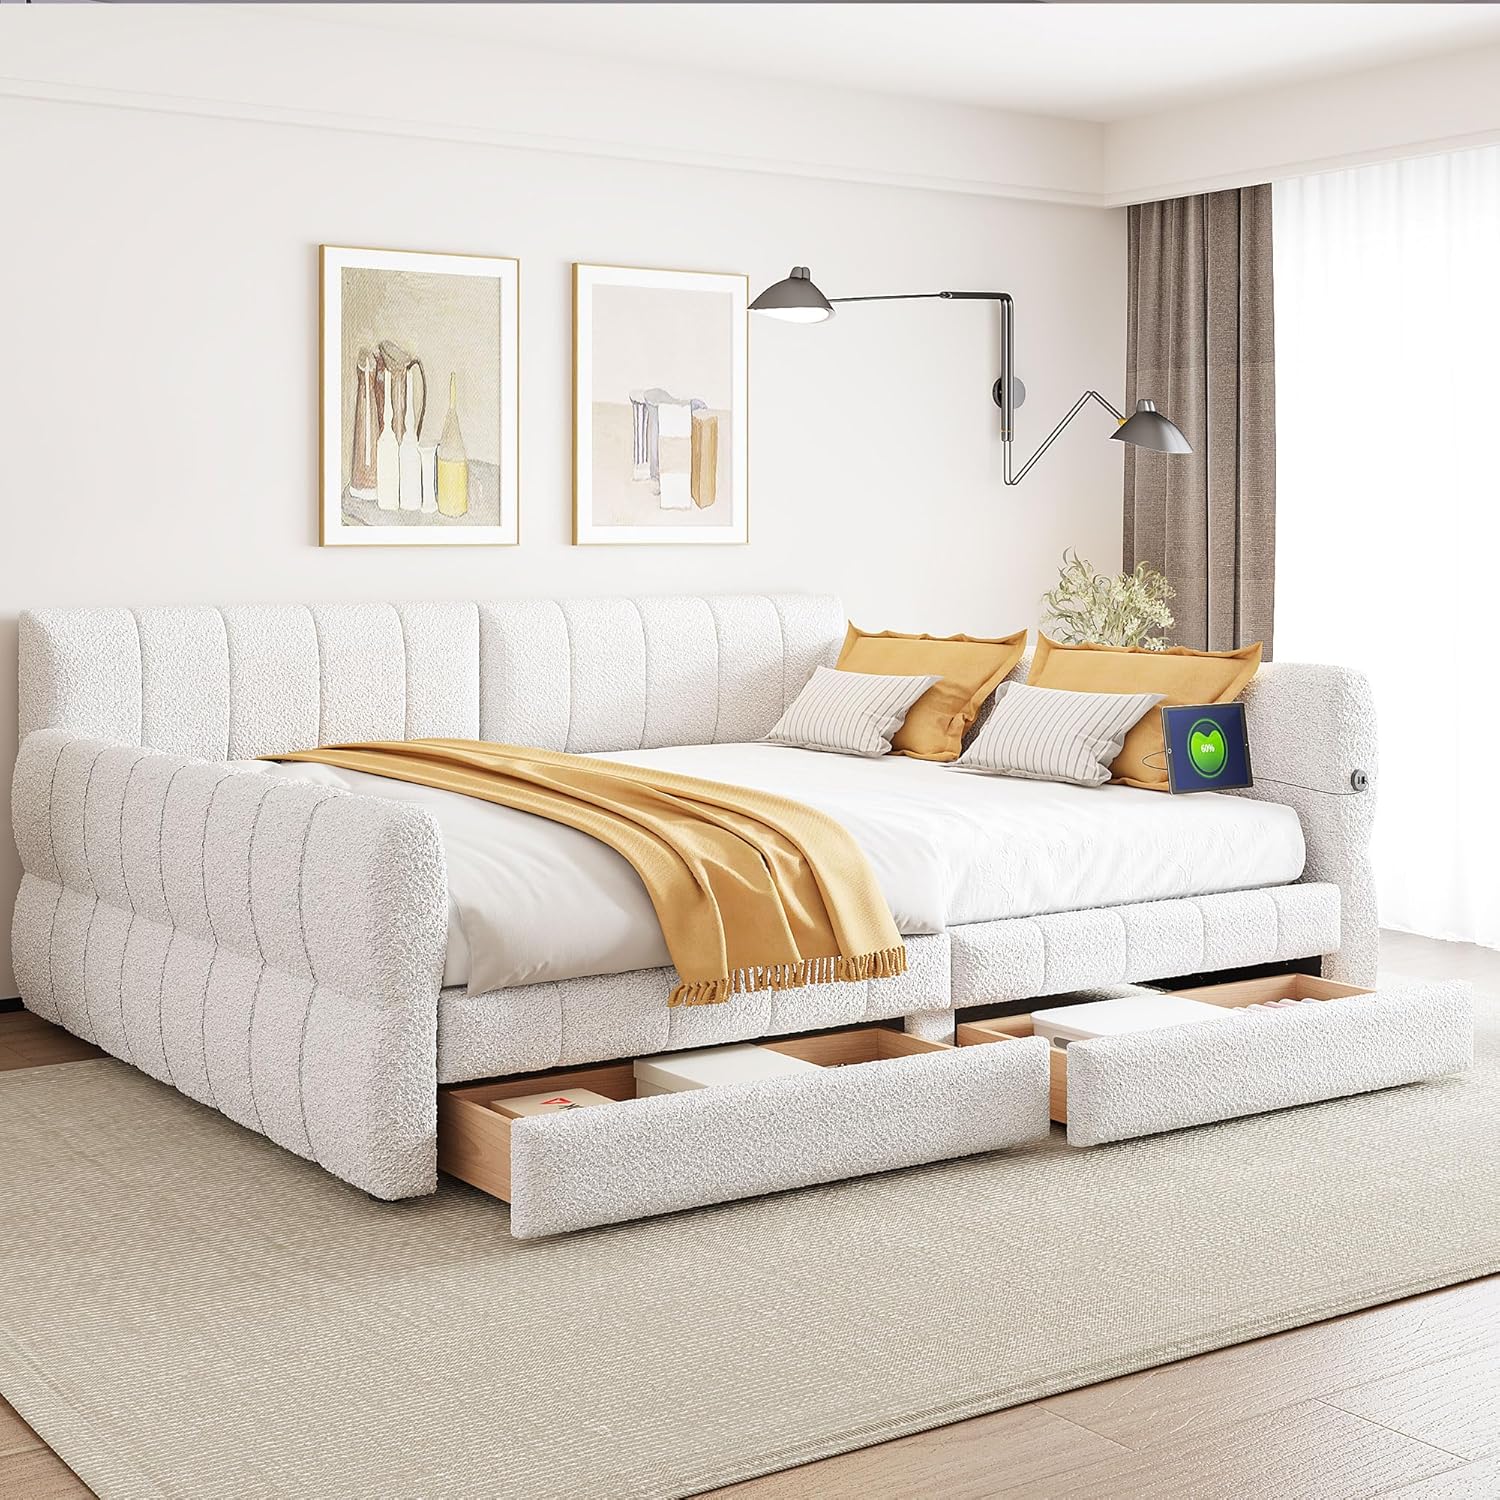
Image: Fully assembled daybed with storage drawers open, demonstrating storage capacity.

Image: Close-up of a single storage drawer.
Using the USB Charging Ports
The daybed features built-in USB charging ports for convenient device charging. Ensure the daybed's USB module is connected to a functional power outlet. Plug your USB charging cable into one of the available ports to charge your electronic devices.

Image: Close-up of the integrated USB charging ports.
Maintenance
- Cleaning: For the lambswool upholstery, gently spot clean with a damp cloth and mild detergent. Avoid harsh chemicals or abrasive cleaners. For the wood and MDF components, wipe with a dry or slightly damp cloth.
- Hardware Check: Periodically inspect all bolts and screws to ensure they remain tight. Re-tighten as necessary to maintain stability.
- Drawer Care: Keep the drawer tracks free of dust and debris to ensure smooth operation.
- USB Ports: Ensure the USB ports are kept dry and free from foreign objects.

Image: Close-up of the lambswool upholstery on the daybed's side panel.
Troubleshooting
| Problem | Possible Cause | Solution |
|---|---|---|
| Daybed feels wobbly or unstable. | Loose hardware. | Check and tighten all bolts and screws. |
| Drawers do not slide smoothly. | Debris in tracks; misaligned. | Clean drawer tracks. Ensure drawers are properly aligned on their wheels. |
| USB ports are not charging devices. | USB module not powered; faulty cable/device. | Ensure the daybed's USB module is plugged into a working wall outlet. Test with a different USB cable or device. |
| Missing parts. | Packaging error. | Contact customer support with your model number and a list of missing parts. |
Specifications
| Feature | Detail |
|---|---|
| Model Number | FST00214-Q-CK1 |
| Size | Queen |
| Material | Pine Wood, MDF, Lambswool |
| Product Dimensions (L x W x H) | 87.7" x 61.8" x 31.8" |
| Item Weight | 73 Pounds |
| Maximum Weight Recommendation | 600 Pounds |
| Number of Drawers | 2 |
| Special Features | Integrated USB Charging Ports |
| Assembly Required | Yes |

Image: Product dimensions diagram.
Warranty and Support
For warranty information or technical support, please refer to the documentation included with your purchase or contact Bellemave customer service. Please have your model number (FST00214-Q-CK1) and purchase date available when contacting support.
Contact Information: Please visit the official Bellemave website or refer to your purchase receipt for the most up-to-date customer service contact details.


