
Introduction
Thank you for choosing the JOMAA X9 Wired Gaming Mouse. This manual provides detailed instructions for setting up, operating, and maintaining your mouse to ensure optimal performance. The JOMAA X9 features 10 programmable buttons, adjustable DPI up to 12800, and customizable RGB lighting effects, designed for both gaming and office use.
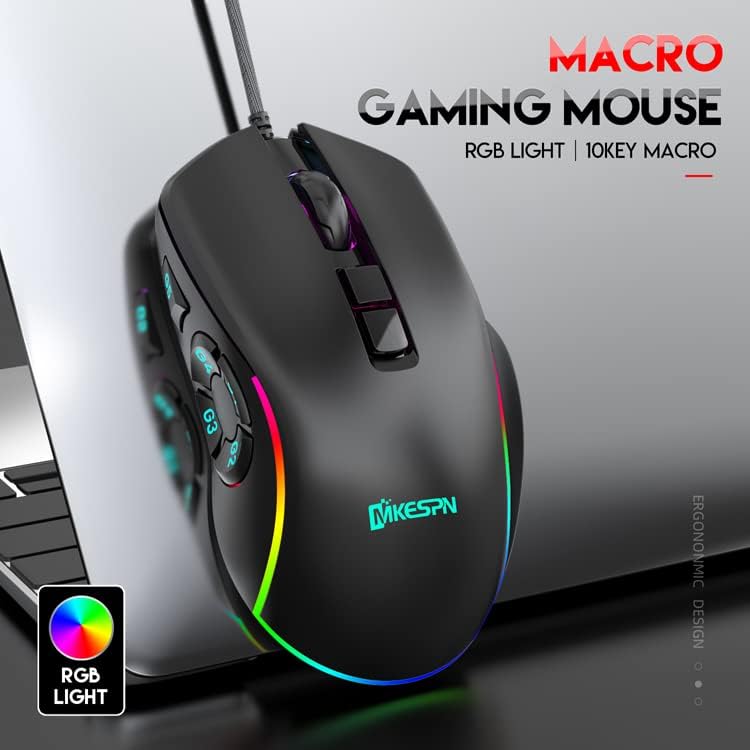
Image: The JOMAA X9 Wired Gaming Mouse, showcasing its ergonomic design and RGB lighting.
Product Features
- 10 Programmable Macro Keys: Customize complex command sequences. Macro programming requires a Windows PC, but settings are saved to onboard memory for use on any system.
- Adjustable DPI: Six default DPI levels (800/1200/1600/3200/4800/6400) with on-the-fly adjustment. Up to 12800 DPI is available via driver software (Windows only).
- 14 RGB Lighting Effects: Personalize your mouse with various lighting modes. RGB control functions on any system without additional drivers.
- Adjustable Polling Rate: Selectable polling rates from 125Hz to 1000Hz to minimize input lag.
- Ergonomic Design: Comfortable for various grip styles (claw, palm, fingertip) during extended use.
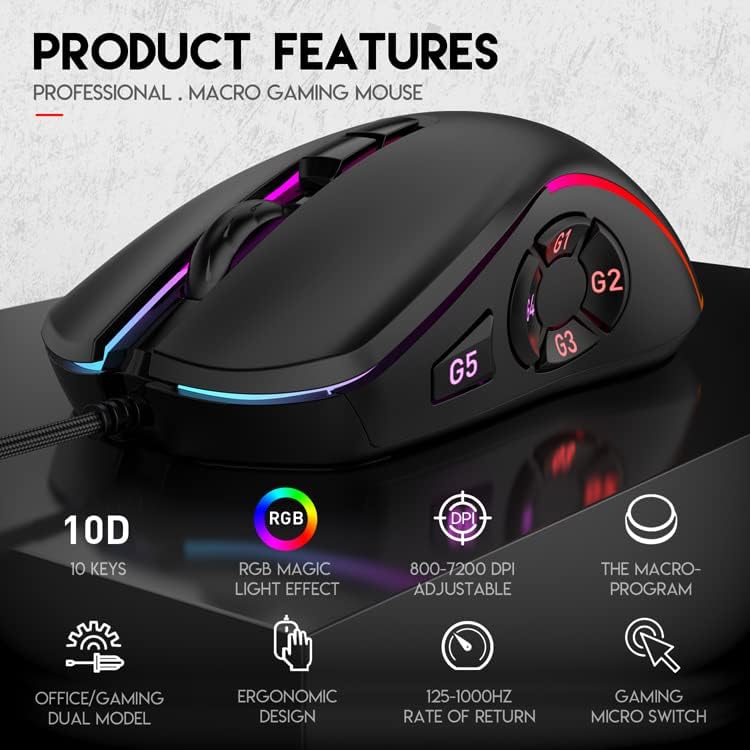
Image: An overview highlighting the key features of the JOMAA X9 mouse, including 10 keys, RGB lighting, adjustable DPI, macro programming, and ergonomic design.
Setup
1. Physical Connection
- Unpack the JOMAA X9 Wired Gaming Mouse from its packaging.
- Connect the USB cable of the mouse to an available USB port on your computer.
- The mouse will be automatically recognized by your operating system (Windows, Mac, Linux) and basic functionality will be available immediately.
2. Driver Software Installation (Optional for Advanced Features)
For macro programming and advanced DPI settings (up to 12800 DPI), driver software is required. This software is compatible with Windows operating systems only.
- Visit the official JOMAA website to download the latest driver software for the X9 Gaming Mouse.
- Follow the on-screen instructions to install the software.
- Once installed, you can access the software to customize macros, adjust DPI beyond default levels, and fine-tune other settings.
Operating Instructions
Button Functions

Image: Diagram illustrating the button layout and functions of the JOMAA X9 mouse.
- (1) Left Button: Standard left-click function.
- (2) Soft Scroll Wheel: Scroll up/down, and middle-click function.
- (3) Right Button: Standard right-click function.
- (4) DPI+ Switch: Increases DPI level.
- (5) A Key Map: Function not explicitly detailed, likely programmable.
- G1 (M4 Pressure Gun): Programmable button.
- G2 (AKM Pressure Gun): Programmable button.
- G3 (UMP9 Pressure Gun): Programmable button.
- G4 (M16 Pressure Gun): Programmable button.
- G5 (Pressure Gun Range Adjustment): Programmable button.
- Office/Game Mode Switch: Press the Middle key + Right button for 3 seconds. The green light flashes to indicate mode change. In Game mode, FN+roller can adjust pressure gun range.
DPI Adjustment
The JOMAA X9 mouse offers 6 default DPI levels that can be changed on the fly without software:
- 800 DPI
- 1200 DPI
- 1600 DPI
- 3200 DPI
- 4800 DPI
- 6400 DPI
Press the DPI+ Switch (4) button located behind the scroll wheel to cycle through these DPI settings. Each change will be indicated by a brief change in the mouse's LED lighting.
For DPI settings up to 12800, install the Windows-compatible driver software and adjust through its interface.

Image: A visual representation of the 6 adjustable DPI levels (800-6400) available on the JOMAA X9 mouse.
Macro Programming
The JOMAA X9 mouse allows you to program up to 10 macro keys for complex command sequences. This feature requires the dedicated driver software and a Windows PC for initial setup.
- Ensure the driver software is installed on your Windows PC.
- Open the JOMAA X9 driver software.
- Navigate to the macro programming section within the software interface.
- Select the desired button (G1-G5 or other programmable keys) and record your macro sequence.
- Save the settings. The programmed macros are stored directly onto the mouse's onboard memory.
Once programmed, these macros will function on any operating system (Windows, Mac, Linux) without needing the driver software to be running or even installed on that system.

Image: Screenshot of the JOMAA X9 macro programming software interface, showing options for key assignment and macro recording.
RGB Lighting Control
The JOMAA X9 features 14 distinct RGB lighting effects. These can be controlled directly from the mouse without any software.
- To cycle through the 14 RGB lighting effects, use the dedicated control combination (if available, otherwise it cycles automatically or via software).
- To turn off the RGB lighting for office use or to conserve power, press the G2 + N0.5 keys simultaneously.
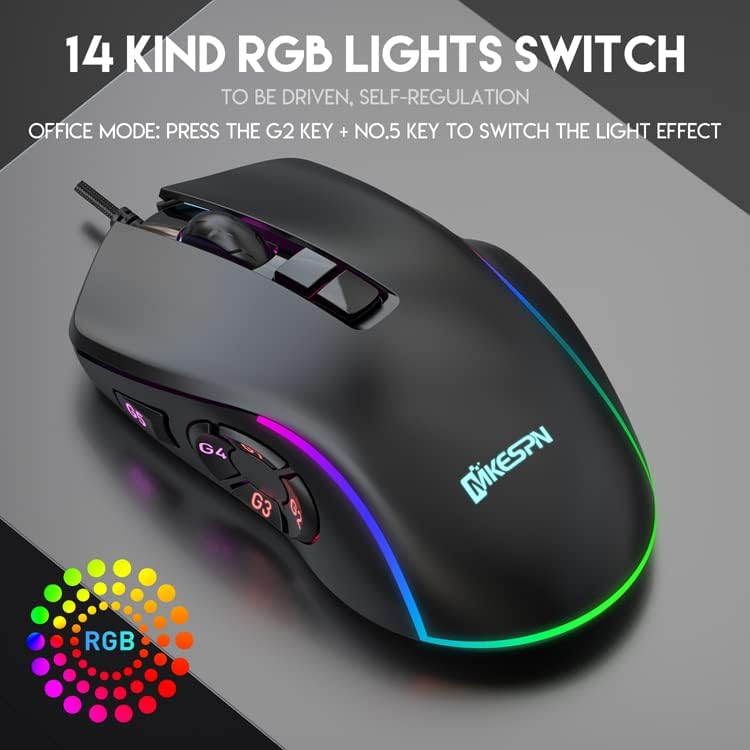
Image: The JOMAA X9 mouse displaying its vibrant RGB lighting effects.
Polling Rate Adjustment
The polling rate of the JOMAA X9 mouse can be adjusted between 125Hz and 1000Hz. This setting influences the mouse's response time. Higher polling rates generally provide smoother tracking but may consume slightly more system resources.
Adjustment of the polling rate is typically done through the driver software on a Windows PC. Refer to the software interface for specific instructions.
Maintenance
Proper maintenance ensures the longevity and optimal performance of your JOMAA X9 mouse.
- Cleaning: Use a soft, dry, lint-free cloth to wipe the surface of the mouse. For stubborn dirt, slightly dampen the cloth with water or a mild cleaning solution. Avoid harsh chemicals or abrasive materials.
- Sensor: Keep the optical sensor on the underside of the mouse clean and free from dust or debris to ensure accurate tracking.
- Cable: Avoid sharp bends or excessive pulling on the braided USB cable to prevent damage.

Image: Close-up details of the JOMAA X9 mouse, showing the soft scroll wheel and the durable braided cable.
Troubleshooting
- Mouse Not Responding:
- Ensure the USB cable is securely connected to your computer.
- Try plugging the mouse into a different USB port.
- Restart your computer.
- Test the mouse on another computer to determine if the issue is with the mouse or your system.
- Inaccurate Tracking:
- Clean the optical sensor on the underside of the mouse.
- Ensure you are using the mouse on a suitable surface (e.g., a mouse pad).
- Adjust the DPI settings to a level that suits your preference.
- Macros Not Working:
- Verify that the macros were correctly programmed using the Windows driver software.
- Ensure the macros were saved to the mouse's onboard memory.
- Check if the mouse is in the correct mode (e.g., Game Mode if macros are specific to it).
- RGB Lights Not Functioning:
- Check if the lights have been turned off using the G2 + N0.5 key combination.
- Ensure the mouse is properly connected and receiving power.
Specifications
| Feature | Detail |
|---|---|
| Brand | JOMAA |
| Model | X9 |
| Connectivity | Wired USB |
| DPI Levels | 800/1200/1600/3200/4800/6400 (up to 12800 via software) |
| Programmable Buttons | 10 |
| RGB Lighting | 14 Effects |
| Polling Rate | 125-1000Hz Adjustable |
| Weight | 230 g |
| Dimensions | 125 x 68 x 35 mm |
| Cable Length | 1.8m Braided |
Warranty and Support
JOMAA products are designed for reliability and performance. For warranty information, technical support, or customer service inquiries, please refer to the contact information provided with your purchase or visit the official JOMAA website.
Please retain your proof of purchase for warranty claims.
