
1. Product Overview
The Thermalright Assassin X 120R Digital ARGB Black is a high-performance CPU air cooler designed to efficiently dissipate heat from your processor. It features a digital screen top cover for real-time monitoring of CPU and GPU parameters, a quiet PWM fan, and ARGB lighting for aesthetic customization.

Image 1.1: Thermalright Assassin X 120R Digital ARGB Black CPU Cooler.
Key Features:
- Efficient Heat Dissipation: Combines an LCD panel top cover, four heat pipes, and a 2000RPM high-speed PWM fan for optimal cooling performance.
- Digital Screen Top Cover: Displays CPU temperature, CPU usage, graphics card temperature, and graphics card occupancy via TRCC software.
- Compact Design: With a 151mm height, it offers broad compatibility with most PC cases without compromising cooling efficiency.
- ARGB Divine Light Synchronization: The PWM fan's ARGB lighting synchronizes with motherboard 5V 3-pin headers for customizable lighting effects.
- AGHP Technology: Equipped with Anti-Gravity Heatpipes to ensure consistent performance regardless of heatsink orientation.
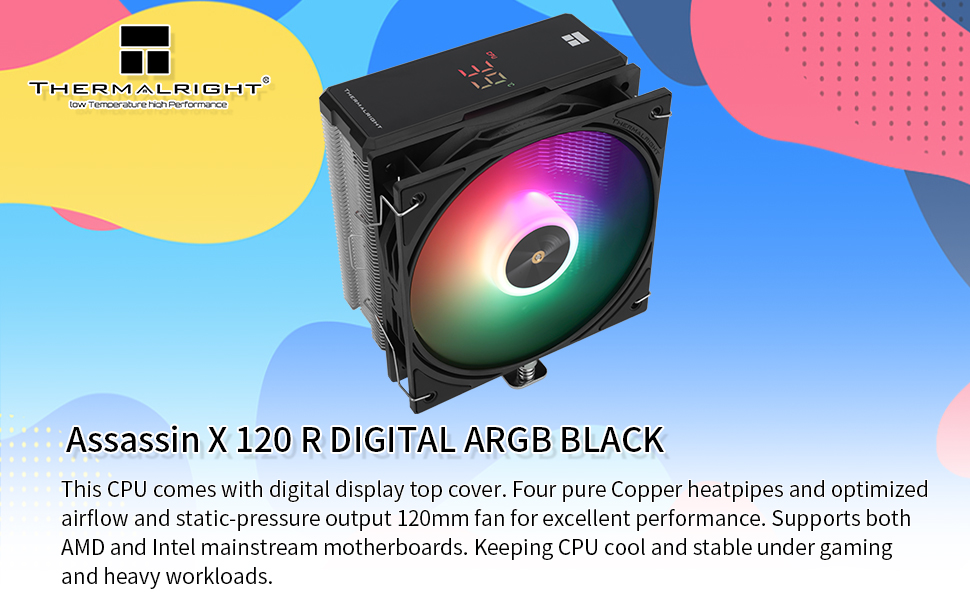
Image 1.2: Close-up view of the AGHP heatpipes, designed for consistent performance in various orientations.
2. Installation Guide
2.1. Compatibility
This cooler is compatible with a wide range of Intel and AMD sockets:
- Intel: LGA 1851 / 1700 / 1150 / 1151 / 1155 / 1156 / 1200
- AMD: AM4 / AM5
Note: For AMD platform installation, the original motherboard backplate is required.
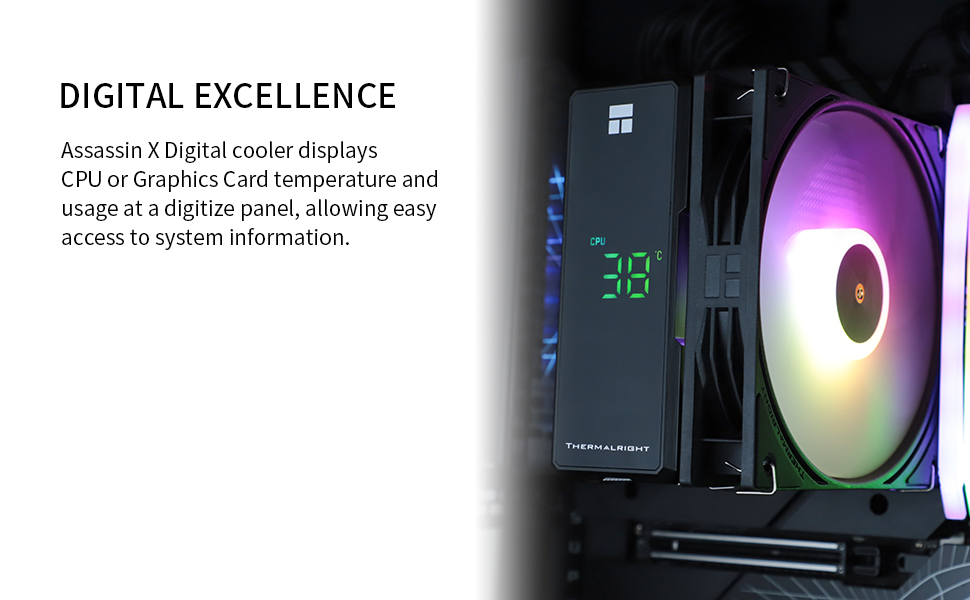
Image 2.1: Visual representation of CPU socket compatibility for Intel and AMD platforms.
2.2. Installation Steps
Follow these general steps for installing your CPU cooler. Refer to the official installation video for detailed visual guidance.
- Prepare Motherboard: Ensure your motherboard is ready for cooler installation. For AMD, retain the original backplate. For Intel, install the appropriate backplate if provided.
- Install Standoffs: Screw the correct standoffs into the motherboard's CPU socket holes.
- Apply Thermal Paste: Apply a small amount of thermal paste (included) to the center of your CPU's integrated heat spreader (IHS).
- Mount Heatsink: Place the heatsink onto the CPU, aligning it with the standoffs. Secure it using the provided mounting brackets and screws. Ensure even pressure.
- Attach Fan: Use the fan clips to attach the TL-P12-S fan to the heatsink. Ensure the fan is oriented correctly for optimal airflow (typically blowing towards the rear exhaust fan of your case).
- Connect Cables: Connect the 4-pin PWM fan cable to the CPU_FAN header on your motherboard. Connect the 5V 3-pin ARGB cable to an available 5V 3-pin ARGB header on your motherboard for lighting control. Connect the digital screen's USB cable to an internal USB 2.0 header on your motherboard.
Video 2.2: Official installation guide for the AX120R Digital series radiator, demonstrating the mounting process for various platforms.
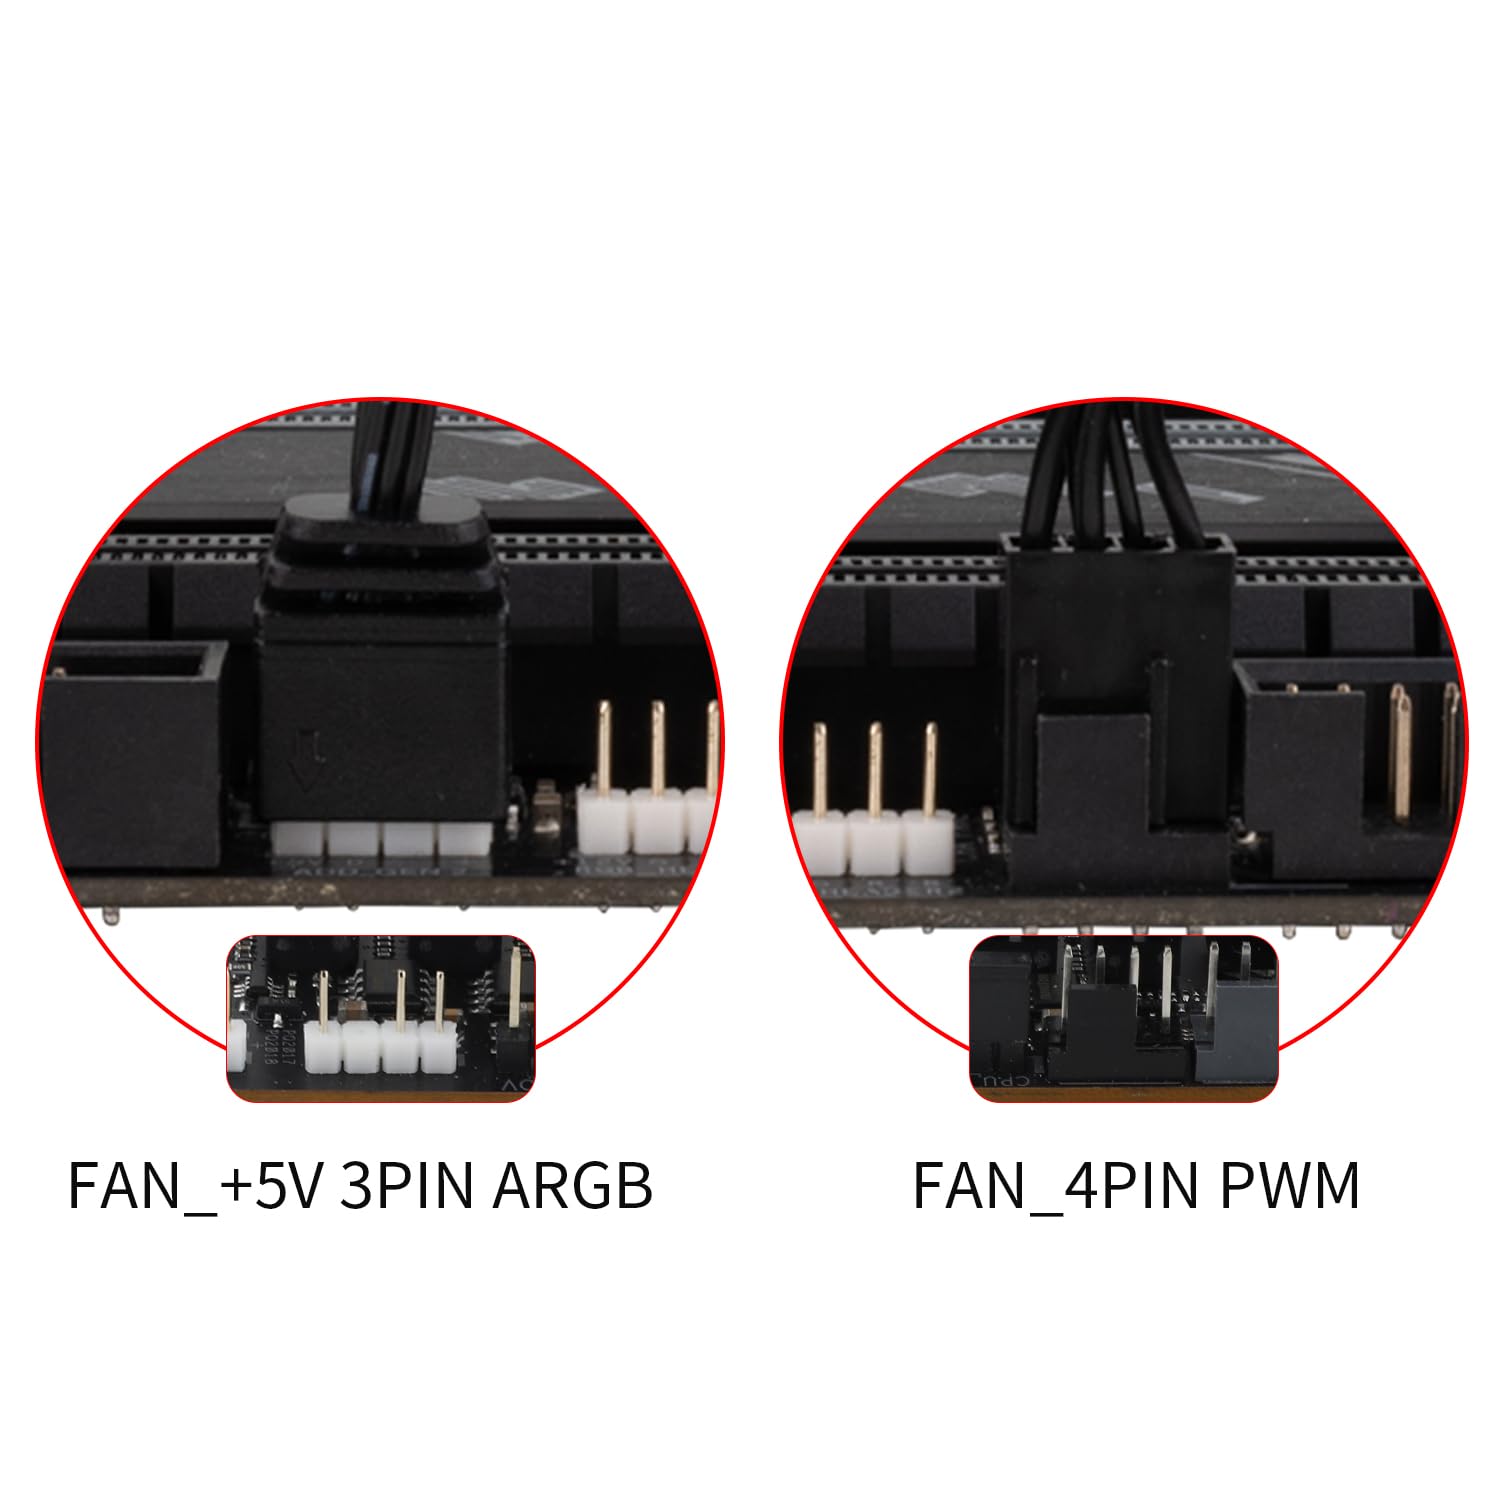
Image 2.3: Illustration of the 4-pin PWM fan connector and the +5V 3-pin ARGB connector for proper wiring.
3. Operation
3.1. Digital Screen Functionality
The integrated digital screen on the cooler's top cover provides real-time system information. To activate and customize the display, you must install the TRCC software.
- The screen can display CPU temperature, CPU usage, graphics card temperature, and graphics card occupancy.
- The display will initially show revolving white lines until the TRCC software is installed and running.
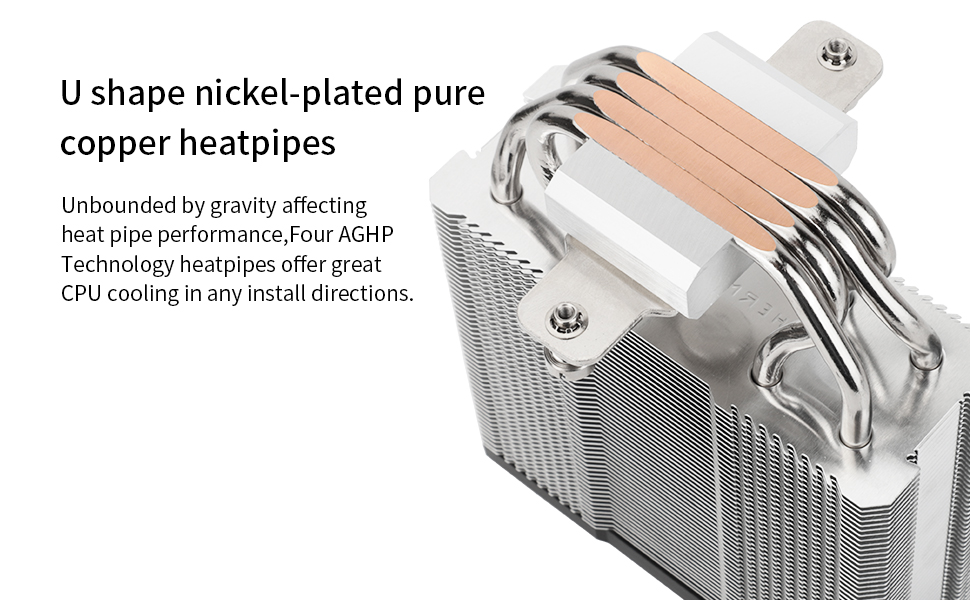
Image 3.1: The digital display integrated into the cooler, showing CPU temperature.
3.2. TRCC Software
The TRCC software allows you to configure the digital display and its parameters. Download the latest version from the official Thermalright website.
- Customize the color of the digital display.
- Set the display to automatically change color based on temperature or usage levels.
- Select which parameters (CPU temp, GPU temp, usage) are shown.
Video 3.2: Tutorial on using the TRCC software to configure the digital display settings for the heat sink.
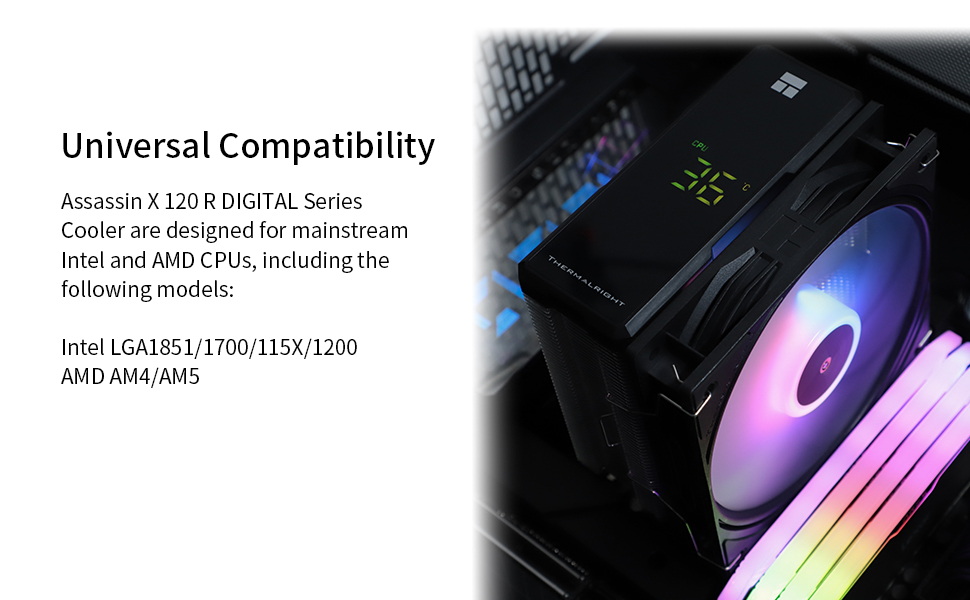
Image 3.3: Screenshot of the TRCC software interface, showing options for color settings and display selection.
3.3. ARGB Lighting
The TL-P12-S fan features Addressable RGB (ARGB) lighting. Connect the 5V 3-pin ARGB cable to a compatible header on your motherboard. You can then control the lighting effects using your motherboard's ARGB software (e.g., ASUS Aura Sync, MSI Mystic Light, Gigabyte RGB Fusion, ASRock Polychrome Sync).
Note: The TRCC software controls only the digital screen display, not the fan's ARGB lighting.
4. Maintenance
Regular maintenance ensures optimal performance and longevity of your CPU cooler.
- Dust Cleaning: Periodically clean the heatsink fins and fan blades to prevent dust buildup, which can impede airflow and reduce cooling efficiency. Use compressed air or a soft brush. The fan can be easily removed using its side clips for thorough cleaning.
- Thermal Paste: Thermal paste typically lasts for several years. If you notice a significant increase in CPU temperatures or if you remove the cooler for any reason, it is recommended to clean off the old thermal paste and apply a fresh layer.
5. Troubleshooting
- Digital Screen Not Displaying:
- Ensure the digital screen's USB cable is correctly connected to an internal USB 2.0 header on your motherboard.
- Install the TRCC software from the official Thermalright website. The display will only show full information once the software is running.
- ARGB Fan Lighting Not Working/Synchronizing:
- Verify the 5V 3-pin ARGB cable is securely connected to a compatible ARGB header on your motherboard.
- Ensure you are using your motherboard's dedicated ARGB control software (not TRCC software) to manage the fan lighting.
- Check your motherboard BIOS/UEFI settings to ensure ARGB headers are enabled.
- High CPU Temperatures:
- Confirm the cooler is securely mounted and making proper contact with the CPU.
- Check if thermal paste was applied correctly and evenly.
- Ensure the fan is spinning and oriented correctly for optimal airflow.
- Clean any dust buildup from the heatsink fins and fan.
- Fan Noise:
- Check for any cables or obstructions hitting the fan blades.
- Adjust fan speed curves in your motherboard's BIOS/UEFI or fan control software to find a balance between cooling and noise.
6. Specifications

Image 6.1: Detailed dimensions of the Assassin X 120R Digital ARGB Black CPU Cooler.
| Feature | Detail |
|---|---|
| Model | Assassin X 120R Digital ARGB Black |
| Dimensions (L x W x H) | 120mm x 71mm x 151mm |
| Heat Sink Material | Aluminum |
| Fan Model | TL-P12-S |
| Fan Size | 120mm x 120mm x 25mm |
| Fan Speed | 2000 RPM ± 10% |
| Air Flow Capacity | 70.84 CFM |
| Wind Pressure | 2.63 mm H2O |
| Operating Noise | ≤ 29.8 dB(A) |
| Fan Interface | 4-Pin PWM |
| ARGB Interface | 5V 3-Pin ARGB |
| Voltage | 12 Volts DC |
| Weight | 100 g (cooler only, without fan) |
| Compatible Sockets | Intel LGA 1851/1700/1150/1151/1155/1156/1200; AMD AM4/AM5 |
7. Warranty and Support
7.1. Warranty Information
Thermalright products are manufactured to high-quality standards. For specific warranty terms and conditions, please refer to the warranty card included with your product or visit the official Thermalright website.
7.2. Customer Support
If you encounter any issues during installation or operation, or have questions regarding your Thermalright Assassin X 120R Digital ARGB Black CPU Cooler, please contact Thermalright customer service. Contact details can typically be found on the official Thermalright website or through your point of purchase.


