
1. Introduction
Welcome to the user manual for your new KitchenAid KF3 Coffee Machine, model 5KES8453. This fully automatic espresso machine is designed to deliver a wide range of hot and iced coffee beverages with ease. Featuring the IntelliGrind mechanism and AutoMilk system, it ensures a perfect cup every time. Please read this manual carefully before operating your machine to ensure safe and optimal performance.
2. Safety Instructions
Always follow basic safety precautions when using electrical appliances to reduce the risk of fire, electric shock, and injury to persons.
- Read all instructions before use.
- Do not immerse the appliance, cord, or plug in water or other liquids.
- Close supervision is necessary when any appliance is used by or near children.
- Unplug from outlet when not in use and before cleaning. Allow to cool before putting on or taking off parts, and before cleaning the appliance.
- Do not operate any appliance with a damaged cord or plug, or after the appliance malfunctions or has been damaged in any manner.
- The use of accessory attachments not recommended by the appliance manufacturer may result in fire, electric shock, or injury to persons.
- Do not use outdoors.
- Do not let the cord hang over the edge of a table or counter, or touch hot surfaces.
- Do not place on or near a hot gas or electric burner, or in a heated oven.
- Always attach plug to appliance first, then plug cord into the wall outlet. To disconnect, turn any control to 'off', then remove plug from wall outlet.
- Do not use appliance for other than intended use.
- Exercise extreme caution when dispensing hot steam or hot water.
3. Product Components
Familiarize yourself with the main parts of your KitchenAid KF3 Coffee Machine:
- Water Tank: Located at the back, easily removable for refilling.
- Bean Hopper: Top-mounted compartment for whole coffee beans.
- Ground Coffee Chute: For pre-ground coffee.
- Coffee Spout: Adjustable height for various cup sizes.
- AutoMilk System: Integrated system for frothing and dispensing milk.
- Drip Tray: Collects excess liquid and removable for cleaning.
- Control Panel & Display: Intuitive 2.4-inch color display for selecting and customizing beverages.
- Brew Unit: Internal component responsible for brewing coffee.

Image: KitchenAid KF3 Coffee Machine with its accessories, including the power cord, cleaning brush, and milk tube.

Image: Exploded view of the KitchenAid KF3 Coffee Machine, illustrating its removable components like the water tank, drip tray, and brew unit for easy access and cleaning.
4. Setup
4.1 Unpacking and Placement
- Remove all packaging materials from the coffee machine.
- Place the machine on a stable, level surface, away from heat sources and direct sunlight. Ensure adequate space around the machine for ventilation and access to the water tank and bean hopper.
4.2 Filling the Water Tank
- Remove the water tank from the back of the machine.
- Fill the tank with fresh, cold tap water up to the 'MAX' level indicator.
- Reinsert the water tank firmly into its position.
4.3 Adding Coffee Beans
- Open the lid of the bean hopper on top of the machine.
- Pour fresh, whole coffee beans into the hopper. Do not overfill.
- Close the lid securely.
4.4 Initial Rinse Cycle
- Plug the power cord into a grounded electrical outlet.
- Place a container under the coffee spout.
- Follow the on-screen instructions for the initial rinse cycle. This primes the system and cleans internal components.
4.5 Connecting the AutoMilk System
- Connect the milk tube to the AutoMilk system on the machine.
- Place the other end of the milk tube into a container of fresh milk.
5. Operating Instructions
Your KitchenAid KF3 offers over 15 predefined recipes for both hot and iced coffee specialties, accessible via its intuitive color display.

Image: The KitchenAid KF3 Coffee Machine's 2.4-inch color display highlights its capability for over 15 predefined recipes, including hot and iced coffee, and its dual automatic milk dispensing system.
5.1 Powering On/Off
Press the power button located on the top right of the machine to turn it on or off. The display will illuminate and guide you through the startup process.
5.2 Using the 2.4" Color Display
The 2.4-inch color touchscreen display allows for easy navigation and customization. Use the arrows and selection buttons to browse through beverage options, adjust settings, and view machine status.
5.3 Selecting a Beverage
- From the main menu, scroll through the available coffee specialties.
- Select your desired beverage, such as Espresso, Americano, Cappuccino, Latte, or Iced Coffee.

Image: A visual representation of the machine's versatility, showing a single glass split between hot frothed milk and iced coffee, indicating its capability to prepare both hot and cold beverages.
5.4 Adjusting Coffee Strength and Volume
Before brewing, you can customize your drink:
- Coffee Strength: Adjust the intensity of your coffee (e.g., mild, regular, strong).
- Volume: Select your preferred cup size or coffee volume.
5.5 Preparing Milk-Based Drinks with AutoMilk
The AutoMilk system ensures barista-quality milk foam for your cappuccinos and lattes.

Image: The KitchenAid KF3 Coffee Machine dispensing a latte with rich, frothed milk, demonstrating its ability to create barista-quality milk for various beverages.
- Ensure the milk tube is correctly placed in a container of cold milk.
- Select a milk-based beverage (e.g., Cappuccino, Latte Macchiato).
- The machine will automatically froth and dispense the milk, followed by the coffee.
5.6 IntelliGrind Technology
The IntelliGrind mechanism automatically adjusts the grinding process to extract the best flavor from each coffee bean, ensuring a consistent and aromatic brew.

Image: Coffee beans being added to the machine's hopper, illustrating the IntelliGrind feature which automatically optimizes grinding for superior flavor extraction.
5.7 Quiet Operation
The KF3 is designed for quiet operation, allowing you to enjoy your coffee preparation without excessive noise.

Image: A couple relaxing at home, with the KitchenAid KF3 Coffee Machine visible, highlighting its quiet operation enabled by the QuietGrind system.
6. Maintenance and Cleaning
Regular cleaning and maintenance are crucial for the longevity and optimal performance of your coffee machine.
6.1 Daily Cleaning
- Drip Tray: Empty and rinse the drip tray daily.
- Milk System: After each milk-based drink, perform a quick rinse of the AutoMilk system as prompted by the machine. For a more thorough clean, detach the milk tube and rinse it with warm water.
6.2 Weekly Cleaning
- Brew Unit: Remove the brew unit (refer to Section 3 for location) and rinse it under lukewarm running water. Allow it to air dry before reinserting.
- Water Tank: Clean the water tank with mild detergent and rinse thoroughly.
- Bean Hopper: Wipe the inside of the bean hopper with a dry cloth to remove any coffee oil residue.
6.3 Descaling Procedure
The machine will prompt you when descaling is required. Follow the on-screen instructions and use a suitable descaling solution recommended by KitchenAid. Regular descaling prevents mineral buildup and ensures proper machine function.
7. Troubleshooting
If you encounter issues with your KitchenAid KF3, refer to the following common problems and solutions:
| Problem | Possible Cause | Solution |
|---|---|---|
| No coffee dispensed | Water tank empty, brew unit clogged, coffee beans empty. | Refill water tank, clean brew unit, refill bean hopper. |
| Milk not frothing correctly | Milk system clogged, milk too warm, incorrect milk type. | Clean milk system, use cold milk, try different milk type. |
| Machine displays an error message | Specific internal issue. | Refer to the on-screen message for specific instructions or contact customer support. |
| Coffee is too weak or too strong | Incorrect strength setting, grind size, or coffee type. | Adjust coffee strength on display, check grind setting, use fresh beans. |
If the problem persists, please contact KitchenAid Customer Support.
8. Specifications
Detailed technical specifications for the KitchenAid KF3 Coffee Machine 5KES8453:
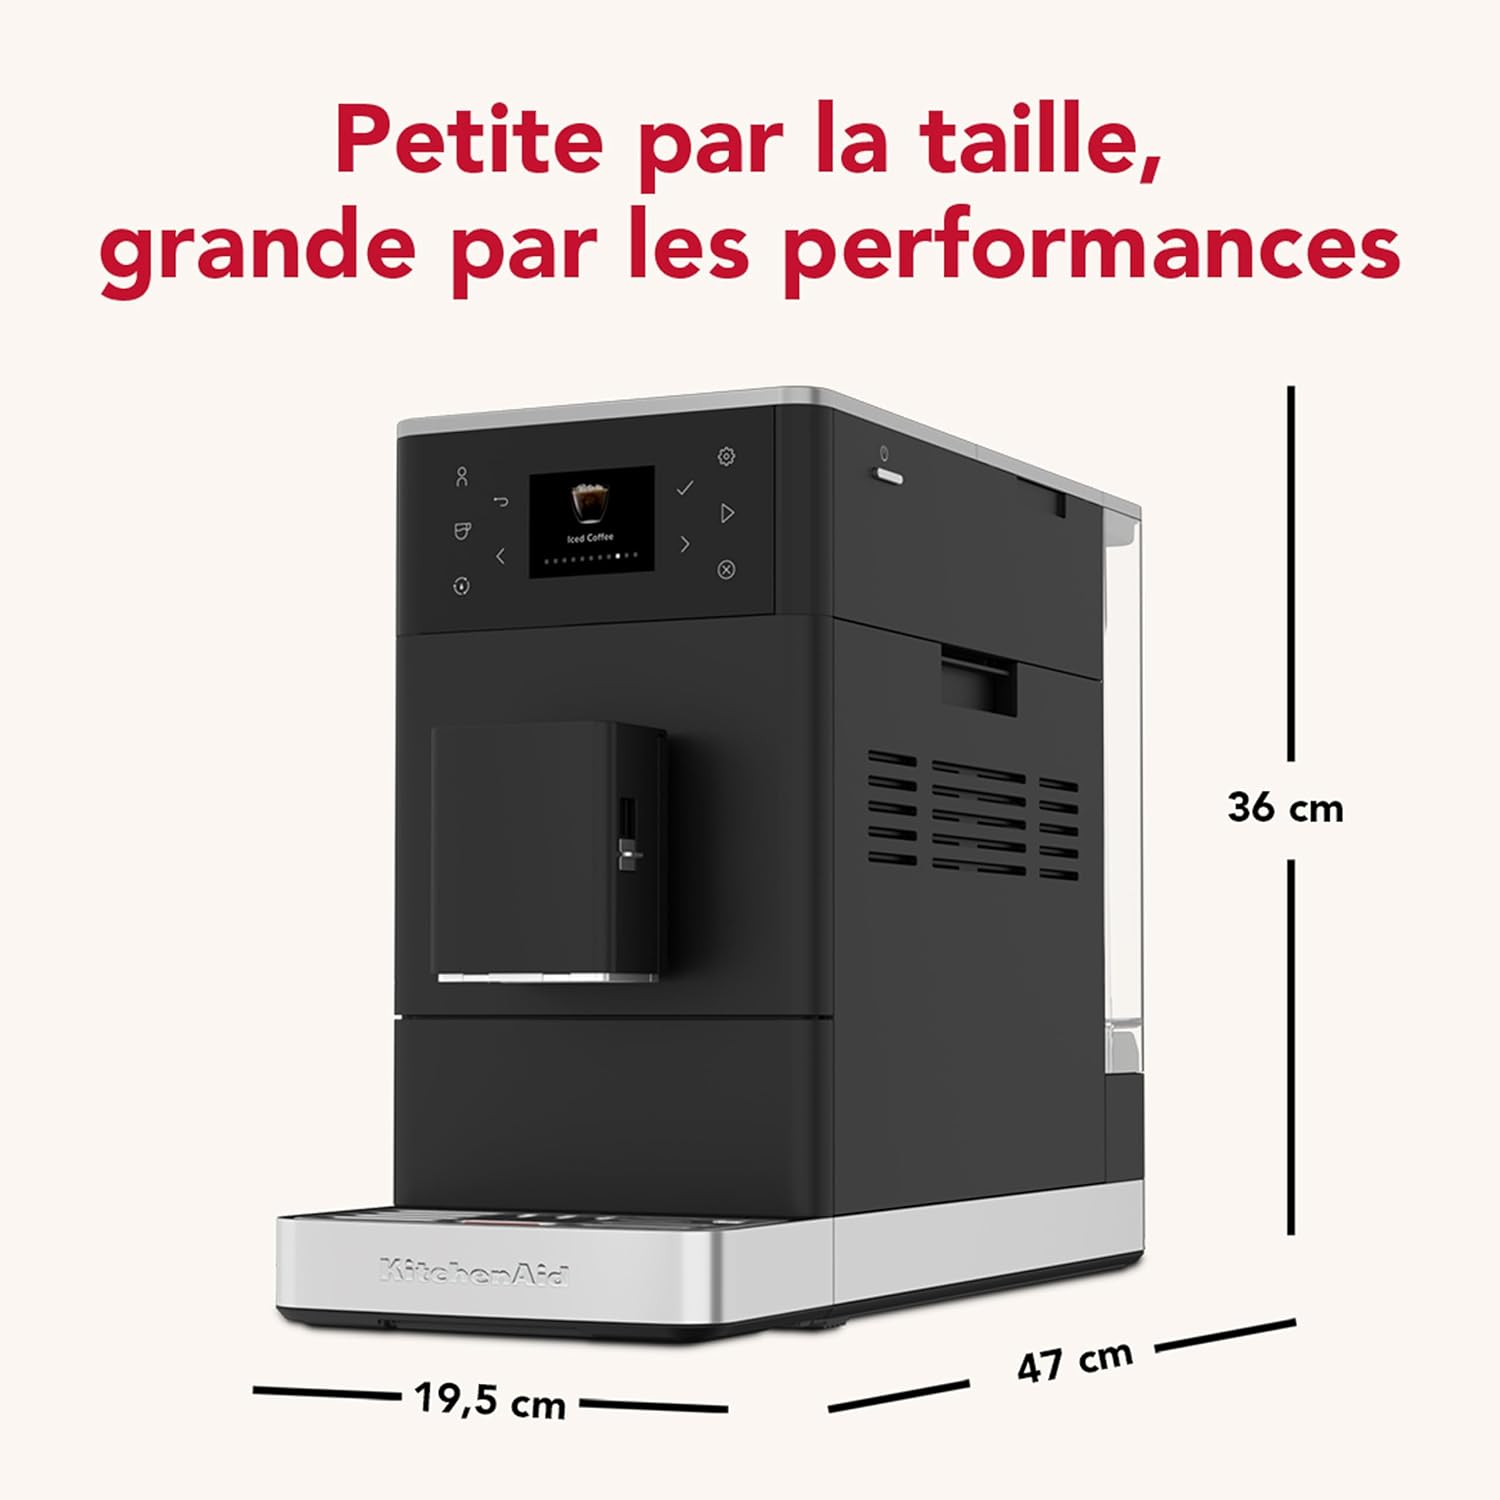
Image: The KitchenAid KF3 Coffee Machine with its compact dimensions clearly marked: 36 cm height, 19.5 cm width, and 47 cm depth.
| Feature | Specification |
|---|---|
| Brand | KitchenAid |
| Model Number | 5KES8453 |
| Capacity | 1.8 Liters (Water Tank) |
| Color | Matte Black |
| Dimensions (D x W x H) | 47 cm x 19.5 cm x 36 cm |
| Special Functions | 17 beverage options, Adjustable cup size, Adjustable beverage volume |
| Coffee Maker Type | Bean-to-cup (Fully Automatic) |
| Specific Product Uses | Americano, Cappuccino, Espresso, Iced Coffee, Latte |
| Weight | 10.1 Kilograms |
| Power | 1450 Watts |
| Voltage | 230 Volts |
| Display Type | 2.4" Color Touchscreen |
| Coffee Type Used | Whole beans, Ground coffee |
9. Warranty and Support
Your KitchenAid KF3 Coffee Machine comes with a manufacturer's warranty. Please refer to the warranty card included in your product packaging for specific terms and conditions. For technical support, spare parts, or service, please visit the official KitchenAid website or contact their customer service department.


