
1. Introduction
Thank you for choosing the INOVIVA Portable Countertop Ice Maker. This manual provides essential information for the proper setup, operation, and maintenance of your ice maker. Please read it thoroughly before use and retain it for future reference.
2. Safety Instructions
- Ensure the ice maker is placed on a stable, level surface away from direct sunlight and heat sources.
- Do not immerse the appliance, power cord, or plug in water or other liquids.
- Use only potable water in the water reservoir.
- Keep children away from the ice maker during operation.
- Unplug the appliance before cleaning or when not in use for extended periods.
- Do not operate the appliance with a damaged cord or plug.
3. Product Overview
Familiarize yourself with the components of your INOVIVA Portable Countertop Ice Maker.
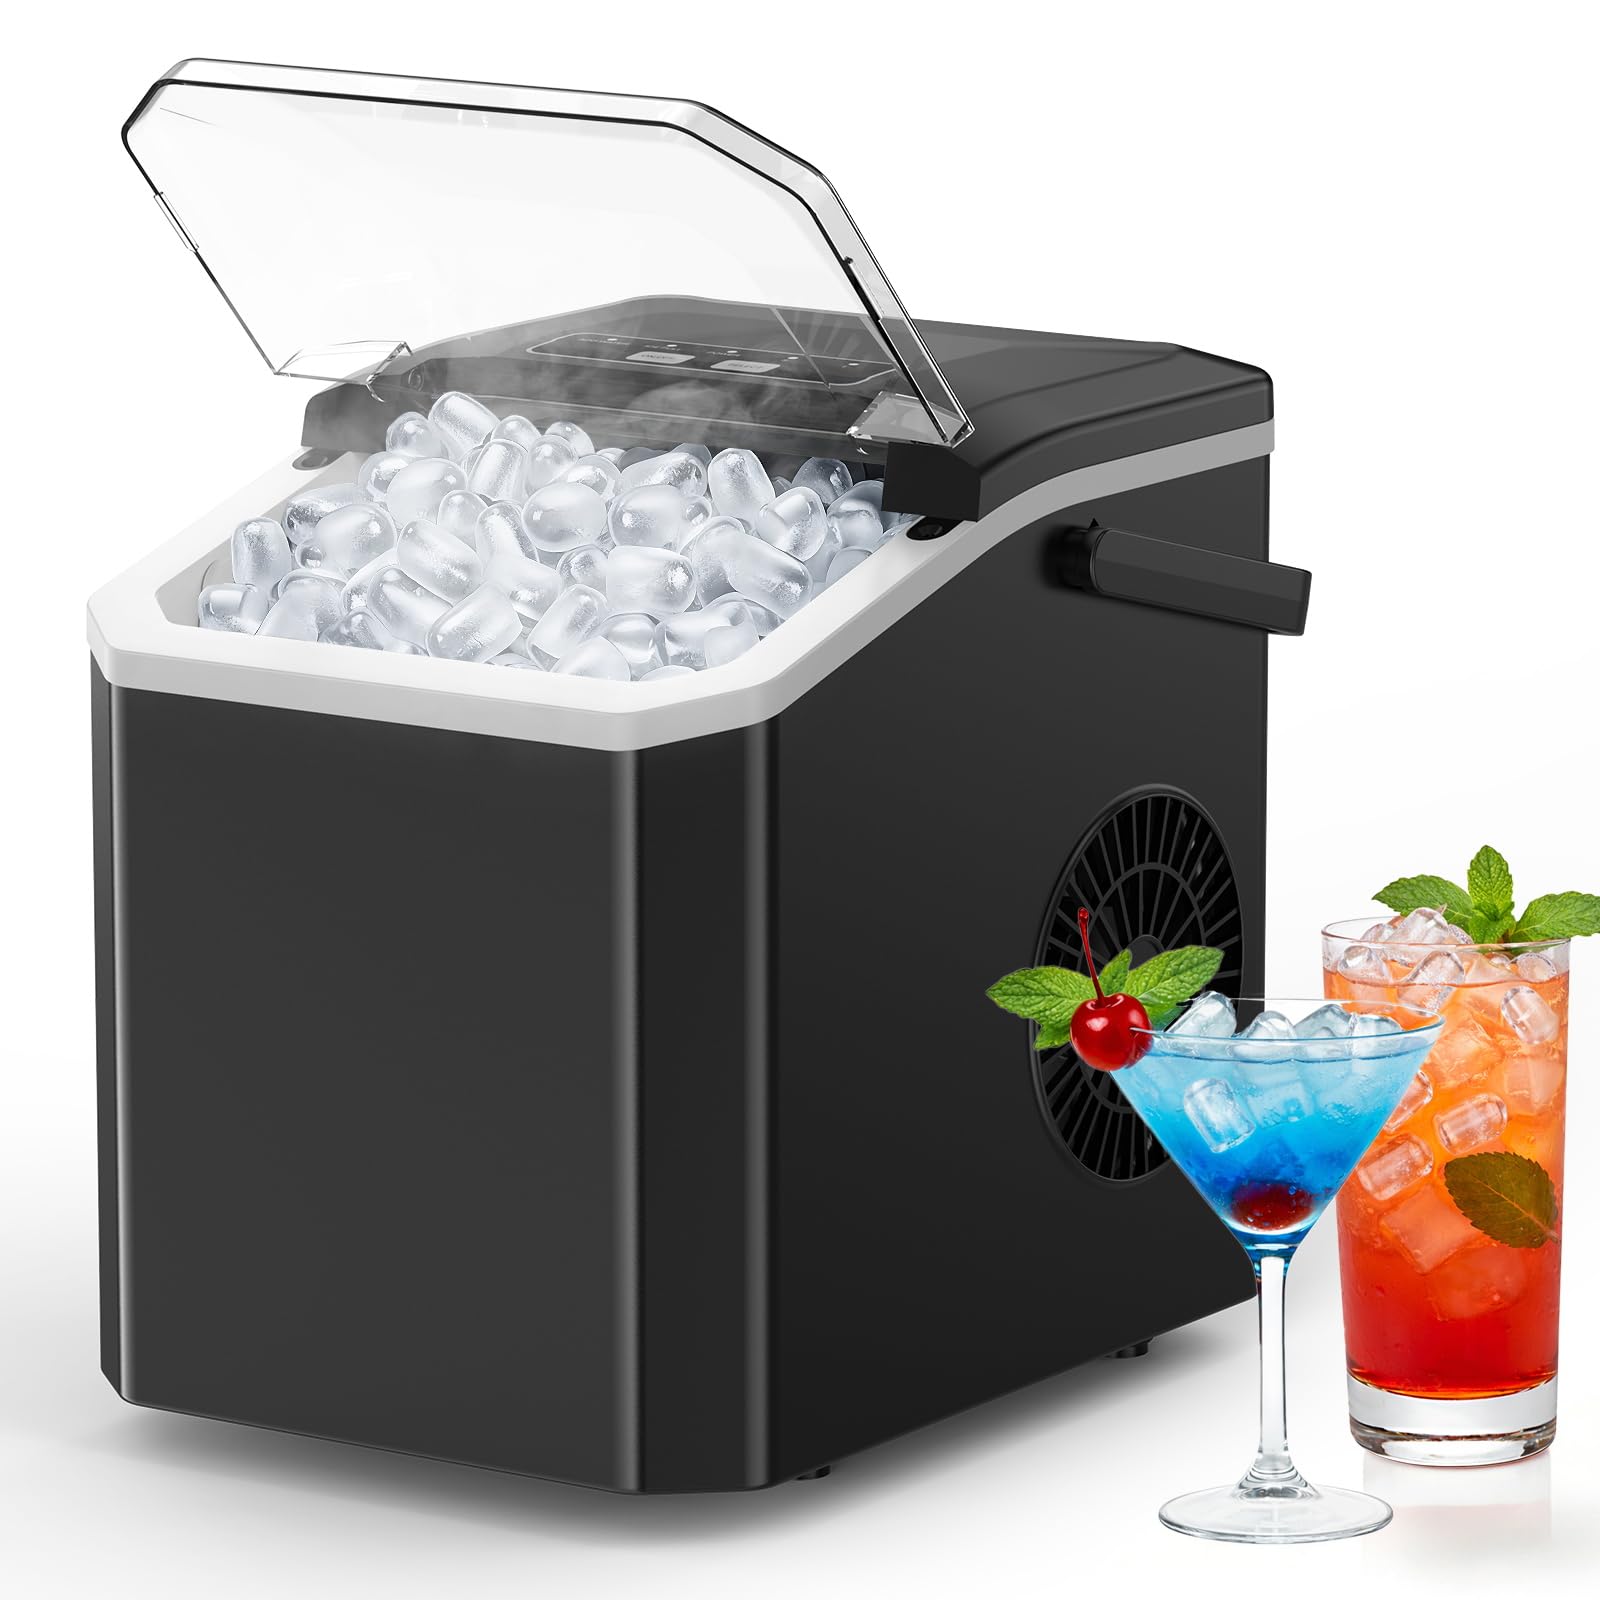
Figure 1: INOVIVA Portable Countertop Ice Maker (Model YH16T)
- Control Panel: Features "ADD WATER", "ICE FULL", "POWER" indicators, and "ON/OFF", "SELECT" buttons.
- Ice Basket: Detachable for easy ice transfer and cleaning.
- Water Reservoir: Holds 1.4 liters of water for continuous ice production.
- Ice Scoop: Included for hygienic ice retrieval.
- Portable Handle: For easy transportation.
4. Setup
- Unpacking: Carefully remove the ice maker from its packaging. Remove all packing materials, including tape and protective films.
- Initial Cleaning: Before first use, clean the interior of the ice maker, including the water reservoir and ice basket, with a soft cloth and mild detergent. Rinse thoroughly with clean water.
- Placement: Place the ice maker on a flat, stable, and heat-resistant surface. Ensure there is at least 4 inches (10 cm) of clearance around the unit for proper ventilation. Avoid placing it near heat sources or in direct sunlight.
- Power Connection: Plug the power cord into a grounded electrical outlet (120V/60Hz).
- Add Water: Open the lid and fill the water reservoir with potable water up to the MAX fill line. Do not overfill.

Figure 2: Initial Setup - Adding Water and Powering On
5. Operating Instructions
- Power On: Press the ON/OFF button to turn on the ice maker. The "POWER" indicator will illuminate.
- Select Ice Size: Press the SELECT button to choose between two ice cube sizes:
- Small (S): Approximately 20mm diameter x 25mm length. Chills drinks quickly.
- Large (L): Approximately 25mm diameter x 30mm length. Melts more slowly.
- Ice Production: The ice maker will begin its first ice-making cycle, which takes approximately 6 minutes. Subsequent cycles will be faster. The unit can produce up to 26.5 lbs of ice per 24 hours.
- Ice Full Sensor: When the ice basket is full, the "ICE FULL" indicator will light up, and the ice maker will automatically pause operation. Remove ice from the basket to resume production.
- Add Water Indicator: If the water level in the reservoir is too low, the "ADD WATER" indicator will illuminate, and the ice maker will stop. Add more potable water to resume.

Figure 3: Choosing Ice Cube Size

Figure 4: Infrared Sensor for Ice Full Detection
6. Maintenance
- Self-Cleaning Function: To activate the automatic self-cleaning cycle, press and hold the ON/OFF button for 3 seconds. The cycle lasts approximately 20 minutes. This helps maintain cleanliness and fresh ice.
- Regular Cleaning:
- Unplug the ice maker before cleaning.
- Remove the ice basket.
- Drain any remaining water from the reservoir by removing the drain plug located at the bottom of the unit.
- Clean the interior with a soft cloth dampened with a mild detergent solution. Rinse thoroughly with clean water.
- Dry all parts completely before reassembling and storing.
- Storage: If the ice maker will not be used for an extended period, drain all water, clean the unit, and store it in a dry, well-ventilated area.

Figure 5: Automatic Self-Cleaning Cycle
7. Troubleshooting
| Problem | Possible Cause | Solution |
|---|---|---|
| "ADD WATER" indicator is on. | Water reservoir is empty or water level is too low. | Add potable water to the reservoir up to the MAX fill line. |
| "ICE FULL" indicator is on. | Ice basket is full. | Remove ice from the basket. Ice production will resume automatically. |
| Ice maker is not producing ice. |
|
|
| Ice cubes are too small or clumpy. |
|
|
8. Specifications
| Feature | Detail |
|---|---|
| Brand | inoviva |
| Model Name | YHZB |
| Model Number (Part Number) | YH16T |
| Product Dimensions (D x W x H) | 8.86"D x 11.22"W x 11.57"H |
| Water Tank Capacity | 1.4 Liters |
| Ice Production per Day | 26.5 Pounds |
| First Ice Making Time | Approx. 6 minutes |
| Wattage | 100 watts |
| Voltage | 120 Volts |
| Refrigerant | R600a |
| Material Type | Acrylonitrile Butadiene Styrene |
| Included Components | Ice maker, ice scoop, ice basket, user manual |
9. Warranty and Support
For warranty information or technical support, please refer to the contact details provided with your purchase documentation or visit the official INOVIVA website. Keep your purchase receipt as proof of purchase for any warranty claims.
The product may be eligible for extended protection plans. Please check your purchase details for available options.