
Introduction
The iROCKER Electric SUP Pump Inflator is designed for efficient inflation and deflation of inflatable paddle boards, kayaks, and other compatible inflatable products. This pump features digital PSI control, an auto shut-off function, and compatibility with various valve types, including iLAND, iROCKER, BLACKFIN, HOBIE, and Halkey-Roberts valves. It is powered by a 12V source, such as a car cigarette lighter or a 12V battery (not included).
This manual provides essential information for the safe and effective use of your iROCKER Electric SUP Pump. Please read it thoroughly before operation.
Setup
- Unpack Components: Remove the electric pump, inflation hose, and power cables from the packaging.
- Connect Hose: Attach one end of the blue inflation hose to the 'INFLATE' port on the pump. Ensure it is securely twisted into place.
- Select Adapter: Choose the appropriate valve adapter for your inflatable product (e.g., iROCKER, Halkey-Roberts) and attach it to the other end of the inflation hose.
- Connect Power:
- For vehicle use: Plug the 12V cigarette lighter adapter into your car's 12V outlet.
- For external battery use: Connect the alligator clips to a compatible 12V battery (red to positive, black to negative).
- Prepare Inflatable: Ensure your paddle board or kayak valve is clean and free of debris.

Figure 1: iROCKER Electric SUP Pump components.
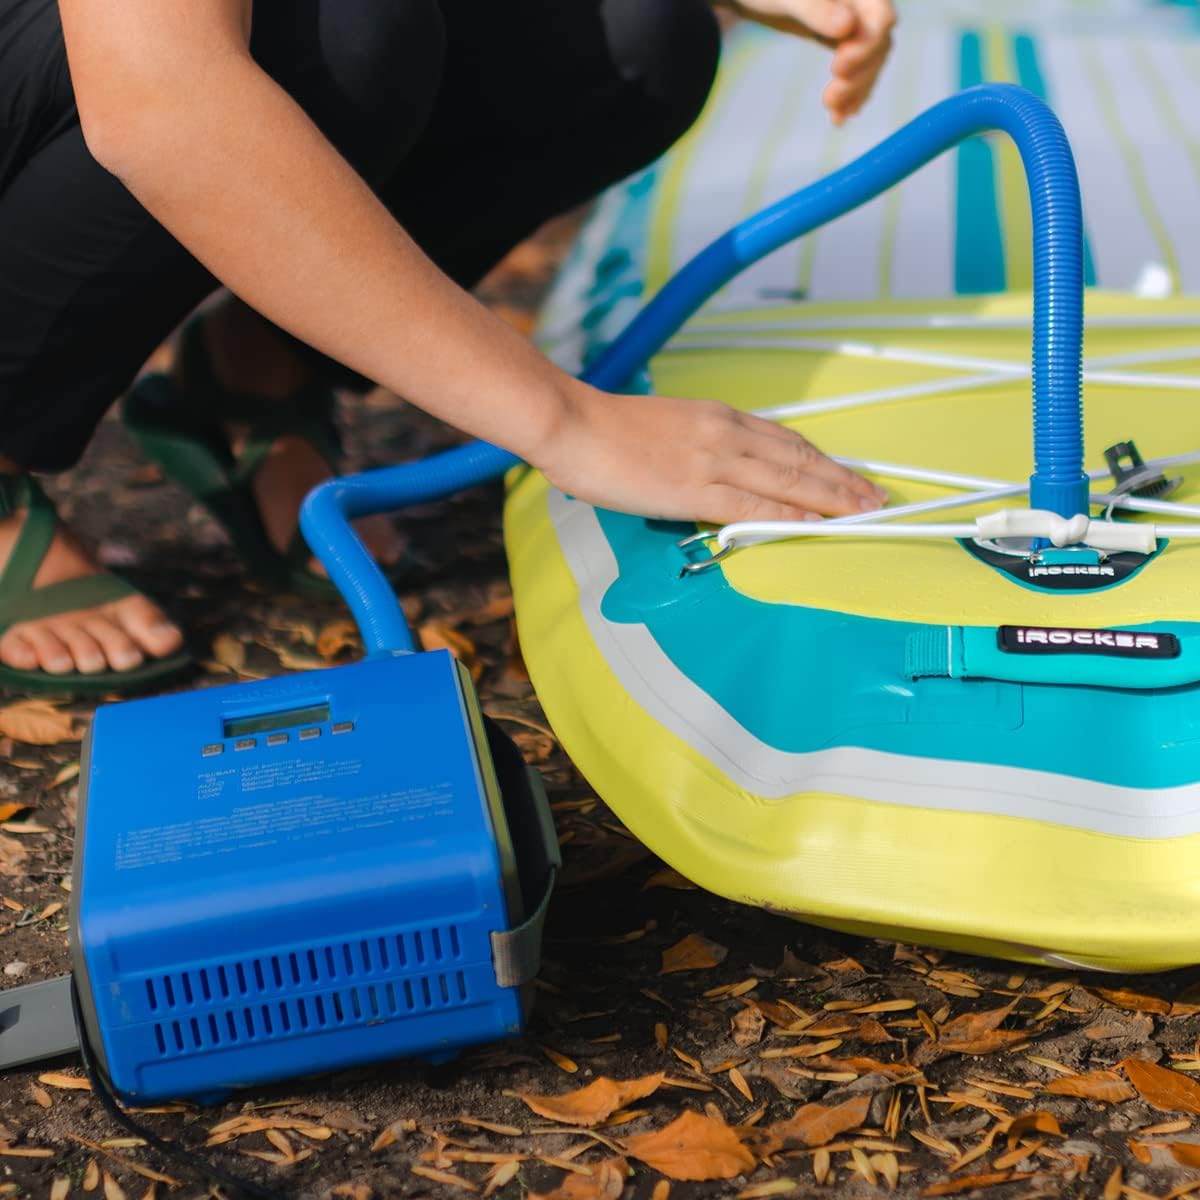
Figure 2: Connecting the inflation hose to a paddleboard valve.
Operating Instructions
Inflation:
- Attach to Valve: Securely connect the hose adapter to the valve of your inflatable product.
- Set Desired PSI: Use the '+' and '-' buttons on the pump's digital display to set your target pressure. The recommended PSI for most iROCKER SUPs is 15 PSI.
- Start Inflation: Press the 'ON' button to begin inflation. The pump will operate in a dual-stage process, first rapidly filling with air, then switching to high-pressure mode to reach the set PSI.
- Automatic Shut-Off: The pump will automatically stop once the preset pressure is achieved, preventing over-inflation.
- Disconnect: Once inflation is complete, disconnect the hose from the valve and the pump.

Figure 3: Setting the desired PSI on the pump's digital display.

Figure 4: The pump actively inflating a paddleboard.
Deflation:
- Connect Hose for Deflation: Attach one end of the blue inflation hose to the 'DEFLATE' port on the pump.
- Attach to Valve: Securely connect the hose adapter to the valve of your inflatable product.
- Start Deflation: Press the 'ON' button. The pump will begin to extract air from the inflatable, assisting in quick and thorough pack-up.
- Disconnect: Once deflation is complete, disconnect the hose from the valve and the pump.

Figure 5: Disconnecting the hose from the pump after use.
Maintenance
- Cleaning: Wipe the pump exterior with a damp cloth after each use. Ensure no water enters the air vents or ports. Do not use harsh chemicals.
- Storage: Store the pump in a cool, dry place, away from direct sunlight and extreme temperatures. Utilize the cord storage compartment for neat organization.
- Cool-Down Periods: To prevent overheating and ensure longevity, allow the pump to cool down for at least 30 minutes after inflating two paddle boards consecutively.
- Inspect Hose and Adapters: Regularly check the inflation hose and valve adapters for any signs of wear, cracks, or damage. Replace if necessary to maintain optimal performance.
Troubleshooting
| Problem | Possible Cause | Solution |
|---|---|---|
| Pump does not turn on. | No power connection or faulty power source. | Ensure the 12V power cable is securely connected to a functioning power source. Check vehicle's 12V outlet or battery connections. |
| Pump shuts off before reaching target PSI. | Overheating or internal safety mechanism activated. | Allow the pump to cool down for at least 30 minutes. Ensure air vents are not obstructed. If problem persists, contact support. |
| Cannot adjust PSI setting lower. | Specific operational design. | If you accidentally set the PSI too high, you may need to cycle the power or consult the digital display instructions for specific adjustment methods. Generally, the '-' button should decrease the value. |
| Pump is very noisy during operation. | Normal operation for high-pressure pumps. | This is typical for electric air pumps. Consider placing the pump inside a vehicle or away from sensitive areas to muffle sound if desired. |
| Slow inflation speed. | Low power input or hose/valve obstruction. | Ensure a stable 12V power supply. Check hose and valve connections for leaks or obstructions. |
Specifications
| Feature | Detail |
|---|---|
| Model Number | IR Epump_20 |
| Brand | iROCKER |
| Material | Plastic |
| Item Weight | 1.97 Kilograms |
| Power Source | Corded Electric (12V) |
| Maximum Pressure | 15 PSI (Pound per Square Inch) |
| Operation Mode | Automatic (Dual Stage) |
| Battery Type | Non-rechargeable (requires external 12V source) |
| Connector Type | 12V Cigarette Lighter Plug, Alligator Clips |
| Included Components | Electric Pump, Inflation Hose, 12V Cigarette Lighter Cable, Alligator Clip Cable, Valve Adapters |
Warranty Information
For detailed warranty information regarding your iROCKER Electric SUP Pump Inflator, please refer to the official iROCKER website or contact iROCKER customer service directly. Keep your proof of purchase for warranty claims.
Customer Support
If you have any questions, require technical assistance, or need to report an issue with your iROCKER Electric SUP Pump, please visit the official iROCKER website for support resources, FAQs, and contact information. You can typically find contact details such as email addresses or phone numbers in the 'Support' or 'Contact Us' section of their website.