
1. Introduction
This manual provides detailed instructions for the assembly, operation, maintenance, and troubleshooting of your YOMILUVE L-Shaped Gaming Desk. Please read this manual thoroughly before assembly and use to ensure proper function and safety. Keep this manual for future reference.

Image 1.1: Fully assembled YOMILUVE L-Shaped Gaming Desk in Antique White, showcasing its monitor stand, storage shelves, and drawers.
2. Safety Information
- Read all instructions: Before assembly and use, carefully read and understand all instructions provided in this manual.
- Keep children and pets away: During assembly, keep small parts and packaging materials away from children and pets to prevent choking hazards.
- Assemble on a clean, flat surface: Assemble the desk on a soft, clean, and flat surface to prevent scratches and damage.
- Use correct tools: Ensure you use the appropriate tools as specified in the assembly instructions.
- Do not overtighten screws: Overtightening screws can damage the material. Tighten until snug.
- Check stability: After assembly, ensure the desk is stable and all connections are secure before placing items on it.
- Electrical safety: The integrated charging station contains electrical components. Do not expose it to water or excessive moisture. Ensure the power cord is not pinched or damaged. Disconnect from power before cleaning or if any issues arise.
- Weight limits: Do not exceed the recommended weight capacity for the desk surfaces, shelves, and monitor stand.
3. Package Contents
Verify that all components are present before beginning assembly. If any parts are missing or damaged, contact customer support.
- Desk panels (L-shaped main desk, monitor stand, side shelves)
- Metal frame components
- 3 Fabric drawers
- Integrated charging station (2 USB ports, 2 AC outlets)
- LED light strip with remote control
- 2 Side hooks
- Assembly hardware (screws, bolts, Allen wrench)
- Instruction manual
4. Setup and Assembly
Assembly typically requires two people. Follow the step-by-step instructions provided in the included assembly guide. The desk features a reversible design, allowing you to configure the storage shelves and drawers on either the left or right side during assembly.

Image 4.1: Product dimensions, showing the overall size of 18.9"D x 55.1"W x 45.3"H.
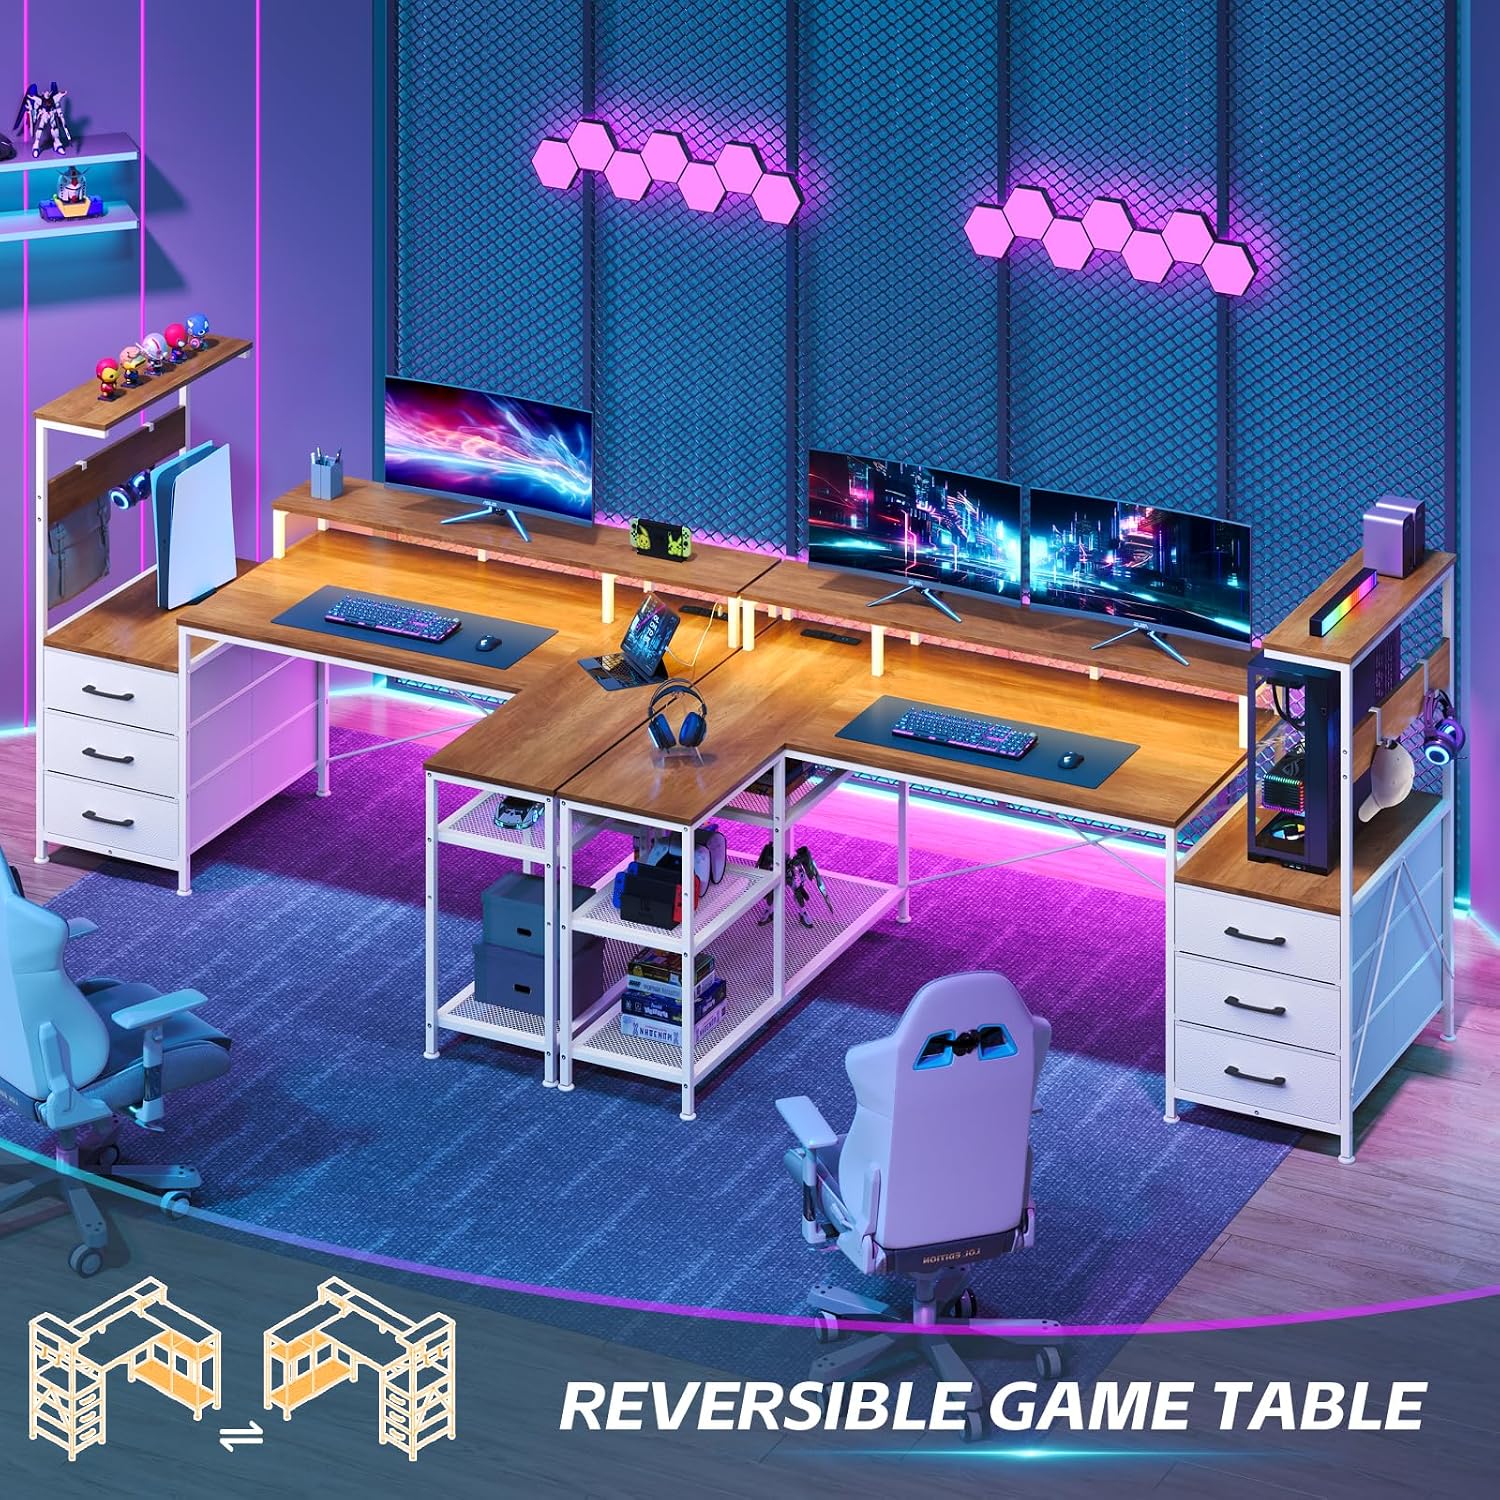
Image 4.2: The reversible design allows the storage unit to be placed on either the left or right side during assembly.
4.1. Key Assembly Steps
- Unpack and Identify Parts: Lay out all components and hardware. Refer to the parts list in your separate assembly guide to identify each piece.
- Assemble the Frame: Connect the metal frame components according to the diagrams, ensuring all screws are finger-tightened initially.
- Attach Desk Panels: Secure the main L-shaped desk panels to the frame.
- Install Storage Unit: Decide on the left or right configuration for the storage shelves and drawers. Assemble and attach this unit to the main desk frame.
- Mount Monitor Stand: Secure the ergonomic monitor stand to the main desk surface.
- Insert Fabric Drawers: Place the fabric drawers into their designated slots.
- Attach Hooks: Install the side hooks for headphones or other accessories.
- Final Tightening: Once all components are in place and aligned, fully tighten all screws with the provided tools. Do not overtighten.
- Install LED Lights: Adhere the LED light strip to the desired location under the desk surface. Connect it to the power source.
- Connect Charging Station: Ensure the integrated charging station's power cord is accessible and can be plugged into a wall outlet.
5. Operating Instructions
5.1. Integrated Charging Station
The desk is equipped with a charging station featuring 2 USB ports and 2 standard AC outlets. To use, plug the charging station's power cord into a wall outlet. You can then connect your devices (computer, tablet, phone, etc.) to the available ports.
5.2. LED Lights
The integrated LED lights offer multiple color options and 4 dynamic modes. Use the included remote control to operate the lights:
- Power On/Off: Press the power button on the remote.
- Color Selection: Use the color palette buttons to choose your desired static color.
- Dynamic Modes: Select from the preset dynamic modes (e.g., flash, strobe, fade, smooth) to create different lighting effects.
- Brightness Adjustment: Use the brightness up/down buttons to adjust the intensity of the lights.

Image 5.1: The LED lights offer various colors and dynamic modes, controllable via remote.
5.3. Monitor Stand
The ergonomic monitor stand is designed to elevate your monitor to a comfortable viewing height, which can help reduce neck and back strain during extended use.

Image 5.2: The monitor stand helps maintain an ergonomic posture, reducing neck and back strain.
5.4. Storage Features
- Fabric Drawers: Use the three fabric drawers for organized storage of books, headphones, files, and other personal items.
- Computer Tower Stand: A dedicated shelf is provided to hold your computer host, keeping it off the floor and easily accessible.
- Side Hooks: Utilize the two side hooks for hanging headphones, cables, or other accessories.
- Open Storage Shelves: The open shelves under the desk provide additional space for game consoles, books, or decorative items.

Image 5.3: Three spacious fabric drawers provide ample storage for various items.

Image 5.4: The computer tower stand provides a secure and accessible location for your PC.
6. Maintenance
- Cleaning: Wipe the desk surfaces with a soft, damp cloth. Avoid harsh chemicals or abrasive cleaners, which can damage the finish. For the fabric drawers, spot clean with a mild detergent if necessary.
- Dusting: Regularly dust all surfaces to prevent buildup.
- Check Connections: Periodically check all screws and bolts to ensure they remain tight. Retighten if necessary to maintain stability.
- Electrical Components: Keep the charging station and LED lights free from dust. Do not attempt to repair electrical components yourself.
- Avoid Direct Sunlight: Prolonged exposure to direct sunlight may cause fading or damage to the desk finish.
7. Troubleshooting
7.1. Desk is Unstable/Wobbly
- Solution: Ensure all screws and bolts are securely tightened. Check that the desk is on a level surface. Adjust the anti-slip feet if necessary to compensate for uneven floors.
7.2. LED Lights Not Working
- Solution: Verify that the LED light strip is properly connected to its power source and that the power source is plugged into a functional wall outlet. Check the remote control battery. Ensure there are no visible damages to the LED strip or wiring.
7.3. Charging Station Not Providing Power
- Solution: Confirm that the charging station's power cord is fully plugged into a working wall outlet. Test the outlet with another device. Check for any visible damage to the charging station or its cord.
7.4. Missing or Damaged Parts
- Solution: If you discover missing or damaged parts during unpacking or assembly, do not proceed with assembly. Contact YOMILUVE customer support immediately for assistance.
8. Specifications
| Feature | Detail |
|---|---|
| Brand | YOMILUVE |
| Model Number | B0GXVSGJHJ |
| Color | Antique White |
| Shape | L-Shape |
| Product Dimensions (D x W x H) | 18.9" x 55.1" x 45.3" |
| Material | Engineered Wood, Metal |
| Number of Drawers | 3 (Fabric) |
| Number of Shelves | 3 (Open Storage) |
| Special Features | Built-In USB Outlet (2 ports), AC Outlets (2 ports), LED Light, Reversible Design, Monitor Stand, Side Hooks |
| Assembly Required | Yes |
| Included Tools | Yes |
9. Warranty Information
YOMILUVE products are manufactured with quality and care. For specific warranty details, including coverage duration and terms, please refer to the warranty card included with your product packaging or visit the official YOMILUVE website. Keep your proof of purchase for warranty claims.
10. Customer Support
If you have any questions, require assistance with assembly, or encounter any issues with your YOMILUVE L-Shaped Gaming Desk, please contact our customer support team. Refer to your product packaging or the YOMILUVE official website for contact information (phone number, email, or support portal).
We are committed to providing excellent service and support for your product.