
Introduction
This manual provides detailed instructions for the VVB 9-in-1 USB-C Docking Station (3.1 inches). This device expands your laptop's connectivity, offering multiple ports for display, data transfer, and power delivery. Please read this manual thoroughly before use to ensure proper operation and to maximize the product's capabilities.
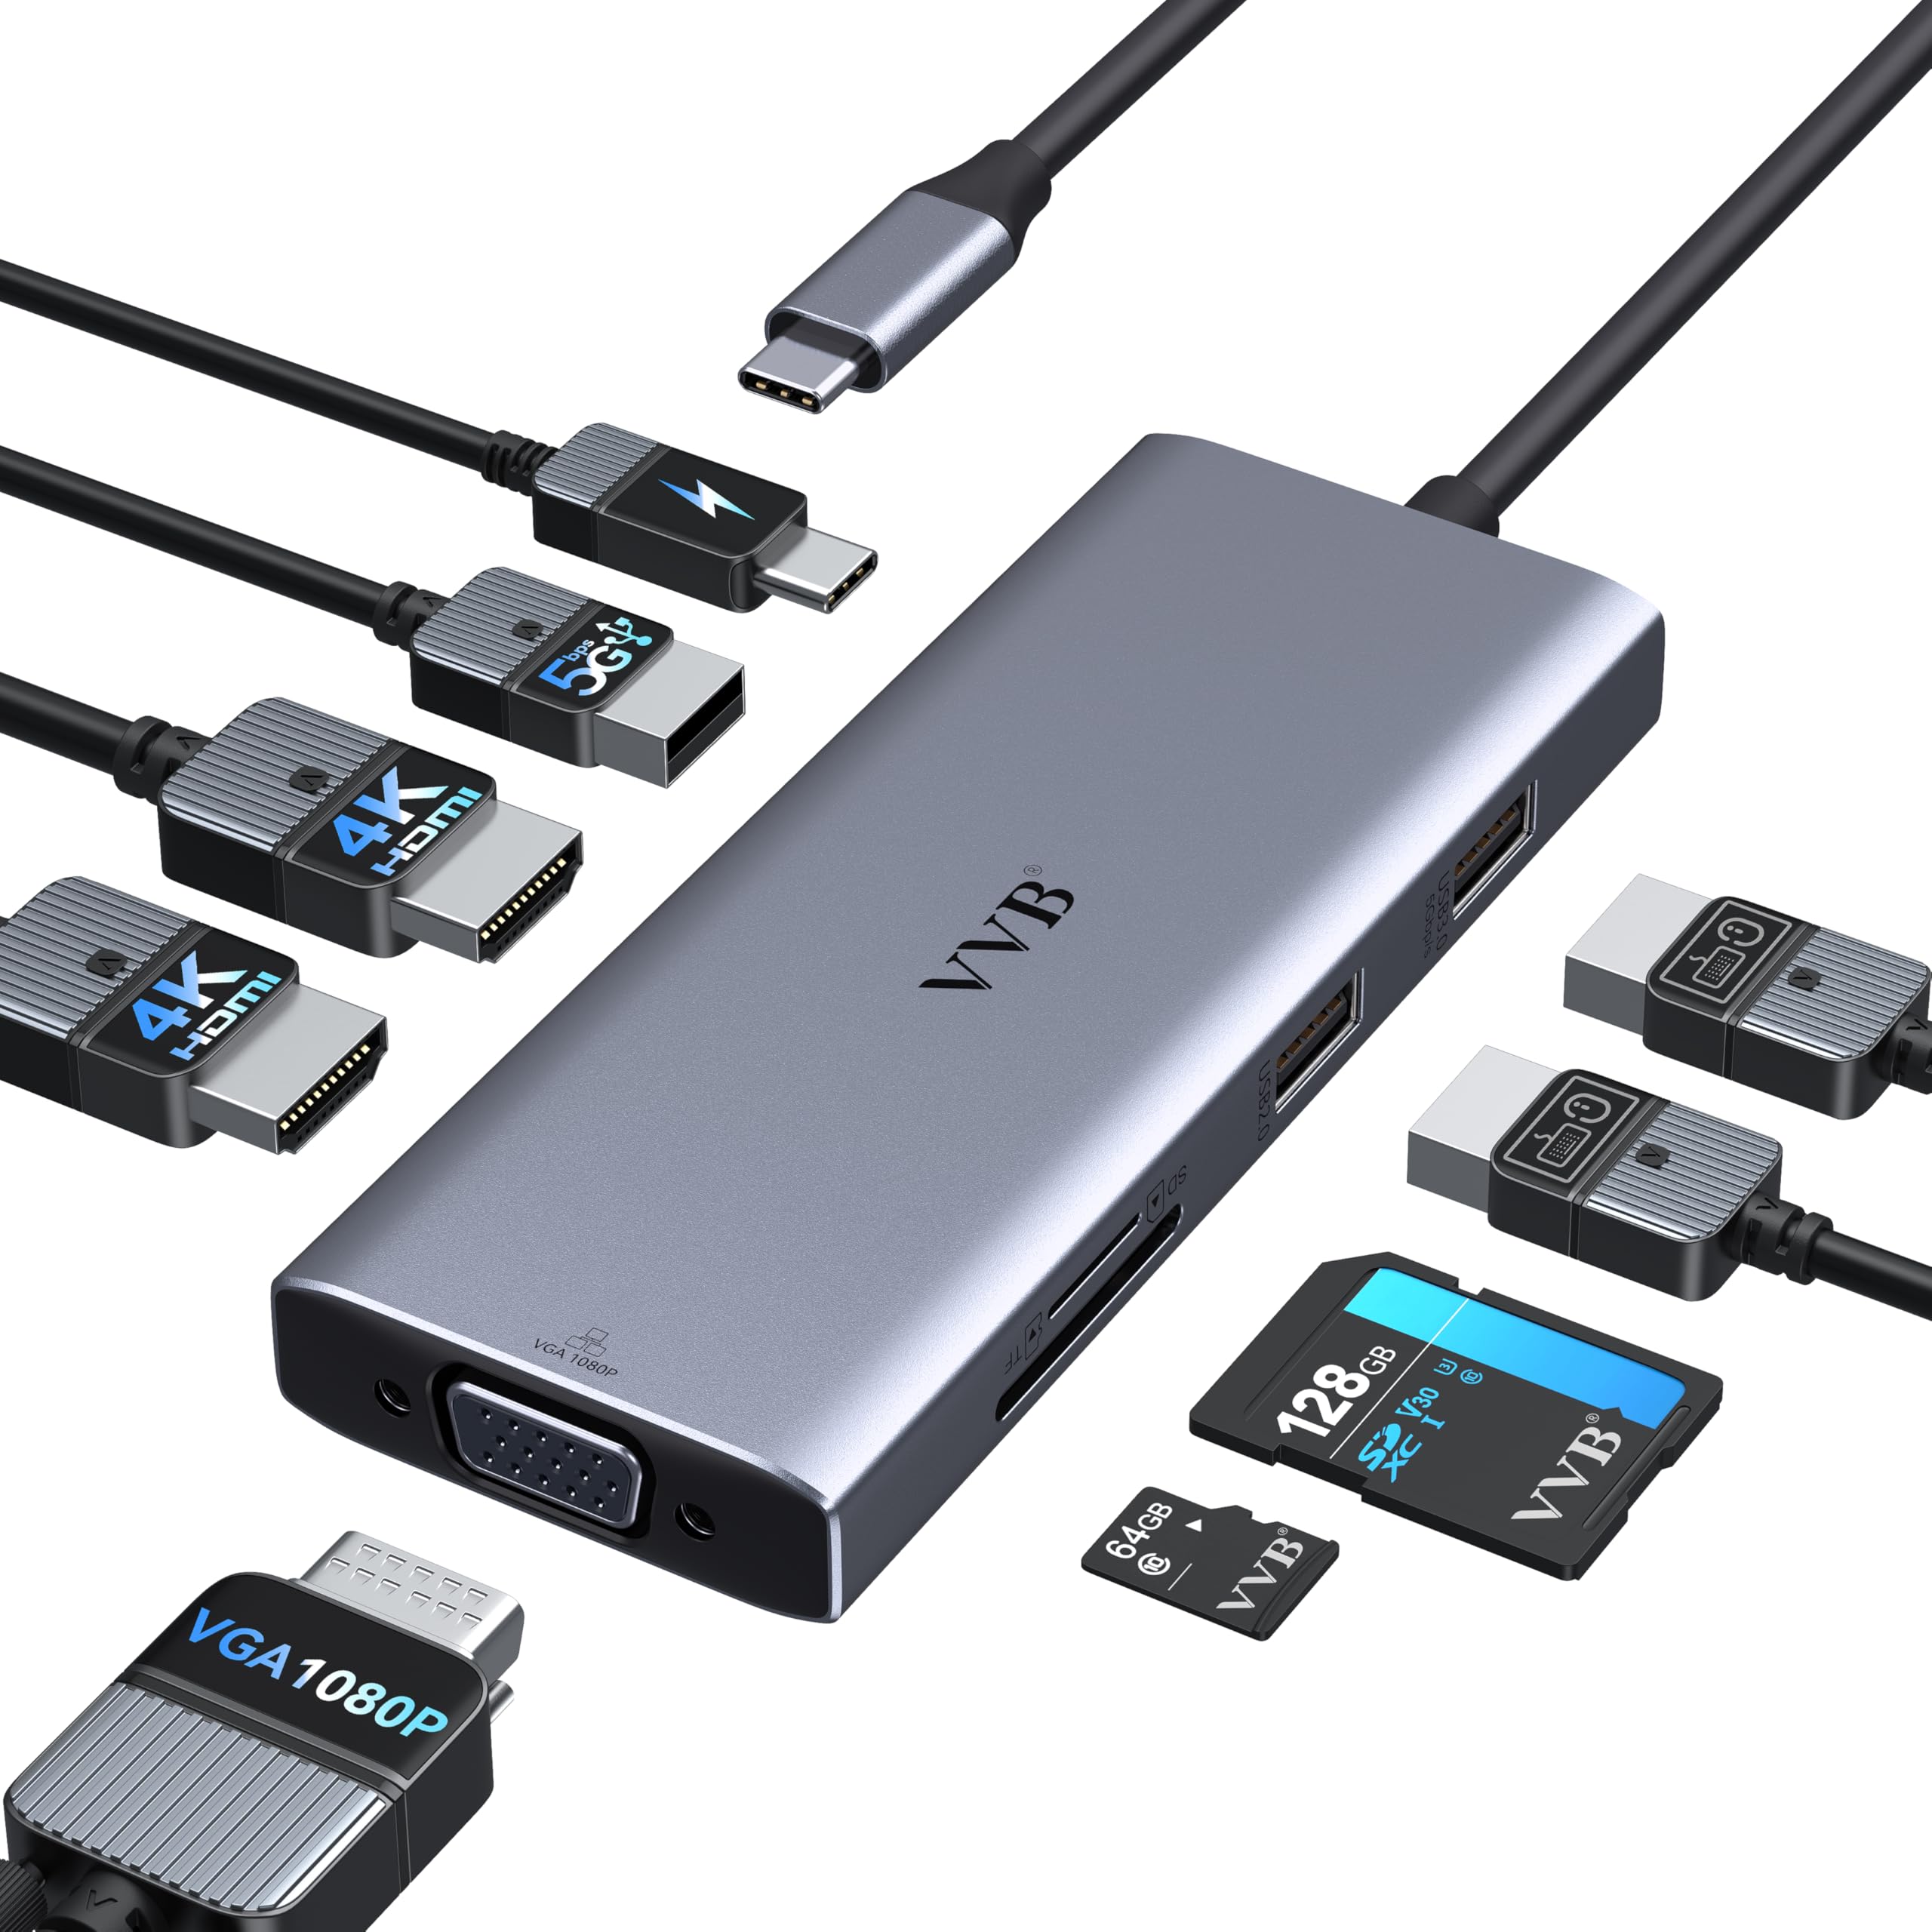
Image: The VVB 9-in-1 USB-C Docking Station, showcasing its compact design.
Product Features
The VVB 9-in-1 USB-C Docking Station offers comprehensive connectivity:
- 9-in-1 Connectivity: Converts a single USB-C/Thunderbolt 3/Type C port into 9 versatile ports.
- Dual HDMI 4K Output: Supports up to 4K@30Hz resolution for single HDMI use.
- VGA 1080P Output: Supports up to 1080P@60Hz resolution for single VGA use.
- 100W Power Delivery (PD): Provides up to 87W safe power output for laptop charging (requires at least 65W power adapter, not included).
- USB Data Ports: Includes 1x USB 3.0 port (up to 5Gbps) and 2x USB 2.0 ports (up to 480Mbps) for peripherals.
- SD/TF Card Readers: Facilitates fast data transfer from SD and Micro SD cards.
- Extensive Compatibility: Compatible with full-featured USB Type-C ports (supporting display, charging, data transfer protocols) such as Thunderbolt 3, Thunderbolt 4, USB-C 3.2 Gen 1 & Gen 2 with Power Delivery/DisplayPort functions.

Image: An overview of the VVB 9-in-1 USB-C Hub, highlighting its various ports including USB-C PD, HDMI, VGA, USB-A, and SD/TF card slots.
Setup Instructions
- Connect to Laptop: Plug the integrated USB-C cable from the docking station into a full-featured USB-C port on your laptop. Ensure your laptop's USB-C port supports display, charging, and data transfer protocols (e.g., Thunderbolt 3/4, USB-C 3.2 Gen 1/2 with PD/DP functions).
- Connect Power Adapter (Optional but Recommended): For stable operation and laptop charging, connect your laptop's USB-C power adapter (at least 65W recommended) to the docking station's 100W USB-C PD charging port.
- Connect External Monitors:
- For HDMI displays, connect HDMI cables from your monitors to the HDMI1 and HDMI2 ports on the docking station.
- For VGA displays, connect a VGA cable from your monitor to the VGA port on the docking station.
- Connect USB Peripherals: Plug your USB devices (mouse, keyboard, external hard drives, etc.) into the available USB 3.0 and USB 2.0 ports.
- Insert SD/TF Cards: If needed, insert your SD or Micro SD cards into the corresponding slots. Note: Only one card can be read at a time.
Important Compatibility Note: Not all USB-C devices are compatible with this docking station. Verify your device's USB-C port functionality before purchase. Incompatible devices may not support HDMI/VGA output.
Operating Instructions
Multi-Monitor Configuration (Windows Laptops with DP1.4)
For Windows laptops supporting DisplayPort 1.4 (DP1.4), various extended display modes are available:
- Triple Monitor (HDMI1 + HDMI2 + VGA): All three external monitors can display at 1080P@60Hz.
- Dual Monitor (HDMI1 + HDMI2): One monitor can display at 4K@30Hz, and the other at 1080P@60Hz.
- Dual Monitor (HDMI1/2 + VGA): Both external monitors can display at 1080P@60Hz.
Note: If your laptop supports DP1.2, one of the external monitor's resolutions will be less than 1080P when using multiple displays.

Image: Diagrams illustrating various multi-monitor configurations for Windows laptops with DP1.4, including triple and dual extended display modes.
Multi-Monitor Configuration (macOS Laptops)
On macOS systems, external monitors will display the same image in both mirrored and extended modes. This means that while you can connect multiple external displays, they will all mirror the same content, or extend the desktop but show identical content across all external screens.

Image: Diagrams showing multi-monitor configurations for macOS laptops, indicating that external monitors will mirror each other.
Power Delivery (PD) Function
The USB-C PD port supports power input up to 100W, with a safe power output (charging) limited to 87W. To charge your laptop via the docking station, ensure:
- Your laptop supports the Power Delivery protocol.
- You use a power adapter of at least 65W (not included).

Image: Illustration of the 100W Power Delivery feature, showing power input to the hub and output to a laptop.
USB Data Transfer
The docking station includes:
- 1x USB 3.0 Port: Offers data transfer speeds up to 5Gbps, ideal for external hard drives or high-speed peripherals.
- 2x USB 2.0 Ports: Provides data transfer speeds up to 480Mbps, suitable for keyboards, mice, and other standard peripherals.
If you experience interference with wireless devices connected to USB 2.0 ports, try connecting them to the USB 3.0 port for a more stable connection.

Image: A visual representation of the USB ports on the docking station, indicating their use for mouse, keyboard, and hard disk connections with 5Gbps transfer speed.
SD/TF Card Reader
The integrated SD and Micro SD card readers allow for convenient transfer of photos and data. Please note that only one card (either SD or Micro SD) can be connected and read at a time.

Image: A user inserting an SD card into the docking station, demonstrating the SD/Micro SD card reader functionality.
Maintenance
- Keep the docking station away from water, fire, and corrosive liquids.
- Avoid dropping or subjecting the device to strong impacts.
- Do not attempt to disassemble or repair the device yourself. Contact customer support if issues arise.
- Clean the device with a soft, dry cloth. Do not use harsh chemicals or abrasive materials.
- Ensure adequate ventilation around the docking station, especially during extended use, as it may become warm.
Troubleshooting
- No display on external monitors:
- Ensure your laptop's USB-C port supports DisplayPort Alternate Mode.
- Check all cable connections (USB-C to laptop, HDMI/VGA to monitors).
- Verify monitor input settings are correct (e.g., HDMI1, HDMI2, VGA).
- Restart your laptop and reconnect the docking station.
- For macOS, remember external monitors will mirror each other.
- Laptop not charging:
- Ensure your laptop's USB-C port supports Power Delivery.
- Confirm your power adapter is connected to the docking station's PD port and is at least 65W.
- Check if the power adapter and cable are functioning correctly.
- USB devices not recognized or unstable:
- Try connecting the device to a different USB port on the docking station.
- If using a wireless device, try connecting its receiver to the USB 3.0 port to minimize interference.
- Ensure the docking station is receiving sufficient power, especially if multiple power-hungry devices are connected.
- SD/TF card not detected:
- Ensure only one card is inserted at a time.
- Check if the card is inserted correctly and fully.
- Test the card directly in your laptop (if possible) to rule out card issues.
Specifications
| Brand | VVB |
| Model | B0GXHJ1TVC (3.1 inches) |
| Color | Dark gray |
| Total Ports | 9 |
| HDMI Ports | 2 (up to 4K@30Hz single) |
| VGA Port | 1 (up to 1080P@60Hz single) |
| USB-C PD Charging | Input 100W, Output 87W (max) |
| USB 3.0 Ports | 1 (up to 5Gbps) |
| USB 2.0 Ports | 2 (up to 480Mbps) |
| Card Readers | SD, Micro SD (one at a time) |
Warranty and Support
This VVB product comes with a 1-Year Warranty from the date of purchase.
For technical support, warranty claims, or any questions regarding the product, please contact VVB customer service through the retailer where the product was purchased or refer to the contact information provided with your product packaging.


