
WILAWELS D11LT06
WILAWELS 300W Low Voltage Landscape Transformer Instruction Manual
Model: D11LT06
1. Important Safety Information
Please read and understand all instructions before installing or operating this low voltage landscape transformer. Retain this manual for future reference.
- Electrical Safety: This transformer converts 120V AC household current to 12/14V AC low voltage. Always disconnect power at the circuit breaker before installing or servicing.
- Outdoor Use Only: This transformer is designed for outdoor installation only. Ensure it is mounted in a location protected from direct water spray if possible, though its metal housing is weather-resistant.
- ETL Listed: The product, including its power cord and sensor wire, is ETL listed, indicating compliance with North American safety standards.
- Wiring: Use only approved low voltage landscape lighting cable. Do not exceed the transformer's maximum wattage capacity (300W).
- Grounding: Ensure proper grounding according to local electrical codes.
- Children and Pets: Keep the transformer and wiring out of reach of children and pets.
2. Product Overview
The WILAWELS 300W Low Voltage Landscape Transformer is designed to provide stable 12/14V AC power for various outdoor lighting applications, including pathway lights, spotlights, deck lights, and string lights. Its robust design and intelligent features ensure reliable and energy-efficient operation.

Image: The WILAWELS 300W Low Voltage Landscape Transformer, showcasing its compact design and control panel.
Key Features:
- Power Output: Converts 120V AC to 12/14V AC, with a maximum output of 300W.
- Multiple Lighting Modes: Features 6 control modes for flexible operation.
- Weatherproof Construction: Durable metal housing resists corrosion, heat, rain, snow, and dust.
- ETL Certified: Ensures safety and quality standards are met.
- Circuit Protection: Automatic power-off in case of faults, with a memory function to retain settings.
- Photocell Sensor: Enables automatic dusk-to-dawn operation.

Image: Visual representation of the transformer's key features, including reinforced metal housing, weather resistance, 6 lighting modes, smart light-sensing system, and ETL certification.
3. Installation and Setup
Installation can typically be completed within one hour. Follow these steps for a secure and functional setup.
Tools Required:
- Screwdriver
- Wire strippers
- Drill (if mounting to a wall)
- Measuring tape
Mounting the Transformer:
- Choose a suitable outdoor location near a 120V AC power outlet. Ensure the location allows for proper cable routing to your lighting fixtures.
- Mount the transformer securely to a wall or post using appropriate screws. Ensure it is level and stable.
Wiring the Lights:

Image: A four-step visual guide to quick installation, showing cable preparation, connection to the transformer, light fixture placement, and transformer mounting.
- Prepare Compatible Cable: Select appropriate low voltage landscape lighting cable (e.g., 12-gauge or 14-gauge, depending on total wattage and run length). Strip the ends of the cable to expose the copper wires.
- Connect Cable to Transformer: Open the wiring compartment on the transformer. Connect the stripped ends of your landscape lighting cable to the low voltage output terminals (12V or 14V, and COM). Ensure a secure connection. The transformer features dual terminals and multiple outputs for flexible wiring arrangements.
- Place Light Fixtures and Wiring: Position your low voltage light fixtures in desired locations. Run the landscape lighting cable from the transformer to each fixture, ensuring all connections are waterproof and secure.
- Fix Transformer in Place: Once all wiring is complete and checked, ensure the transformer is firmly fixed in its mounted position.
After installation, plug the transformer's power cord into a grounded 120V AC outdoor outlet. The unit is ready for programming.
4. Operating Modes
The transformer offers six distinct lighting control modes to suit various needs and preferences. Use the control panel buttons (MENU, CLOCK, UP/DOWN arrows, ENTER) to navigate and set modes.
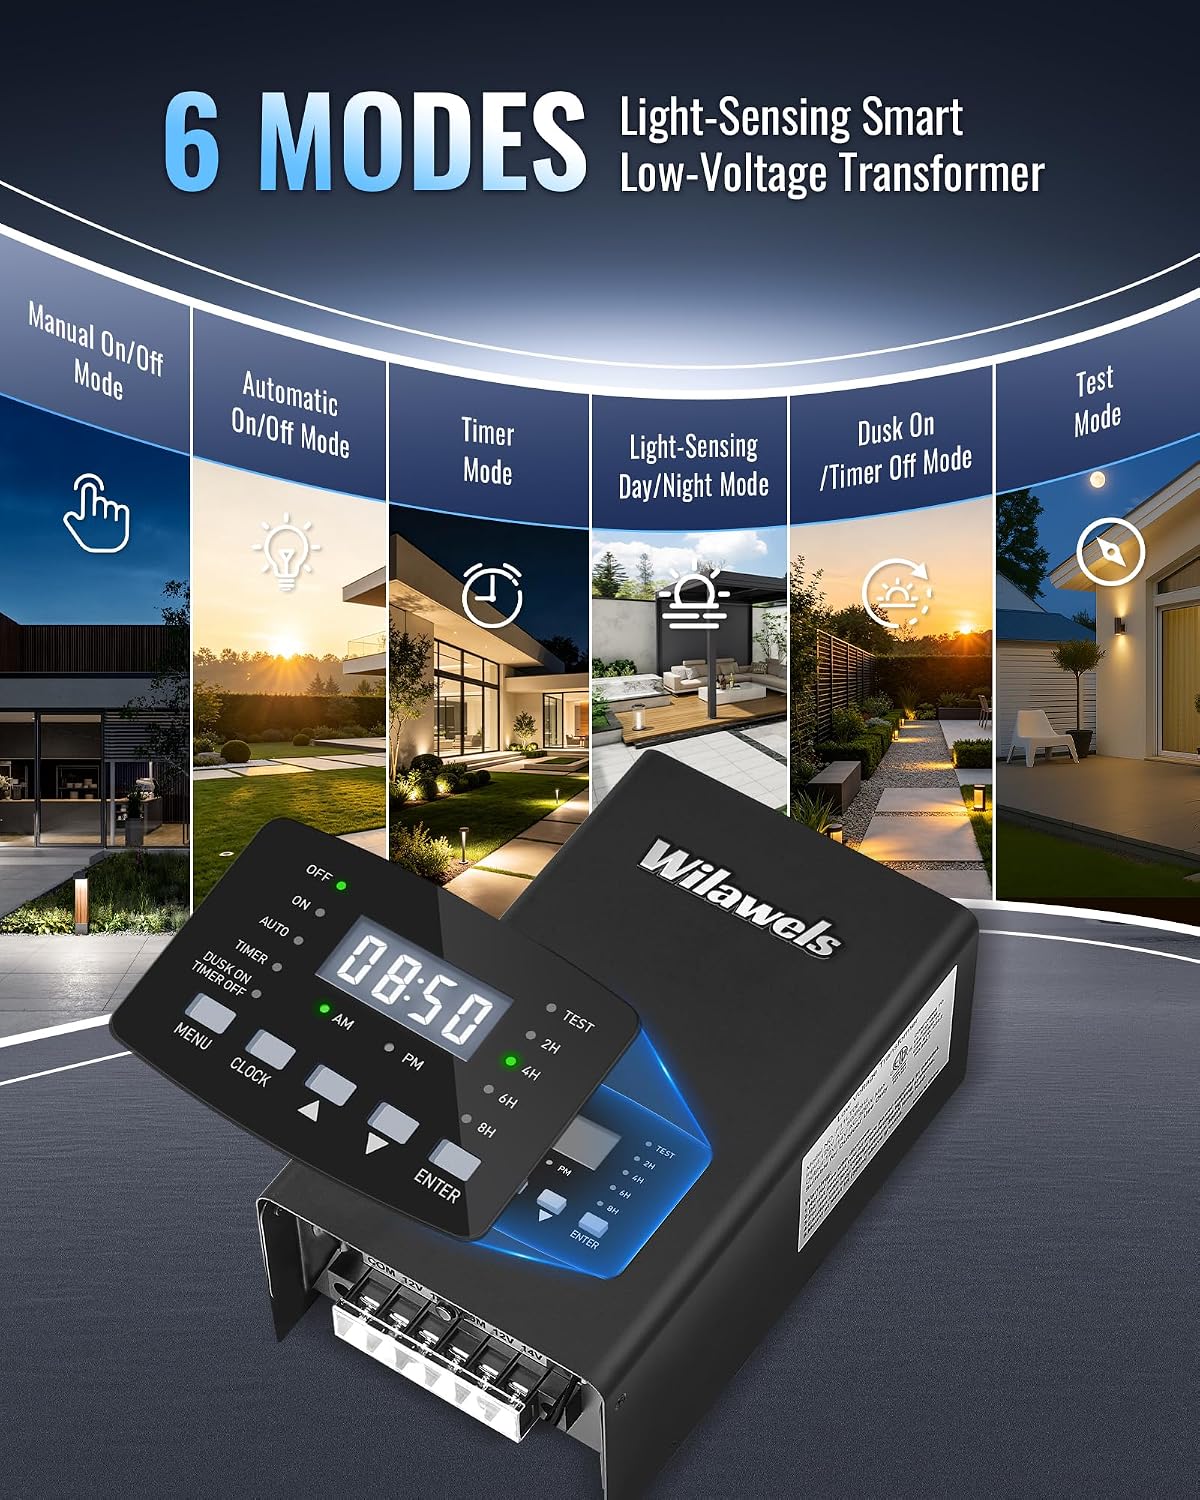
Image: A visual display of the six operating modes: Manual On/Off, Automatic On/Off, Timer, Light-Sensing Day/Night, Dusk On/Timer Off, and Test Mode.
4.1. Manual On/Off Mode
Allows you to manually turn the lights on or off at any time. This mode bypasses all automatic settings.
4.2. Automatic On/Off Mode (Light-Sensing Day/Night)
Utilizes the integrated photocell sensor to automatically turn lights on at dusk and off at dawn. No manual intervention is required.

Image: Illustration of the smart light-sensitive sensor, showing lights turning on at dusk and off at dawn automatically.
4.3. Countdown Mode
After the lights turn on at dusk (via the photocell sensor), they will automatically turn off after a preset duration (2H, 4H, 6H, or 8H). This mode is ideal for energy saving.

Image: Depiction of the countdown mode, where lights turn on at dusk and then off after a selected duration (2, 4, 6, or 8 hours).
4.4. Timer Mode (Customized Night Lighting)
Allows you to set specific ON and OFF times for your lights. This provides full control over your lighting schedule.

Image: An example of customized night lighting timer settings, showing lights turning on at 10:00 PM and off at 01:00 AM.
4.5. Dusk-to-Dawn Off Mode
Lights turn on automatically at dusk and then turn off at a freely set time, rather than waiting until dawn. This combines light-sensing with a specific off-time.

Image: Illustration of the Dusk-On Timer-Off mode, where lights activate at dusk and turn off at a user-defined time, such as 00:30 AM.
4.6. Test Mode
A temporary mode for testing light fixtures. The light sensor responds within 1 second, allowing for quick verification of connections and light placement.

Image: Visual explanation of the Test Mode, demonstrating rapid light sensor response for efficient fixture tuning.
5. Maintenance
Regular maintenance ensures the longevity and optimal performance of your transformer.
- Cleaning: Periodically wipe the transformer's exterior with a damp cloth to remove dirt and debris. Do not use abrasive cleaners or immerse the unit in water.
- Sensor Check: Ensure the photocell sensor is clean and unobstructed for accurate light-sensing operation.
- Wiring Inspection: Annually inspect all wiring connections for corrosion or damage. Tighten any loose connections.
- Environmental Protection: While the metal housing is weather-resistant, consider additional protection in extreme weather conditions to prolong its lifespan.

Image: The transformer shown enduring snowy, rainy, and sunny conditions, highlighting its weather-resistant housing.
6. Troubleshooting
If you encounter issues with your transformer, refer to the following common problems and solutions.
| Problem | Possible Cause | Solution |
|---|---|---|
| Lights not turning on. |
|
|
| Lights flickering or dim. |
|
|
| Automatic settings not working. |
|
|
| Transformer automatically shuts off. |
|
|

Image: An illustration demonstrating the power-off memory function, which automatically restores previous settings after a power interruption.
7. Specifications
| Feature | Detail |
|---|---|
| Brand | WILAWELS |
| Model | D11LT06 |
| Input Voltage | 120V AC |
| Output Voltage | 12V AC / 14V AC |
| Maximum Power Output | 300W |
| Certification | ETL Listed |
| Housing Material | Metal |
| Control Modes | Manual On/Off, Automatic On/Off (Light-Sensing), Countdown, Timer, Dusk-to-Dawn Off, Test Mode |
| Power Cord Length | 3.3 ft (ETL listed, 18AWG/3C) |
| Sensor Wire Length | 6 ft (ETL listed, 20AWG/2C) |
| Dimensions (Approx.) | 25cm (9.8") Length x 15cm (5.9") Width x 10.5cm (4.1") Height |

Image: A graphic detailing the ETL listing, 300W maximum power, and 120V AC input to 12/14V AC output, along with a view of the wiring terminals.

Image: Detailed view of the transformer's dimensions, power cord specifications (ETL Certified, SJTW, 18AWG/3C, 3.3Ft), and sensor cord specifications (ETL Certified, SJTW, 20AWG/2C, 6Ft).
8. Warranty and Support
WILAWELS stands behind the quality of its products. For specific warranty details, please refer to the product packaging or contact WILAWELS customer support.
If you have any questions, require technical assistance, or need to report an issue, please contact our customer support team through the retailer's platform or the official WILAWELS website. Please have your model number (D11LT06) and purchase information ready when contacting support.
Ask a question about this manual
Ask about setup, troubleshooting, compatibility, parts, safety, or missing instructions. Manuals+ will review the question and use this page’s manual context to help answer it.