
1. Introduction
This manual provides essential information for the safe and efficient installation, operation, and maintenance of your DATOUBOSS 48V 5500W Hybrid Solar Inverter. Please read this manual thoroughly before installation and keep it for future reference. This inverter is designed to provide reliable power for various applications, including residential, office, and off-grid systems, by converting DC power from solar panels and batteries into stable AC power.

Figure 1: DATOUBOSS 48V 5500W Hybrid Solar Inverter applications.
2. Safety Instructions
Always observe the following safety precautions to reduce the risk of electric shock, fire, or injury:
- Installation must be performed by qualified personnel in accordance with all local electrical codes.
- Do not disassemble the inverter. There are no user-serviceable parts inside.
- Ensure all connections are tight and correct to prevent overheating and fire.
- Keep the inverter away from flammable materials, moisture, and direct sunlight.
- Ensure adequate ventilation around the inverter to prevent overheating.
- Wear appropriate personal protective equipment (PPE) during installation and maintenance.
- Always disconnect all power sources (solar, battery, AC grid) before performing any maintenance or wiring.

Figure 2: Multiple safety protections integrated into the inverter.
3. Product Overview
3.1 Key Features
- 48V High-Efficiency Storage System: Compatible with both 48V lead-acid and lithium batteries. Supports solar panel integration. Rated output 5500W, AC input/output 100V-120V. Achieves a maximum conversion efficiency of 98%.
- Pure Sine Wave Output: Utilizes high-performance pure sine wave inverter technology to provide stable, high-quality AC power. Protects sensitive electronic devices such as TVs, refrigerators, air conditioners, and computers from voltage fluctuations, ensuring safe and long-life operation.
- Smart 3-Stage Charging Modes: Offers three selectable modes: PV priority, Hybrid charging, and PV only charging. This flexibility adapts to various usage scenarios, intelligently selecting the optimal energy source to maximize solar energy utilization, reduce electricity costs, and optimize energy efficiency.
- Multiple Safety Protections: Built-in comprehensive safety features including short circuit protection, overcurrent protection, overvoltage protection, undervoltage protection, overheat protection, and overload protection. Features a parallel operation system and current balance control circuit to monitor load balance in real-time. Intelligent charge/discharge management extends battery life.
- Remote Monitoring & 3-Year Warranty: Connects to an optional Wi-Fi module (sold separately) for real-time remote monitoring via smartphone. The product comes with a 3-year warranty and 24-hour professional customer support for prompt after-sales service.

Figure 3: Core technologies and high-performance hybrid design.
3.2 Component Identification
Familiarize yourself with the various components and ports of the inverter:

Figure 4: Function introduction and part names.
- AC Input
- AC Output
- Communication Port (RS232)
- BMS / RS485 Communication Port
- Dry Contact
- Battery Input
- Power ON/OFF Switch
- PV Input
- Input Breaker
- Cooling Fan
- Battery Terminal (+)
- Battery Terminal (-)
- Solar Panel Input
- AC Main / Second Output
- Output Ground Terminal
- CT Signal Port
3.3 Dimensions and Weight
The inverter measures approximately 31.2 cm (length) x 12.5 cm (width) x 49.5 cm (height) and weighs 11.46 kg.
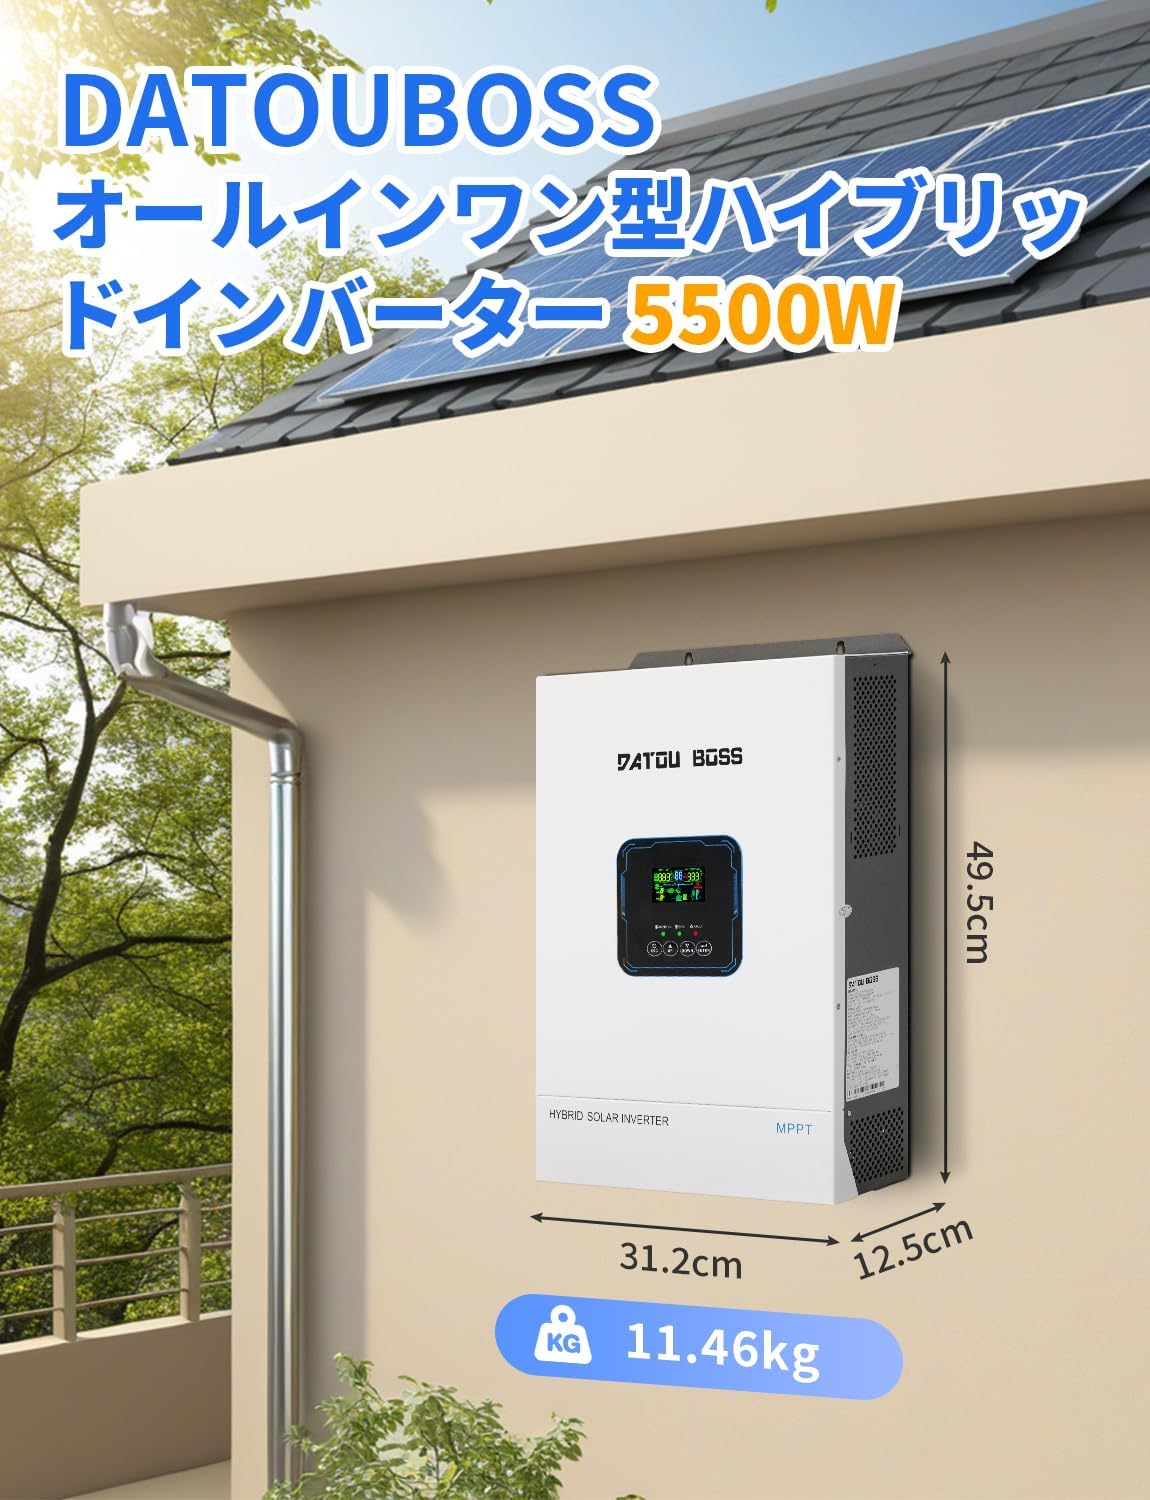
Figure 5: Inverter dimensions and weight.
4. Setup
4.1 Unpacking and Inspection
Upon receiving the inverter, carefully unpack it and inspect for any shipping damage. Ensure all components listed in the packing list are present. If any damage or missing parts are found, contact your dealer immediately.
4.2 Mounting the Inverter
Mount the inverter vertically on a sturdy wall or support structure. Ensure sufficient clearance around the unit for proper ventilation. Recommended clearances are 20cm on the sides and 50cm above and below the unit.

Figure 6: Recommended mounting clearances.
4.3 Wiring Connections
All wiring must comply with local electrical codes. Use appropriate wire gauges for all connections.
- Battery Connection: Connect the 48V battery bank to the DC battery input terminals (+ and -). Ensure correct polarity.
- Solar Panel Connection: Connect the solar panel array to the PV input terminals. Observe maximum voltage and current ratings.
- AC Input/Output: Connect the AC grid input to the AC input terminal and your household loads to the AC output terminal. The inverter supports 100V-120V AC.
- Grounding: Ensure the inverter is properly grounded to a reliable earth ground.
- Communication Ports (Optional):
- RS232 Port: Connect to an optional Wi-Fi module for remote monitoring. Note: Remote parameter changes are not supported via Wi-Fi.
- RS485 Port: Used for communication with compatible batteries. Ensure correct pin mapping (e.g., Pin 1 to 485B, Pin 2 to 485A).

Figure 7: Stable power for home and office wiring diagram.

Figure 8: RS232 and RS485 communication port details.
4.4 Initial Power-Up
After all connections are securely made and verified:
- Turn on the battery breaker.
- Turn on the solar panel (PV) breaker.
- Turn on the AC input breaker (if connected to grid).
- Finally, turn on the inverter's power switch.
The inverter will perform a self-test and the LCD display will light up.
5. Operating Instructions
5.1 LCD Display and Buttons
The high-precision LCD display provides real-time monitoring of the system status. Use the buttons to navigate menus and adjust settings.

Figure 9: High-precision LCD display and control buttons.
- LCD Display: Shows system parameters and status.
- Status Indicator: Indicates operational status.
- Charging Indicator: Shows battery charging status.
- Fault Indicator: Lights up if an error occurs.
- ESC Button: Exits current menu or setting.
- UP Button: Navigates up or increases value.
- DOWN Button: Navigates down or decreases value.
- ENTER Button: Confirms selection or enters menu.
5.2 Operating Modes
The inverter supports various charging and discharging modes to optimize energy usage:

Figure 10: Charging and discharging methods.
- PV Priority Charging: Solar power is prioritized for charging the battery.
- Hybrid Charging: Uses both solar and AC grid power for charging.
- PV Only Charging: Only solar power is used for charging.
- PV Priority Discharge: Solar power is prioritized for loads.
- Utility/Auxiliary Power Priority Discharge: Grid power is prioritized for loads.
- Battery Priority Discharge: Battery power is prioritized for loads.
5.3 Remote Monitoring (Optional)
With the optional Wi-Fi module, you can monitor your inverter's performance and status in real-time using a smartphone application. This allows for convenient oversight of your solar power system from anywhere.

Figure 11: Optional Wi-Fi module for remote monitoring.
5.4 Shutdown Procedure
To safely shut down the inverter:
- Turn off the inverter's power switch.
- Turn off the AC input breaker (if connected to grid).
- Turn off the solar panel (PV) breaker.
- Turn off the battery breaker.
6. Maintenance
Regular maintenance ensures optimal performance and longevity of your inverter.
- Periodic Inspection: Regularly check all wiring connections for tightness and signs of corrosion. Inspect the inverter casing for any damage.
- Ventilation: Ensure the cooling fans and ventilation openings are free from dust and obstructions. Clean them periodically with a soft brush or compressed air.
- Battery Care: Follow the battery manufacturer's guidelines for maintenance. Ensure battery terminals are clean and free of corrosion.
- Environment: Keep the inverter in a clean, dry, and well-ventilated area, away from direct sunlight and extreme temperatures.
7. Troubleshooting
If you encounter issues, refer to the following common problems and solutions. For complex issues, contact customer support.
| Problem | Possible Cause | Solution |
|---|---|---|
| Inverter does not power on | No battery connection, low battery voltage, power switch off, blown fuse/breaker. | Check battery connections, ensure battery voltage is sufficient, turn on power switch, check and reset breakers/fuses. |
| No AC output | Overload, short circuit, inverter fault, AC output breaker tripped. | Reduce load, check for short circuits, check inverter fault codes on LCD, reset AC output breaker. |
| Battery not charging | No PV input, low PV voltage, charging mode incorrect, battery fault. | Check solar panel connections and output, verify PV voltage, select correct charging mode, check battery health. |
| Overheat warning | Insufficient ventilation, blocked fans, high ambient temperature, excessive load. | Ensure proper clearances, clean fans, reduce ambient temperature, decrease load. |
8. Specifications
Detailed technical specifications for the DATOUBOSS 48V 5500W Hybrid Solar Inverter:
| Parameter | Value |
|---|---|
| Brand | DATOUBOSS |
| Model Number | 4855U |
| Rated Power | 5500 W |
| Peak Power (Instantaneous) | 11000 W |
| AC Input Voltage | 100V ~ 120V AC |
| AC Output Voltage | 100V ~ 120V AC |
| Frequency | 50Hz / 60Hz (Auto-sensing) |
| Output Waveform | Pure Sine Wave |
| Efficiency | >98% |
| Max Bypass Current | 50A |
| UPS Transfer Time | Approx. 0.01 seconds |
| Battery Voltage | 48 V DC |
| Max PV Input Power | 8500 W |
| MPPT Tracking Range | 60 ~ 500 Vdc |
| Optimal Voltage | 360 ~ 430 V |
| Max PV Input Voltage | 500 Vdc |
| Max PV Input Current | 27 A |
| Max PV Charge Current | 100 A |
| Max AC Charge Current | 40 A |
| Communication Interface | BMS RS485 / RS232 |
| Operating Temperature | -10°C ~ 55°C |
| Dimensions (L x W x H) | 31.2 x 12.5 x 49.5 cm |
| Weight | 11.46 kg |
| Display Type | LED |
9. Warranty and Support
The DATOUBOSS 48V 5500W Hybrid Solar Inverter comes with a 3-year warranty from the date of purchase. This warranty covers defects in materials and workmanship under normal use.
For technical assistance, troubleshooting, or warranty claims, please contact our professional customer support team. We offer 24-hour support to ensure quick resolution of any issues you may encounter.
Contact Information: Please refer to your purchase documentation or the official DATOUBOSS website for the most up-to-date contact details.


