
1. Introduction
Thank you for choosing the VERMESS 60-inch Computer Desk. This desk is designed to enhance your home office or study space with its spacious carbon fiber white desktop, integrated storage, and convenient power and lighting features. This manual provides essential information for safe assembly, proper operation, and routine maintenance to ensure long-lasting use of your product.

Figure 1.1: Overview of the VERMESS 60-inch Computer Desk.
2. Product Features
- Integrated Power Hub: Equipped with 3 AC outlets, 1 USB-A port (5V/2A), and 1 USB-C port (5V/2A) for convenient device charging and power access.
- LED Lighting: An integrated LED light strip offers adjustable brightness, speed control, and 20 color options, controllable via a mobile app.
- Reversible Storage Unit: The 6-drawer printer stand can be installed on either the left or right side of the desk to suit your space and preference.
- Ample Storage: Features six deep fabric drawers and a dedicated printer cabinet for organized storage of office supplies and equipment.
- Spacious Workspace: A 60-inch wide carbon fiber desktop provides generous space for multiple monitors, laptops, and paperwork.
- Ergonomic Monitor Stand: A raised monitor shelf promotes ergonomic viewing, reducing neck and eye strain.
- Durable Construction: Built with a thickened metal frame and a waterproof carbon fiber desktop for stability and longevity.
- Adjustable Feet Pads: Ensures stability on uneven surfaces.
3. Safety Information
- Read all instructions carefully before assembly and use.
- Keep all small parts and packaging materials away from children and pets to prevent choking hazards.
- Assemble the desk on a soft, clean surface to prevent scratches.
- Ensure all screws and fasteners are securely tightened before use. Periodically check and re-tighten as needed.
- Do not overload the desk or drawers. Refer to specifications for weight limits.
- Keep liquids away from electrical components (power outlets, LED light) to prevent electric shock.
- Do not attempt to modify the electrical components. Contact qualified personnel for any repairs.
- Use only the provided power cord and ensure it is properly routed to avoid tripping hazards.
4. Package Contents
Verify that all components are present before beginning assembly. If any parts are missing or damaged, contact customer support.
- Desktop Panel (Carbon Fiber White)
- Metal Frame Components (Legs, Support Bars)
- Monitor Stand Components
- Storage Unit Frame
- Fabric Drawers (6 units)
- Power Outlet Strip with USB-A and USB-C ports
- LED Light Strip
- Assembly Hardware (Screws, Bolts, Allen Wrench)
- Instruction Manual
5. Setup and Assembly Instructions
Follow these steps carefully for proper assembly. It is recommended to have two people for assembly.
- Unpack and Identify Parts: Lay out all components on a clean, soft surface. Refer to the parts list to ensure everything is present.
- Assemble the Main Desk Frame: Attach the desk legs to the main desktop panel using the provided screws. Ensure all connections are secure but do not fully tighten until the frame is complete.
- Assemble the Storage Unit: Construct the frame for the 6-drawer storage unit. Decide whether you want the storage unit on the left or right side of the desk. This unit also includes the printer cabinet section.
- Attach Storage Unit to Main Desk: Securely connect the assembled storage unit to the main desk frame. Ensure alignment and tighten all screws.
- Install Monitor Stand: Attach the monitor stand components to the top of the main desktop panel.
- Insert Fabric Drawers: Assemble the fabric drawers by inserting the MDF board into the bottom of each drawer. Slide the completed drawers into the storage unit compartments.
- Install Power Hub: Mount the power outlet strip into its designated slot on the desktop. Connect the power cord.
- Install LED Light Strip: Adhere the LED light strip to the underside of the monitor stand or desired location. Connect it to the power source.
- Final Tightening and Adjustment: Once all components are in place, fully tighten all screws. Adjust the feet pads to level the desk on your floor.

Figure 5.1: Product dimensions and key components for assembly. Note the reversible design for the storage unit.

Figure 5.2: The storage unit can be installed on either the left or right side of the desk.

Figure 5.3: Fabric drawer construction with MDF board for shape retention.
6. Operating Instructions
6.1 Power Outlets and USB Ports
The integrated power hub provides convenient access to electrical outlets and charging ports.
- Plug the desk's main power cord into a standard wall outlet.
- Use the 3 AC outlets (120V/12A) for powering monitors, lamps, or other devices.
- Use the USB-A (5V/2A) and USB-C (5V/2A) ports for charging smartphones, tablets, and other compatible USB devices.
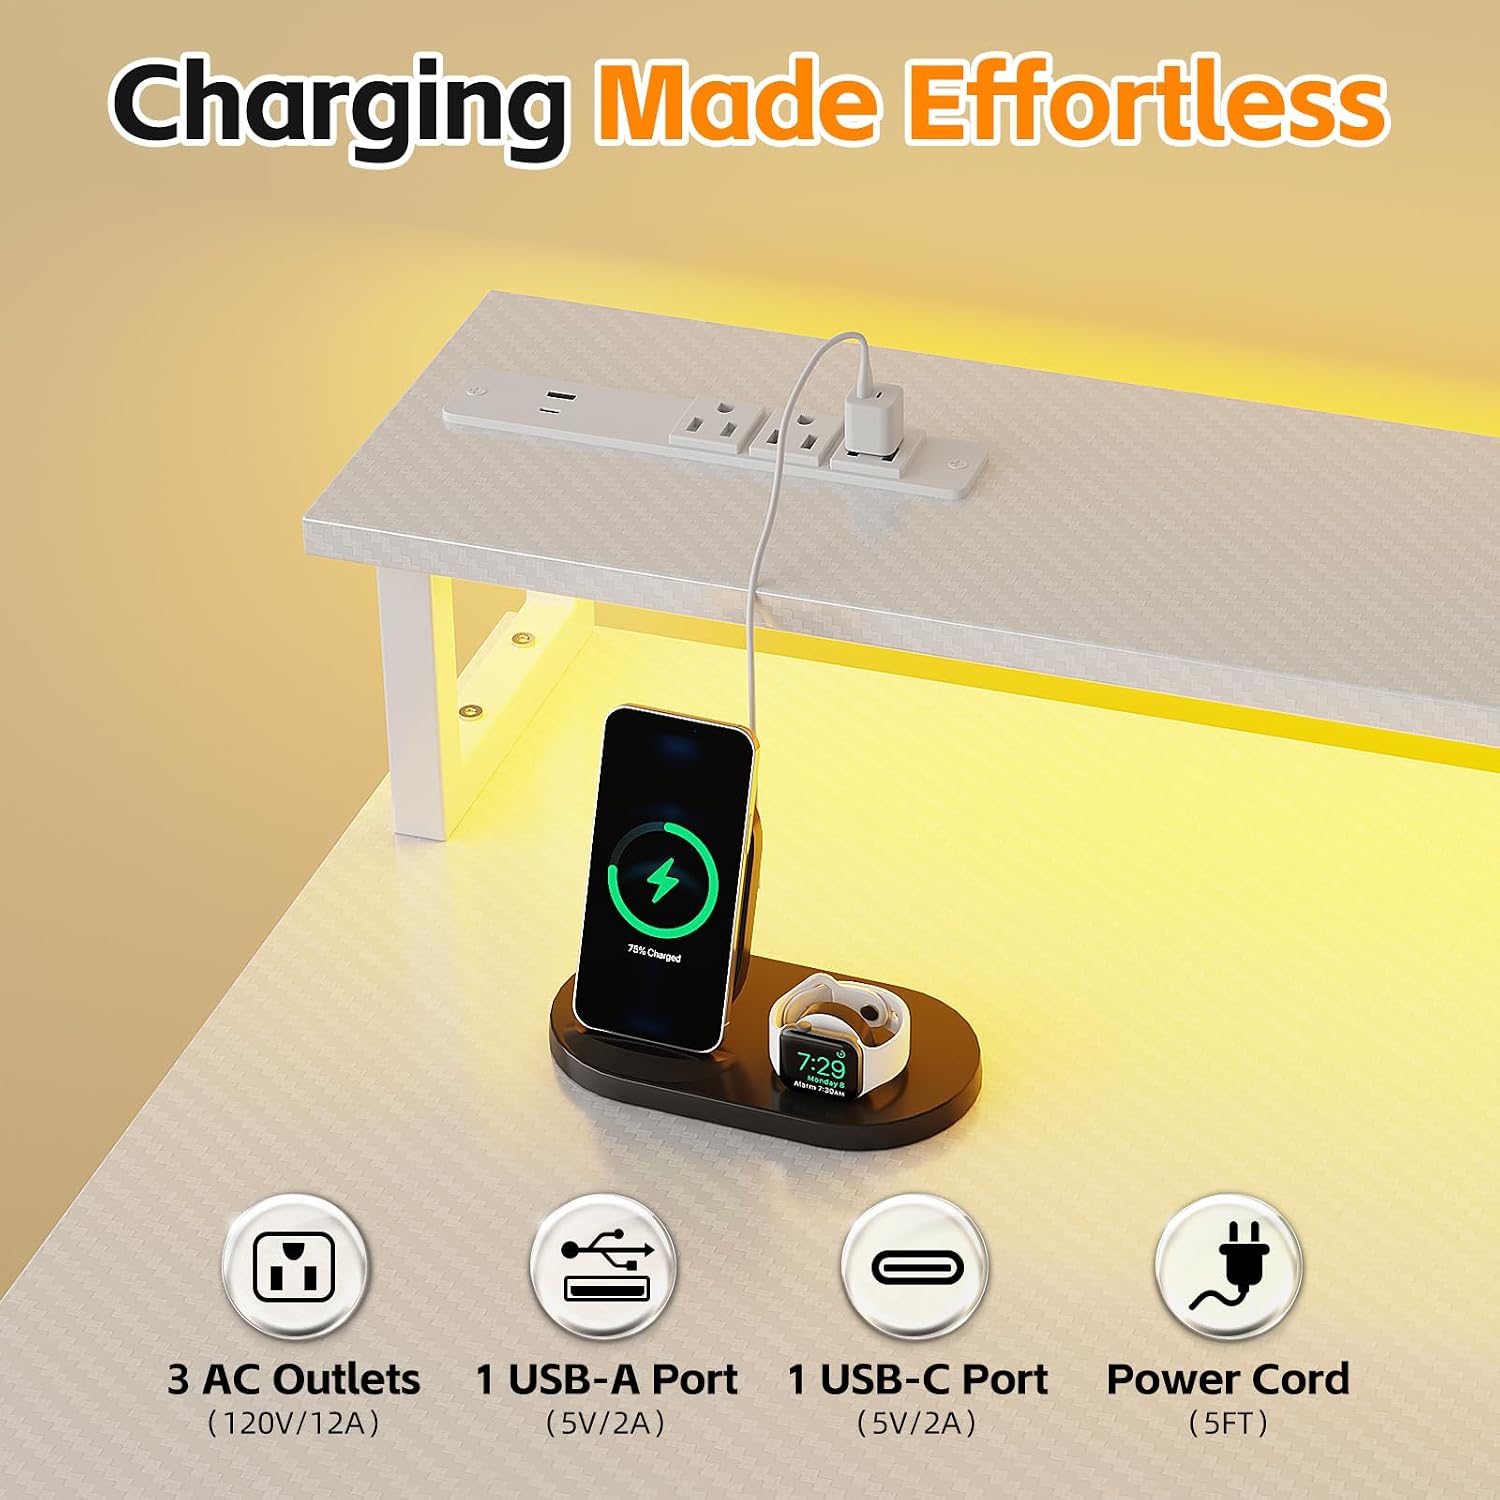
Figure 6.1: Integrated power hub with AC outlets, USB-A, and USB-C ports.

Figure 6.2: Specifications for the integrated power hub.
6.2 LED Lighting
The LED light strip provides customizable illumination for your workspace.
- Connect the LED light strip to its power source.
- To control the LED light, scan the QR code located behind the switch to download the mobile application.
- Through the app, you can adjust the color (20 options), brightness, and speed of lighting effects.

Figure 6.3: Desk with integrated LED lighting, showing various color options and app control.

Figure 6.4: Mobile application interface for controlling LED light colors and settings.
6.3 Ergonomic Monitor Stand
The raised monitor stand helps maintain an ergonomic posture during use.
- Place your monitor(s) on the elevated stand for improved viewing height.
- Adjust your chair height to ensure your eyes are level with the top third of your screen.

Figure 6.5: The long monitor stand design promotes ergonomic posture.
7. Maintenance
7.1 Cleaning
- For the carbon fiber desktop, wipe with a soft, damp cloth. Avoid abrasive cleaners or harsh chemicals that may damage the surface.
- For the metal frame, use a mild detergent and a soft cloth. Dry thoroughly.
- For fabric drawers, spot clean with a mild fabric cleaner. Do not machine wash.
7.2 General Care
- Periodically check all screws and fasteners to ensure they remain tight. Re-tighten if necessary.
- Avoid placing hot items directly on the desktop without protection.
- Do not drag the desk when moving it; lift it to prevent damage to legs and floor.

Figure 7.1: Features like waterproof desktop and thickened metal frame contribute to durability and ease of maintenance.
8. Troubleshooting
- Desk is wobbly: Ensure all screws are fully tightened. Adjust the leveling feet pads on the bottom of the desk legs to stabilize it on uneven floors.
- Power outlets/USB ports not working: Check if the desk's main power cord is securely plugged into a functional wall outlet. Ensure the power strip is correctly installed and connected.
- LED light not turning on/changing colors: Verify the LED light strip is properly connected to its power source. Ensure the mobile app is correctly installed and paired with the LED light. Check for any loose connections.
- Drawers are stiff or not sliding smoothly: Ensure the fabric drawers are correctly assembled with the MDF board at the bottom. Check for any obstructions in the drawer compartments.
9. Specifications
| Brand | VERMESS |
| Model Number | VMS-DYJTJ-63-CW-CA |
| Color | Carbon Fiber White |
| Dimensions (L x W x H) | 151D x 48W x 17H centimetres (60 x 18.9 x 6.7 inches) |
| Item Weight | 17.96 kg (39.6 lbs) |
| Material | Carbon Fibre (Desktop), Metal (Frame) |
| Number of Drawers | 6 (Fabric) |
| Power Outlets | 3 AC Outlets (120V/12A) |
| USB Ports | 1 USB-A (5V/2A), 1 USB-C (5V/2A) |
| Special Features | Built-In USB Outlet, Ergonomic Monitor Stand, Reversible Storage, Scratch Resistant, LED Light |
10. Warranty and Support
VERMESS products are manufactured with quality and durability in mind. For warranty information, technical support, or to report missing/damaged parts, please contact VERMESS customer service through the retailer's platform or the official VERMESS website. Please have your model number (VMS-DYJTJ-63-CW-CA) and purchase date available when contacting support.