
1. Introduction
This manual provides essential instructions for the assembly, operation, and maintenance of your Benass Large Metal Chicken Coop (Model B-JL-3x8N-1). Please read this manual thoroughly before beginning assembly or use to ensure proper setup and safe operation. Retain this manual for future reference.
Safety Information
- Always wear appropriate safety gear, such as gloves, during assembly.
- Ensure all components are securely fastened before placing animals inside.
- Do not allow children to assemble or play unsupervised near the coop.
- Position the coop on a level, stable surface to prevent tipping.
- Regularly inspect the coop for any damaged parts and replace them immediately.
2. Components List
Verify that all parts listed below are present in your package before starting assembly. If any components are missing or damaged, please contact Benass customer support.

Figure 2.1: All included accessories for the Benass Large Metal Chicken Coop.
- Galvanized Steel Frame Pipes: Various lengths and shapes for the main structure.
- Wire Fencing Mesh: PVC coated hexagonal wire for enclosure.
- PE & UV Coated Covers (4 pieces): Double-sided polyethylene UV coated covers for roof.
- Detachable Zip Ties (600 pieces): For securing the wire mesh to the frame.
- Bungee Balls (64 pieces): For attaching the roof covers.
- Chicken Roosting Ladder (1 piece): Provides a perch for poultry.
- U-shaped Locks (3 pieces): For the split door mechanism.
- Assembly Hardware: Bolts, nuts, and connectors as required.
3. Setup and Assembly
Follow these steps carefully to assemble your Benass Large Metal Chicken Coop. It is recommended to have at least two people for assembly.
3.1 Frame Assembly
- Unpack all components and lay them out on a clear, flat surface.
- Connect the main horizontal and vertical galvanized steel pipes to form the base and side frames. Ensure all connections are secure.
- Assemble the spire roof frame by connecting the angled pipes.
- Attach the roof frame to the side frames, ensuring all joints are tightly secured with the provided hardware.

Figure 3.1: Example of a reinforced corner joint for structural stability.
3.2 Wire Mesh Installation
- Unroll the PVC coated chicken wire mesh around the assembled frame.
- Starting from one corner, use the detachable zip ties to secure the mesh to the galvanized steel frame. Ensure the mesh is taut and evenly distributed.
- Continue securing the mesh along all sides and the roof of the coop, placing zip ties at regular intervals (approximately every 6-12 inches) to prevent gaps.
- Trim any excess mesh with wire cutters, ensuring no sharp edges remain.

Figure 3.2: Detail of the PVC coated hexagonal wire mesh.
3.3 Door and Roosting Perch Installation
- Install the split door into the designated opening in the frame.
- Attach the three U-shaped locks to the door, ensuring they allow for independent opening of the upper and lower sections.
- Position the chicken roosting ladder inside the coop at a suitable height and angle for your poultry. Secure it to the frame if necessary.
3.4 Cover Attachment
- Place the PE & UV coated covers over the spire roof frame.
- Use the bungee balls to securely attach the covers to the frame, threading them through the grommets on the covers and around the frame pipes.
- Ensure the covers are taut to prevent water pooling and wind damage. You can use 2 or 4 covers depending on weather conditions and desired shade/protection.

Figure 3.3: The PE & UV double-sided coating cover provides protection from elements.
4. Operating Instructions
This section details the proper use of your Benass Large Metal Chicken Coop.
4.1 Access and Feeding
- The split door design allows for convenient access. Use the U-shaped locks to open only the upper section for feeding or placing water dispensers without allowing animals to escape.
- To enter the coop for cleaning or other tasks, unlock both sections of the door and open fully.
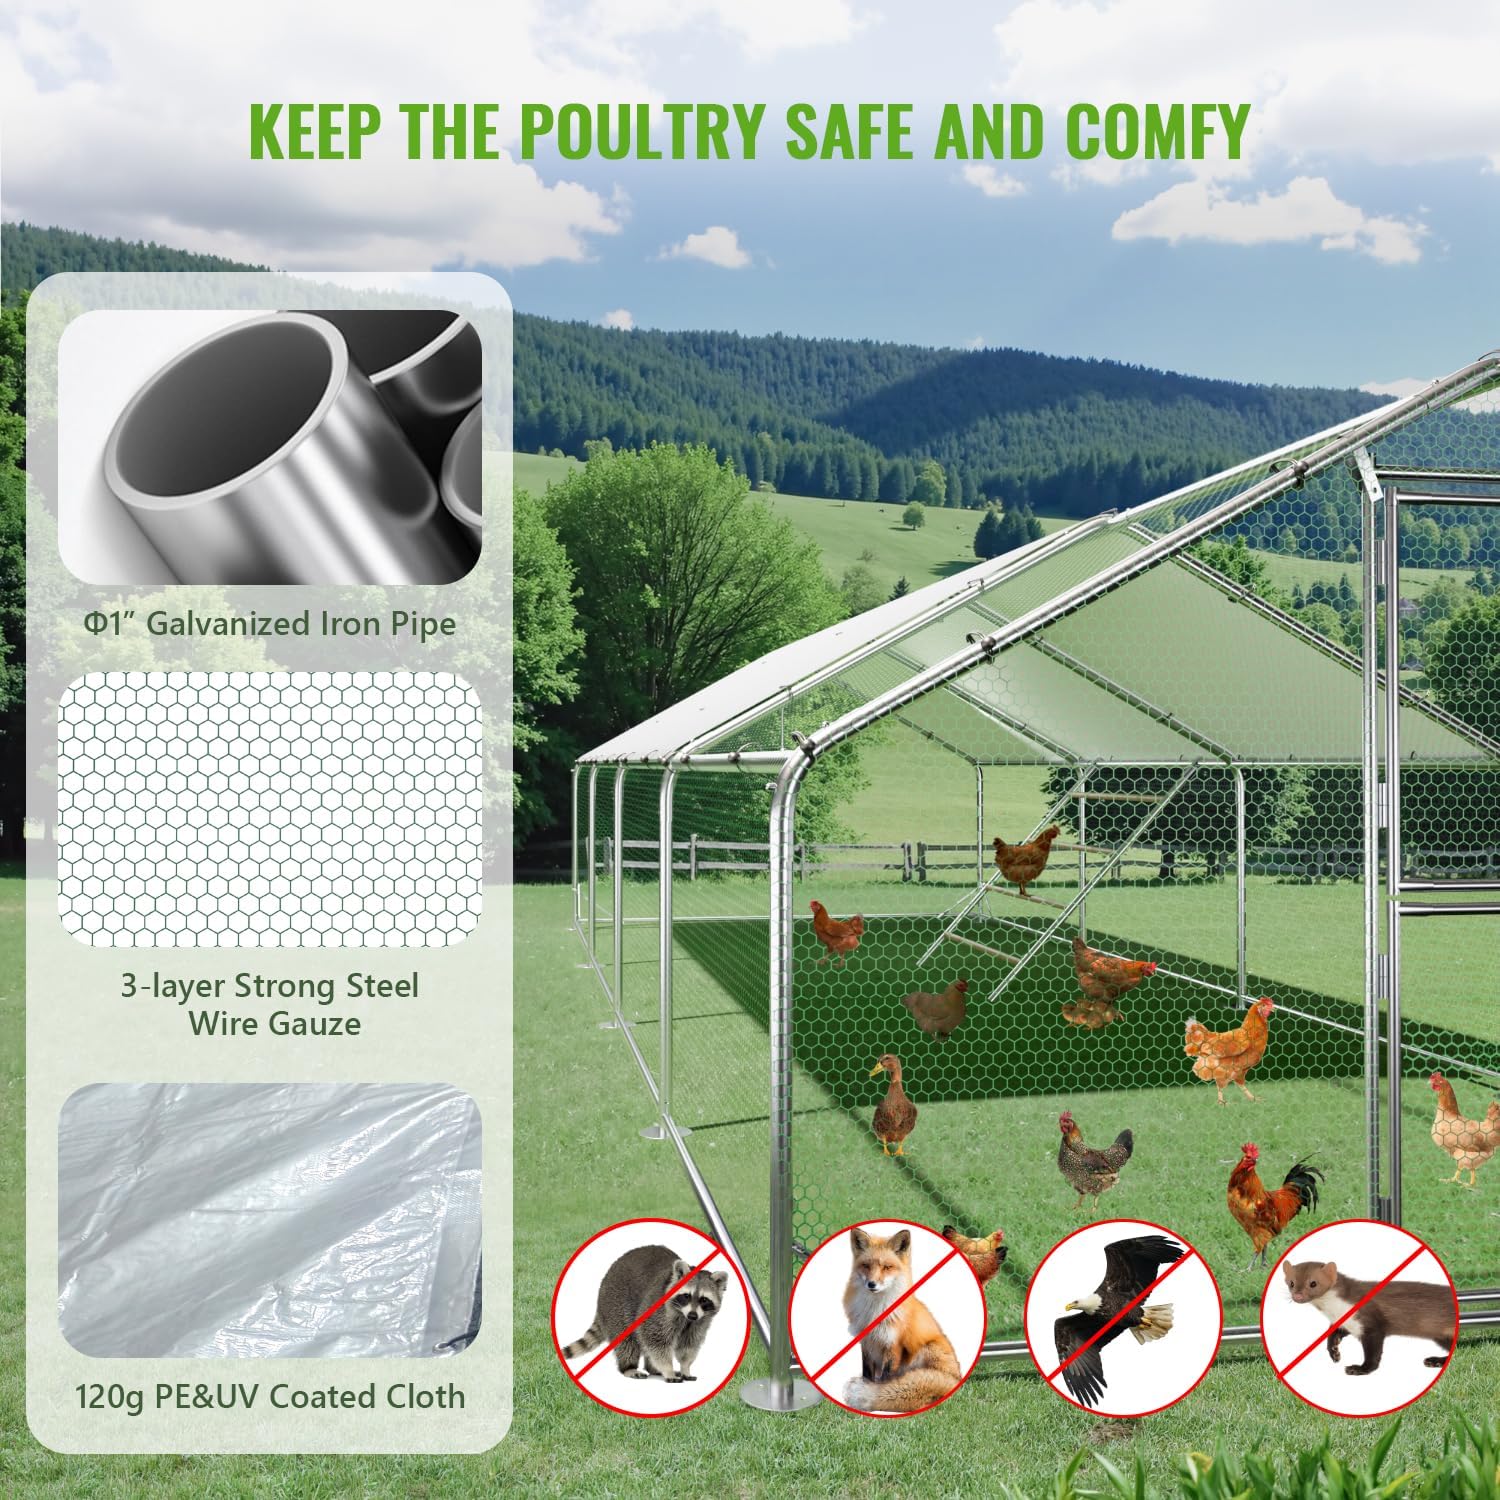
Figure 4.1: The split door design facilitates easy feeding and access.
4.2 Environmental Protection
- The included PE & UV coated covers protect your poultry from rain and harmful UV rays, ensuring a comfortable environment. Adjust the number of covers based on weather conditions.
- The sturdy wire mesh and galvanized steel frame provide a secure enclosure, protecting your animals from predators.

Figure 4.2: The coop's design helps keep poultry safe from predators.
4.3 Versatile Use
- This coop is suitable for various small animals including chickens, ducks, rabbits, pigeons, and cats.
- It can also be used to protect garden vegetables and plants from being damaged by poultry or other small animals.

Figure 4.3: The coop can also serve as a protective barrier for gardens.
5. Maintenance
Regular maintenance will extend the lifespan of your chicken coop and ensure a healthy environment for your animals.
- Cleaning: Periodically clean the interior of the coop, removing waste and soiled bedding. The wire mesh can be hosed down.
- Frame Inspection: Annually inspect the galvanized steel frame for any signs of rust or damage. Tighten any loose bolts or connections.
- Mesh Inspection: Check the wire mesh for any tears, holes, or loose sections that could compromise security. Repair or replace as needed using additional zip ties or wire.
- Cover Care: Clean the PE & UV coated covers with mild soap and water. Ensure they are securely attached, especially during windy conditions. Replace covers if they become significantly torn or degraded by UV exposure.
- Roosting Perch: Clean the roosting perch regularly to maintain hygiene for your poultry.
6. Troubleshooting
This section addresses common issues you might encounter with your chicken coop.
6.1 Coop Instability
- Issue: The coop feels wobbly or unstable after assembly.
- Solution: Ensure all frame connections are fully tightened. Verify the coop is placed on a firm, level surface. If the ground is uneven, consider leveling the area or using shims under the base pipes.
6.2 Loose Wire Mesh
- Issue: Sections of the wire mesh are loose or sagging.
- Solution: Use additional detachable zip ties to re-secure the mesh to the frame, ensuring it is pulled taut. Inspect for any broken zip ties and replace them.
6.3 Water Accumulation on Cover
- Issue: Rainwater is pooling on the roof covers.
- Solution: Ensure the covers are stretched tightly and evenly across the spire roof frame. Re-adjust the bungee balls to create tension and prevent sagging. Check that the roof frame itself is correctly assembled to maintain its angled shape.

Figure 6.1: The waterproof cover is designed to repel water, but proper tension is key to prevent pooling.
7. Specifications
Detailed specifications for the Benass Large Metal Chicken Coop (Model B-JL-3x8N-1).

Figure 7.1: Product dimensions overview.
| Feature | Detail |
|---|---|
| Model Name | B-JL-3x8N-1 |
| Overall Dimensions (L x W x H) | 315" x 118.1" x 78.74" (10x26x6.5ft equivalent) |
| Door Size (H x W) | 5.25' x 2' (approx. 63" x 24") |
| Material | Galvanized Iron, Alloy Steel, Polyester, PVD, Oxford |
| Frame Pipe Diameter | 1 inch |
| Wire Mesh Type | 1mm PVC coated steel wire (hexagonal) |
| Cover Material | 120gms double-sided polyethylene UV coated fabric |
| Roof Type | Spire Top |
| Capacity | Accommodates 30-40 chickens |
| Special Features | Easy Assembly, Independent Split Doors, Waterproof Cover, Roosting Perch |
| Target Species | Chicken, Ducks, Rabbits, Pigeons, Cats |
8. Warranty & Support
8.1 Warranty Information
For specific warranty details regarding your Benass Large Metal Chicken Coop, please refer to the warranty card included with your product or contact Benass customer support directly. Warranty terms typically cover manufacturing defects under normal use.
8.2 Customer Support
If you have any questions, require assistance with assembly, or need to report missing/damaged parts, please contact Benass customer support. Have your model number (B-JL-3x8N-1) and purchase information ready for faster service.
- Manufacturer: Benass
- Contact Information: Please refer to the contact details provided in your product packaging or visit the official Benass website.