
1. Safety Information
Please read all safety instructions carefully before using the projector. Keep this manual for future reference.
- Do not look directly into the projector lens when the lamp is on. The bright light can cause eye damage.
- Do not block the ventilation openings. Ensure adequate airflow around the projector to prevent overheating.
- Use only the power adapter provided with the projector. Using an unauthorized adapter may cause damage or fire.
- Keep the projector away from water, moisture, and flammable materials.
- Do not attempt to repair the projector yourself. Refer all servicing to qualified personnel.
- Place the projector on a stable, level surface to prevent it from falling.
- Unplug the projector during lightning storms or when unused for long periods.
2. Package Contents
Verify that all items are present in the package:
- LYNCAST OptiBarrel 500 Mini Projector (Model X1)
- Power Adapter
- HDMI Cable
- Remote Control
- User Manual
- Cleaning Kit

Figure 2.1: Included accessories with the LYNCAST OptiBarrel 500 Mini Projector.
3. Product Overview
The LYNCAST OptiBarrel 500 (Model X1) is a compact and portable mini projector designed for versatile entertainment and presentation needs. It features Android 14 with built-in apps, Wi-Fi 6, Bluetooth 5.4, and supports up to 4K resolution input.
3.1 Key Features
- Operating System: Android 14 with integrated applications.
- Wireless Connectivity: Wi-Fi 6 for seamless streaming and Bluetooth 5.4 for audio devices.
- Resolution Support: Native 720P, supports 1080P and 4K input.
- Automatic Adjustments: Auto Vertical Keystone Correction for quick setup.
- Flexible Projection: 270° rotation for multi-angle projection (ceiling, wall, floor).
- Compact Design: Weighs 350 grams, with dimensions of 15L x 8.4W x 8.4H cm, making it highly portable.
- Projection Size: Achieves 60 to 200-inch screen sizes, with an ultra-short-throw ratio for small spaces.
- Brightness & Contrast: 300 ANSI Lumens with a 10000:1 contrast ratio.
- Connectivity: HDMI, USB, 3.5mm Audio.
- Built-in Speaker: Integrated audio for convenience.
3.2 Physical Dimensions and Portability
The OptiBarrel 500 is designed for easy portability, weighing only 350g. Its compact cylindrical form factor allows for convenient placement and transport.

Figure 3.1: Dimensions and weight of the OptiBarrel 500, highlighting its compact size.
3.3 Interfaces
The projector includes multiple interfaces for connecting various devices.
- HDMI: Connect to laptops, gaming consoles, TV sticks, etc.
- USB: For media playback from USB drives.
- 3.5mm Audio: For connecting external wired speakers or headphones.

Figure 3.2: Available interfaces on the projector and examples of compatible devices.
4. Setup
4.1 Initial Power-On
- Connect the power adapter to the projector's power input and then to an electrical outlet.
- Press the power button on the projector or the remote control to turn it on.
- The projector will boot up, displaying the Android 14 home screen.
4.2 Network Connection (Wi-Fi 6)
To access online content and apps, connect the projector to a Wi-Fi network.
- From the home screen, navigate to Settings.
- Select Network & Internet.
- Turn on Wi-Fi and select your desired network from the list.
- Enter the Wi-Fi password if prompted and select Connect.

Figure 4.1: The projector supports Wi-Fi 6 for fast and stable wireless connectivity.
4.3 Bluetooth Pairing (Bluetooth 5.4)
Connect external Bluetooth speakers or headphones for enhanced audio.
- From Settings, select Connected Devices or Bluetooth.
- Turn on Bluetooth.
- Put your Bluetooth device into pairing mode.
- Select your device from the list of available devices on the projector screen to pair.
The projector also supports two-way Bluetooth, allowing it to act as a Bluetooth speaker for your phone.

Figure 4.2: Two-way Bluetooth 5.4 allows connection to external speakers or using the projector as a Bluetooth speaker.
4.4 Placement and Projection Adjustment
The projector offers flexible placement options and automatic adjustments for optimal image quality.
4.4.1 Multi-Angle Projection
The projector's design allows for rotation up to 270°, enabling projection onto walls, ceilings, or floors without needing to reposition the entire unit.
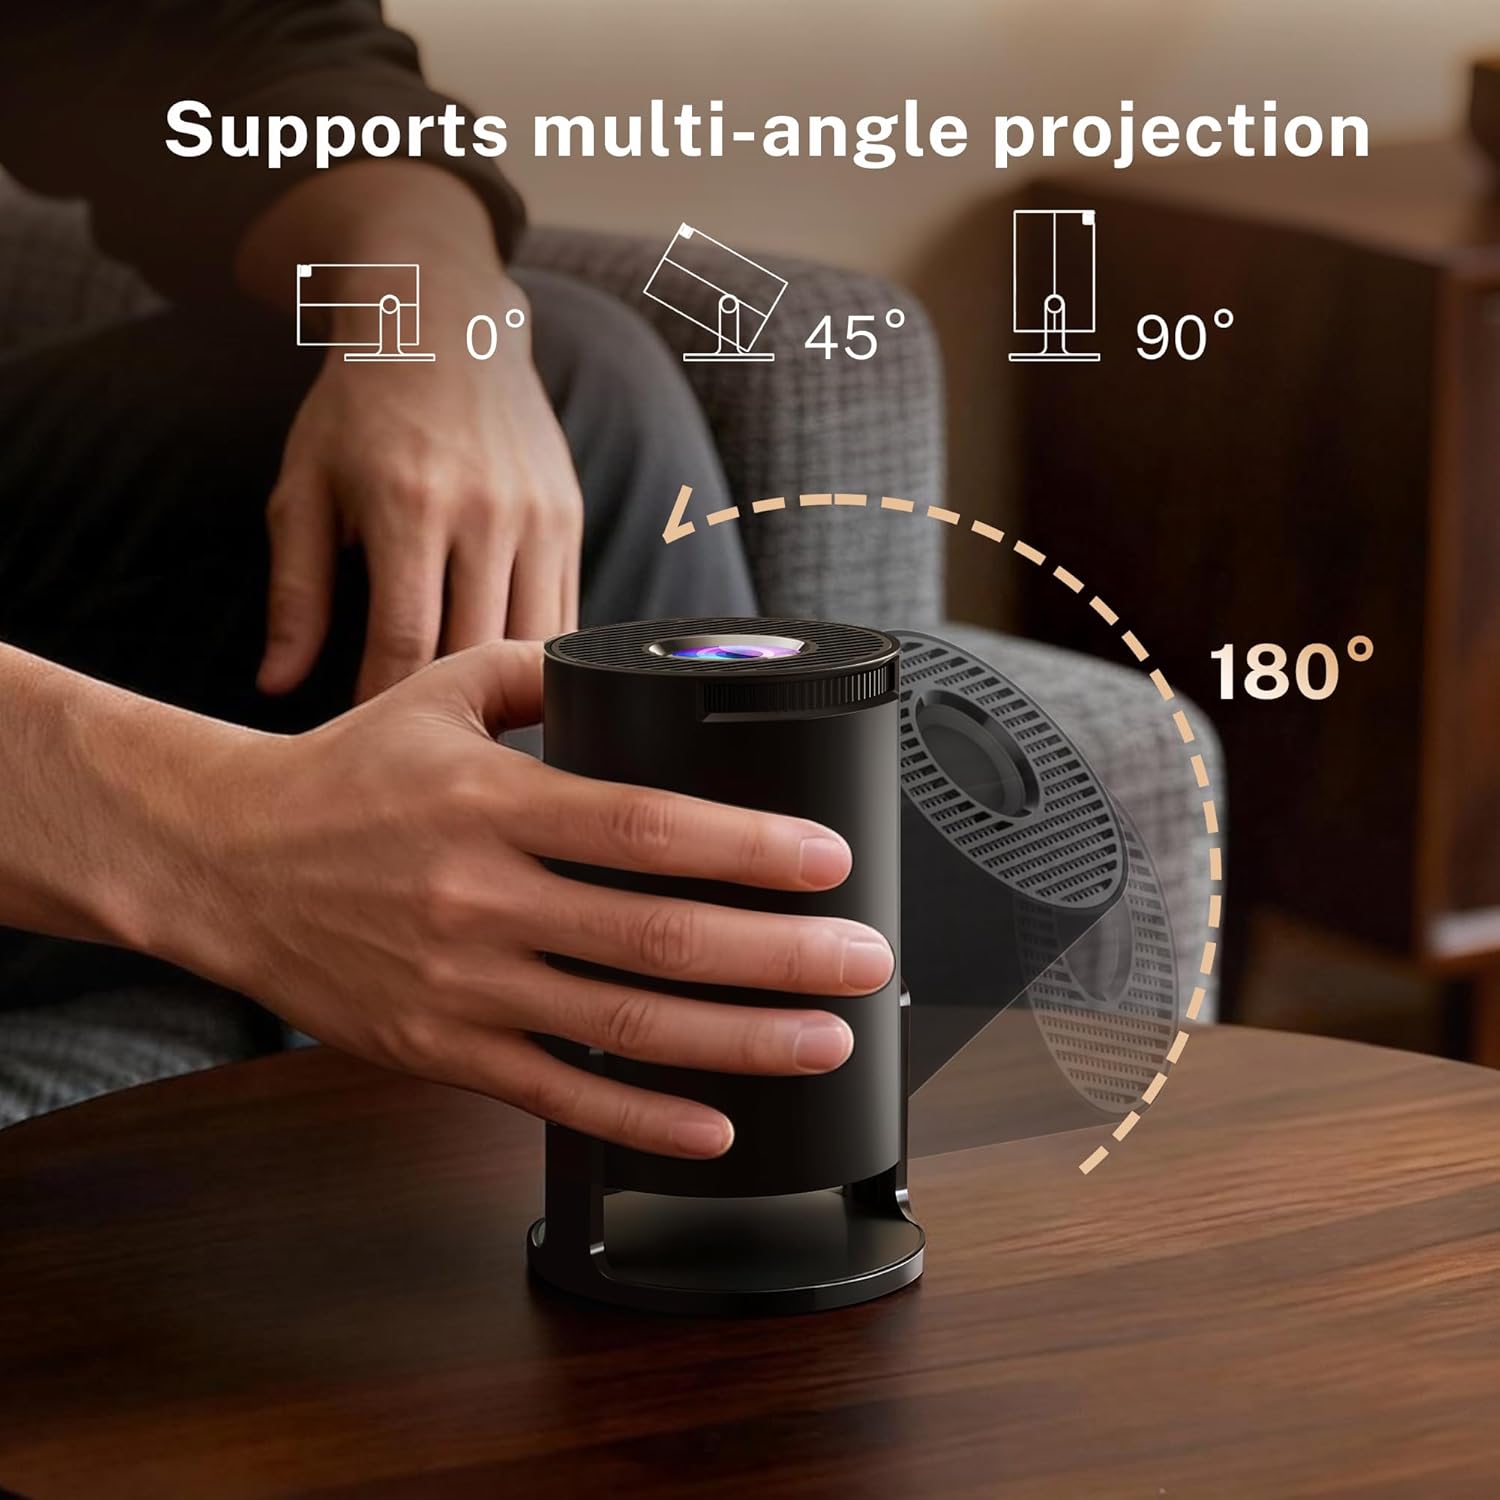
Figure 4.3: The projector supports multi-angle projection with up to 270° rotation.
4.4.2 Mounting Options
The projector can be used on a tabletop, mounted on a tripod, or installed on the ceiling.

Figure 4.4: Examples of tabletop, tripod, and ceiling mounting for the projector.
4.4.3 Auto Vertical Keystone Correction
The projector automatically corrects vertical image distortion when placed at an angle, ensuring a rectangular image.

Figure 4.5: Automatic vertical keystone correction for a perfectly aligned image.
4.4.4 Focus Adjustment
The projector features both manual and auto vertical focus capabilities. Adjust the focus ring on the projector if the image appears blurry after auto-correction.
4.4.5 Projection Size and Distance
The projector is an ultra-short-throw model, capable of producing large images in small spaces. Refer to the table below for typical projection sizes and distances.

Figure 4.6: Projection size and distance for the ultra-short-throw projector.
| Projection Size | Projection Distance (0.8:1 Ratio) |
|---|---|
| 40 inches | 0.71 meters |
| 60 inches | 0.96 meters |
| 80 inches | 1.42 meters |
| 100 inches | 1.77 meters |
5. Operating
5.1 Navigation and Control
The projector can be controlled using the included remote control or the Lumina Go official app.
5.1.1 Remote Control
Use the remote control to navigate menus, adjust volume, select input sources, and power the projector on/off.
5.1.2 Lumina Go Official App
The Lumina Go app transforms your smartphone into a full-featured remote control with navigation, QWERTY keyboard, touchpad, and voice control.
- Get the App: Download the Lumina Go app from your device's app store.
- For Android: Download APK
- For iOS: Download from App Store
- Connect to Wi-Fi: Ensure your smartphone and the projector are connected to the same Wi-Fi network.
- Launch the app and follow the on-screen instructions to pair with your projector.

Figure 5.1: Lumina Go Official App for advanced projector control.
5.2 Source Selection
The projector supports various input sources:
- Built-in Apps: Access streaming services and other applications directly from the Android 14 interface.
- HDMI: Connect external devices like laptops, gaming consoles, or TV sticks. Select the HDMI input from the source menu.
- USB: Insert a USB drive into the USB port to play media files. Navigate to the file browser to select content.

Figure 5.2: Android 14 interface with widely compatible built-in applications.
5.3 Power Off
To turn off the projector, press the power button on the remote control or the projector unit. Confirm power off if prompted.
6. Maintenance
6.1 Cleaning
Regular cleaning helps maintain optimal performance and image quality.
- Lens: Use the provided cleaning kit or a soft, lint-free cloth specifically designed for optical lenses. Gently wipe the lens in a circular motion. Do not use abrasive cleaners or excessive force.
- Exterior: Wipe the projector's exterior with a soft, dry cloth. For stubborn marks, slightly dampen the cloth with water, then wipe dry.
- Ventilation Openings: Periodically check and gently clean the ventilation openings to ensure they are free from dust and debris. Use a soft brush or compressed air (held at a distance) if necessary.
6.2 Storage
When not in use for extended periods, store the projector in a cool, dry place, away from direct sunlight and extreme temperatures. Use the original packaging or a protective case to prevent dust accumulation and physical damage.
7. Troubleshooting
If you encounter issues with your projector, refer to the following common problems and solutions:
- No Power:
- Ensure the power adapter is securely connected to both the projector and a working power outlet.
- Check if the power outlet is functional by plugging in another device.
- Try a different power outlet.
- No Image / Blank Screen:
- Verify that the projector is powered on.
- If using an external source (HDMI), ensure the cable is securely connected and the correct input source is selected on the projector.
- Check the connected device (laptop, TV stick) to ensure it is outputting a signal.
- Blurry Image:
- Adjust the focus ring on the projector until the image is clear.
- Ensure the projection surface is flat and smooth.
- Check the projection distance against the recommended specifications.
- No Sound:
- Increase the volume on the projector and the connected source device.
- If using Bluetooth speakers, ensure they are properly paired and connected.
- If using a 3.5mm audio cable, ensure it is fully inserted into both the projector and the external speaker.
- Check audio output settings on the projector to ensure the correct output (internal speaker, Bluetooth, 3.5mm) is selected.
- Wi-Fi/Bluetooth Connectivity Issues:
- Ensure the projector is within range of your Wi-Fi router or Bluetooth device.
- Restart the projector and your router/Bluetooth device.
- Verify the Wi-Fi password is correct.
- For Bluetooth, ensure the device is in pairing mode.
8. Specifications
Below are the technical specifications for the LYNCAST OptiBarrel 500 Mini Projector (Model X1).
| Feature | Specification |
|---|---|
| Brand | LYNCAST |
| Model Name | OptiBarrel 500 |
| Model Number | X1 |
| Display Technology | LCD |
| Native Display Resolution | 1280 x 720 (720P) |
| Maximum Display Resolution Supported | 3840 x 2160 (4K) |
| Brightness | 300 ANSI Lumens |
| Contrast Ratio | 10000:1 |
| Light Source Life | 50000 Hours |
| Projection Size (Min-Max) | 60 - 200 Inches |
| Projection Distance (Min-Max) | 1 - 4 Meters |
| Connectivity Technology | Bluetooth 5.4, HDMI, USB, Wi-Fi 6 |
| Hardware Connectivity | 3.5 mm Audio |
| Compatible Devices | Game console, Speaker, Laptop, Smartphone, Tablet |
| Special Features | Native 720P, 4K 1080P Support, Mini Portable Size, Built-in Speaker, Wi-Fi6 & Bluetooth5.4, Auto Keystone |
| Form Factor | Portable |
| Mounting Type | Tabletop, Ceiling Mount, Floor Mount |
| Product Dimensions (L x W x H) | 15L x 8.4W x 8.4H Centimeters |
| Item Weight | 350 Grams |
| Power Consumption | 120 Watts |
| Control Device Type | Remote Control |
| Recommended Uses | Home cinema, Outdoor movie night, Gaming, Garden cinema, Remote work, Workout companion |
9. Warranty and Support
Information regarding specific warranty terms and software update guarantees for the LYNCAST OptiBarrel 500 (Model X1) is not provided in the product details.
For warranty claims, technical support, or inquiries about spare parts, please contact LYNCAST customer service directly through their official website or the retailer where the product was purchased.