
1. Introduction
This manual provides detailed instructions for the operation and maintenance of your Generic V539 Car OBD2 Scanner Diagnostic Tool. This device is designed to assist in diagnosing vehicle engine issues by reading and clearing fault codes, monitoring live data, and performing various diagnostic tests on OBD2-compliant vehicles. Please read this manual thoroughly before using the device to ensure proper and safe operation.
2. Safety Information
- Always perform automotive testing in a safe environment.
- Wear eye protection that meets ANSI standards.
- Keep clothing, hair, hands, tools, test equipment, etc., away from all moving or hot engine parts.
- Operate the vehicle in a well-ventilated work area; exhaust gases are poisonous.
- Put blocks in front of the drive wheels and never leave the vehicle unattended while running tests.
- Use extreme caution when working around the ignition coil, distributor cap, ignition wires, and spark plugs. These components create hazardous voltages when the engine is running.
- Ensure the transmission is in PARK (for automatic) or NEUTRAL (for manual) and the parking brake is engaged.
- Keep a fire extinguisher suitable for gasoline/chemical/electrical fires nearby.
3. Product Overview
The V539 OBD2 scanner features a 2.8-inch high-definition color screen for clear display of information and an engineering-grade ABS protective shell for durability. It is designed for ease of use with intuitive navigation.
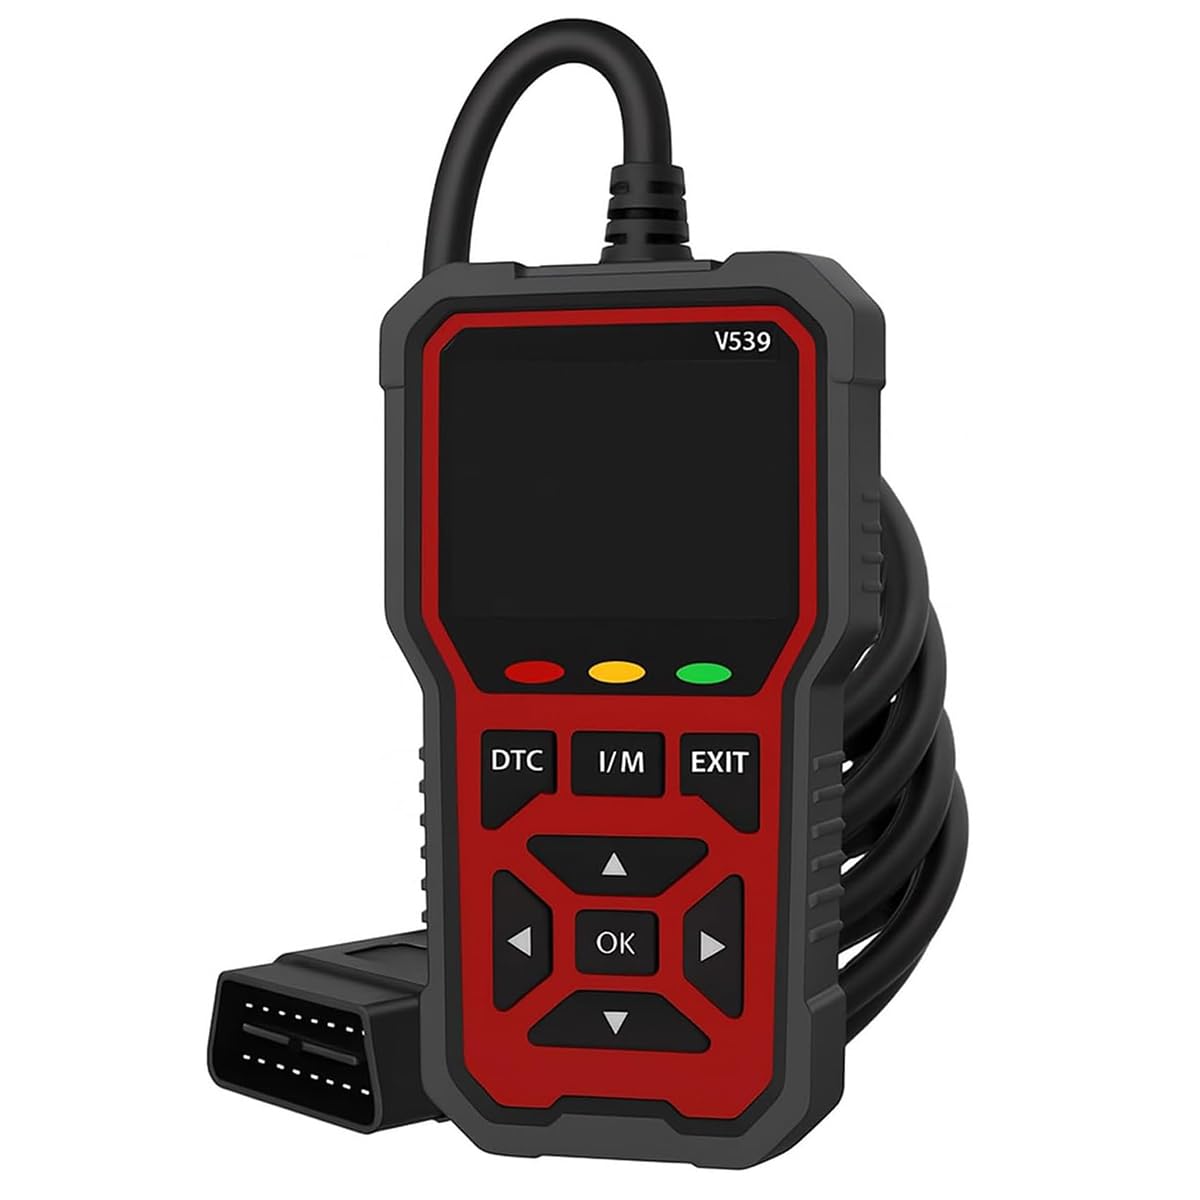
Image: Front view of the Generic V539 OBD2 Scanner, showing the display screen, navigation buttons, and the OBDII connector cable.

Image: Close-up of the V539 scanner's 2.8-inch high-definition color screen, illustrating the clear display of menu options such as Diagnosis, Real-Time Data Stream, DTC Library, Playback, Battery, and Settings.

Image: The V539 scanner held in a hand, highlighting its engineering-grade ABS protective shell and anti-slip design for durability and comfortable grip.
4. Setup
- Locate the OBD2 Port: The OBD2 port is typically located under the dashboard on the driver's side of the vehicle. Refer to your vehicle's service manual for the exact location if needed.
- Connect the Scanner: With the vehicle's ignition off, firmly plug the V539 scanner's OBDII connector into the vehicle's OBD2 port.
- Power On: Turn the vehicle's ignition to the 'ON' position (do not start the engine). The scanner will automatically power on and display the main menu.
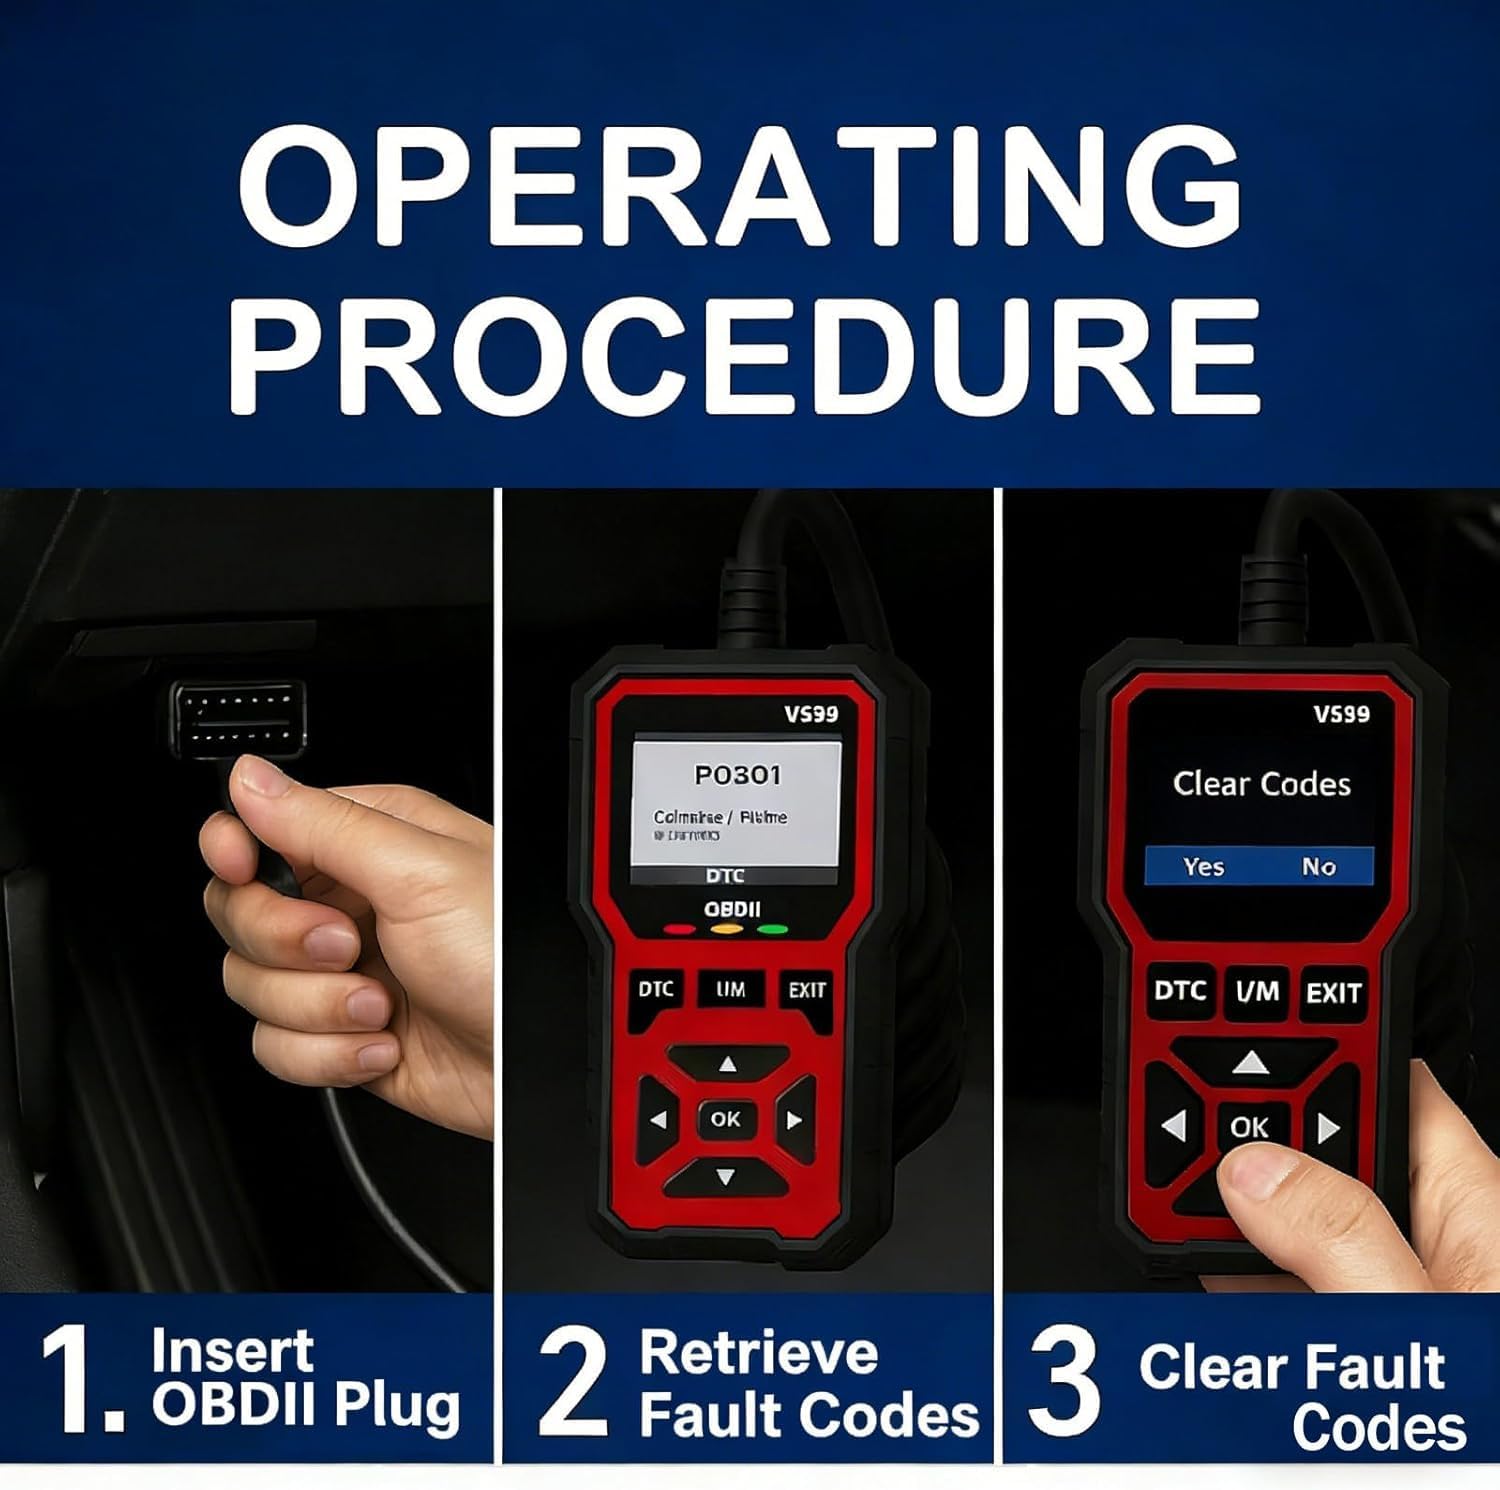
Image: A visual guide demonstrating the three-step operating procedure: 1. Inserting the OBDII plug into the vehicle's port, 2. Retrieving fault codes on the scanner screen, and 3. Clearing fault codes.
5. Operating Instructions
The V539 scanner offers various functions accessible via the main menu. Use the directional buttons (Up, Down, Left, Right) and the OK button to navigate and select options. The EXIT button typically returns to the previous screen or the main menu.
5.1. Engine Fault Diagnosis (OBD/EOBD)
This function allows you to read and clear Diagnostic Trouble Codes (DTCs) from the vehicle's Engine Control Unit (ECU).
- From the main menu, select OBD/EOBD.
- The scanner will establish communication with the vehicle.
- Select Read Codes to view current, pending, and permanent DTCs.
- Select Clear Codes to erase DTCs from the vehicle's memory. Confirm the action when prompted. Note: Clearing codes will also clear I/M Readiness Monitor Status.

Image: The V539 scanner displaying a fault code, alongside a dashboard illustration showing the 'Check Engine' light on and then off after clearing codes. This highlights the device's ability to read and clear fault codes.
5.2. Live Data Stream
View real-time operational parameters from the vehicle's sensors and components.
- From the main menu, select Data Stream.
- Choose to view all data items or select specific parameters.
- Data can be displayed in text or graph format for easier analysis.
5.3. I/M Readiness Status
Check the status of the vehicle's emission-related monitoring systems to determine if they are ready for an emissions test.
- From the main menu, select I/M or use the dedicated I/M readiness hotkey.
- The screen will display the status of various monitors (e.g., Misfire Monitor, Fuel System Monitor, O2 Sensor Monitor) as 'OK' (complete) or 'INC' (incomplete).
5.4. Mode 6 (On-Board Monitor Test)
Access the results of on-board diagnostic monitoring tests for specific components/systems that are not continuously monitored.
- Select Mode 6 from the menu.
- Review the test results for various non-continuous monitors.
5.5. Mode 8 (Component Test)
Initiate a test of an on-board diagnostic system or component.
- Select Mode 8 from the menu.
- Follow on-screen prompts to perform specific component tests.
5.6. Oxygen Sensor Test
Retrieve O2 sensor monitor test results for the most recently completed tests from the vehicle's on-board computer.
- Select Oxygen Sensor Test from the menu.
- View the results of the oxygen sensor tests.
5.7. DTC Lookup
Access a built-in library of over 40,000 fault codes to understand their meaning.
- Select LOOKUP from the main menu.
- Enter the DTC (e.g., P0171) to view its description.
5.8. Playback Function
Review previously recorded diagnostic data, including fault codes and data streams.
- Select Playback from the main menu.
- Choose between fault code playback or data stream playback.
5.9. Vehicle Information
Retrieve the Vehicle Identification Number (VIN), Calibration ID (CALID), and Calibration Verification Number (CVN) from the vehicle's ECU.
- Select Vehicle Information from the menu.
- The scanner will display the available vehicle information.

Image: The V539 scanner screen showing a list of its core functions, including Engine Fault Diagnosis, Engine Fault Code Clearance, Record Freeze Frame Information, Vehicle Information Reading, I/M Readiness Status, Real-time Data Stream Reading, Battery Voltage Test, Oxygen Sensor Test, Retrieve Fault Code Library, and Playback Function.
6. Maintenance
6.1. Cleaning
Clean the scanner's casing with a soft, damp cloth. Do not use abrasive cleaners or solvents. Keep the screen free of dust and smudges for optimal visibility.
6.2. Storage
Store the device in a dry, clean environment away from direct sunlight and extreme temperatures. Keep it in its original packaging or a protective case when not in use to prevent damage.
7. Troubleshooting
- Scanner does not power on: Ensure the OBDII connector is securely plugged into the vehicle's OBD2 port and the vehicle's ignition is in the 'ON' position. Check the vehicle's battery voltage.
- Communication error: Verify that the ignition is on and the scanner is correctly connected. Ensure the vehicle is OBD2 compliant. Try connecting to a different OBD2-compliant vehicle to rule out scanner issues.
- Screen is blank or frozen: Disconnect the scanner from the vehicle, wait a few seconds, and reconnect. If the issue persists, contact customer support.
- Codes cannot be cleared: Some fault codes cannot be cleared until the underlying issue causing them has been resolved. Ensure the vehicle's ignition is on but the engine is off when attempting to clear codes.
8. Specifications
| Specification | Detail |
|---|---|
| Product Model | V539 |
| Operating Voltage | 9~16V |
| Display Screen | 2.8-inch High-Definition Color Screen |
| Supported Languages | English, German, Dutch, Spanish, French, Italian, Chinese, Portuguese, Russian |
| Fault Code Library | Built-in 40,000+ codes |
| Housing Material | Engineering-grade ABS |
| Item Weight | 1.76 pounds |
| Product Dimensions | 0.39 x 0.39 x 0.39 inches (approximate, refer to image for detailed dimensions) |
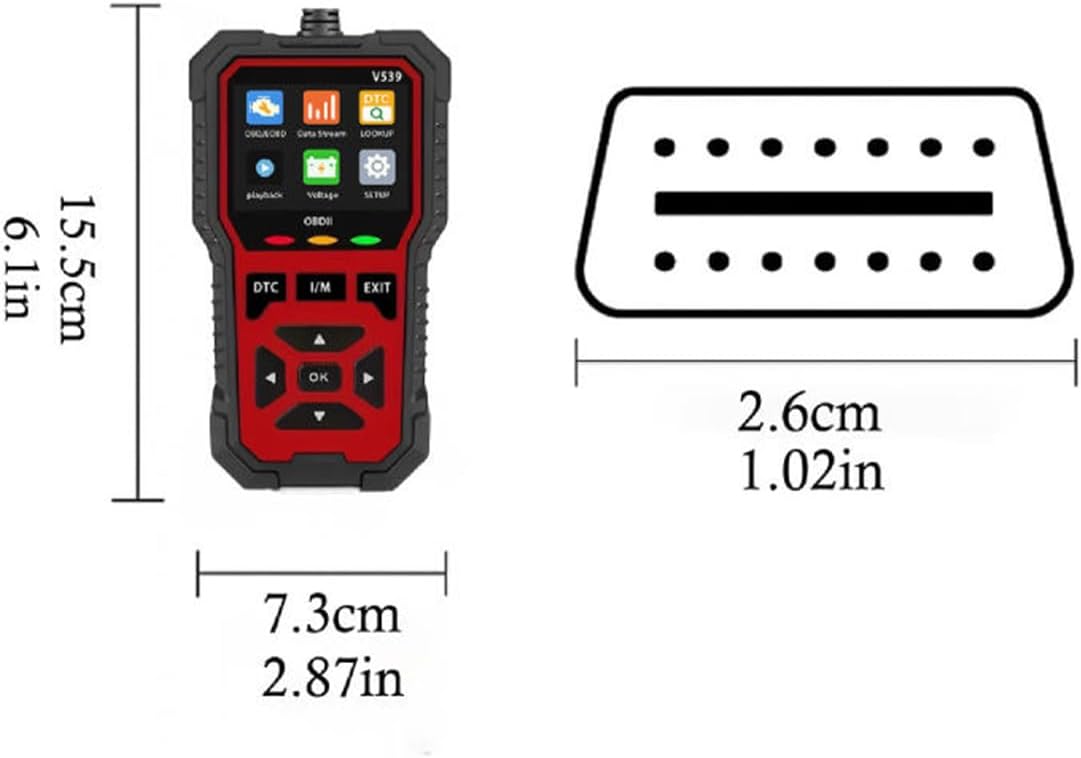
Image: Detailed dimensions of the V539 scanner and its OBDII connector, showing measurements in both centimeters and inches.
9. Warranty and Support
For warranty information or technical support, please refer to the contact details provided with your purchase or visit the manufacturer's official website. Keep your purchase receipt as proof of purchase for warranty claims.