
XK P-407A
XK P-407A 8000 lb 4-Post Car Lift Instruction Manual
Model: P-407A | Brand: XK
1. Safety Information
Read and understand all safety warnings and instructions before installing, operating, or maintaining the XK P-407A car lift. Failure to follow these instructions may result in serious injury or property damage.
- Qualified Personnel Only: Installation and major maintenance should only be performed by qualified technicians.
- Load Capacity: Do not exceed the maximum lifting capacity of 8000 lbs (3628 kg).
- Level Surface: Operate the lift only on a level, solid concrete surface capable of supporting the lift and maximum load.
- Clearance: Ensure adequate overhead and side clearance before lifting any vehicle.
- Vehicle Placement: Center the vehicle on the runways and engage parking brakes before lifting.
- Safety Locks: Always engage all safety locks before working under a lifted vehicle or storing a vehicle on the upper platform.
- Power Disconnection: Disconnect power before performing any maintenance or repairs.
- Hydraulic System: Regularly inspect hydraulic hoses and connections for leaks or damage. Use recommended hydraulic oil grade.
- Electrical: Ensure the electrical supply is 110V with a minimum 40A circuit breaker. All electrical connections must comply with local codes.
- Moving Parts: Keep hands and feet clear of moving parts during operation.
2. Product Overview
The XK P-407A is an 8000 lb capacity 4-post car lift designed for vehicle storage and maintenance. Its mobile design allows for flexible placement within a garage or workshop.
Key Features:
- 8000 lb Lifting Capacity: Suitable for most cars, SUVs, and light trucks.
- Mobile Design: Equipped with four durable caster wheels for easy relocation.
- Space-Saving: Allows parking one vehicle above another.
- Enhanced Safety: Features reinforced safety locks and a stable four-post structure.
- User-Friendly: Includes oil drip trays and a movable tool tray.
Components:
- Four vertical posts
- Two runways (platforms)
- Hydraulic power unit
- Lifting cables and pulleys
- Safety lock system
- Mobile caster wheel kit
- Oil drip trays
- Movable tool tray

Figure 2.1: The XK P-407A 4-Post Car Lift in operation, demonstrating its double parking capability.
3. Setup and Installation
This section provides general guidelines for setting up the XK P-407A car lift. Refer to the detailed assembly manual provided with your product for specific step-by-step instructions.
3.1 Site Preparation
- Ensure the installation area is a level concrete slab, free from cracks or damage, capable of supporting the lift's weight and maximum load.
- Verify adequate overhead clearance for the maximum lift height of the vehicle.
- Confirm access to a dedicated 110V electrical outlet with a 40A circuit breaker.
3.2 Assembly
- Unpack all components and verify against the packing list.
- Position the four posts according to the provided dimensions.
- Install the runways, ensuring they are level and securely fastened.
- Connect the hydraulic power unit and route the hydraulic hoses as per the diagram.
- Install the lifting cables and adjust tension according to specifications.
- Connect the electrical wiring to the power unit and ensure proper grounding.
- Fill the hydraulic reservoir with the recommended hydraulic oil (Summer 46#, Winter 32#).
- Attach the mobile caster wheels for portability.

Figure 3.1: Lift dimensions for planning installation space.

Figure 3.2: Mobile wheels for easy repositioning of the lift.
4. Operating Instructions
4.1 Pre-Operation Checklist
- Ensure the lift is on a stable, level surface.
- Verify all safety locks are disengaged before lifting.
- Check for any obstructions around or under the lift.
- Confirm the hydraulic fluid level is adequate.
4.2 Lifting a Vehicle
- Drive the vehicle onto the runways, ensuring it is centered and the weight is evenly distributed.
- Engage the vehicle's parking brake.
- Press and hold the "UP" button on the hydraulic power unit.
- Lift the vehicle to the desired height.
- Once at the desired height, lower the lift slightly until the safety locks engage. Listen for the audible click of the locks.
- Release the "UP" button. The vehicle is now supported by the safety locks.
- For double parking, ensure the lower vehicle has sufficient clearance.
4.3 Lowering a Vehicle
- Ensure the area beneath the lift is clear of personnel and obstructions.
- Slightly raise the lift by pressing the "UP" button to disengage the safety locks.
- Pull the safety lock release handle(s) to fully disengage the locks.
- Press and hold the "DOWN" button to lower the vehicle.
- Lower the lift completely until the runways rest on the ground.
- Once fully lowered, release the vehicle's parking brake and carefully drive off the lift.
Video 4.1: Demonstration of the XK P-407A car lift's operation, showing the lifting and lowering process. This video illustrates the basic functionality and movement of the lift.
5. Maintenance
Regular maintenance ensures the longevity and safe operation of your XK P-407A car lift.
5.1 Daily Checks
- Inspect all cables, pulleys, and connections for wear or damage.
- Check for any hydraulic fluid leaks.
- Ensure safety locks engage and disengage properly.
- Verify all fasteners are tight.
5.2 Monthly Maintenance
- Lubricate all moving parts, including pulleys, hinges, and lock mechanisms.
- Check hydraulic fluid level and top up if necessary.
- Clean the lift structure, especially the runways and posts, to prevent debris buildup.
- Inspect the oil drip trays for proper positioning and cleanliness.
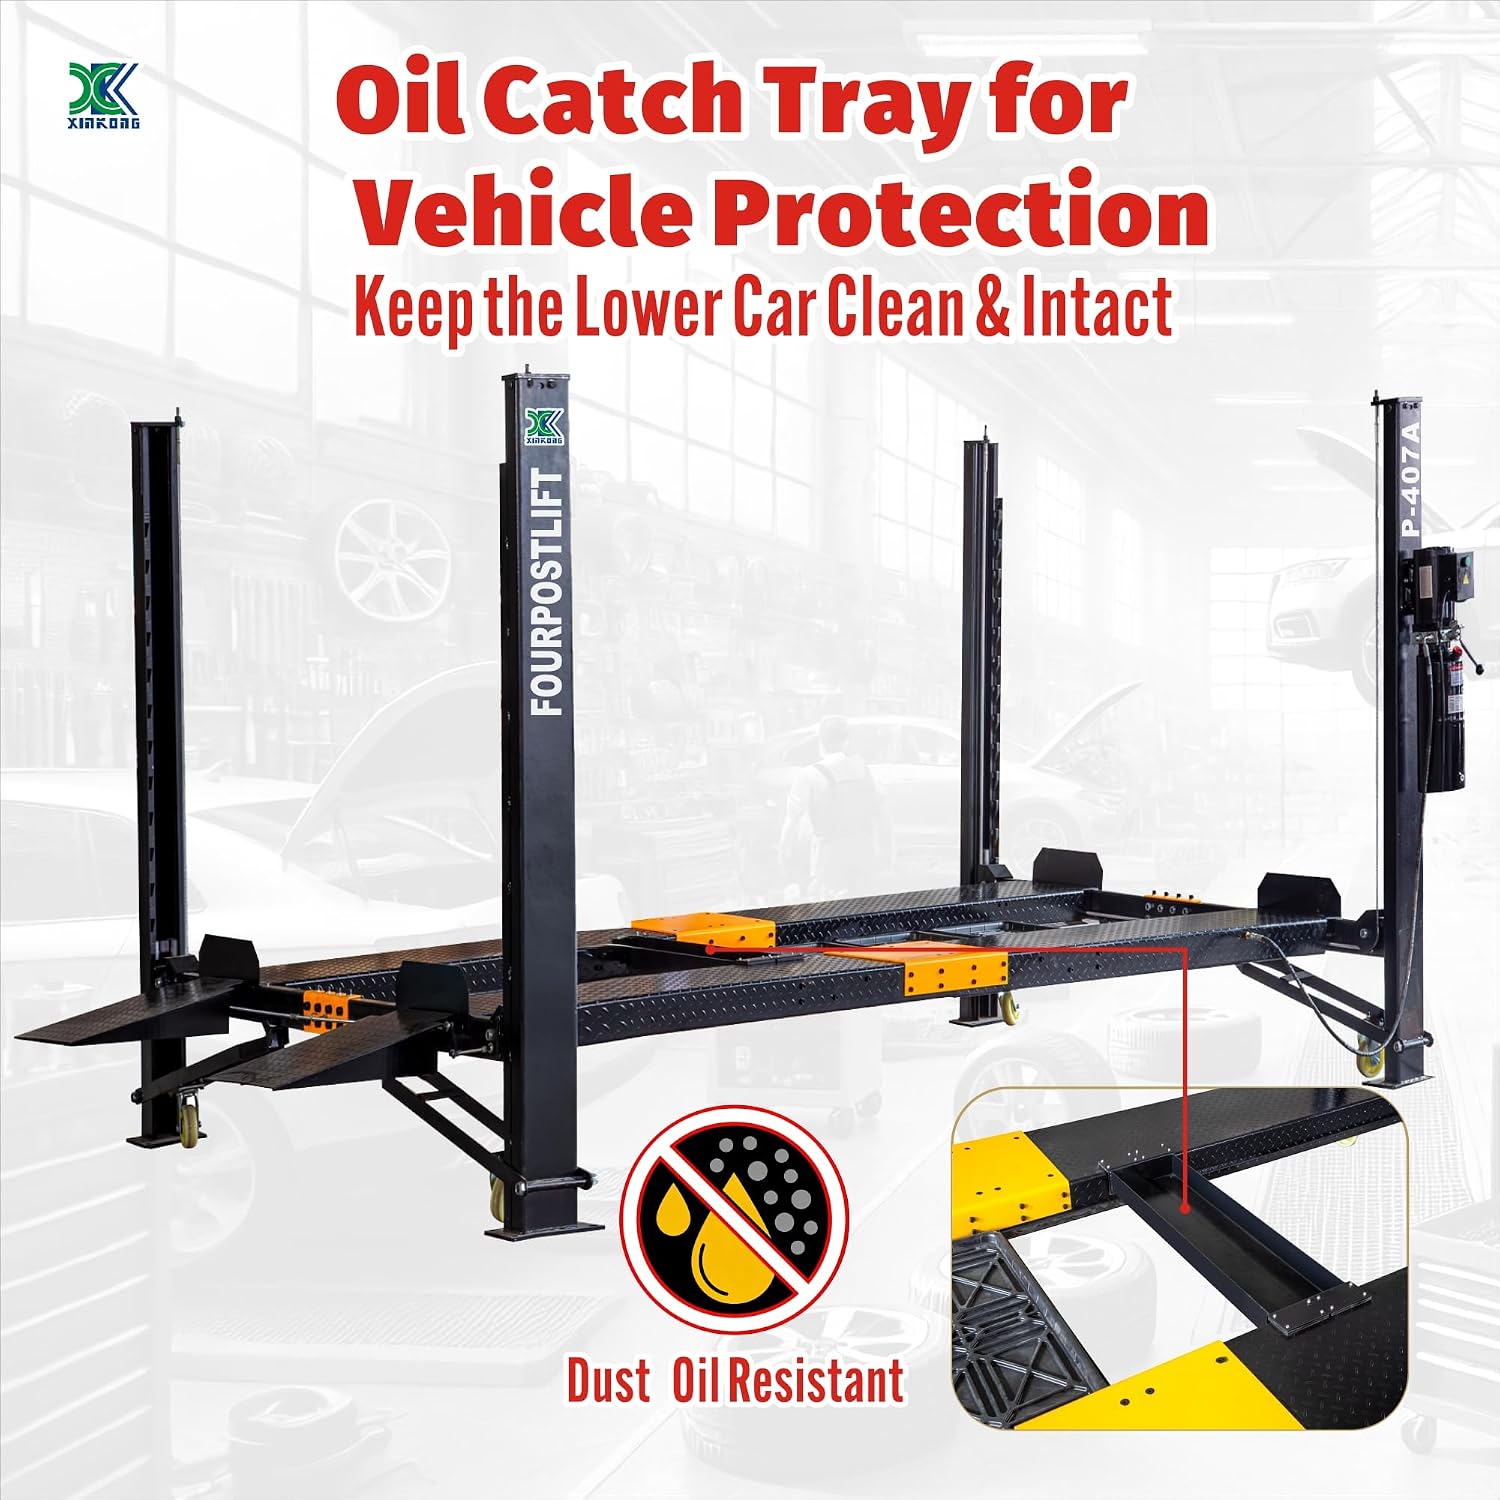
Figure 5.1: Oil catch tray for vehicle protection and maintenance.

Figure 5.2: View of the hydraulic power unit and cable system, critical for lift operation and maintenance.
6. Troubleshooting
This section provides solutions to common issues. For problems not listed here, contact customer support.
| Problem | Possible Cause | Solution |
|---|---|---|
| Lift does not raise | No power, low hydraulic fluid, motor issue, safety lock engaged. | Check power supply and circuit breaker. Verify hydraulic fluid level. Inspect motor connections. Ensure safety locks are fully disengaged. |
| Lift lowers slowly or unevenly | Air in hydraulic system, hydraulic fluid leak, worn seals, cable tension imbalance. | Bleed air from the hydraulic system. Inspect for leaks and repair. Check and adjust cable tension. |
| Safety locks do not engage | Obstruction, damaged lock mechanism, cable issue. | Clear any obstructions. Inspect and repair or replace damaged lock components. Check lock cable operation. |
| Unusual noises during operation | Lack of lubrication, loose components, worn bearings. | Lubricate all moving parts. Tighten any loose bolts or connections. Inspect pulleys and bearings for wear. |
7. Specifications
| Feature | Specification |
|---|---|
| Model | XK-P-407A |
| Lifting Capacity | 8000 lbs (3628 kg) |
| Power Supply | 110V |
| Minimum Circuit Breaker Current | 40A |
| Hydraulic Oil Grade (Summer) | 46# |
| Hydraulic Oil Grade (Winter) | 32# |
| Product Weight | 1543.24 lbs (700 kg) |
| Overall Length (with ramps) | 209.84 inches (533 cm) |
| Overall Width | 105.08 inches (266.9 cm) |
| Max Lifting Height | 79.13 inches (201 cm) |
8. Warranty and Support
The XK P-407A car lift comes with a 36-month parts replacement warranty. This warranty covers manufacturing defects and component failures under normal use.
For technical assistance, warranty claims, or to order replacement parts, please contact XK customer support. Refer to your purchase documentation for contact details or visit the official XK website.
Ask a question about this manual
Ask about setup, troubleshooting, compatibility, parts, safety, or missing instructions. Manuals+ will review the question and use this page’s manual context to help answer it.