
1. Introduction
Thank you for purchasing the GOWENIC 4-Channel Stereo Bluetooth Sound Mixer. This professional audio mixer is designed for a wide range of applications, including live sound, studio recording, karaoke, and events. It features a DSP 99 digital signal processor, a 7-band graphic equalizer, +48V phantom power, integrated Bluetooth MP3 player, and a versatile USB interface. This manual provides essential information for safe operation, setup, and maintenance of your device.
2. Safety Instructions
- Power Supply: Use only the provided power adapter. Ensure the voltage matches the requirements specified on the device.
- Water and Moisture: Do not expose the mixer to water, rain, or excessive moisture. Avoid placing liquids near the device.
- Ventilation: Ensure adequate ventilation around the mixer. Do not block ventilation openings.
- Heat: Keep the device away from heat sources such as radiators, heat registers, stoves, or other heat-producing appliances.
- Cleaning: Disconnect the power before cleaning. Use a dry, soft cloth. Do not use liquid cleaners or aerosols.
- Servicing: Do not attempt to service this product yourself. Refer all servicing to qualified service personnel.
- Placement: Place the mixer on a stable, level surface to prevent accidental falls.
3. Product Overview
The GOWENIC 4-Channel Stereo Bluetooth Sound Mixer is equipped with a comprehensive set of controls and connectivity options for professional audio mixing. Below is an overview of the main unit and its components.

Figure 3.1: Front Panel Overview of the GOWENIC Mixer. This image displays the mixer's front panel, highlighting the input channels, equalization controls, DSP effects section, and main output faders.

Figure 3.2: Rear Panel Connections. This image shows the rear panel of the mixer, detailing the power input, main output jacks, and other auxiliary connections.
Key Features:
- 2 XLR Microphone Inputs with +48V Phantom Power
- 2 Stereo Line Inputs (1/4" TRS)
- 3-Band Equalizer on Input Channels
- 99-Bit DSP Digital Signal Processor with adjustable effects
- 7-Band Graphic Equalizer for Main Output
- Integrated Bluetooth MP3 Player
- USB Interface for Recording and PC Connection (Sound Card Functionality)
- Main Stereo Output (XLR/TRS) and Headphone Output
4. Setup
4.1. Power Connection
- Ensure the mixer's power switch is in the OFF position.
- Connect the provided power adapter to the DC INPUT jack on the rear panel of the mixer.
- Plug the power adapter into a suitable electrical outlet.
4.2. Connecting Microphones
The mixer features 2 XLR microphone inputs (1/L and 2/R) with switchable +48V phantom power for condenser microphones.
- Connect your microphone(s) to the XLR inputs.
- If using condenser microphones requiring phantom power, press the +48V PHANTOM button for the respective channel. Ensure all connections are made before activating phantom power to prevent damage to equipment.
4.3. Connecting Line Inputs
Use the 1/4" TRS jacks for connecting line-level devices such as keyboards, guitars, or other audio players.
- Connect stereo line-level sources to the 3/4 (L/R) inputs.
4.4. Connecting Output Devices
- Main Output: Connect your main speakers or amplifier to the MAIN OUT (XLR or 1/4" TRS) jacks.
- Headphones: Connect headphones to the PHONES 1/4" jack for monitoring.
4.5. USB Connection (PC/Recording)
The mixer can be connected to a computer via USB for recording or playback, functioning as an external sound card.
- Connect a USB cable from the mixer's USB port to your computer.
- Your computer should automatically detect the mixer as an audio device. Select it as the input/output device in your audio software settings.

Figure 4.1: Mixer connected to a computer for recording or live streaming. This image illustrates the mixer integrated into a computer-based audio production setup.
4.6. Bluetooth Pairing
The integrated Bluetooth module allows wireless audio streaming from compatible devices.
- Press the MODE button on the digital audio player section until 'BT' is displayed.
- On your Bluetooth-enabled device (e.g., smartphone, tablet), search for available devices and select the mixer (usually named 'BT-MIXER' or similar).
- Once paired, you can stream audio wirelessly to the mixer.
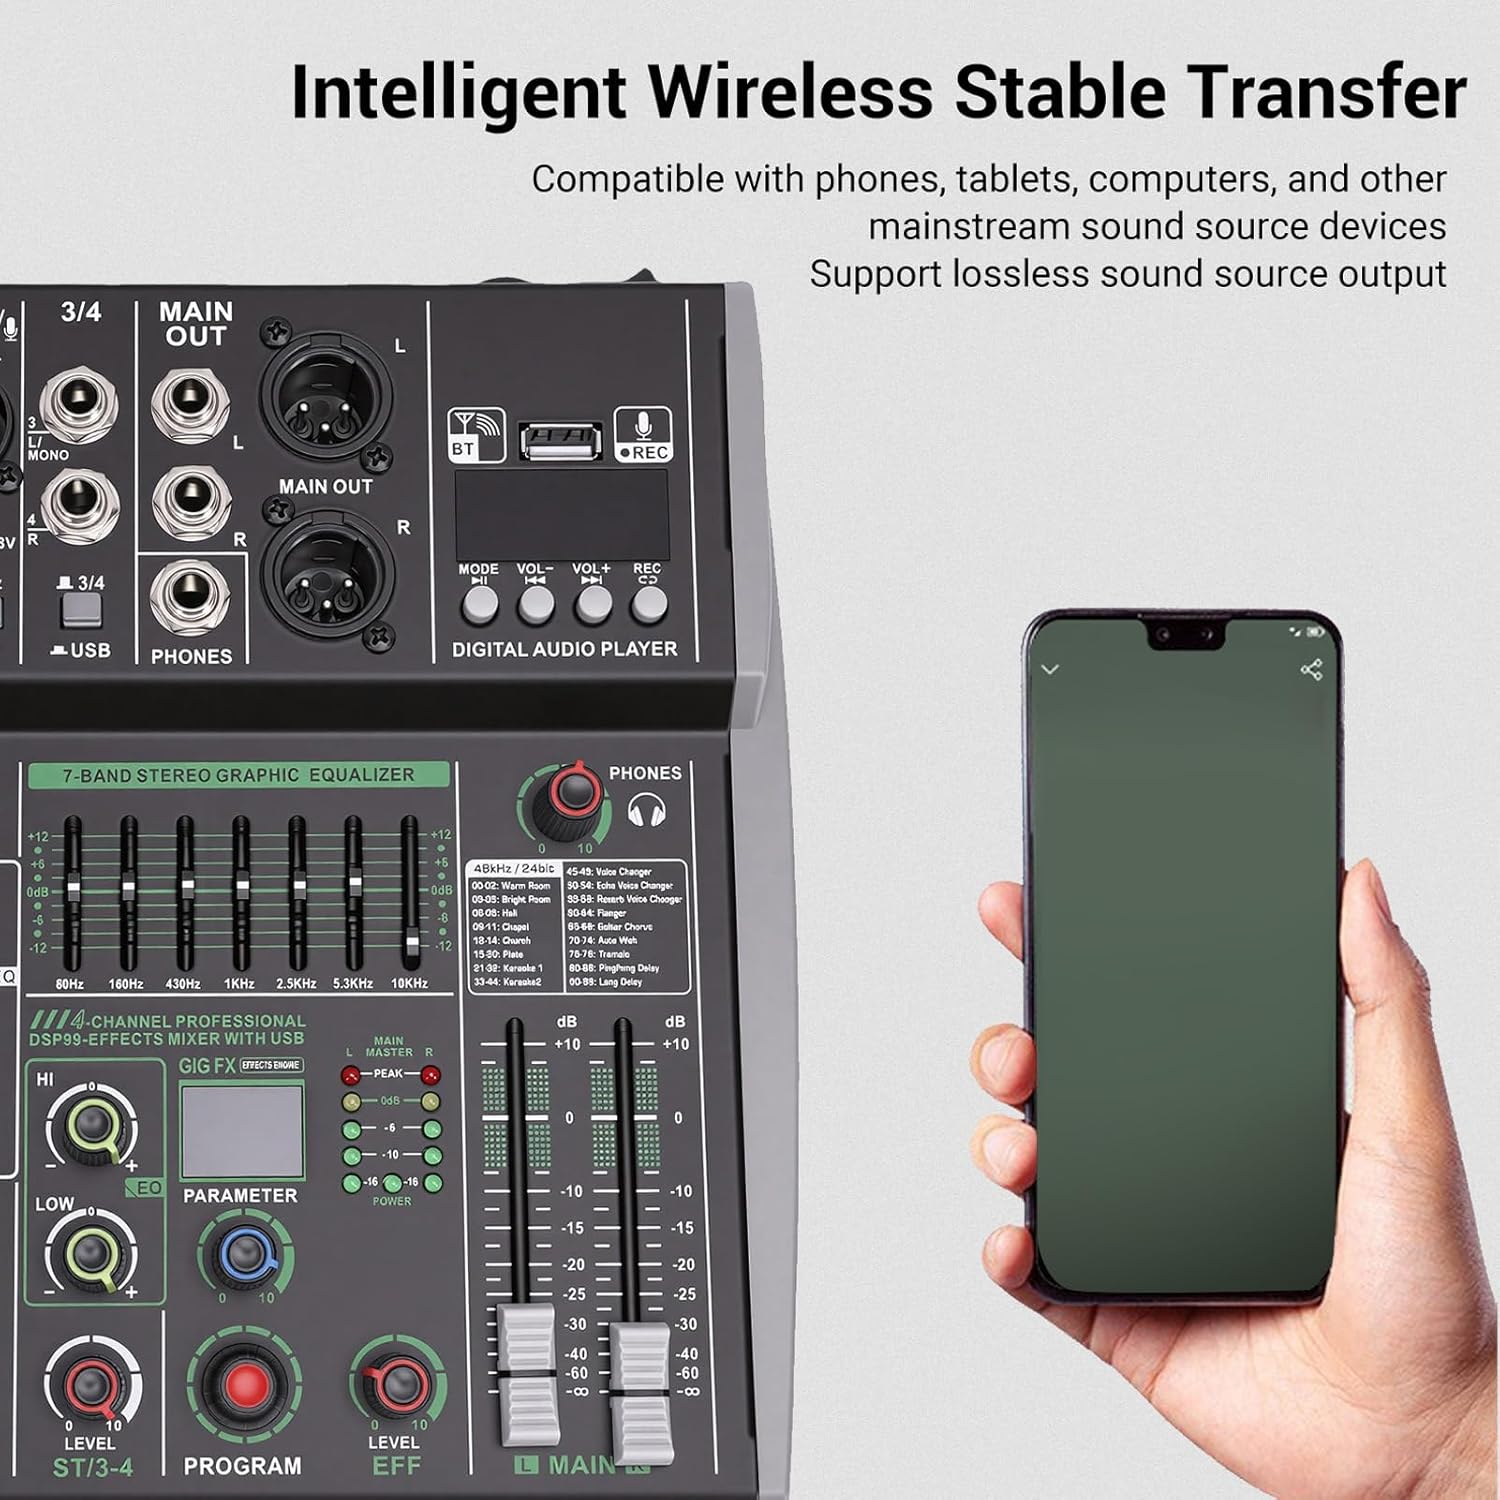
Figure 4.2: Bluetooth Wireless Connection. This image shows the mixer with a smartphone, demonstrating the wireless audio transfer capability.
5. Operating
5.1. Basic Operation
- Power On: After connecting all cables, turn on the mixer by pressing the POWER button.
- Input Level Adjustment: Use the GAIN knob for each channel to set the input sensitivity. Adjust until the PEAK LED flashes only occasionally.
- Channel Equalization: Use the HI, MID, and LOW knobs for each input channel to adjust the tone.
- DSP Effects:
- Turn the PROGRAM knob to select one of the 99 available DSP effects.
- Use the PARAMETER knob to adjust specific parameters of the selected effect.
- Adjust the LEVEL EFF knob to control the overall effect send level to the main mix.
- Main Output Level: Use the MAIN LEVEL fader to control the overall volume of the mixed audio. Monitor the main output meters to avoid clipping.
- Headphone Monitoring: Adjust the PHONES knob to control the headphone volume.

Figure 5.1: DSP Effects and Main Level Controls. This image provides a detailed view of the DSP effect selection, parameter adjustment, and the main output level fader.
5.2. Advanced Features
- 7-Band Stereo Graphic Equalizer: Use the faders in the 7-BAND STEREO GRAPHIC EQUALIZER section to fine-tune the overall frequency response of the main output. Adjust specific frequency bands (60Hz, 160Hz, 400Hz, 1KHz, 2.5KHz, 6.3KHz, 16KHz) to shape your sound.
- Digital Audio Player (USB/Bluetooth):
- MODE: Switch between USB playback, Bluetooth, and PC sound card modes.
- VOL+/VOL-: Adjust the volume of the digital audio player.
- REC: Press to initiate recording to a connected USB drive (if supported by the specific model and firmware).
6. Maintenance
6.1. Cleaning
- Always disconnect the power cable before cleaning.
- Use a soft, dry, lint-free cloth to wipe the exterior surfaces of the mixer.
- For stubborn dirt, slightly dampen the cloth with water. Avoid using harsh chemicals, solvents, or abrasive cleaners.
- Do not allow any liquids to enter the mixer's openings.
6.2. Storage
- When not in use for extended periods, store the mixer in a cool, dry place, away from direct sunlight and extreme temperatures.
- Protect the mixer from dust by covering it with a dust cover or placing it back in its original packaging.
7. Troubleshooting
| Problem | Possible Cause | Solution |
|---|---|---|
| No sound output |
|
|
| Distorted sound |
|
|
| Bluetooth not connecting |
|
|
| Phantom power not working |
|
|
8. Specifications
| Feature | Specification |
|---|---|
| Item Type | 4-Channel Sound Mixer |
| Material | ABS, Iron |
| Digital Signal Processor | 99 Bits DSP Effects |
| Phantom Power | +48V (with independent switch) |
| Input Channel Equalizer | 3-Band (HI, MID, LOW) |
| Main Output Equalizer | 7-Band Stereo Graphic Equalizer |
| Bluetooth | Integrated MP3 Player with Bluetooth connectivity |
| USB Interface | Supports recording via USB drive, PC recording, integrated sound card |
| Microphone Inputs | 2 x XLR (balanced/unbalanced) |
| Line Inputs | 2 x 1/4" TRS Stereo, RCA (as per specifications) |
| Connectivity Technology | Ethernet (as per specifications) |
| Model Number | GOWENICphjvk8lic5-12 |
| Country of Origin | China |
9. Warranty and Support
9.1. Warranty Information
All purchased products come with a standard 120-day warranty. The warranty period begins on the day the product was originally shipped. The warranty covers all products and conditions identified in the manufacturer's original warranty. Please note that some specific products may not be covered by this warranty.
9.2. Customer Support
For technical assistance, troubleshooting, or warranty claims, please contact your retailer or the GOWENIC customer support team. Please have your product model number (GOWENICphjvk8lic5-12) and purchase information ready when contacting support.