
1. Introduction
This manual provides comprehensive instructions for the installation, operation, and maintenance of your LOCKIMELOW JT-S207CW-62TS-SE 2.5GbE Web Managed Ethernet Network Switch. This device is designed to provide high-speed network connectivity with advanced management features, suitable for various network environments from small businesses to server racks.
2. Key Features
- Fast and Stable Connectivity: Supports full-duplex and auto-negotiation Gigabit Ethernet data transmission for reliable performance.
- Easy Installation: Designed for simple and convenient setup.
- Efficient Heat Dissipation: Features excellent heat dissipation performance to ensure continuous, stable operation.
- Wide Compatibility: Compatible with Cat5, Cat5e, and Cat6 network cables.
- Versatile Applications: Suitable for desktop computers, small businesses, server racks, and other networking needs.
- Web Managed Interface: Allows for advanced configuration and monitoring, including VLAN support.
3. Package Contents
Please verify the contents of your package. If any items are missing or damaged, contact your vendor.
- LOCKIMELOW JT-S207CW-62TS-SE 2.5GbE Web Managed Ethernet Network Switch
- Power Adapter
- User Manual (this document)
4. Physical Description
The LOCKIMELOW JT-S207CW-62TS-SE switch features a robust design with multiple high-speed ports and LED indicators for status monitoring.
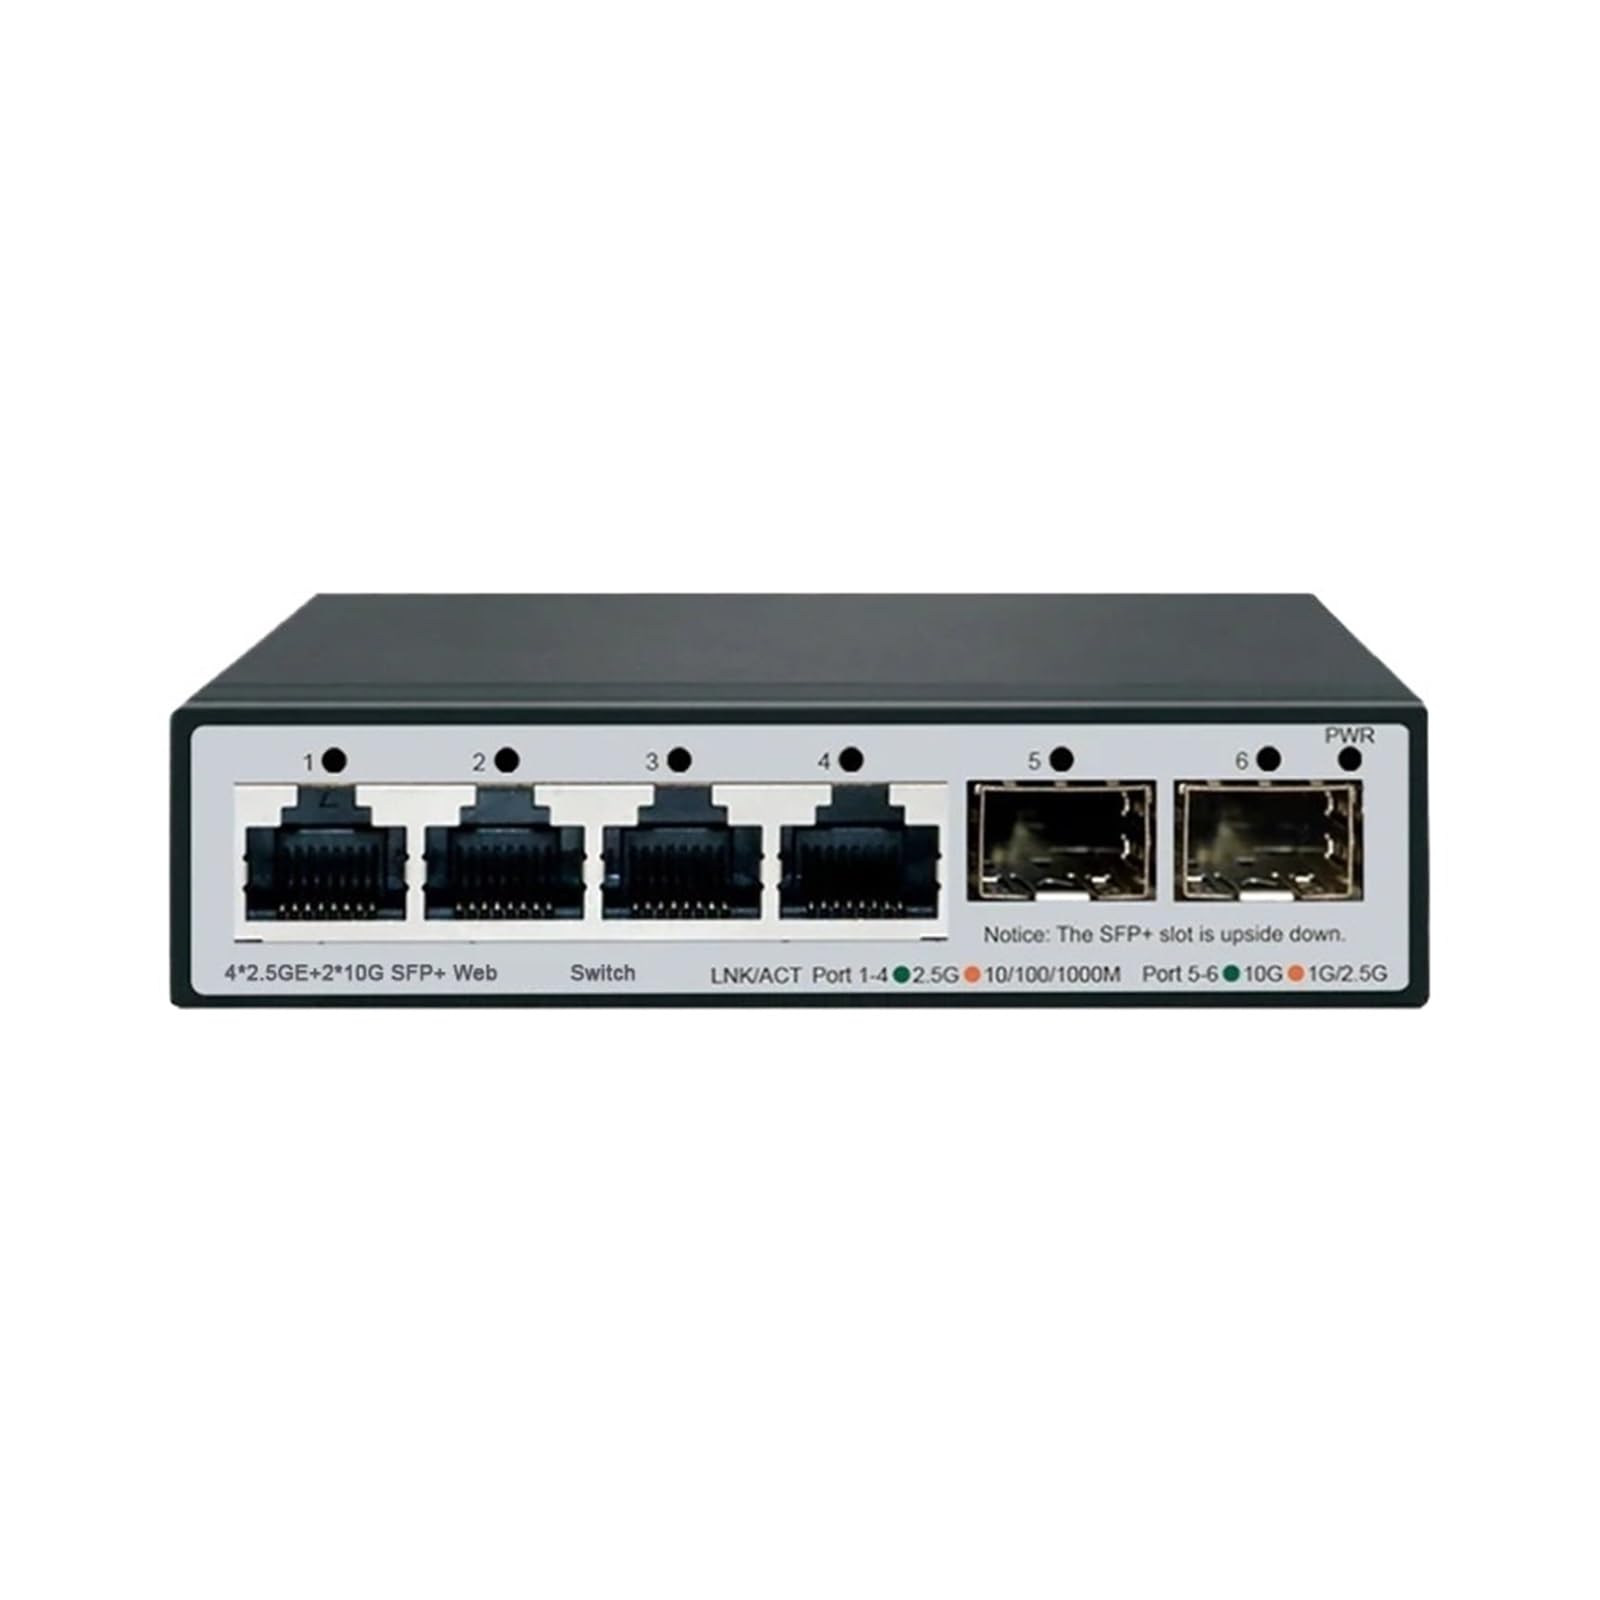
Front view of the LOCKIMELOW JT-S207CW-62TS-SE switch, showing 4 RJ45 2.5GbE ports, 2 SFP+ 10G ports, and LED indicators.
Port Layout:
- 4 x RJ45 Ports: Support 2.5Gbps Ethernet connectivity. These ports are auto-negotiating for speed and duplex mode.
- 2 x SFP+ Ports: Support 10Gbps fiber optic connectivity, allowing for high-speed uplinks or connections to other network devices.
LED Indicators:
Each port and the device itself have LED indicators to show status:
- Power LED: Indicates the power status of the switch.
- Link/Act LEDs (per port): Indicates a network link and data activity on the respective port.
5. Setup Instructions
5.1 Unpacking and Placement
- Carefully remove the switch and all accessories from the packaging.
- Place the switch on a stable, flat surface or mount it in a suitable rack (if applicable). Ensure adequate ventilation around the device to prevent overheating.
- Avoid placing the switch near strong electromagnetic fields, heat sources, or in direct sunlight.
5.2 Power Connection
- Connect the provided power adapter to the power input port on the switch.
- Plug the other end of the power adapter into a standard electrical outlet.
- Verify that the Power LED on the switch illuminates, indicating that the device is receiving power.
5.3 Network Connections
- Connect your network devices (e.g., computers, servers, other switches) to the RJ45 ports using Cat5e or Cat6 Ethernet cables.
- For high-speed uplinks or connections to fiber-optic networks, insert compatible SFP+ transceivers (not included) into the SFP+ slots and connect appropriate fiber optic cables.
- Observe the Link/Act LEDs on each connected port. A solid light indicates a successful link, and a blinking light indicates data activity.
6. Operating Instructions
6.1 Accessing the Web Management Interface
The LOCKIMELOW JT-S207CW-62TS-SE is a web-managed switch, allowing configuration through a web browser.
- Ensure your computer is connected to one of the switch's RJ45 ports.
- Configure your computer's IP address to be in the same subnet as the switch's default IP address (e.g., if the switch's default IP is 192.168.1.1, set your computer to 192.168.1.X, where X is not 1).
- Open a web browser (e.g., Chrome, Firefox, Edge) and enter the switch's default IP address in the address bar. (Refer to the product label or included quick start guide for the default IP address, username, and password).
- Enter the default username and password when prompted. It is highly recommended to change the default password immediately after the first login for security purposes.
6.2 Basic Configuration (Example: VLAN Setup)
The web interface provides various configuration options. One common feature is VLAN (Virtual Local Area Network) support.
- Navigate to the VLAN section within the web management interface.
- Create new VLANs by assigning a VLAN ID and a name.
- Assign specific ports to the created VLANs. Ports can be configured as Access ports (for end devices in a single VLAN) or Trunk ports (for carrying traffic from multiple VLANs to other switches or routers).
- Save your configuration changes. The switch may require a reboot for changes to take effect.
For detailed information on other advanced features such as QoS, Link Aggregation, or Spanning Tree Protocol, please refer to the online documentation available from the manufacturer's support website.
7. Maintenance
7.1 Cleaning
- Ensure the switch is powered off and disconnected from the power source before cleaning.
- Use a soft, dry cloth to wipe the exterior of the switch.
- Do not use liquid cleaners or aerosol sprays, as they may damage the device.
- Keep ventilation openings clear of dust and debris to maintain optimal airflow.
7.2 Firmware Updates
Periodically check the LOCKIMELOW support website for firmware updates. Firmware updates can provide new features, performance improvements, and security patches. Follow the instructions provided with the firmware update package carefully to avoid damaging the device.
7.3 Environmental Considerations
To ensure long-term reliability, operate the switch within its specified environmental conditions (temperature, humidity). Avoid extreme conditions that could lead to device failure.
8. Troubleshooting
This section addresses common issues you might encounter with your switch.
8.1 No Power
- Symptom: The Power LED is off.
- Solution:
- Ensure the power adapter is securely connected to both the switch and a working electrical outlet.
- Verify the power outlet is functional by plugging in another device.
- Check if the power adapter is the correct one supplied with the switch.
8.2 No Link on a Port
- Symptom: The Link/Act LED for a connected port is off.
- Solution:
- Ensure the Ethernet cable is securely plugged into both the switch port and the connected device.
- Try a different Ethernet cable to rule out a faulty cable.
- Verify the connected device is powered on and functioning correctly.
- Check the port settings in the web management interface to ensure it is enabled and configured correctly.
8.3 Cannot Access Web Management Interface
- Symptom: Unable to open the switch's web interface in a browser.
- Solution:
- Verify your computer's IP address is in the same subnet as the switch's IP address.
- Ensure there are no IP address conflicts on your network.
- Try pinging the switch's IP address from your computer to confirm network connectivity.
- Clear your browser's cache or try a different browser.
- If the IP address has been changed and forgotten, a factory reset may be necessary (refer to manufacturer documentation for reset procedures).
9. Specifications
| Feature | Description |
|---|---|
| Brand | LOCKIMELOW |
| Model Number | JT-S207CW-62TS-SE |
| Switch Type | Web Managed Ethernet Switch |
| RJ45 Ports | 4 x 2.5Gbps (2500Mbps) |
| SFP+ Ports | 2 x 10Gbps |
| Transmission Rate | Up to 10000 Mbps (10Gbps) |
| Communication Mode | Full-Duplex & Half-Duplex |
| Functions | VLAN Support, Web Management |
| Compatibility | Cat5, Cat5e, Cat6 Network Cables |
10. Warranty and Support
For warranty information, technical support, and additional resources, please refer to the official LOCKIMELOW website or contact your authorized reseller. Keep your purchase receipt for warranty claims.
For the most up-to-date information, visit: LOCKIMELOW Official Support