
1. Introduction
The GL.iNet GL-E5800 MUDI 7 is a high-performance 5G Tri-Band Wi-Fi 7 travel router designed for reliable and secure internet connectivity on the go. This device integrates advanced features such as eSIM, dual nano-SIM support, 2.5G Ethernet, a 2.8-inch touchscreen, and robust VPN capabilities, making it suitable for various professional and personal travel scenarios. This manual provides comprehensive instructions for setting up, operating, and maintaining your MUDI 7 router.
2. What's in the Box
Carefully unpack the box and ensure all items are present. If any items are missing or damaged, please contact GL.iNet support.
- Mudi 7 (GL-E5800) Travel Router
- Battery Pack (Pre-installed)
- 10 Gbps USB-C Cable
- Travel Pouch
- User Manual

Image: Contents of the GL.iNet MUDI 7 box, including the router, battery pack, USB-C cable, travel pouch, and user manual.
Video: An unboxing video demonstrating the contents of the GL-E5800 MUDI 7 package.
3. Product Overview
3.1 Key Features
- Ultra-Fast 5G & Tri-Band Wi-Fi 7: Delivers up to 4.67 Gbps 5G download and tri-band Wi-Fi 7 speeds (688 Mbps 2.4 GHz, 2882 Mbps 5 GHz, 5765 Mbps 6 GHz).
- Built-in eSIM + Dual Nano-SIM: Supports flexible carrier switching with an onboard eSIM and two physical nano-SIM slots, including dual standby.
- 2.5G Ethernet + 10 Gbps USB-C: Features a 2.5 Gbps WAN/LAN port and a 10 Gbps USB-C port for tethering, OTG storage, and external NAS sync.
- Quad-Path Multi-WAN Failover: Ensures continuous connectivity by automatically switching between 2.5G Ethernet, Wi-Fi Repeater, USB Tethering, and 5G Cellular if one link fails.
- 13.5h Battery + 30W PD Fast Charging: Provides up to 13.5 hours of operation with a 5380 mAh battery, recharging in approximately 1.3 hours.
- 2.8" Touchscreen Quick Controls: Allows direct management of SIMs, VPN clients, Wi-Fi sharing, and data usage without needing the app or admin panel.
- 700 Mbps Pre-Installed VPN: Supports OpenVPN-DCO up to 700 Mbps and WireGuard up to 600 Mbps, compatible with over 30 VPN providers.
3.2 Ports and Controls
The MUDI 7 router features several ports and controls for versatile connectivity and easy management:
- Power Button: Located on the front, used to power the device on/off and wake the screen.
- 2.8" Touch Screen: For device configuration, status monitoring, and quick controls.
- USB-C Power Port: For charging the device.
- USB-C 3.1 Port: Supports 10 Gbps data transfer, tethering, and OTG functions.
- 2.5G LAN/WAN Port: An Ethernet port for wired connections, configurable as either LAN or WAN.
- Dual External Antenna Ports (TS-9): For connecting optional external antennas to enhance signal reception.

Image: Diagram illustrating the physical layout, dimensions, and port locations of the GL.iNet MUDI 7 router.
3.3 Dimensions
The GL-E5800 MUDI 7 has compact dimensions, making it highly portable:
- Length: 3 inches (75mm)
- Width: 0.9 inches (22.8mm)
- Height: 6.2 inches (157mm)
4. Setup Guide
4.1 Powering On/Off
- To power on, press and hold the Power Button for 3 seconds until the screen illuminates.
- To power off, press and hold the Power Button for 3 seconds and confirm shutdown on the touchscreen.
- A short press of the Power Button will wake or put the screen to sleep.
4.2 SIM/eSIM Installation
The MUDI 7 supports two physical nano-SIM cards and one integrated eSIM.
- Locate the SIM card tray on the side of the device.
- Use the provided SIM ejector tool to open the tray.
- Insert up to two nano-SIM cards into the designated slots, ensuring correct orientation.
- Gently push the tray back into the device until it clicks into place.
- For eSIM activation, navigate to the 'eSIM Management' section on the touchscreen and follow the on-screen instructions to scan a QR code or manually enter details.
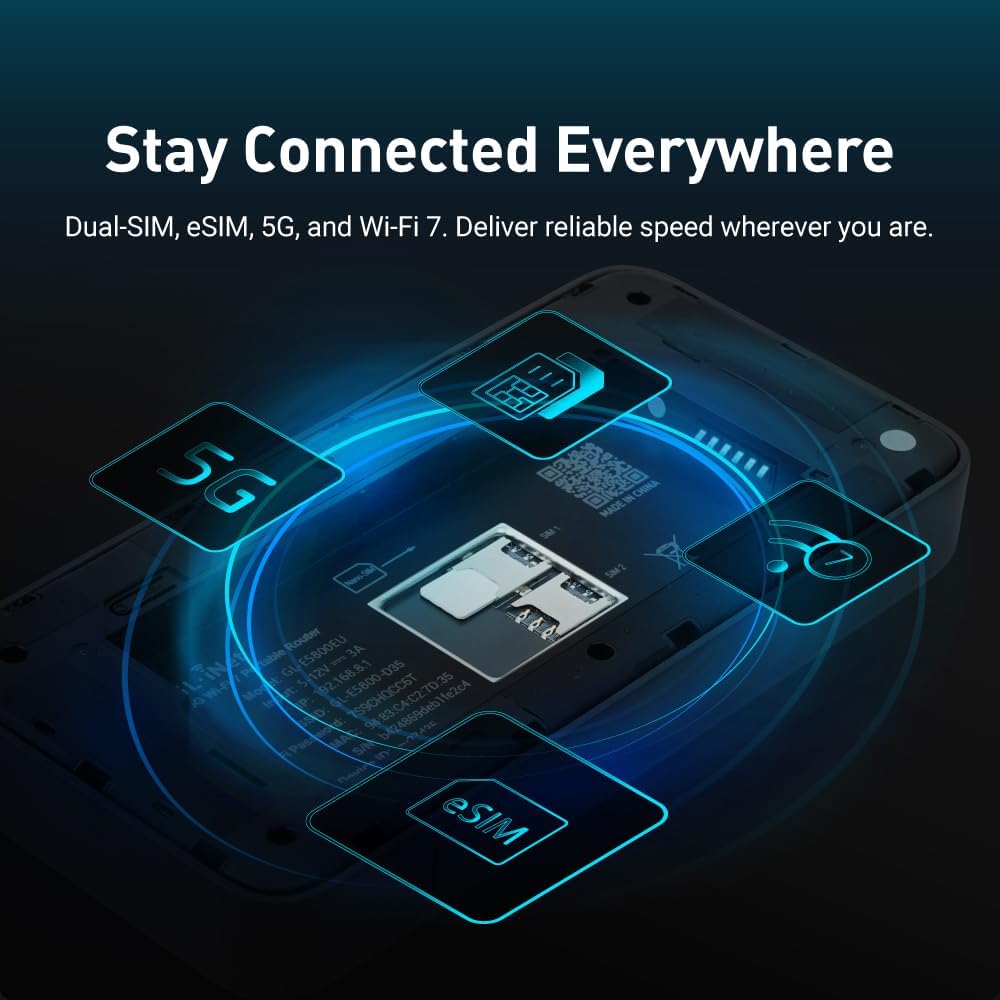
Image: Close-up view of the GL.iNet MUDI 7 highlighting the dual SIM card slots and eSIM functionality.
4.3 Initial Configuration
Upon first power-on, the device will guide you through initial setup steps on the 2.8-inch touchscreen:
- Select your preferred language.
- Set an Admin Password for accessing the device's web interface.
- Configure basic network settings, including Wi-Fi name (SSID) and password.
- The device will automatically detect and connect to an available cellular network if a SIM/eSIM is active.
Video: A step-by-step guide on setting up the GL-E5800 MUDI 7 router, including initial configuration and network settings.
5. Operating Instructions
5.1 Connecting Devices
- Wi-Fi: Search for the Wi-Fi network name (SSID) displayed on the MUDI 7's touchscreen from your device and enter the password. You can also scan the QR code displayed on the router's screen for quick connection. Click here to connect via QR code (example)
- Ethernet: Connect an Ethernet cable from your device to the 2.5G LAN/WAN port on the MUDI 7.
- USB Tethering: Connect your device to the MUDI 7 via the 10 Gbps USB-C port. Select 'Device (USB Tethering)' on the MUDI 7's touchscreen if prompted.
5.2 Managing Connections via Touchscreen
The 2.8-inch touchscreen allows for intuitive management of your network:
- Switch SIMs: Easily toggle between active SIM cards or eSIM profiles.
- VPN Client Control: Activate or deactivate VPN connections.
- Wi-Fi Sharing: Generate QR codes for guests to quickly connect to your Wi-Fi network.
- Data Usage Monitoring: View real-time data consumption for each connection.
- Network Status: Check signal strength, battery level, and connected devices.

Image: The MUDI 7 touchscreen interface showing various network access and management options.
5.3 Advanced Features
5.3.1 VPN Capabilities
The MUDI 7 comes with OpenVPN-DCO and WireGuard pre-installed, offering secure browsing and data protection. It is compatible with over 30 VPN providers.
- VPN Client: Connect to a VPN server to secure your internet traffic, especially on public Wi-Fi networks.
- VPN Server: Create a VPN server to access your home network or devices remotely.

Image: Visual representation of MUDI 7's VPN support, including OpenVPN and WireGuard speeds.
5.3.2 Multi-WAN Failover
The Quad-Path Multi-WAN Failover feature ensures uninterrupted internet access. The router can simultaneously utilize 2.5G Ethernet, Wi-Fi Repeater, USB Tethering, and 5G Cellular connections. If one connection drops, traffic is automatically routed to the next available connection within seconds.
6. Battery and Charging
The MUDI 7 is equipped with a built-in 5380 mAh battery, providing up to 13.5 hours of usage on a single charge. It supports 30W PD/PPS USB-C fast charging, allowing a full recharge in approximately 1.3 hours.
- To charge, connect the provided 10 Gbps USB-C cable to the USB-C Power Port on the device and a compatible 30W (or higher) USB-C power adapter.
- Monitor the battery status on the touchscreen.

Image: The MUDI 7 router demonstrating its long-lasting battery and fast-charging capability in a work setting.
7. Maintenance
7.1 Firmware Updates
Regularly update the router's firmware to ensure optimal performance, security, and access to new features. Firmware updates can typically be performed via the device's web administration panel or through the GL.iNet mobile app.
- Connect your device to the MUDI 7's Wi-Fi network or via Ethernet.
- Access the web administration panel by entering the router's IP address (usually
192.168.8.1) into a web browser. - Navigate to the 'Firmware Upgrade' section and follow the instructions to check for and install updates.
7.2 Cleaning
To maintain the device's appearance and functionality:
- Use a soft, dry cloth to wipe the exterior of the router.
- Avoid using liquid cleaners or abrasive materials.
- Keep the ports free of dust and debris.
8. Troubleshooting
If you encounter issues with your MUDI 7 router, refer to the following common troubleshooting steps:
8.1 No Internet Connection
- Check SIM/eSIM: Ensure the SIM card is properly inserted and activated, or the eSIM profile is correctly configured and active. Verify that your data plan is not exhausted.
- Signal Strength: Check the 5G/LTE signal strength indicator on the touchscreen. If the signal is weak, try moving to a different location or connecting external TS-9 antennas (sold separately).
- WAN Source: Confirm that the correct WAN source (5G, Ethernet, Wi-Fi Repeater, USB Tethering) is selected and active on the touchscreen or web interface.
- Reboot: Power off the router, wait 10 seconds, and then power it back on.
8.2 Slow Connection Speed
- Network Congestion: High network traffic in your area or too many devices connected to the router can reduce speeds.
- VPN Overhead: If using a VPN, some speed reduction is normal. Try disabling the VPN temporarily to see if speeds improve.
- Wi-Fi Interference: Ensure the router is placed away from other electronic devices that might cause interference.
- Firmware: Ensure your router's firmware is up to date.
8.3 Device Not Responding
- Soft Reset: Press and hold the Power Button for 10 seconds to force a restart.
- Factory Reset: If issues persist, a factory reset may be necessary. Locate the reset pinhole (usually near the SIM tray or USB ports). With the device powered on, use a paperclip to press and hold the reset button for approximately 5-10 seconds until the indicator lights flash. Warning: A factory reset will erase all custom settings and configurations.
9. Specifications
| Brand | GL.iNet |
| Model Name | GL-E5800-US |
| Frequency Band Class | Tri-Band (2.4 GHz, 5 GHz, 6 GHz) |
| Wireless Communication Standard | 802.11.be (Wi-Fi 7), 802.11ax (Wi-Fi 6), 802.11ac, 802.11n |
| Connectivity Technology | 5G, Ethernet, LTE, USB, Wi-Fi |
| Data Transfer Rate | Up to 5765 Mbps (Wi-Fi 7) |
| LAN Port Bandwidth | 10/100/1000/2500 Mbps |
| Number of Ports | 3 (1x 2.5G Ethernet, 2x USB-C) |
| RAM Memory Installed | 2 GB |
| Operating System | OpenWrt 23.05.4 (Linux Kernel 5.15.170) |
| Security Protocol | WPA-PSK, WPA2-PSK, WPA3 |
| Special Features | Access Point Mode, Beamforming, Guest Mode, Parental Control, Remote Access, eSIM, Dual Nano-SIM, 2.8" Touchscreen |
| Battery Capacity | 5380 mAh (Up to 13.5 hours) |
| Charging | 30W PD/PPS USB-C Fast Charging |
| Item Dimensions L x W x H | 3"L x 0.9"W x 6.2"H |
10. Warranty and Support
10.1 Warranty Information
The GL.iNet GL-E5800 MUDI 7 router comes with a 2-Year Manufacturer Warranty. This warranty covers defects in materials and workmanship under normal use. Please retain your proof of purchase for warranty claims.
10.2 Customer Support
For technical assistance, troubleshooting, or warranty inquiries, please visit the official GL.iNet website or contact their customer support team. Detailed support resources, FAQs, and firmware downloads are available online.